cards, Catalogues, Sale-A-Bration, Stampin' Up!, Techniques

COLOURING THE SPRINGTIME FOILS PAPER – PART 3!

Yet even more ways to colour the Springtime Foils Specialty Designer Series Paper.  The last 2 posts have shown colouring with the Blends and sponging.  (head back to see those posts if you missed them).  Today’s post is colouring the Foils paper by Swiping ink over it.

I have shared some cards doing this in past posts too.  You can see them -> HERE and HERE. The first one shows a video (as good as it is 😉 ) of inking it up.  You can see it if you dare.  Great timing for our Wednesday WOW! this week as you can go back and review that.
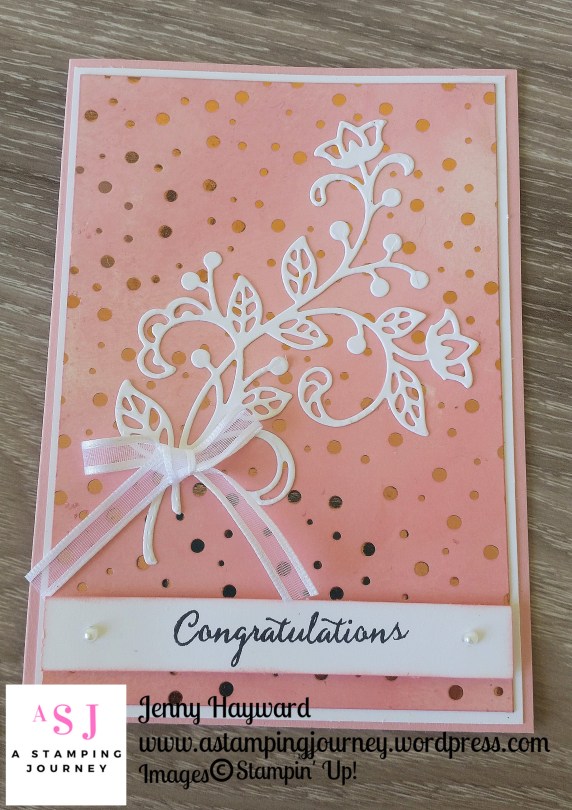
The piece above was actually the piece I inked up in the video in the early post so I thought why waste that.  This time I used the Flourish Thinlits.  The sentiment is from Balloon Celebration.  So pretty and soft that mini Organza ribbon.
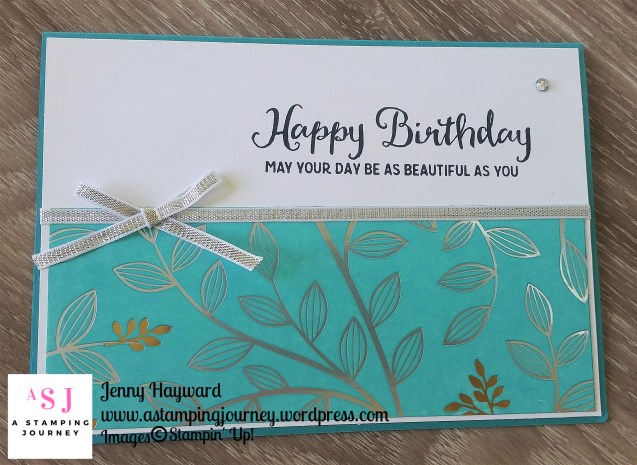
On the card above I swiped over Bermuda Bay on to a piece of the Springtime Foils Paper.  It needed a few swipes with it and I will say it can look a bit blotchy and you think “what have I done!!”.  Once you wipe over it with a tissue it smooths it out and looks nice.  Believe me. 🙂  The sentiment is from Beautiful Day again.

So now you don’t have to leave this paper plain (or you can).  How easy is it to colour the paper with ink in different way.

So have you got this paper yet?  I hope so.  You only have until Saturday.  And it’s free too.  Stock up on some card and adhesives and maybe throw in a stamp set that is sitting on your wish list and you are there are $90.  Then pick this paper up before it is gone.  Head to my store -> HERE to order it now.

Thanks for looking,

Jenny

cards, Catalogues, Sale-A-Bration

COLOURING THE SPRINGTIME FOILS PAPER – PART 1!

The Springtime Foils Designer Series Paper has been HUGELY popular for Sale-A-Bration.  Have you got it yet?  You really have to jump on this THIS WEEK as Sale-A-Bration is coming to an end on Saturday. Here is the gorgeous paper if you haven’t seen it.

For the next 3 posts I thought I would show you different ways you can colour the paper.  Of course it is very elegant and classy just left on it’s own too.

For these cards I coloured them with the Stampin’ Blends.  They glide on so easily.

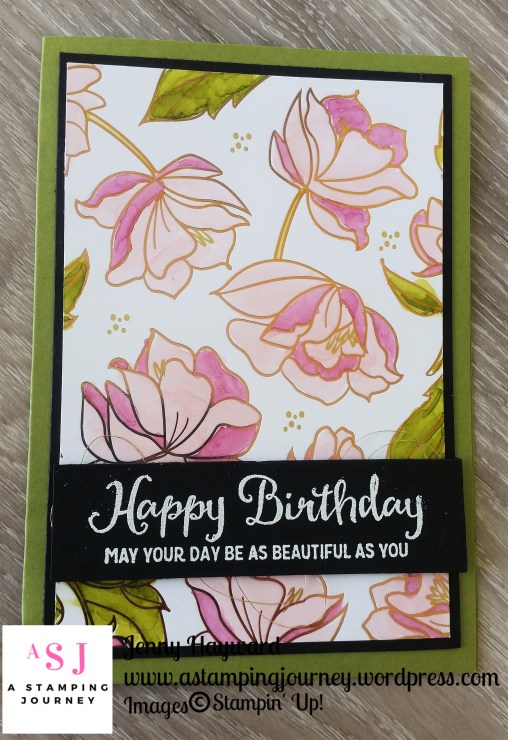
For the card above I used the Dark Pink Pirouette in the centres and the Light Rich Razzleberry in the edges.  The leaves were Old Olive.  The sentiment is from Beautiful Day and embossed with White Embossing Powder.  I had to finish it with a few loops of Gold Thread.

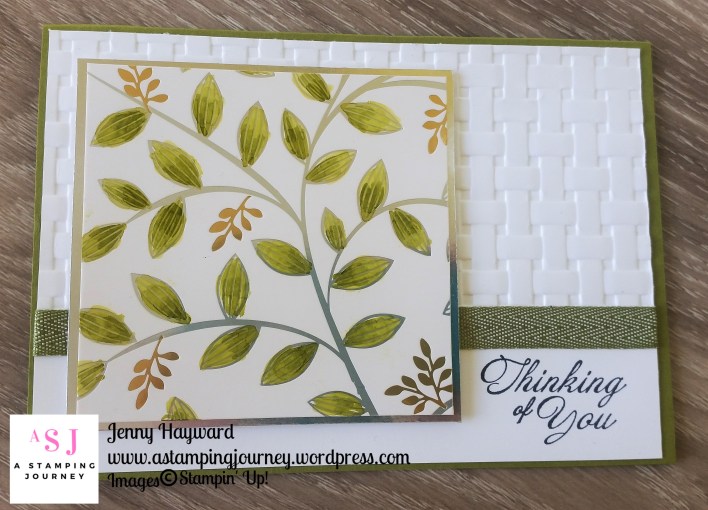
The card below was coloured with the Old Olive Stampin’ Blends. (Don’t look too closely 😉 )

The coloured piece was adhered to a mat from Gold Foil. I embossed the white piece in the top 2/3 of the Whisper White card piece.  Tying around some Old Olive Mini Chevron Ribbon.  The sentiment is from another Sale-A-Bration set Heartfelt Blooms.  It was all adhered to an Old Olive Card base.

Stop by again tomorrow for Part 2 colouring with the Springtime Foils Designer Series Paper.

Jenny

cards, Catalogues, Sale-A-Bration, Tutorials

PARTY PANDA POCKET CARD!

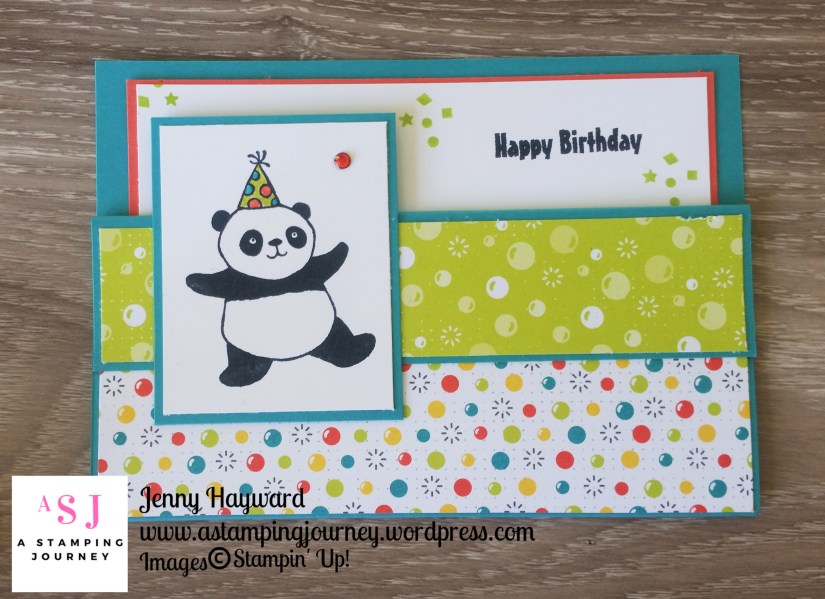
I am going to miss these Party Pandas.  Seriously, aren’t they so cute??  I had to use them again for one last blast.  I saw THIS POCKET CARD by Barbstamps the other week and thought the Pandas would be great for it.

Here is my version.

MEASUREMENTS FOR POCKET CARD

If you head to Barb’s link at the top you can see the video with the instructions to make the card.  Below is a general idea.

Card Base:    21cm x 14.8cm     (8 1/2″x 5 1/2″)    Score at 3.5 cm and 10.5cm.          (Score at 1 1/2″ and 4 1/4″)

Fold in at the half way score line and fold back on the small scored line.  Staple or adhere the front of the card to the back.  Underneath the flap so you don’t see the staples.

Designer Series Paper: Top piece – 14.4cm x 3.1cm     (approximately 5 1/4″x 1 1/4″)        Bottom piece:  14.4cm 3.6cm   (aprroximatly 5 1/4″ x 1 1/2″)

Cut the stamped piece for the image according to the size of your image.  This piece for the Panda was card mat: 6.9cm x 5.5cm    Whisper White 6.5cm x 5.1cm.

Pocket Insert: 13.2cm x 10cm   (5 1/8″x4″)   Whisper White 12.8cm x 9.6cm   (5″x 3 3/4″)

——

On the Panda stamped piece I coloured a Rhinestone with the Pumpkin Pie Stampin’ Blends.

The Designer Series Paper is from the Bubbles and Fizz pack that is a Free choice with Sale-A-Bration.

Hope you like it,

Jenny


cards, Catalogues, Stampin' Up!, Techniques

A LITTLE BLACK MAGIC WITH A BEAUTIFUL PEACOCK!

I really love the effect of using the Stampin’ Blends over heat embossing (AKA Black Magic Technique).  It seems to really give a vibrancy to the images.  I showed one with the Epic Celebrations set yesterday.  Today it is the Beautiful Peacock set.

The Beautiful Peacock set is one of the Sale-A-Bration Free choices.  I haven’t used this a lot but it is quite a fun set.  I have seen some fantastic samples with it.

To create the Black Magic Effect

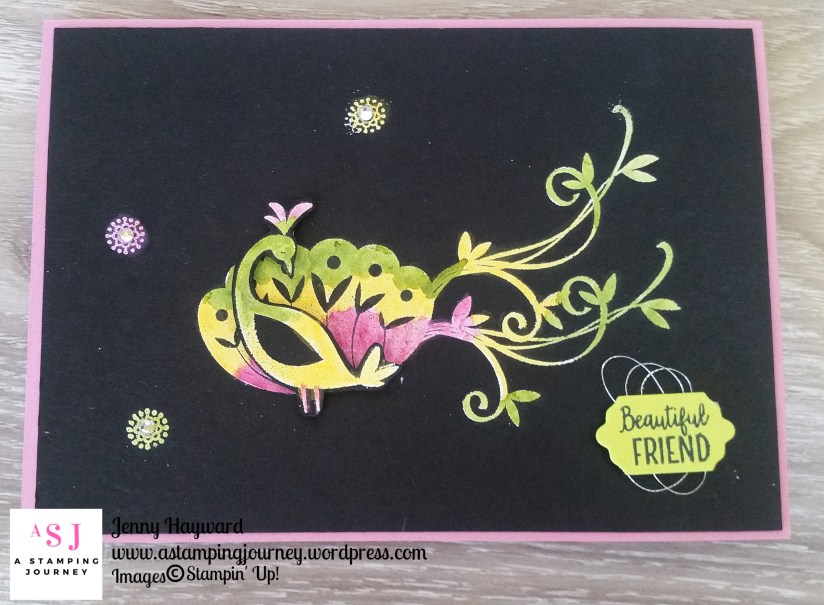
Stamp your image in Versamark and Heat Emboss in White Embossing Powder.  When cooled colour over the embossing with the Stampin’ Blends.  (The Blends will not be available to order now until late May but store this idea in mind for later if you haven’t got them yet).  The Blends colours I used were the Light Old Olive, the Dark Daffodil Delight and the Light Rich Razzleberry.

I stamped the Peacock body on a scrap piece of black card and then coloured it and cut it out with scissors.  This was then raised up off the card with Dimensionals.

To finish the card stamp your sentiment on Lemon Lime Twist card and cut with the smallest of the Lots of Labels Framelits.  I added some loops of Silver Thread under the label piece before raising it up off the card with Dimensionals and added some Rhinestones in the centres of the Flowers.  The card base is Sweet Sugarplum.

Only a week left for Sale-A-Bration.  I am sad with so many of these great sets leaving.  Don’t miss out to grab your Free set with your qualifying order. 

If in Australia you can order Online -> HERE Please use the Host Code: FSX2YS39

Also, last days to join and get TWO extra stamp sets for Free up to $174.  Crazy to knock that back??? 😉 

Come and join my JEN’s INK team. You can click the JOIN THE FUN tab on my website -> HERE

Do you want to know more about joining Stampin’ Up!?  Head to my ‘Join the JEN’s INK team’ tab at the top or head -> HERE to find out more.

Thanks for stopping by,

Jenny


cards, Catalogues, Classes, Techniques

BRUSHO WITH CHARMING CAFE!

On a previous post I showed you the cute Thank You cards using the Party Pandas and they had a fun Brusho background. (If you missed it then head back 2 posts).

Today I have a similar little card to show you using the Brusho Crystals but this time using the Charming Cafe set.  These little cards are to welcome new members to my team who have joined during Sale-A-Bration.  It’s so nice to have them in the JEN’s INK team. 🙂

Here are a couple of them for you to see.


Aren’t they fun backgrounds?  Each time they turn out different. The pieces were made in my Brusho classes to demonstrate how they work before each class member made their own.  I thought why not use them for these cards rather than waste them.

For these I sprinkled over some Brusho Crystals and I used Glossy card this time.  Then I spritzed lightly with water.  I also tilted the cards slightly so you get the colour run.

The pieces were then adhered to a small card base made with the Thick Whisper White card.  You can make these any size but to give you the approximate size of these.

The Brusho card piece measures 8cm x 12.4cm ( 3 1/8″x 4 7/8″).  The card base is 8.4cm x 24.8cm, scored at 12.4cm.  (3 3/8″ x 7.3/4″ scored 4 7/8″  ** Please check the imperial size measurements beforehand).

The sweet little cafe chairs and table from the Charming Cafe set was stamped and coloured with Watercolor Pencils then cut with the Framelits.  Once I had adhered the Brusho piece to the card base then a vellum circle cut with the Stitched Circle Framelits was lightly adhered to the front.  So you couldn’t see the adhesive I added some dabs of snail adhesive near the centre so it would be covered with the table and chairs.   Then the Table and chairs were raised up with Dimensionals. The sentiment piece is from the Color Me Happy set and simply stamped in Black and cut around.   Before they were adhered down I looped around some Silver Thread.

Just a quick reminder:  Get 2 free stamp sets up to $174 in total when you join the Stampin’ Up! family during Sale-A-Bration.  (only just over a week left).  You might well receive one of these cards when you join my JEN’s INK team (and a little gift 😉 ).  What’s the rest of the story??  Order up to $235 of products and pay only $169.  No shipping costs either.  Then you get the 2 free stamp sets (all your choice). You get a minimum 20% discount on orders after that.  You have the choice if you do parties or classes.  You have the choice  when (and if you want) to leave.  You have the choice of when and what you do.  So what are you waiting for??  It’s time NOW.  

If you are in Australia and would like to join you can do so right now.  Head to my website -> HERE and click JOIN THE FUN.  Just have your order together first it might save some time.  I can’t wait to send you one of these sweet cards.

Thanks for stopping by,

Jenny

3D projects, Blog Hops, Catalogues

EASTER TREAT BAG FOR STAMPIN’ DREAMS BLOG HOP!

This month’s Theme for the Stampin’ Dreams Blog Hop is … Easter.  You might have just come from Angela’s Blog -> HERE or starting at my blog here either way enjoy the hop.

Easter time is fast approaching!  I have an Easter Treat Bag to share with you.

THE TREAT BAG

I have made the treat bag using the Mini Treat Bag Thinlits set from Thick Whisper White card.  It would be more sturdier than regular white card.  You want it strong to hold that chocolate  in. 🙂  There are a couple of modifications to the bag to make it wider to hold the chocolate bar.  I will outline these changes below for you.

Cut your Treat Bag out with the Thinlits from cardstock.  Emboss the card pieces with the Basket Weave Embossing Folder.  Adhere the 2 pieces of the diecut bag together as you would usually to have one long card piece. Don’t adhere together to form the bag as yet.

Due to the thickness of the chocolate bar you will need to add an additional piece to your bottom tab. Cut a strip of white card measuring 9cm x 3cm.  Score on the short side at 1.5cm (3 1/2″ x 1 1/8″ scored at approximately 1/2″). This piece will be adhered to the bottom of the treat bag to enable the bottom to be sealed.  To do this, add adhesive along one side of the small scored strip.  Adhere this to  the bottom tab section.  Place adhesive on the back tab and fold over to adhere.  NOTE:  Place your chocolate or other treat in before doing this and wrap it around the treat so it is folded at the right place to fit.  Also, it won’t adhere completely the full length due to the size but will adhere at the top points.

DECORATING THE BAG

To decorate the front of the bag I wanted to keep it simple.  I had just received the You’re Inspiring set so thought it would be just appropriate for Easter.  Although Easter does not exactly fall in our Spring time when the Daffodils appear but it is still nice and sunny and warm and I think these daffodils are quite bright and cheery.  I coloured the daffodils with the Stampin’ Blends.

Once the daffodils were coloured it was then cut with the largest circle from the Layering Circle Framelits.  The paper for the banner is from the Color Theory Designer Series Paper Stack.  I flagged the end of the strip and raised that up off the front with Dimensionals.   At the top of the banner piece I added a Gold Binder Clip and tied around some White Organza Ribbon. Adhere your stamped circle off the paper with Dimensionals.  Stamp the sentiment from the Inspiring You set on Pumpkin Pie and punch out with the Duet Banner Punch.  

——-

Thanks for visiting. Now hippity-hoppity to the next blog to see what Easter creativeness beholds.  You will be off to Kim’s blog ->  HERE (click on this to head to it as I have a WordPress blog I can’t add the link within the ‘NEXT’ below). 🙂

Jenny


cards, Catalogues, Sale-A-Bration, Videos

WEDNESDAY’S WOW! #18 WITH HAPPY WISHES!

Today’s Wednesday’s WOW! we are looking at the Happy Wishes set in the Sale-A-Bration Catalogue.  I have to say I haven’t really paid much attention to this set but I think it might be one of those hidden gems.  I didn’t realise just how versatile it is.  There are so many different sentiments in the set and you can layer them together before and after the main word or just have one of the 2 main words which are pretty in themselves with the flowery swirls.  So since I didn’t pay much attention to it I thought you might not have either.  So here is a video from Stampin’ Up! showcasing it. Take a quick look at it.

The cards look pretty with some simple colouring and a few of the sentiments.

Here are 2 of the cards shown in the video.  These ones are fancy with the Textured Embossing Paste.

This is the stamp set.  So many sentiments. How could you use them?

This set is available Free with a qualifying orders from $180.  So be sure to grab it very soon.  There is only 2 weeks left for Sale-A-Bration so be quick.

Have a great day,

Jenny

Catalogues, Sale-A-Bration

SELECT CATALOGUE PRODUCTS NOW AVAILABLE AS SALE-A-BRATION CHOICES!

As if Sale-A-Bration isn’t exciting enough but Stampin’ Up! keep on giving!  Just announced: Stampin’ Up! have released some new choices for Sale-A-Bration AND they are catalogue products.  Check them out.

As already for Sale-A-Bration there are 2 levels of products.  Level 1 is for orders from $90 (green circle choices).  Level 2 are orders from $180 (orange circle choices).  I know the products aren’t too clear in this image but you can see them in the catalogue.

So have you stocked up on your cardstock and ink?  What about the reinkers for the retiring incolors?  Throw in some adhesive and you are at least at $90 before you get to stamps and dies.  As a bonus you choose something for Free!

In Australia?  Head to my store -> HERE now.  Go shopping and then choose your Sale-A-Bration item.  If you want to choose one of the above items you will need to use the item numbers on the image above.  As they are a little hard to see, drop me a message or comment to ask me.

If shopping online Please use the HOST CODE:   UUDCYQDV 

OR

You can contact me directly to place your order.

Thanks for shopping with me,

Jenny

cards, Catalogues, Sale-A-Bration

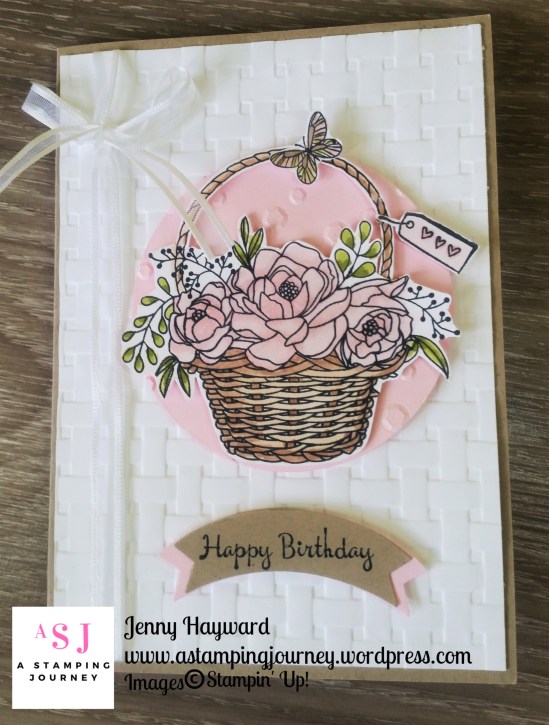
BLOSSOMING BASKET BIRTHDAY!

I have just received the new Blossoming Basket Bundle which is a new Sale-A-Bration choice.  I had a little colour with it on the weekend.

Here is a quick HOW-TO.

Emboss the Whisper White card with the Basket Weave Embossing Folder.

Stamp the basket from the set in Memento Black on Thick Whisper White and colour with the Stampin’ Blends.  Cut the basket out with scissors (sorry no framelits for this one).  Just a tip to cut inside the handle: snip the handle just at the flowers on the right hand side.  Then cut the white section on the inside of the handle.  Then add a tiny dab of Multipurpose adhesive just behind the flowers and adhere the handle back in place.  No one will even know but it makes cutting so much easier.   Stamp the little tag and the butterfly as well and colour those with the Stampin’ Blends also.

Cut a circle from Pink Pirouette card using one of the largest circles from the Layering Circle Framelits.  Run the piece through the Big Shot with the Scattered Sequins Embossing Folder.  

Stamp the sentiment from You’re Inspiring Set on crumb Cake card.  Punch out with the Duet Banner Punch.  Punch another banner out in Pink Pirouette.  Cut the pink banner in half and adhere these to the back of the Crumb Cake one with the ends of the pink extending past the Crumb Cake banner.

To assemble the card:  Wrap around some White Organza Ribbon around the white card.  Adhere to a Crumb Cake base.  Raise up the Pink Pirouette Circle off the white card and raise up the Basket off the circle.  Raise up the Sentiment banner down the bottom.

I coloured over the flowers and the butterfly with the Clear Wink of Stella Pen although I didn’t take a close up of the flowers.  It is very sparkly though.

———

This is a really lovely stamp set and very easy to colour especially with the Blends.  This Bundle is one of the free choices for Sale-A-Bration with a qualifying order over $180.  There is just over 2 weeks left so you don’t want to leave this too long if you want to grab the Bundle.

See it in my store -> HERE now.  You can order from there too and be sure to check off your Sale-A-Bration choice before you finish your order.

Thanks for looking.

Jenny


cards, Catalogues, Personal Ramblings

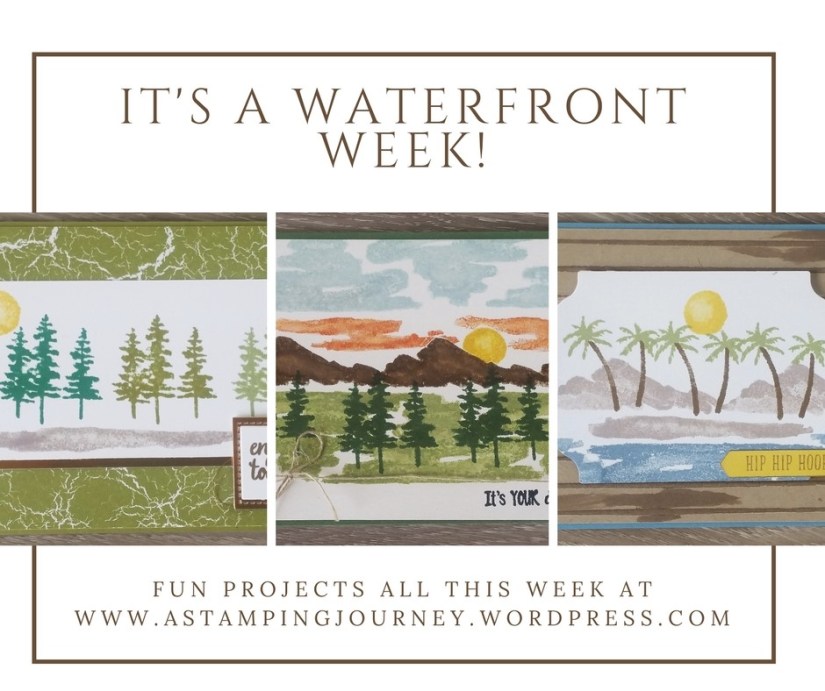
LAKE SCENE WITH THE WATERFRONT SET!

OK.  I have another Waterfront card for you.  Are you sick of seeing these cards yet? Sorry about that.  Tomorrow is the last one for a while.

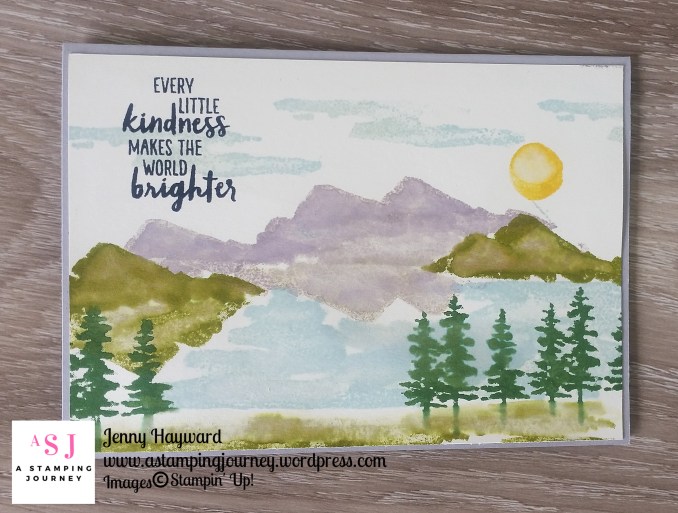
Today though I have a Lake scene stamped with this stamp set.  It might be your typical scene with it.  I was trying to recreate this scene from one of my favourite places in the world – Cradle Mountain in Tasmania, Australia.  It didn’t quite look as I wanted to but I like the card anyway.

This is the scene and then I will show you my card.  You be the judge. 🙂  I made this early on in my playing with this set so I was still getting a feel for it.


I climbed to the top of that mountain peak in the distance last year.  It was a HUGE effort.  It had been a goal of mine for maybe 18 years.  It holds a special place in my heart.

The trees are a little larger in the forefront but I had to work with what I had. I can see a few changes that I would make now. It doesn’t matter.  It doesn’t have to be exact.  The landscape images are just to inspire us.  Maybe I will have another go at it.

Thanks for your patience this week while sharing these projects.  Last one for the week tomorrow.

Have a great day,

Jenny 

*** You still have time to order the Waterfront stamp set this week either online or directly to me. Receive 4 x A4 sheets of Shimmery White cardstock PLUS a tutorial for an exclusive project.  

You can order online in my store -> HERE.  Please use the Host Code this week: SBZEJCNH    Thank  You.  🙂