cards, Catalogues, Classes, Stampin' Up!

LAST DAY TOMORROW FOR PAPER AND FOR MERRY PATTERNS!

End of October tomorrow.  Yikes! That is scary how quickly the year is speeding by.  I wanted to let you know though that tomorrow is the last day for these Stampin’ Up! specials.

Yes! If you want to grab the free pack of Designer Series Paper with the purchase of 3 then you better be quick.

Here are the ones that are available just to remind you.

Here are the papers again to see them.

You can order them in store HERE.  Choose your 3 then you can add your 4th one for free!  Ordering Online?? Please use the Host Code: BRE396PY

OR to order you can contact me directly.

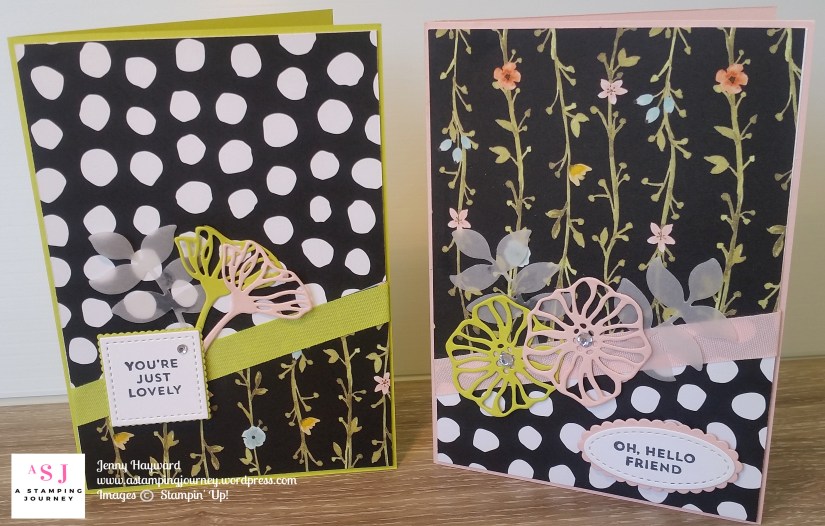
While we are talking paper.  I hadn’t shown you this cute card with the Delightful Daisy DSP that is one of the listed papers.

This card was inspired by Marcy Denning on Pinterest.

Just a little strip of the Delightful Daisy Paper, one happy piggy coloured with the Aquapainters and ink and a few loopy threads.  One Happy Card I think. 🙂

———————

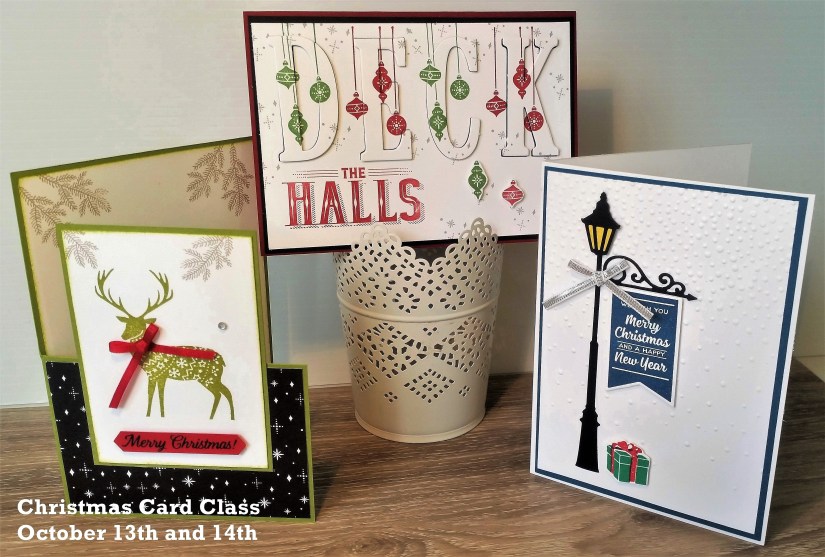
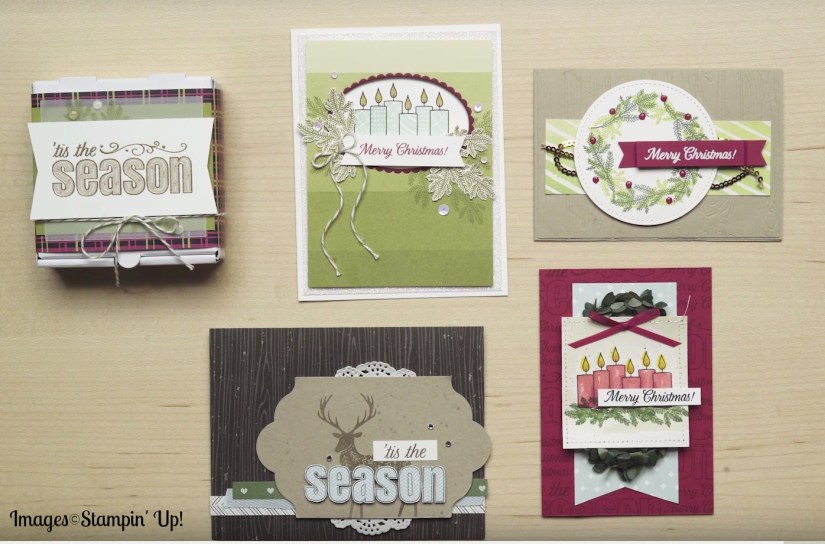
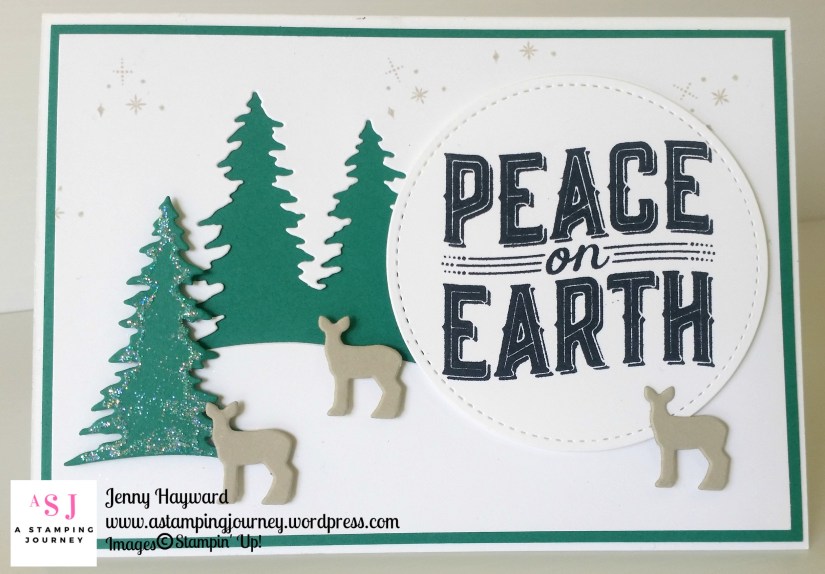
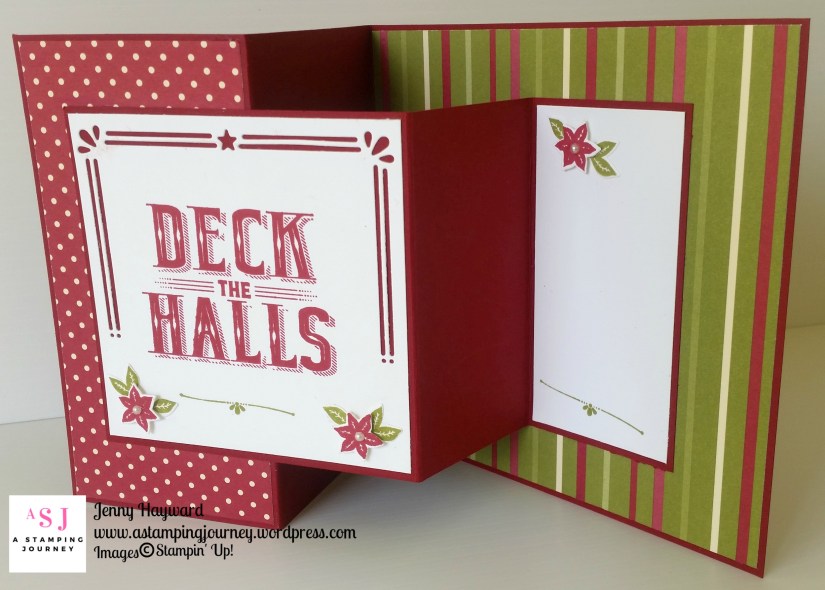
Another quick reminder too, the stamp set Merry Patterns is only available for one more day Receive it free with a minimum $450 party order (or maybe you need to stock up big!) 🙂  I have had fun playing with this set these past 2 months.  It’s sad to see it go.

This is one of the cards we made at my Stamp A Stack class on Friday.  This was inspired by a couple of different cards on Pinterest.  Gotta love that Pinterest!! 🙂

—————————-

While these 2 specials end tomorrow I can’t wait until Wednesday when the Stampin’ Blends alcohol markers are available for you to order.  I have had fun playing with these the past couple of weeks so stay tuned for them later.

“See” you soon,

Jenny

cards, Catalogues, Classes, Stampin' Up!

CUT THAT PAPER ON AN ANGLE!

Do you hoard that precious paper away?  Occasionally pulling it out and admiring it and stroking it.  Maybe just maybe you might cut it.  Oh boy that’s tough isn’t it!

This week it’s all about paper.  We are going to cut that paper that you have piling up.  You know if you use it then you can go and buy more of the pretty stuff. 🙂

Today’s card is getting that angle on your paper.  I normally don’t do angles.  They don’t sit well with me.  Everything has to sit straight and even.  I am trying to let go a bit  more and throw caution to the wind – and angle things up.

So let’s check out this gorgeous paper Whole Lot of Lovely Designer Series Paper and cut it on an angle.  I did give a sneak of these cards last week but I will tell you about them now.

Whether you use this gorgeous paper or another of the gorgeous papers Stampin’ Up! has, the idea is the same.  You don’t need a lot of stamping with these cards as you can let the paper be the star.

Another great benefit to creating this type of card is that you get to make 2 cards at the one time.

TO CREATE YOUR ANGLE 

1. From your 12″x 12″ piece of Designer Series Paper you will cut a strip of paper.  Which way you cut will depend on which way the pattern lies on the paper but for the most part you will cut it vertically but just check first.  The width you cut will be just slightly smaller than your card base.  For metric you will cut your paper 10.1cm wide.  For the US I think your card base is slightly wider at 4 1/4″ x 5 1/2″. You just want a small margin around each side so cut your paper to this size, (4″ but just double check).

2. Then from this long strip of paper, cut 2 pieces at 14.4cm (approx. 5 1/4″).

3.  With these 2 pieces you have cut, flip one over and put them together.  You can cut them both at the same time which will mean you get the same angle making it so much easier.

4. To cut the pieces put them together and place them on your paper trimmer with the long side along the top and the left hand end at approximately the 3 cm mark (1 1/4″).  Tilt your paper to angle it slightly. The angle is really up to you.  When you are happy with the angle then cut the papers.

5.  You can now separate the papers.  You will have 2 large sections which will be for the top.  Take the 2 narrow bottom angled pieces and swap them over to mix them with the tops.

6. Assemble your cards as you like.  I have added a strip of ribbon with the gorgeous Lemon Lime Twist and the Powder Pink Finely Woven Ribbon.  I have then finished the cards with the sentiments from Oh! So Eclectic cut with the Stitched Shapes Framelits and the Ovals and Squares Framelits.  I also added some diecuts with the Eclectic Layers Thinlits.

—————————–

This gorgeous Whole Lot of Lovely DSP is one of the packs available this month for the Buy 3, Get One Free!  There are some beautiful prints in this pack.  Well really all of them. 🙂

It’s only a couple of weeks left for this promotion to get your free paper.


Stop by again and we will see some more fun ways of using that paper.

Jenny


cards, Christmas, Classes, Stampin' Up!

MERRY PATTERNS HALF FOLD CARD!

I have had a couple of great classes yesterday and today.  Lots of fun and chatter and creating.  We have a good time at class.  If you are local you will just have to come sometime.

These are the cards we made.  Creating an Eclipse Christmas card with Carols of Christmas, a sweet one with Brightly Lit and a fun Half-Fold card with Merry Patterns. Everyone loved them. 🙂

I don’t often show the “how-to” of my class cards on my blog but I wanted to show you this one.   I have seen a few Half Fold cards on Pinterest lately and wanted to try this card AND as we only have a couple of weeks left for the Merry Patterns I thought it would be good to give this an ink.

So for you to make your own here are the details.  Of course, you could substitute any stamps and paper.

CREATING A HALF FOLD CARD

1. Whether you are using the Metric or imperial measurements it doesn’t matter the idea is the same.  Take your standard base card (for this one I used Old Olive) and score at the half way mark on the long side.  (For metric the base card is 14.8cm x 21cm.  Score on the long side at 10.5).

2. On your score line cut down half way.  Then cut across on the front of the card base from where you finished your cut on the score line to the edge of the card.

3. The piece that you have cut off becomes your card mat for the front image.  Cut a piece of Whisper White just slightly smaller than the card mat. (For metric that measures 10.1cm x 7cm).

4. Cut a piece of Whisper White for the inside of your card just slightly smaller than the inside card base.

5. Stamp and Decorate your card as you like. The Designer Series Paper for this card is from the Merry Little Christmas pack.

I hope this makes sense.  Please ask if you are unsure.

Jenny

PS. Only 2 weeks left to get your Merry Patterns set with qualifying parties/orders of a minimum of $450.  Be sure to book your event soon or place your order so you can grab your set.

3D projects, Blog Hops, cards, Classes, Stampin' Up!, Techniques, Tutorials

SINGLE STEP CARD TUTORIAL WITH NIGHT IN BETHLEHEM!

Yesterday I shared my Step Card I had created for the Stampin’  Dreams Blog Hop.  As time was limited yesterday as you were all on the Hop I thought I would share the tutorial for you in a separate post.  So here it is for you.

Firstly,  to refresh you this is the Single Step Card.  I have used with the Night In Bethlehem Bundle.  

The original card design I found on Patti’s blog HERE.  While it has the Imperial measurements I have worked out the Metric for you and added the Imperial measurements for you also.

SINGLE STEP CARD TUTORIAL

** Cut card to 28cm x 10.5cm  (11″ x 4 1/4″)

On the long side score at 3.2cm, 6.3cm, 10.8cm 15.2cm and 21cm     (1 1/4″, 2 1/2″, 4 1/4″, 6″ and 8 1/4″)

For back panel piece: Cut card 10.5cm x 10.5cm (4 1/4″ x 4 1/4″)

** The White mat pieces are:

Back mat piece – 10.1cm x 10.1cm (4″ x 4″)

Middle mat piece – 10.1cm x 4.1cm (4″ x 1 5/8″)

Front mat piece – 10.1cm x 2.8cm (4″ x 1 1/4″)

** To fold the card:

With the narrowest scored section on the left end start folding it concertina style.  On the score lines fold into a mountain fold, then next one a valley fold, then a mountain fold, then a valley fold, then a mountain fold.  See the photo below.

Then you can decorate the card as you like.

I hope you like it.  It’s a very simple card. I would love to see your version if you create one.  Do send me an email. 🙂

Thanks for stopping by,

Jenny

3D projects, cards, Christmas, Classes, Stampin' Up!

NIGHT IN BETHLEHEM CANDLE CLASS THIS WEEK!

I have a special class for you this week if you are a Wollongong local.  We are making a lovely Tent Card and a stamped candle using the Night in Bethlehem Bundle.  I am sure this would look lovely sitting on your shelf over the festive season.  This would be a special gift to give someone too.

Here are the details.

NIGHT IN BETHLEHEM CLASS

WHEN: This Friday 22nd 10am or Saturday 23rd 2pm.
Can’t make this time?? Let’s make another time to get together (or invite your friends along too).

COST: $20.  Please bring your own scissors and adhesives.

RSVP:  Wednesday 20th.
It’s important to RSVP early to be sure there is enough candles.

I hope you can make it.

Jenny


cards, Catalogues, Classes, Stampin' Up!

BOGO SALE ON THIS WEEKEND IN WOLLONGONG!

I have to get rid of all this stuff and I need you to help me out.

I am selling off all my retired Stampin’  Up! products.  It’s a BOGO Sale. For every $1 you spend you receive the same Free of new stuff from the new catalogues.  How cool!

Here is a little tour to show you what you can see at the sale.

Stamps
Christmas
Bundles
Big Shot
Handmade boxes and cards

If you are in Wollongong come along.  Help me get rid of all this!

Saturday 9th 2pm – 3.30pm and Sunday 10th 2.30-3.30pm

If you are not local, stay tuned.  I will list what I have left after the weekend.

Jenny


Catalogues, Classes, Stampin' Up!

BOGO SALE ON THIS COMING WEEKEND. BUY ONE, GET ONE FREE!

The BOGO Sale Days have been popular the past few years and it is on again. Why wouldn’t it be when you get brand new Stampin’ Up! products free for the value of the retired products you buy I need to clear out loads of retired products.

WHEN:

Saturday 9th – Any time between 2pm – 3.30pm
and
Sunday 10th between 2.30pm – 3.30pm.

Can’t make these times.  Contact me and I can arrange a time for you to come after these dates.

WHERE: 

My studio in East Corrimal.  Contact me for address.

HOW DOES IT WORK:  

All my retired products are priced near Catalogue price. (Previous years products have been reduced further). Add up  your total order that you purchase on the day and pay for that total. For every $1 you spend you choose up to that total from the new Catalogue (Annual, Holiday and Clearance Rack) and get these items FREE!  WIN! WIN!  

I look forward to seeing you there and grabbing some bargains.

Jenny

Catalogues, Christmas, Classes, Stampin' Up!, Workshops

MERRY PATTERNS CHRISTMAS SET FOR FREE!

What do you think of this Merry Patterns Stamp set?? Pretty cool Hey!  It’s a special free bonus during September and October.

If you hold a cardmaking event whether it is a party, private card class, catalogue order or even your own order (Ssh! I won’t tell), and the total of the orders are over $450, it is your’s for Free!  

It wouldn’t take much to get to that amount with everyone keen to get started on their Christmas cards and a fantastic Holiday Catalogue released today.

Who do you think you could invite over to make cards?? I am sure you can think of a few people.  Invite them over, I show some ideas and we all make cards and sit and have coffee and –  not get interrupted by family members … 🙂  Grab a date and let me know so I can book you in.  Can’t wait!!  I always love sharing cardmaking with others.

To show you just some of the ideas you can create with this set here is a group of projects created by Stampin’  Up! artists.  Such a diversity!

I look forward to creating cards together with you and your friends. Book me in ASAP.

Jenny


cards, Catalogues, Classes, Stampin' Up!

A DAISY MAKE AND TAKE!

This past weekend I was at a Craft Show with my Stamping buddy Leonie.  I love meeting people and sharing stamping with them.  It is lots of fun to share in their excitement and joy when they discover new things.

I thought I would show you the make and take we did at our stand.  We focused on the Daisy Delight Bundle. I am so glad that is available again.

This card was CASED from Julie Davison on Julie’s Stamping Spot. I couldn’t locate this exact card on her blog. I originally found it on Pinterest and it didn’t link back to the exact post.

The card is a very simple one but I think effective and uses the Daisy Delight Stamp set, the Daisy Punch and the Delightful Daisy Designer Series Paper.  You can find all of them on Page 127 of the Annual Catalogue.  I changed the sentiment to Happy Birthday which is from the Happy Birthday Gorgeous set for the make and take.

This is the Bundle if you can’t get to see it in the Catalogue.

Now it’s back make sure you grab it in my store -> HERE now.

I have lots of cards using this bundle that I will share with you this week so be sure to check in.

See you tomorrow,

Jenny

cards, Catalogues, Christmas, Classes

CAROLS OF CHRISTMAS CLASS CARDS!

I have had my Carols of Christmas class this weekend.  I thought I would show you the cards we made.  Everyone loved using this bundle and making these cards.

The first card was one of the cards from my Carols of Christmas week last week.  (If you missed that head back a few posts.  I posted a different card each day with this bundle).

This one is using Fresh Fig and adding a little Copper Foil.  It’s hard to see but I wrapped some Copper Thread around the Fresh Fig card before adhering it to the White card base.  We had a Fig and Gold combination as well which was still nice.

The next card was inspired by one on Pinterest but it took a different direction – as it does sometimes.

The double trees were cut from the White card mat and adhered to the Emerald Envy card mat. You can see the green trees through the cut window. Another tree was cut from a small piece of Emerald Envy and then raised up with Dimensionals.  We added a little sparkle with the Dazzling Diamonds.  You can just run around the edge of the tree with the Fine Tip glue and then sprinkle with the Dazzling Diamonds.  The sentiment is cut with a Circle Stitched Shapes Framelit.  And of course, don’t forget those cute little deers. These are cut from Sahara Sand card.

The last card which I think was the favourite of each class as it was so different is the Square Z-Fold Christmas.  I am loving these Z-Fold cards.

While I have just received my new Christmas paper this one used retired Christmas paper from a few years back.  I still had so much left and really it was the idea of the card.  I never normally use retired products in class but I didn’t have anything else, And yes it’s not an idea to use retired stuff as everyone says “I love it! can I buy it?”  :/

The flowers and leaves were stamped and cut using the Thinlits and adhered off the card with Dimensionals.  Adhesive Pearls were added to the centres.  Don’t you love that frame??

If you want to make your own Square Z-Fold card, then head HERE to a recent post with this card fold. 

There you have the 3 cards we made.  This bundle is SO versatile.  It is endless what you can do with it.  I hope you can grab your bundle and you can get it this month – early!

Here is the bundle if you have missed it.

You can grab it in my store now HERE (Australian residents only) and get started on your Christmas cards.

Hope you are having a wonderful weekend.  See you again soon,

Jenny

The 2017 Holiday Catalogue starts on September 1st.  Grab your Free copy now to be sent to you by commenting or emailing me.