cards, Catalogues, Classes, Techniques

BRUSHO WITH CHARMING CAFE!

On a previous post I showed you the cute Thank You cards using the Party Pandas and they had a fun Brusho background. (If you missed it then head back 2 posts).

Today I have a similar little card to show you using the Brusho Crystals but this time using the Charming Cafe set.  These little cards are to welcome new members to my team who have joined during Sale-A-Bration.  It’s so nice to have them in the JEN’s INK team. 🙂

Here are a couple of them for you to see.


Aren’t they fun backgrounds?  Each time they turn out different. The pieces were made in my Brusho classes to demonstrate how they work before each class member made their own.  I thought why not use them for these cards rather than waste them.

For these I sprinkled over some Brusho Crystals and I used Glossy card this time.  Then I spritzed lightly with water.  I also tilted the cards slightly so you get the colour run.

The pieces were then adhered to a small card base made with the Thick Whisper White card.  You can make these any size but to give you the approximate size of these.

The Brusho card piece measures 8cm x 12.4cm ( 3 1/8″x 4 7/8″).  The card base is 8.4cm x 24.8cm, scored at 12.4cm.  (3 3/8″ x 7.3/4″ scored 4 7/8″  ** Please check the imperial size measurements beforehand).

The sweet little cafe chairs and table from the Charming Cafe set was stamped and coloured with Watercolor Pencils then cut with the Framelits.  Once I had adhered the Brusho piece to the card base then a vellum circle cut with the Stitched Circle Framelits was lightly adhered to the front.  So you couldn’t see the adhesive I added some dabs of snail adhesive near the centre so it would be covered with the table and chairs.   Then the Table and chairs were raised up with Dimensionals. The sentiment piece is from the Color Me Happy set and simply stamped in Black and cut around.   Before they were adhered down I looped around some Silver Thread.

Just a quick reminder:  Get 2 free stamp sets up to $174 in total when you join the Stampin’ Up! family during Sale-A-Bration.  (only just over a week left).  You might well receive one of these cards when you join my JEN’s INK team (and a little gift 😉 ).  What’s the rest of the story??  Order up to $235 of products and pay only $169.  No shipping costs either.  Then you get the 2 free stamp sets (all your choice). You get a minimum 20% discount on orders after that.  You have the choice if you do parties or classes.  You have the choice  when (and if you want) to leave.  You have the choice of when and what you do.  So what are you waiting for??  It’s time NOW.  

If you are in Australia and would like to join you can do so right now.  Head to my website -> HERE and click JOIN THE FUN.  Just have your order together first it might save some time.  I can’t wait to send you one of these sweet cards.

Thanks for stopping by,

Jenny

cards, Stampin' Up!, Techniques

WEDNESDAY’S WOW! #19 – TAILORED TAG PUNCH BANNERS!

I have a little trick for you today for Wednesday’s WOW! this week.  I discovered this on my blog travels a couple of weeks ago and have been pondering the idea since so I thought I would share it with you.

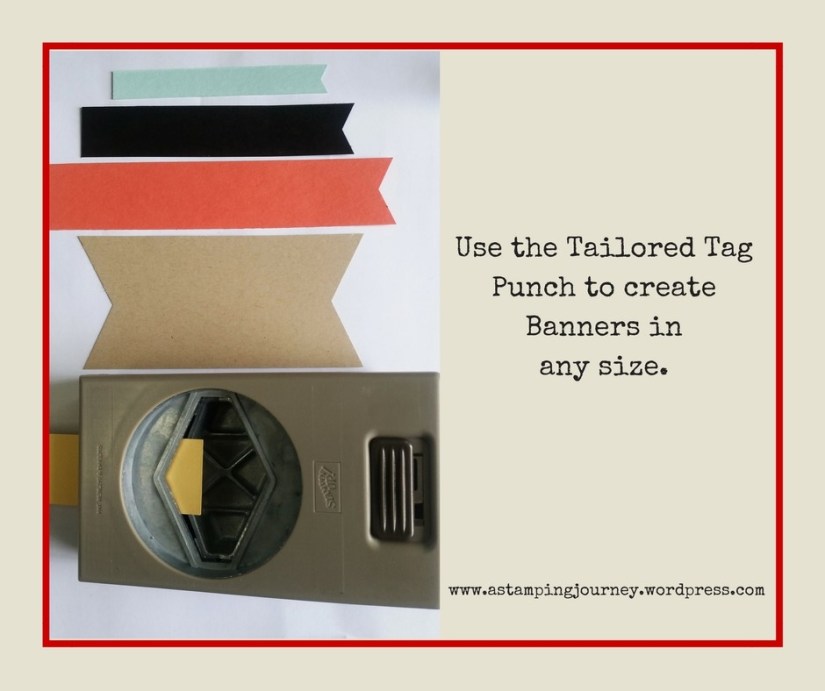
WEDNESDAY’S WOW! #19 – Making Banner ends with the Tailored Tag Punch.

The Tailored Tag Punch featured in the Occasions Catalogue is not just great for punching around sentiments and adding to your cards BUT did you know that it is a handy, dandy little punch to create Banner ends in any size.  How cool is that!

I will show you below.

Just slip your card strip into your punch with just the end showing in the angled section on one side.  Be sure to centre the piece first, then punch.  If you are a little unsure that you will line it up in the centre then you can mark the centre with a pencil.  For the 2 ended banner I marked the centre on both ends so I would be sure that both ends would be aligned.

Create the banners for your sentiment pieces, or you can make a banner and add a sentiment on a separate piece of card to layer on top.

I hope you find this tip very useful.

Thanks for visiting today,

Jenny


cards, Stampin' Up!, Techniques

PALM TREE ISLAND WITH THE WATERFRONT AND NOW TO PICK YOUR FAVOURITE!

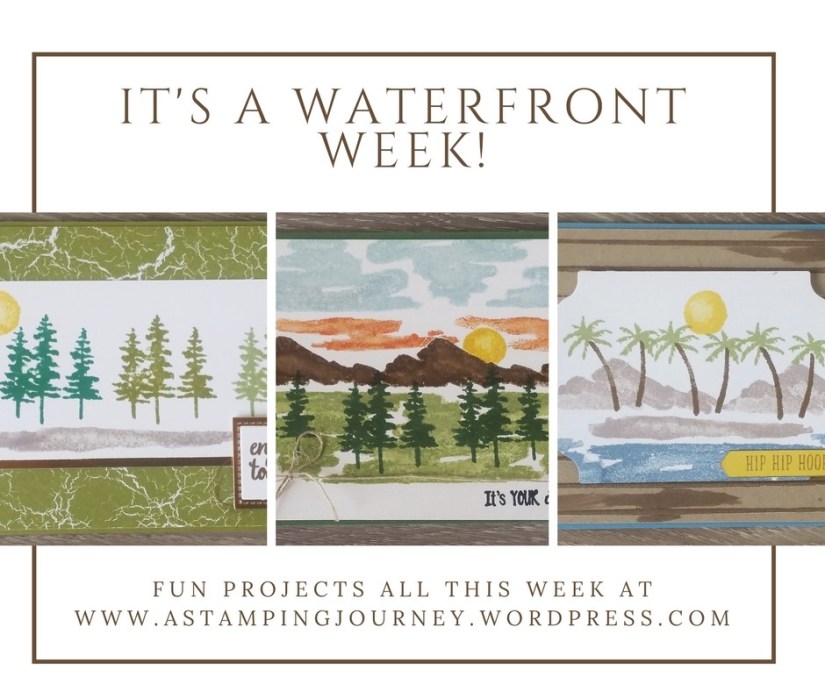
We are up to the last day of Waterfront Week.  You are probably glad of that hey!  It’s been a big week.

Don’t head off too quickly today.  I have shared a lot of cards this week but I would love to know what card you have liked the most.  So at the end of this post is a little Poll.  Tick the box for your favourite.

This last card came together quite quickly and I kinda like it. 🙂

I think I would like to be lying on that beach somewhere.  It reminds me of Hawaii.  I first cut the white card with the Lots of Labels Framelits.  I think it was the 2nd largest. Then stamp your 2 mountains in Crumb Cake and stamp the palm trees 3 times.  I added the thin streak stamp in Crumb Cake underneath the palm trees and the scribbly streaks in Marina Mist.  Don’t forget your sun in Daffodil Delight.

The Crumb Cake card mat was embossed with the Simple Stripes Embossing Folder.  I only just received this folder so I wanted to check it out. Once embossed I swiped the Crumb Cake inkpad over the card to add some ink in places.  To assemble, wrap around some Burlap Ribbon and adhere to the Marina Mist card base.  The stamped piece is raised up with Dimensionals.  The sentiment is from the Happy Birthday Gorgeous set stamped on Daffodil Delight and punched with the Classic Label punch.  I added some Clear Epoxy Shapes to finish.

Well that’s it for the Waterfront from me for a little while.  I think I should move on now right.  Hope you have enjoyed it as much as I have had in creating them and sharing them with you.

Now before you head off, I am interested to see what your favourite card has been this past week.  Can you take less than a minute to take this little poll.  Thanks so much.

Vote for your favourite Waterfront card by clicking on the image below.  If you can’t remember the card properly just head back through the posts for the past week.


cards, Techniques, Tutorials, Videos

CREATING LANDSCAPES WITH THE WATERFRONT SET FOR WEDNESDAY’S WOW #17!

We have seen some simple stamping with this set and I will show you in the coming days but today for Wednesday’s WOW! #17 I thought it would be a good opportunity to share with you how you can create watercoloured landscapes.  It’s truly amazing and I have had fun creating these.  I will share the cards in later posts.

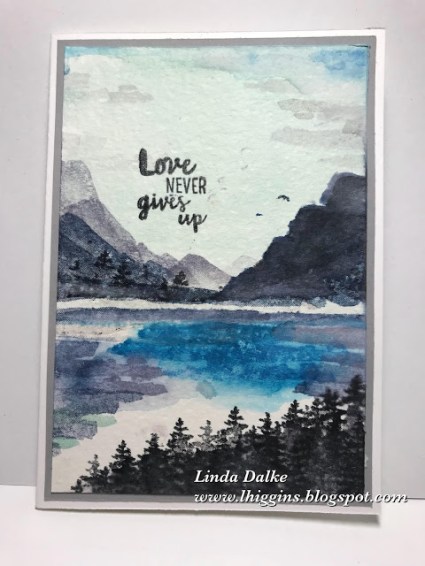
For today though I asked a lovely Demo friend Linda Dalke if she would mind if I shared her video to create watercoloured landscapes.  She can show it so much better than I could.  You really must watch this.  It is long, about 18 minutes, but totally worth it.  Firstly, this is her card, then watch the video below.


Isn’t it amazing! If you want to see more of Linda’s work do check her blog out.  She creates such gorgeous cards.  Visit her blog -> HERE. 

Tomorrow I will share one of my watercoloured creations.  I have shared this card already on my Facebook and Instagram and I think it was well received, so watch out for it.

Jenny

***Order the Waterfront stamp set this week either online or directly to me and receive 4 x A4 sheets of Shimmery White cardstock PLUS a tutorial for an exclusive project.  

You can order online in my store -> HERE.  Please use the Host Code this week: SBZEJCNH

cards, Techniques

ANOTHER MOUNTAIN SCENE WITH WATERFRONT!

Yesterday’s post I mentioned that when I first get a stamp set I check out Pinterest.  Is that your first port of call too??

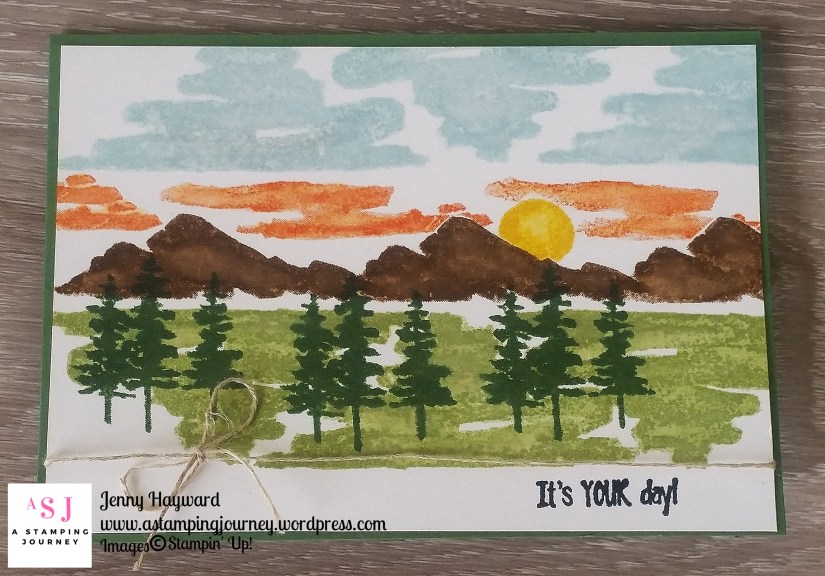
What I have found with the Waterfront set is that inspiration is all around you.  (Well, it is with most creativity isn’t it?)  But with the Waterfront set you start to see the landscapes differently.  On this card I was inspired by a photo on our computer log in screen.

For this card I simply stamped to get a feel for how they can work together to create a landscape.

Do you think it looks like the setting sun over the mountains?  Hope so anyway.

The sentiment is from Confetti Celebration and I wrapped some Linen Thread around the stamped piece.  The card base is Garden Green.

Thanks for watching.  We start to get a little more artistic with this set tomorrow so be sure to check in.

Jenny

***Order the Waterfront stamp set this week either online or directly to me and receive 4 x A4 sheets of Shimmery White cardstock PLUS a tutorial for an exclusive project.  

You can order online in my store -> HERE.  Please use the Host Code this week: SBZEJCNH

cards, Challenges, Techniques

A DIFFERENT COLOUR WITH THE SPRINGTIME FOILS SPECIALTY DESIGNER SERIES PAPER!

A couple of posts back I showed you a card with the Springtime Foils Specialty Designer Series Paper.  If you missed it then just head back -> HERE.

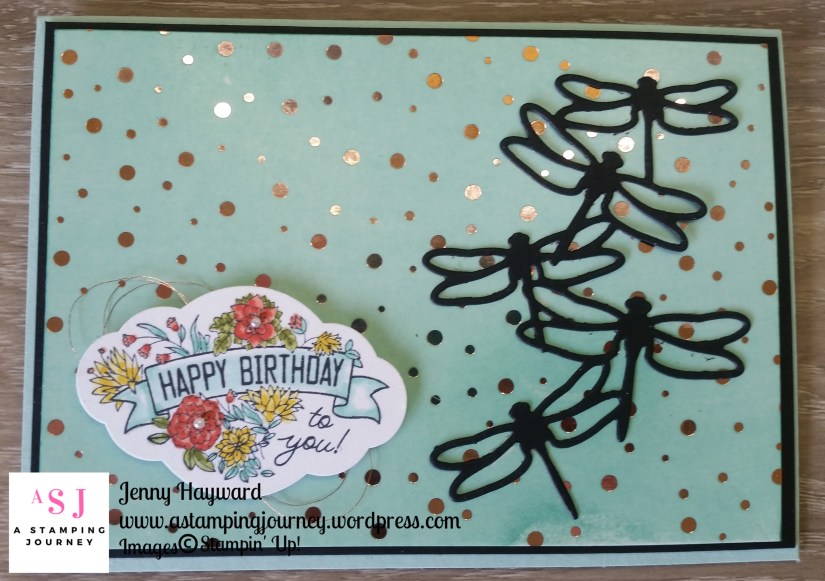
After a little discussion with a lovely friend, a different colour was suggested – Pool Party.  I thought that sounded a great idea.  How would this gorgeous paper turn out in other colours? I had a little time on Saturday and quickly whipped up this card.  I think the longest part was colouring the sentiment from the Label Me Pretty set.  I haven’t used this set very much so it was good to play with it and I dusted off the Detailed Dragonfly Thinlits.  

So what do you think of this version?

For this one to be quick I patted the Pool Party ink pad over the paper then I used a sponge to rub over it to smooth out the ink.  I was impatient. 🙂

I kept the card simple layering it on to a black card mat and then a Pool Party card base.  I added the line of dragonflies from the Detailed Dragonfly Thinlits.

The sentiment from Label Me Pretty was coloured with the Stampin’ Blends.  I added a few loops of the Copper Thread under the sentiment and added some tiny Pearls in the flower centres.

Still shiny and sparkly!  Thanks Lynda for the tip to try another colour. 🙂

See you next time,

Jenny


cards, Catalogues, Techniques, Tutorials

EXTRA GORGEOUSNESS FOR SALE-A-BRATION WITH THE SPRINGTIME FOILS PAPER!

The gorgeousness just keeps on coming for Sale-A-Bration.  Yesterday was the 2nd release of fantastic, beautiful new free choices that you can receive with your qualifying orders. I think you will love them.  I do. 🙂  If you haven’t seen them yet then I will show them to you in the next couple of posts.

Today I want to show you the gorgeous Springtime Foils Specialty Designer Series Paper. To be honest it really doesn’t do it justice in the catalogue but you can see them in this image.

Last week I shared a video on my Facebook page showing the sparkle and shine of this paper.  It truly is just gorgeous!  If you didn’t see it head to my page -> HERE and scroll down a little to see it.  You really must.

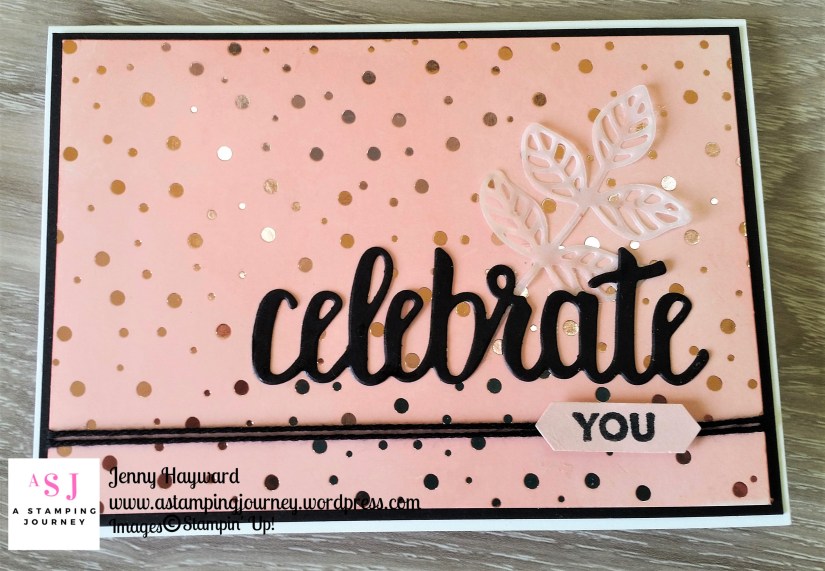
Today I was playing around with it.  I have seen some images of it this past week inking it so thought I would give it a whirl.  I have to say it just lifts the gorgeousness to a whole new level.  This is the finished card I made.

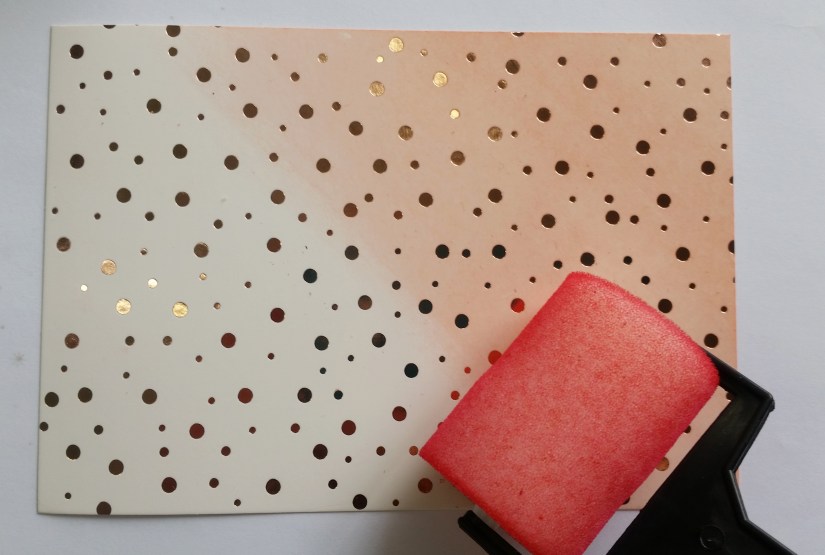
I posted a video on Youtube of how to colour this gorgeous paper.  It was a very quick video but might give you some idea.

Here it is for you.

If you like a visual of this then it is simply a matter of rolling over it with your sponge roller and inkpad.  It does take some time but it is worth it.  I did dab some ink on with my inkpad too.  You can do that if you get a bit impatient. Then roll over it with the roller to smooth it.

On my card to finish I cut the “celebrate” from the Celebrate You Thinlits and added the “YOU” stamped on Powder Pink.  I found that a better match with the inked paper in the end.   I finished it off with some Black Baker’s Twine and cut a vellum leaf from the Flourish Thinlits.

Hope you like it? I really think you need this paper.  It is a free choice now added for Sale-A-Bration when you have a minimum $90 order.  It doesn’t take much to get to $90 by the time you grab a stamp set and stock up on your paper and adhesives.  What about the sponge rollers?  Do you have them?

I look forward to playing more with this paper so stay tuned.

Have a great weekend,

Jenny

IN AUSTRALIA? 

You can order these products and any other Stampin’  Up! products in my store -> HERE now.  Please use the Host Code this week: 6NRCJVMT


cards, Challenges, Stampin' Up!, Techniques, Tutorials

A LITTLE BLACK MAGIC WITH THE EPIC CELEBRATIONS SET!

I was going to share these cards with you as part of a Bloghop tonight BUT I was too busy making the cards and fussing around with other things that when I came to register for the Bloghop I found that it was full already.  That’s a bit disappointing. 😦  It doesn’t matter big time really I guess.  I can still share them with you.  I hope that you like them.

The theme for the Bloghop was colouring.  Stampin’ Up! have a great number of choices for colouring with the Inkpads, markers, Blends, Watercolour Pencils and now the Brusho Crystals.  So many choices what should I do?? I am no way an expert in colouring but I have been trying my hand at it a bit recently.  I decided in the end to go with the Stampin’ Blends.

I used a technique you might have seen around a bit.  The Black Magic technique.  It’s an oldie but a goodie.  It’s colouring over White heat embossed images.  You can use pencils or the markers.

STEPS TO  CREATE YOUR BLACK MAGIC CARDS

Of course you can use a multiple of colours for your images but I thought for this particular image one colour worked better.  I made a set of cards in 4 different colours.

To create it:

1. First stamp your image on black card in versamark and heat emboss with White Embossing Powder.  Don’t forget to use your Embossing Buddy to help reduce the little stray specks. 🙂

2. Allow to cool slightly and then colour over it with the Stampin’ Blends.  I went over the image twice to intensify the colours.

3. I coloured some of the White Organza Ribbon with the Stampin’ Blends to match and layered it on a strip of the Silver Foil. The sentiment was stamped on the coloured card and cut with the Stitched Shapes Framelits and that was raised up with Dimensionals. 

4. The black card was adhered to a piece of Silver Foil.  TIP: cut the centre from the foil so you can use it for something else.  It is only getting hidden after all.  Before you adhere this piece to your card base stamp your card base with the “earphone” image in the set in the same colour as the card.

This Epic Celebrations set is one of the free choices for  Sale-A-Bration.  Have you got your set yet?  It’s great for the young teen cards.

So I hope you like this “epic” set.  Thanks for stopping by.

I have some exciting news to share with you tomorrow so stay tuned.

Have a good night,

Jenny


cards, Catalogues, Techniques, Videos

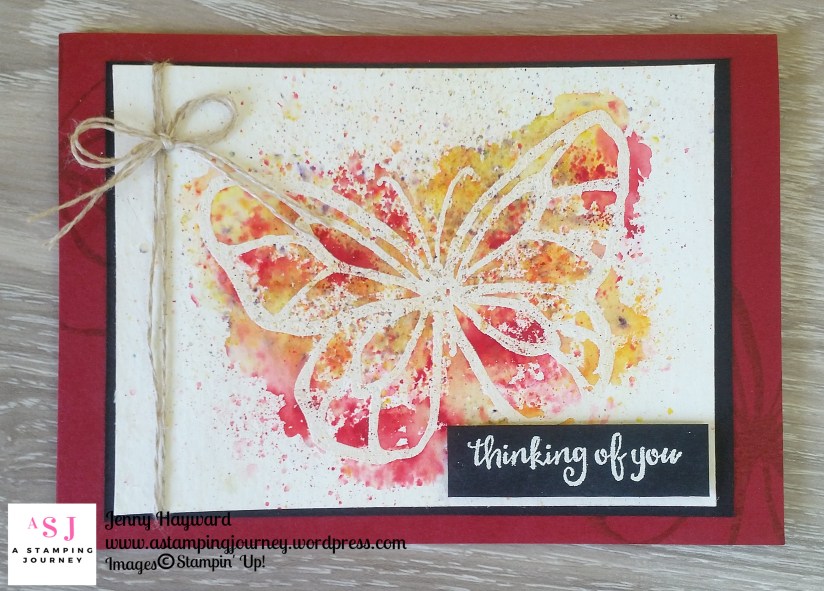
BRUSHO LONG WEEKEND DAY 3 – A SPECKLED BUTTERFLY!

I think this is my favourite card.  I really like how it turned out.  Can I say that??  Sometimes I am hesitant to say that about something I have made.  But I like the effect of it and I have to say it is just chance really.  When you use these Brusho Crystals you don’t know how it will work.

The butterfly is from A Beautiful Day set.  For the sentiment I masked the first word in the sentiment from the set to just stamp the “thinking of you” and heat embossed it in white.

To find out how to create this effect I have a video for you.

So what are your thoughts on the Brusho Crystals?  Have you tried them?  Do you think now you might give them a go?  Let me know what you think.  I would love to hear.

Just a reminder that my 15% off the Brusho Crystals ends at 8pm tonight. If you want to grab them and save money on then just drop me a comment or email me and I will get that sorted for you.  Included is an information sheet to help you use your set of Brushos.  I hope you will give them a try.  I don’t think it is the last you will see of these from me.

Thanks for joining me in this.  I hope you have had a great weekend.

Jenny

cards, Catalogues, Techniques, Tutorials

BRUSHO CRYSTALS LONG WEEKEND – DAY 2!

What did you think of yesterday’s project??  I have a another project for you today.  

We saw yesterday creating a background with the background.  They are really fun to use them that way.  This is another type of background.  I don’t have a video for this one but I will walk you through it.

CREATING A BACKGROUND WITH THE BRUSHO CRYSTAL COLOURS

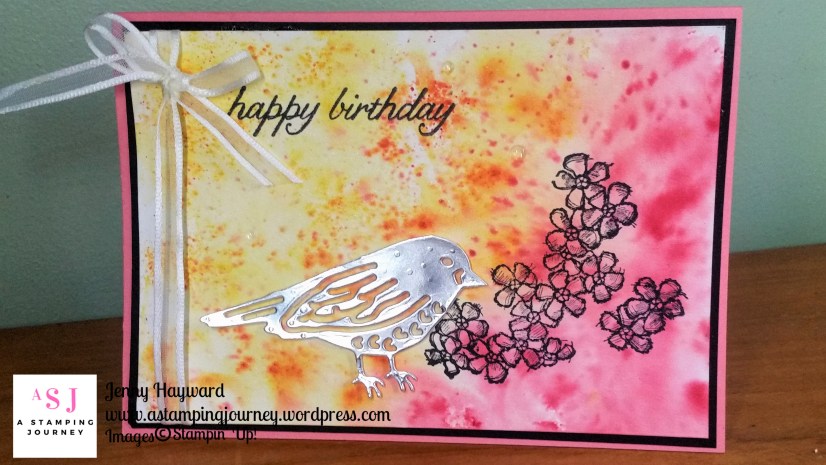
On this card I have used Shimmery White card and I have added the Brusho to dry card.

On your card sprinkle over your Brusho Crystals.  I added the Brilliant Red in the right hand corner, a small amount of the Gamboge in the centre section and the Yellow on the left.  Use the Spritzer and lightly spritz the card with water. It’s always magical watching the crystals dissolve and the colour emerge.  It’s one of those moments like heat embossing.  Do you feel that?? 🙂

Take your time and just play and watch what happens.  You may want to spritz more or you may want to add more crystals.  The “speckly” effect is created by sprinkling with the Crystals and only spritzing lightly so they are more spots than actually blended if that makes sense??

Leave your card to dry.

Once dry you can assemble the card.  For this one I stamped the flowers from Birthday Blossoms in the corner and the sentiment at the top.  I was going to stamp the sentiment and raise it up and I think I should have done that but never mind it’s more to see the Brusho effect.  I love the thin White Organza ribbon.  So soft and pretty to tie.  The base card is Flirty Flamingo.  It worked out a good match for it even with using the Red on the card.  The bird from Birds and Blooms Thinlits were cut in Silver Foil.


Thanks for stopping by for this one.  Come on by tomorrow.  I think I have left my favourite until last.