Do you love the Take Your Pick Tool? It’s like a Swiss army knife for crafters. 🙂
Wednesday’s WOW! #160 – Let’s look at just some of the features of the Take Your Pick Tool.
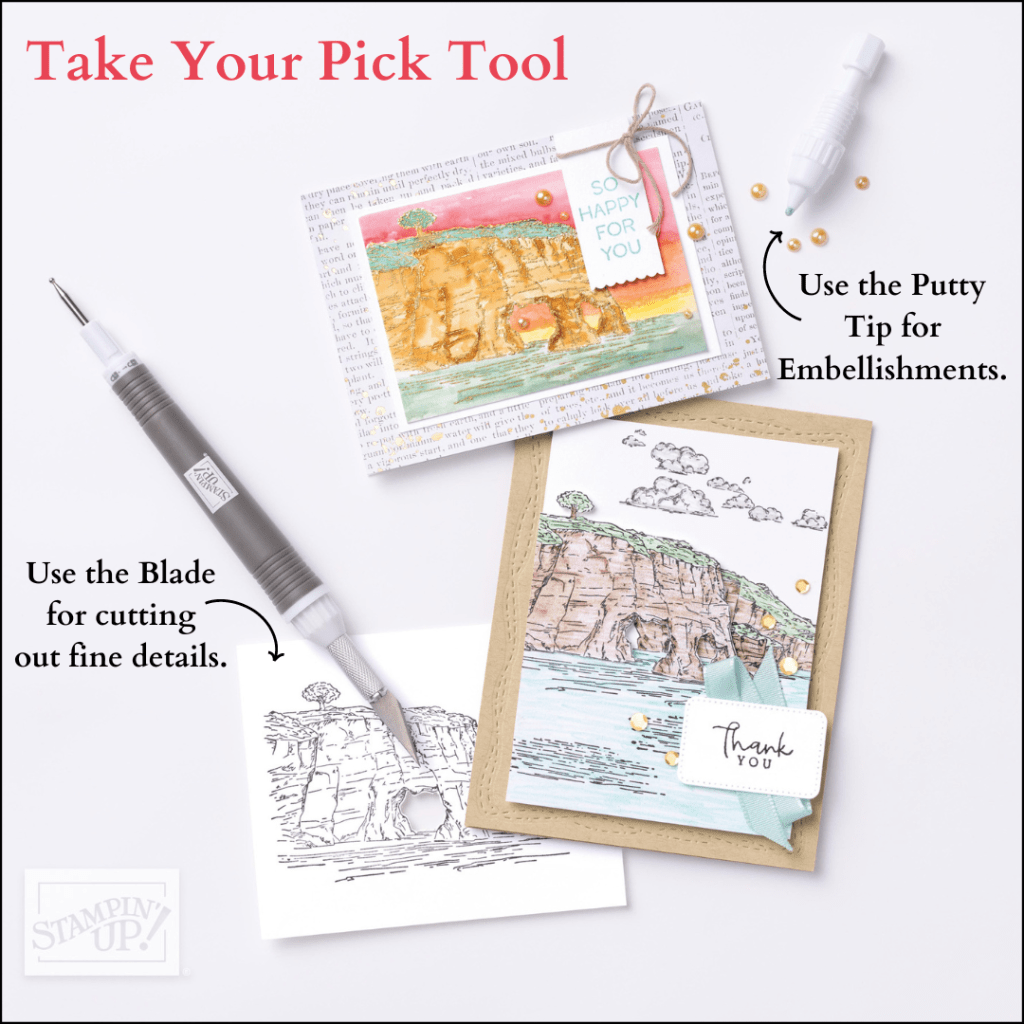
About the Take Your Pick Tool:
- It is a Multipurpose Pickup and Precision tool simplifies some of the fiddly crafting tasks.
- The Tacky Putty end easily picks up sequins, paper accents, and other small objects; twist to dispense more putty. There is also a Putty Refill that you can replace on the tool when you run out. AND TIP: Don’t sit there fiddling and twisting the end when you are not noticing. Ask me how I know …
- The other end has 2 changeable, double-ended tips with paper piercer, mini spatula, small stylus, and large stylus. See I said it was a the Swiss Army Knife.
Here is the Take Your PickTool plus the extra Attachments.

There is the Take Your Pick Die Brush attachment. This will help remove those tiny little diecuts from the dies when diecutting.
There is also the Take Your Pick Crafter Tips. These tips include:
- The Hobby Blade for precision cutting.
- A Double-Ended Pick Tip for piercing or removing pieces from intricate die cuts.
- And a Rotary Perforating Tip for cutting perforated patterns.
These tips fit onto the Take Your Pick Tool to give you even more crafting tools to work with! Simply remove a tip from the tool and insert a different tip for the task you need.
What a versatile Tool! It certainly makes some of those crafting tasks that much easier.
See it in action.
You can see it more in my store -> HERE.
If you need assistance you can contact me directly if you are in Australia. Or shop in my store at the above link.
Happy Wednesday crafting,
Jenny