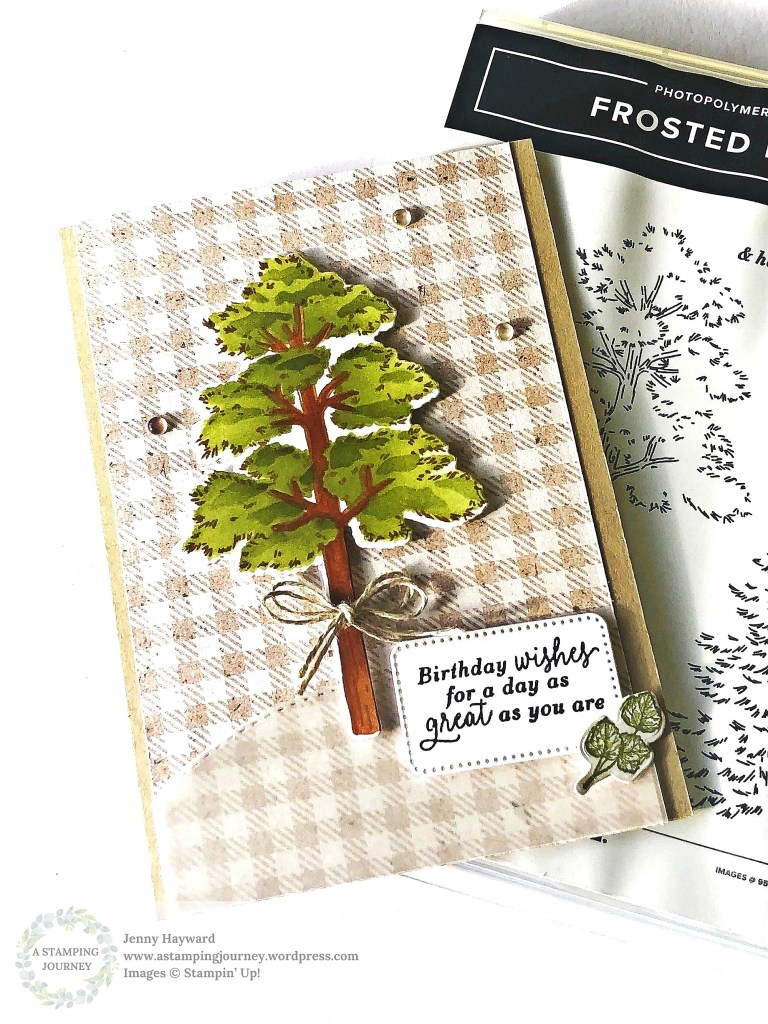
I made this card some months ago but forgot to show you. So here you are in all it’s glory. Well maybe not quite…
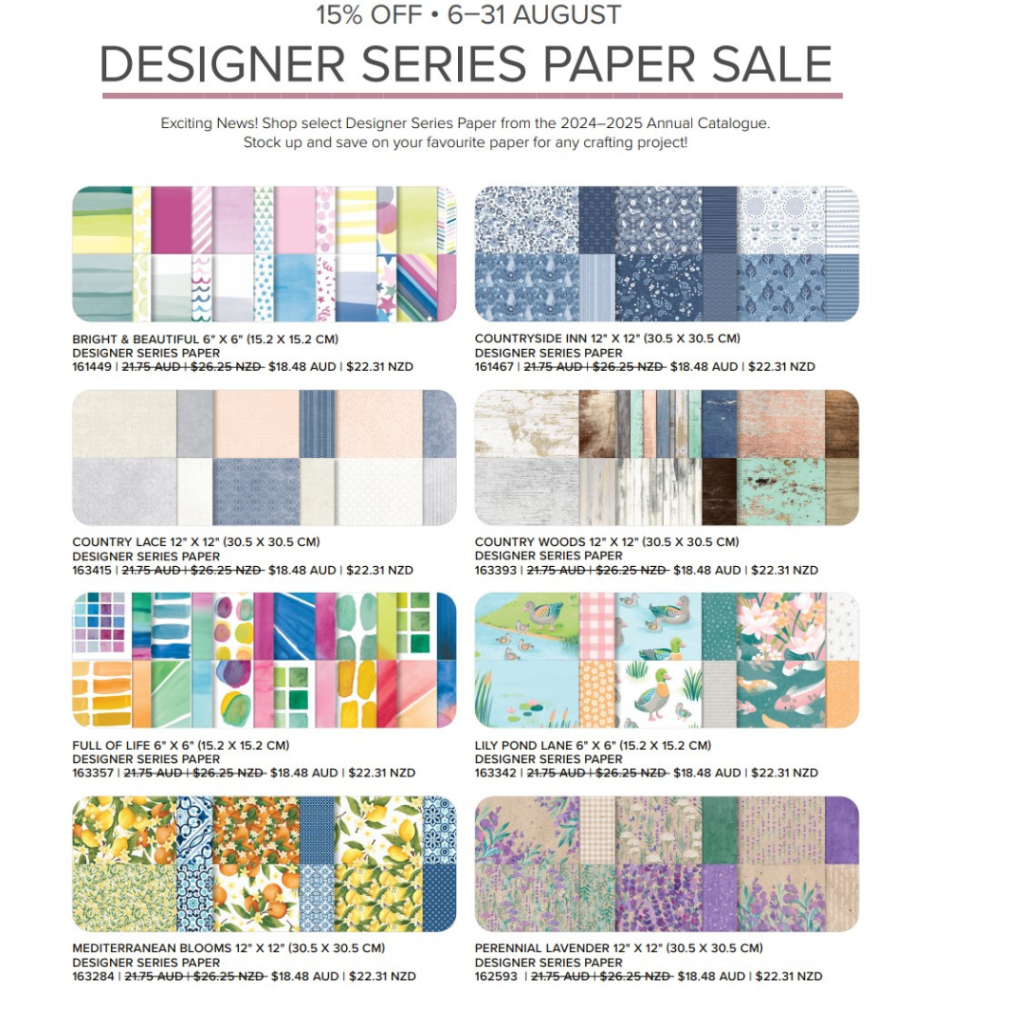
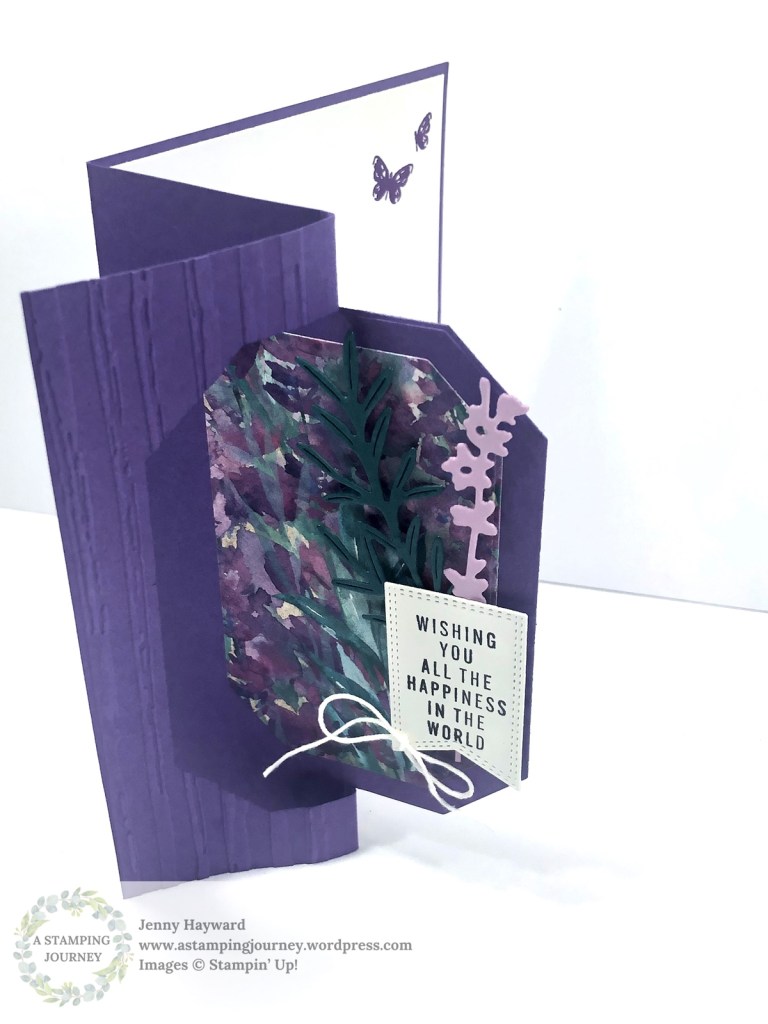
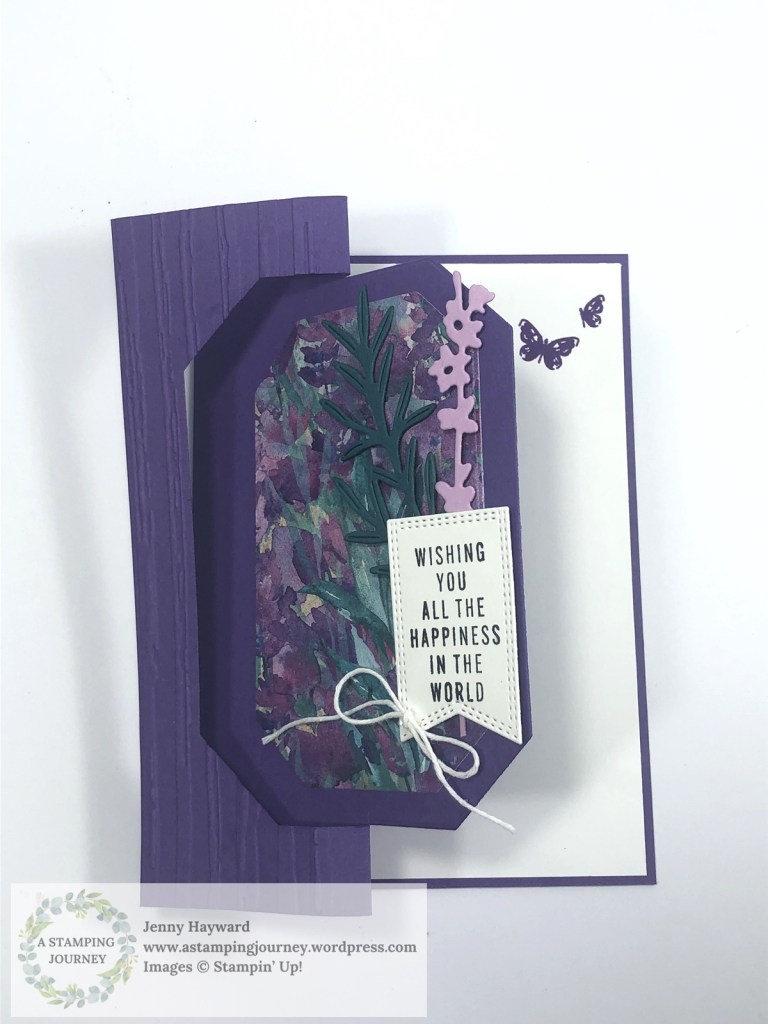
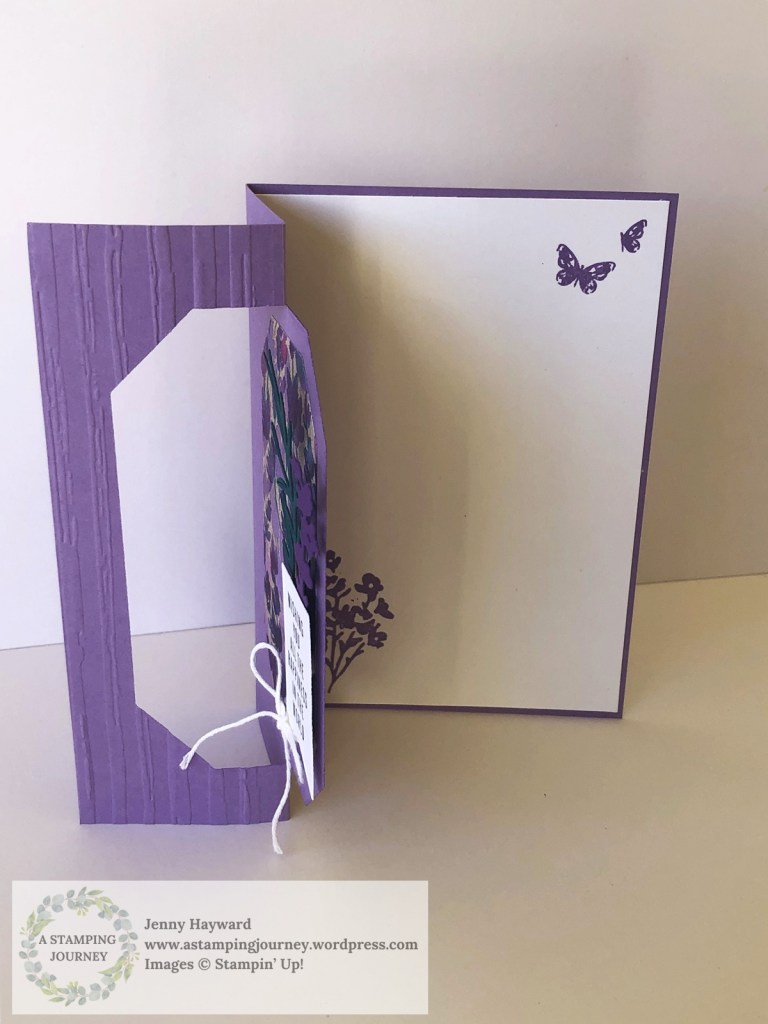
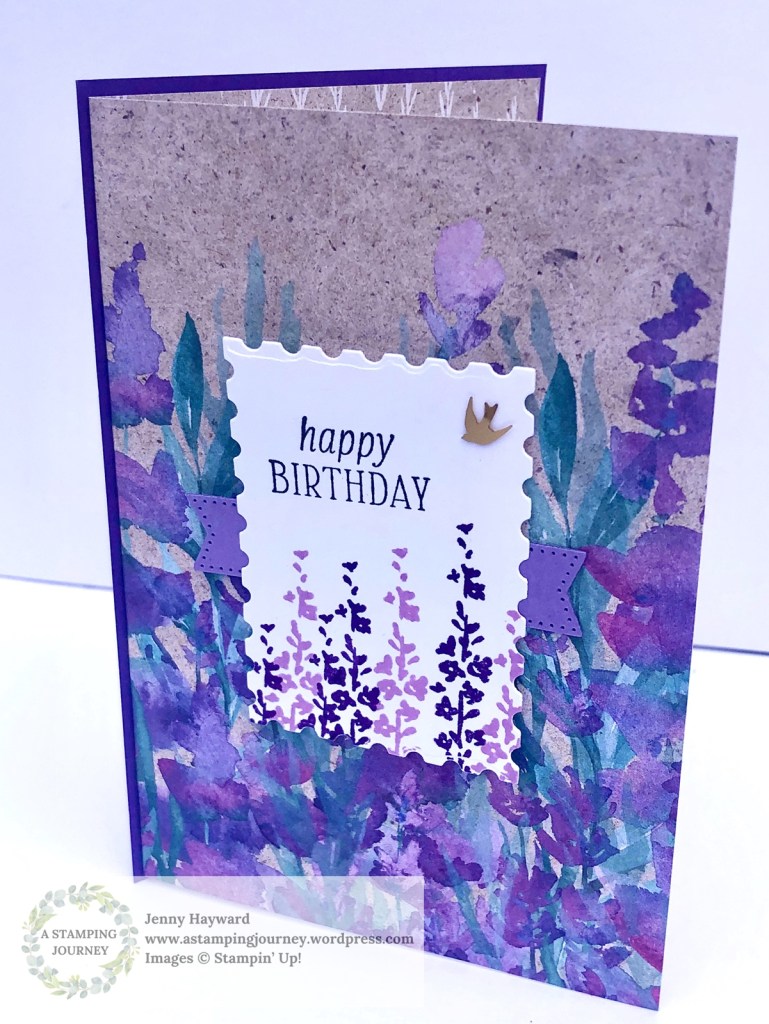
I paired the Pretty Florals stamps and dies with the Perennial Lavender Paper. They work well together I think.
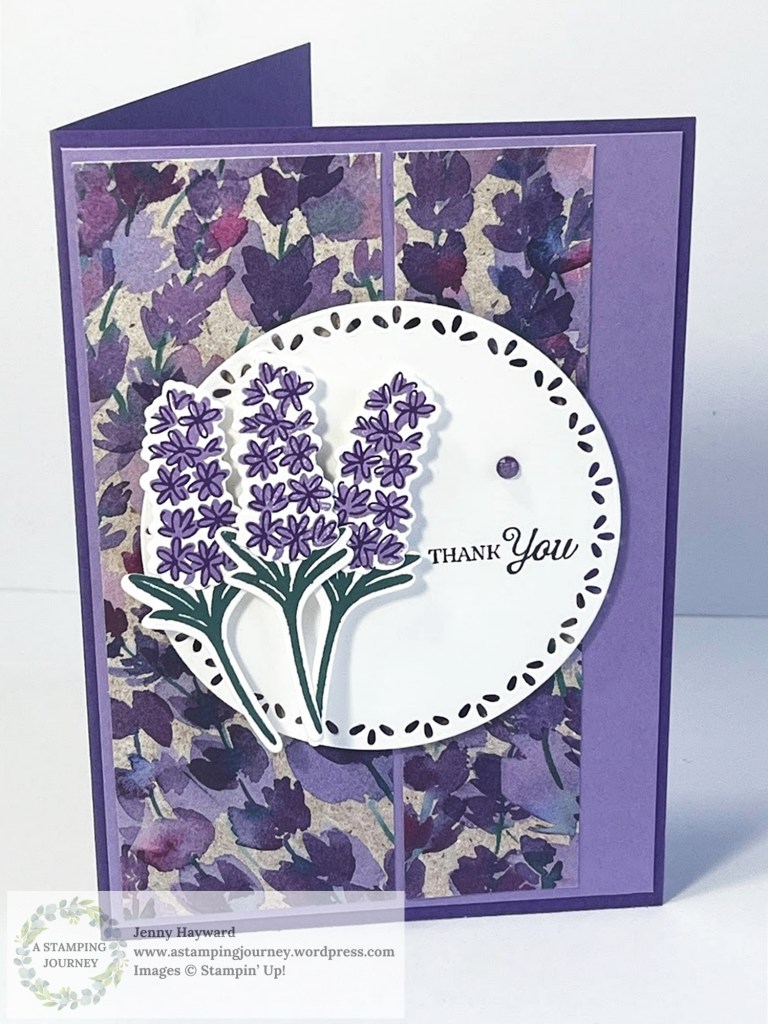
To give it some variation rather than just having a piece of the paper as a mat I cut 2 different width strips and layered it on the card mat. It also came about because I had a piece of the paper not quite wide enough so cut it to give that variation.
I have show quite a few cards with the Pretty Florals Bundle already. If you missed them do a search for the Tag of Pretty Florals and they should come up. Or do a little scrolling. 🙂
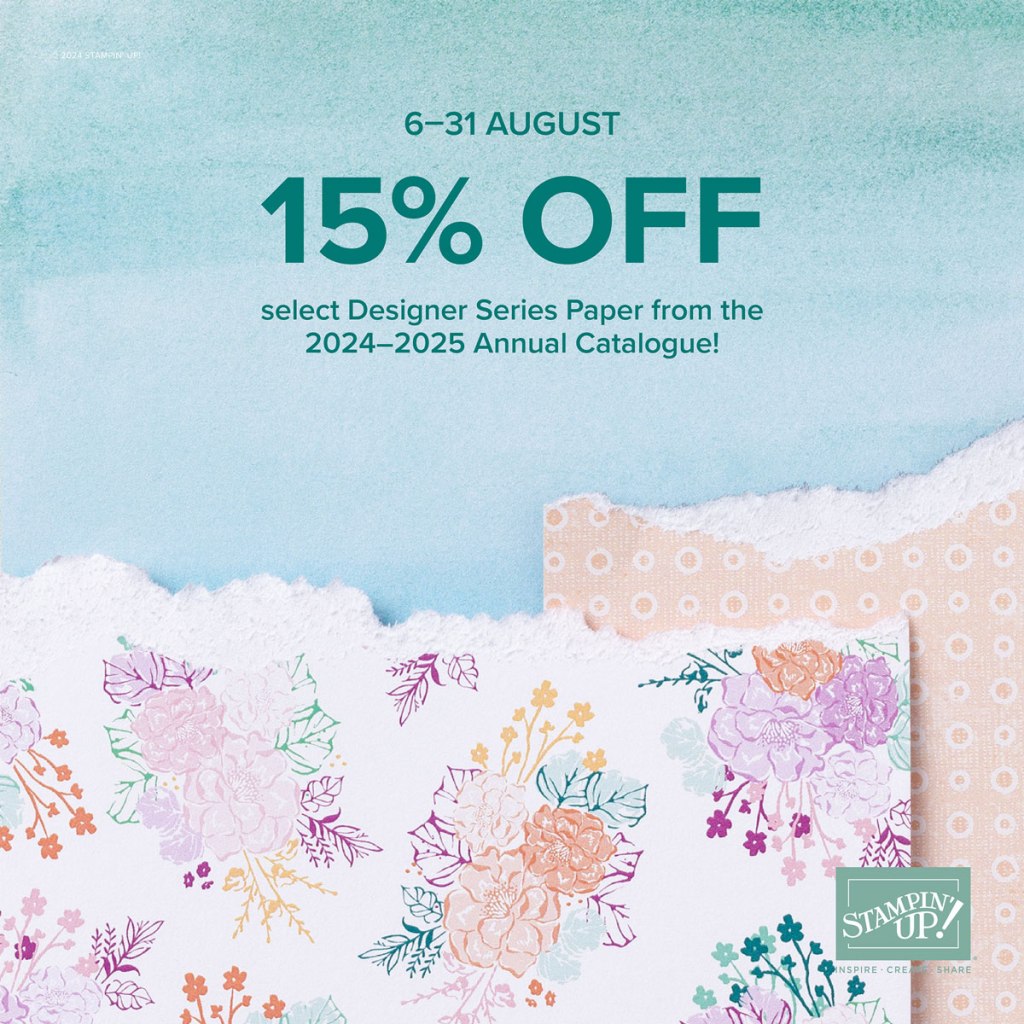
It is good that the Perennial Lavender Paper is still around. We get to use those gorgeous colours for a little longer.
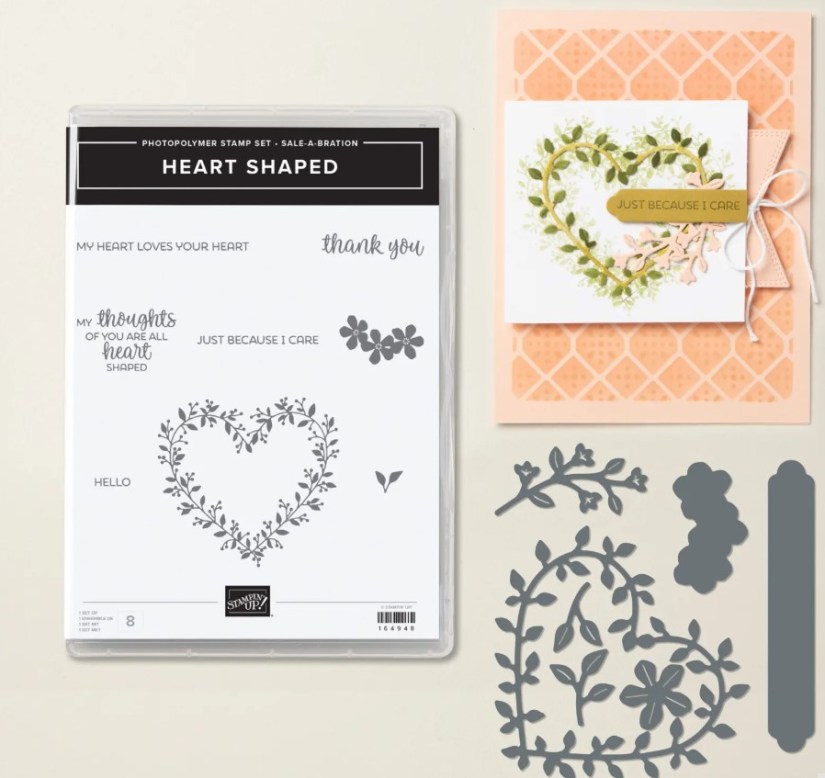
The Sentiment is from the Loveliest Tree Stamp Set.
If you would like these or other crafty products and you are in Australia I would love to help you get them. You can head to my store -> HERE OR Contact me directly.
Happy Crafting,
Jenny