cards, Catalogues, Stampin' Up!

GOOD-BYE BUNDLES!

During this month we focus so much on the retiring products and what is leaving the catalogue that we forget what products are staying but won’t be available as bundles.  Did you know that you can save 10% by buying them as a Bundle now rather than decide in the new catalogue that you want them.

Let’s look at a couple of them.

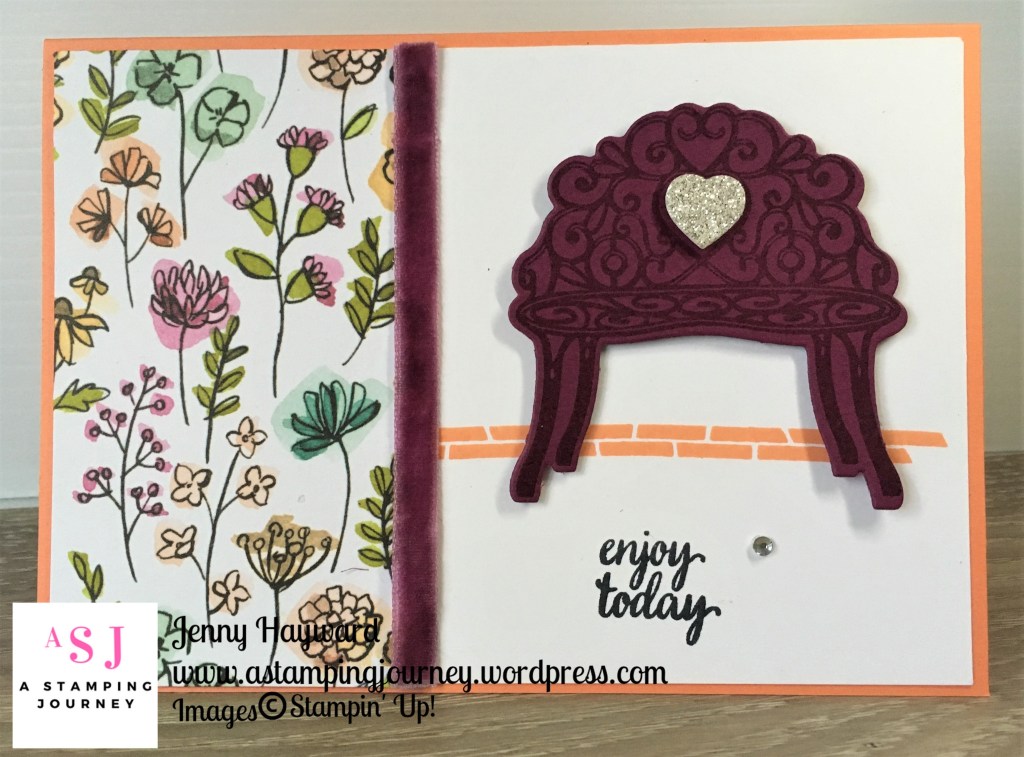
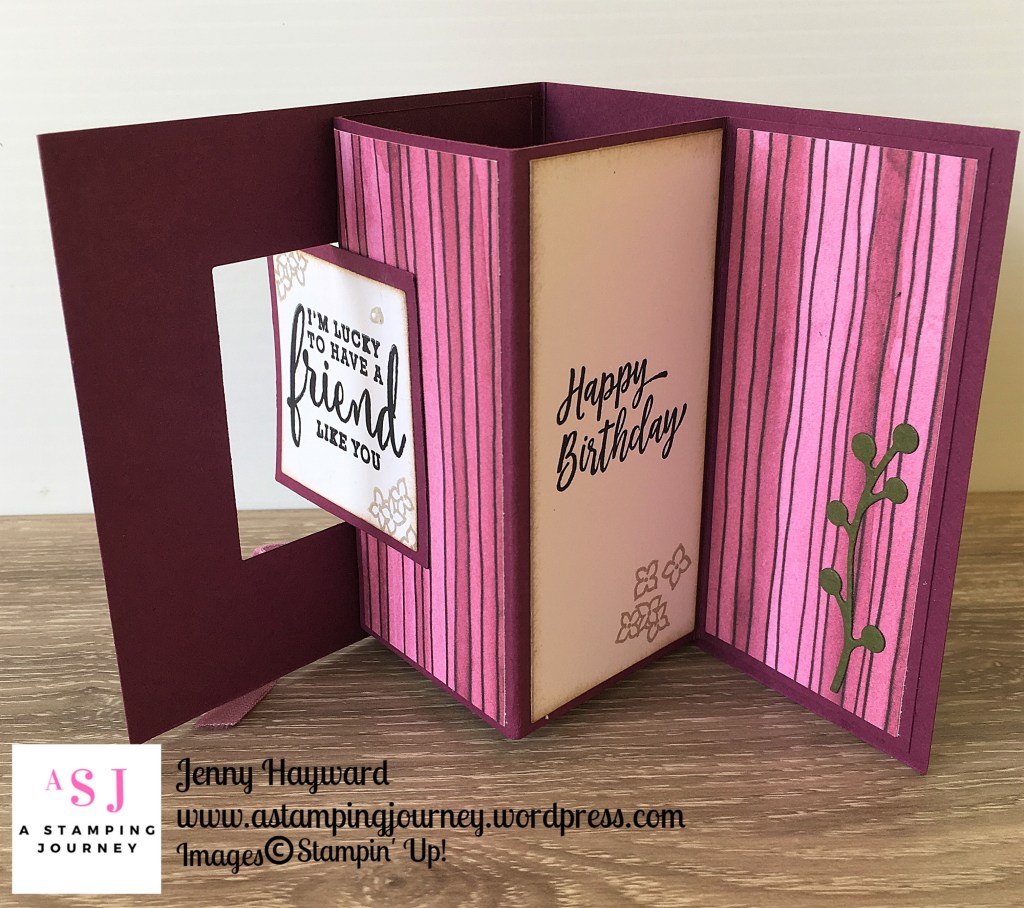
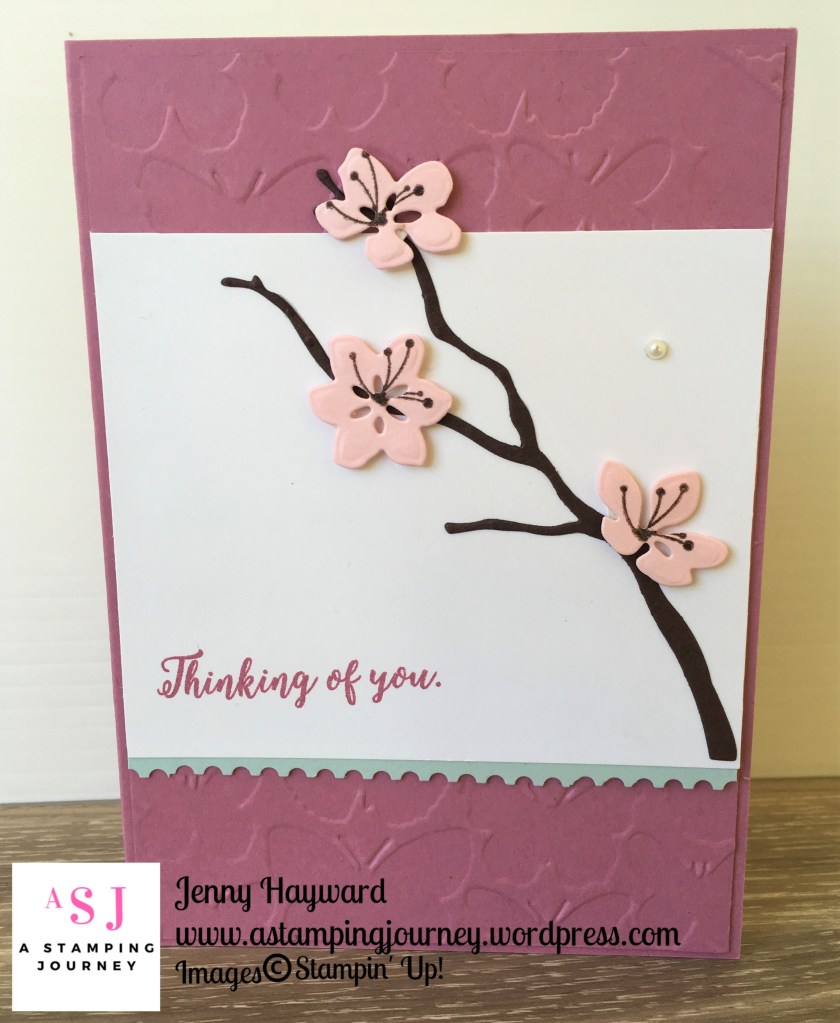
My favourite bundle has to be the Colorful Seasons Bundle.  I have used it a lot.

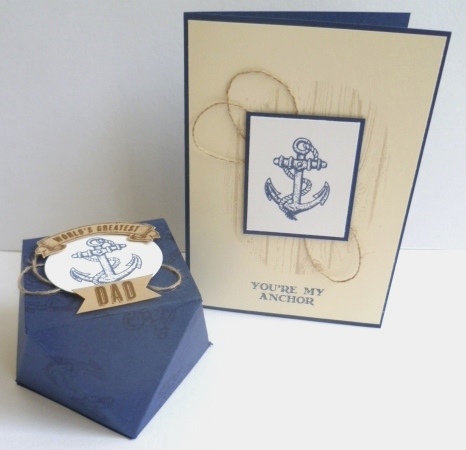
These Z-Fold cards are still a very popular post on my blog.  I had matching gift bags to go with them.

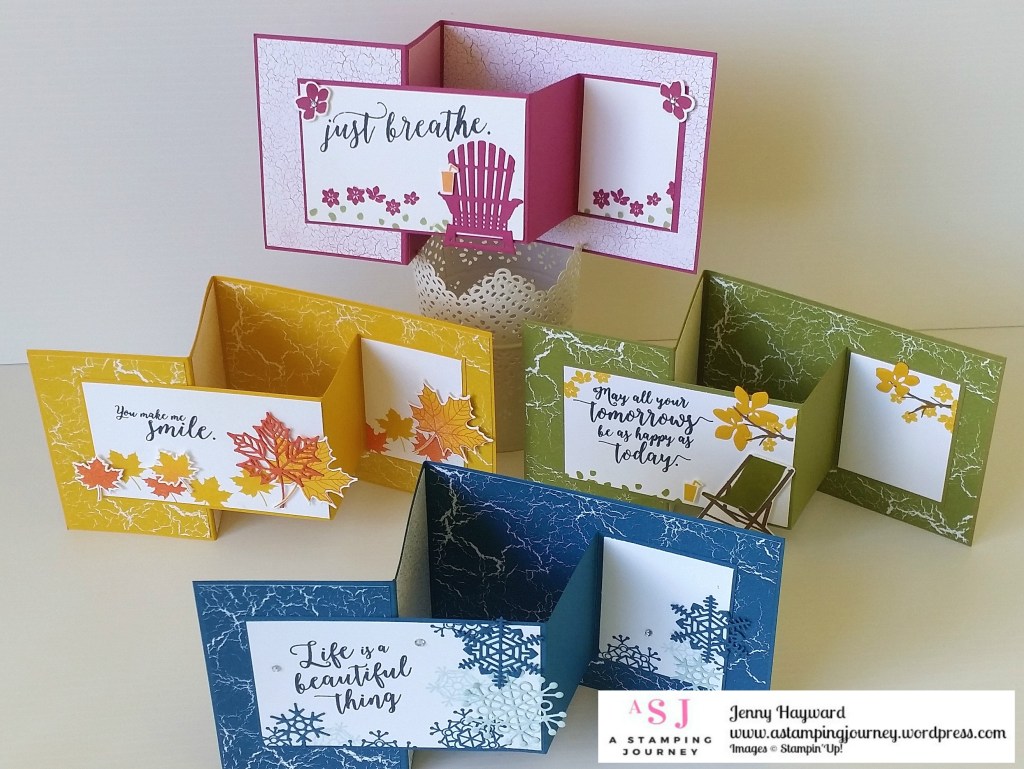
You can see that post -> HERE.

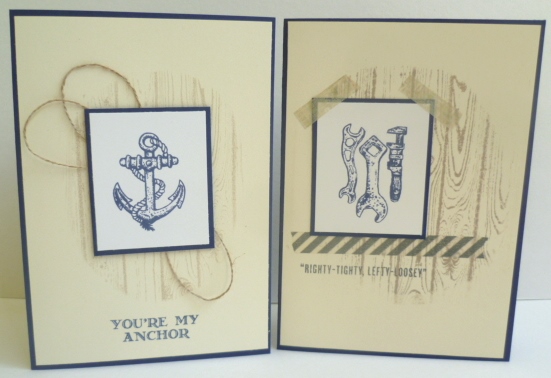
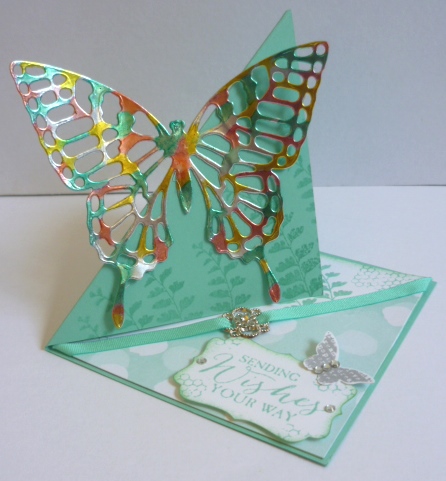
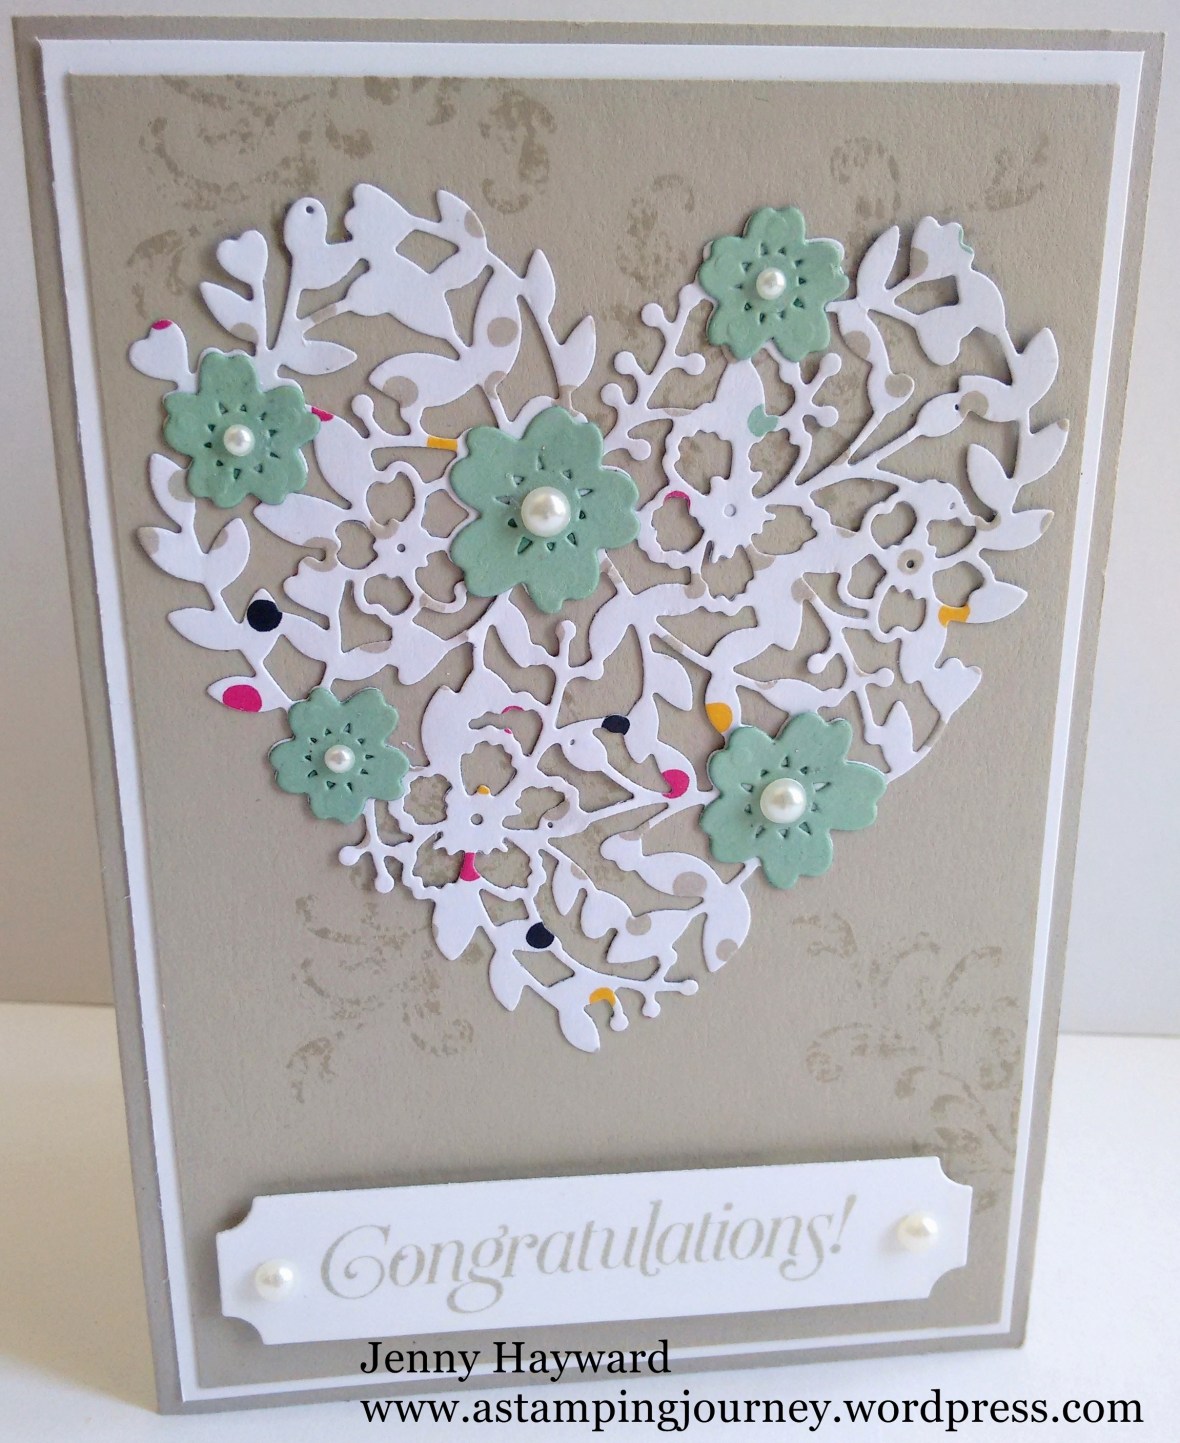
This card was inspired by Patty Bennett that we made at my Catalogue Launch last year.

See the post -> HERE.

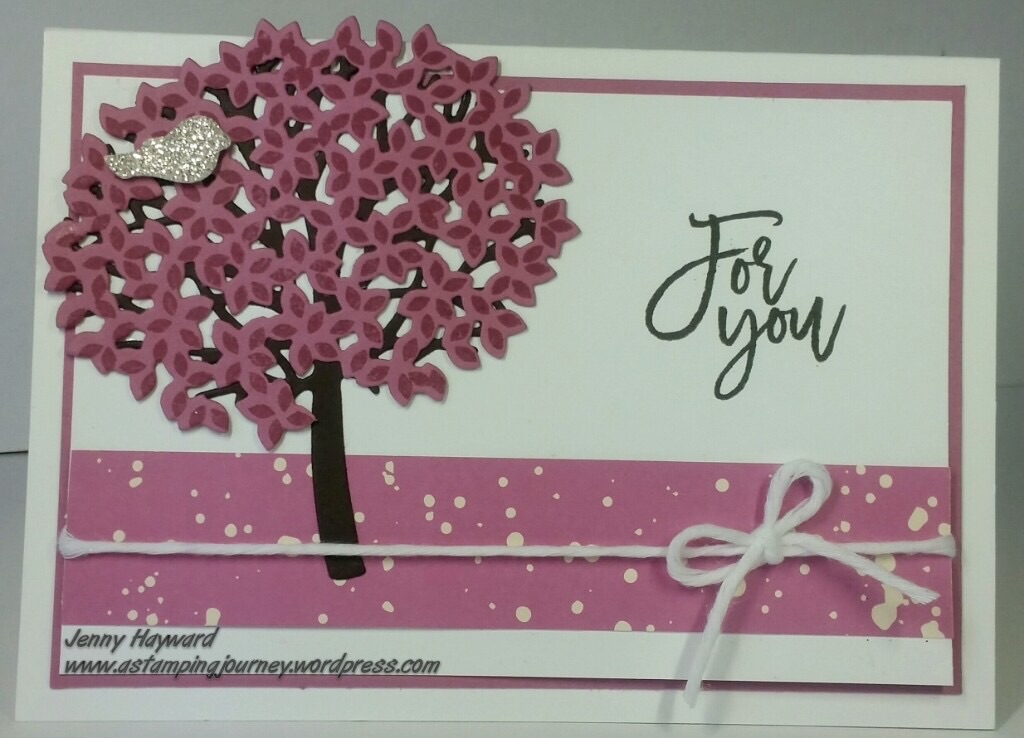
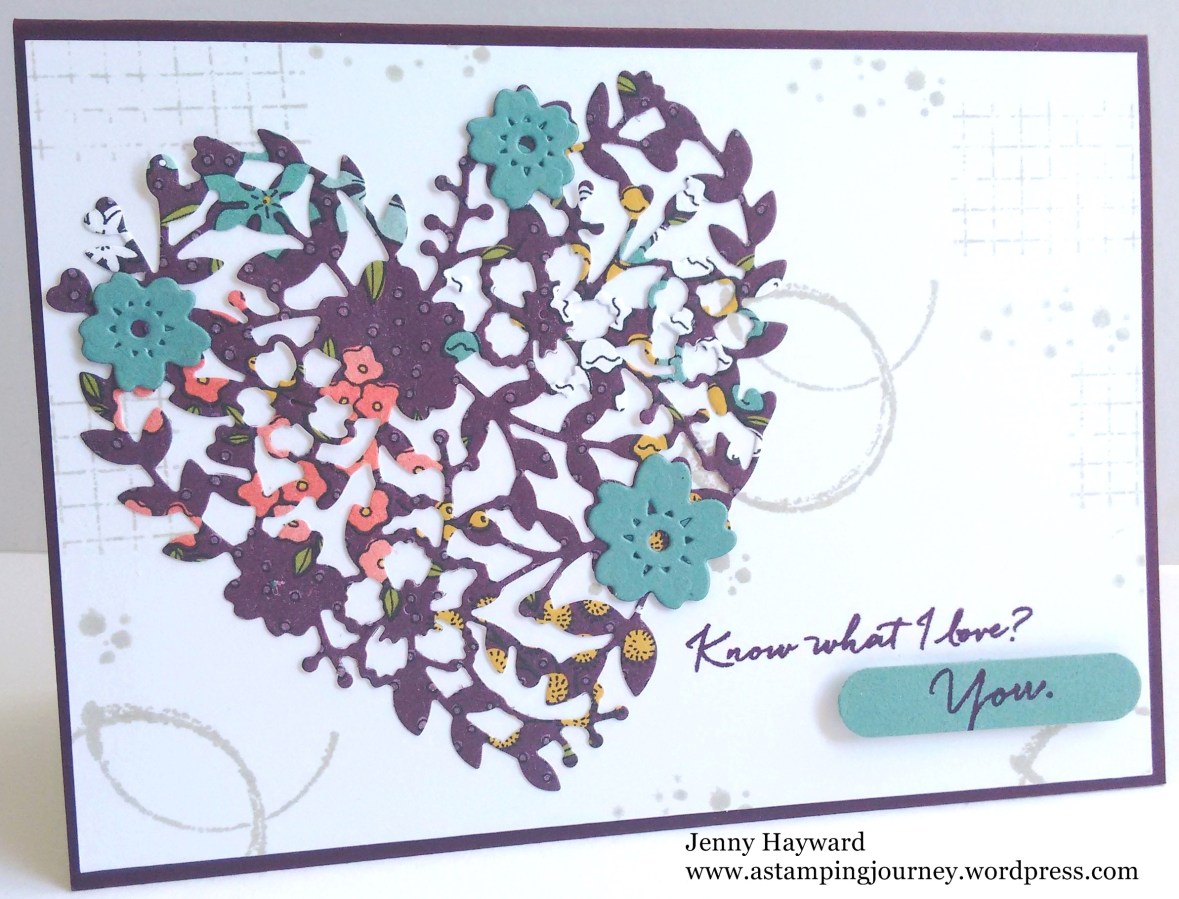
This card below I made just last week for my class last weekend.  It was a very popular card in the lovely retiring Sweet Sugarplum colour.  It was CASED from Leanne on Pinterest.  You can see the original card -> HERE. 

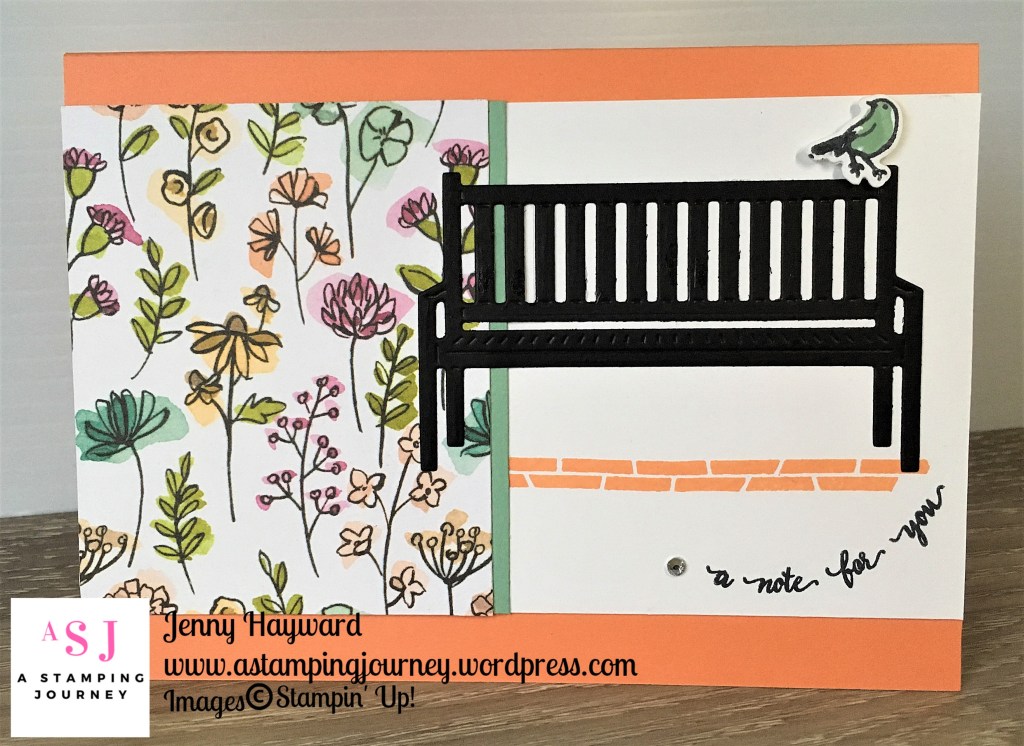
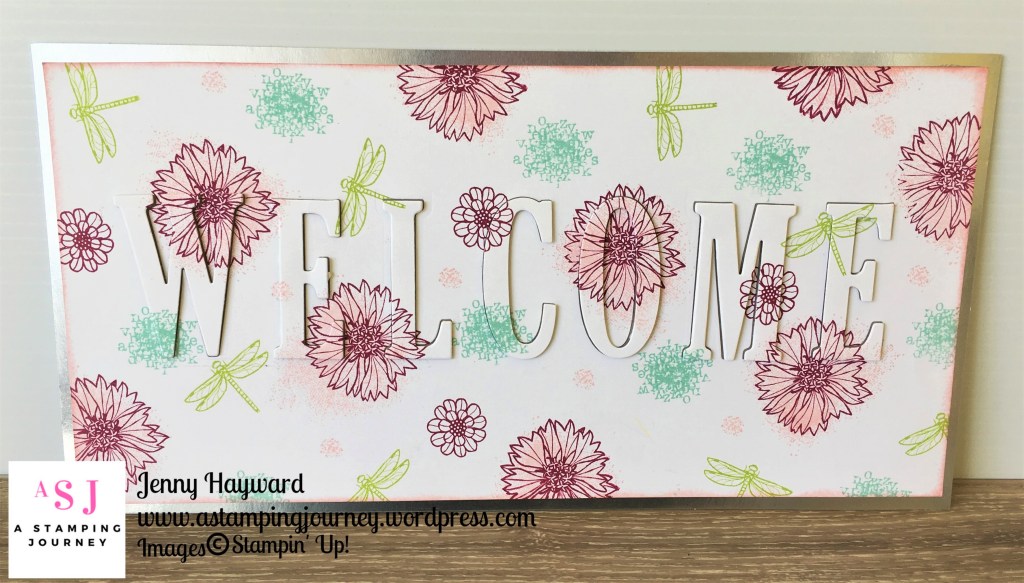
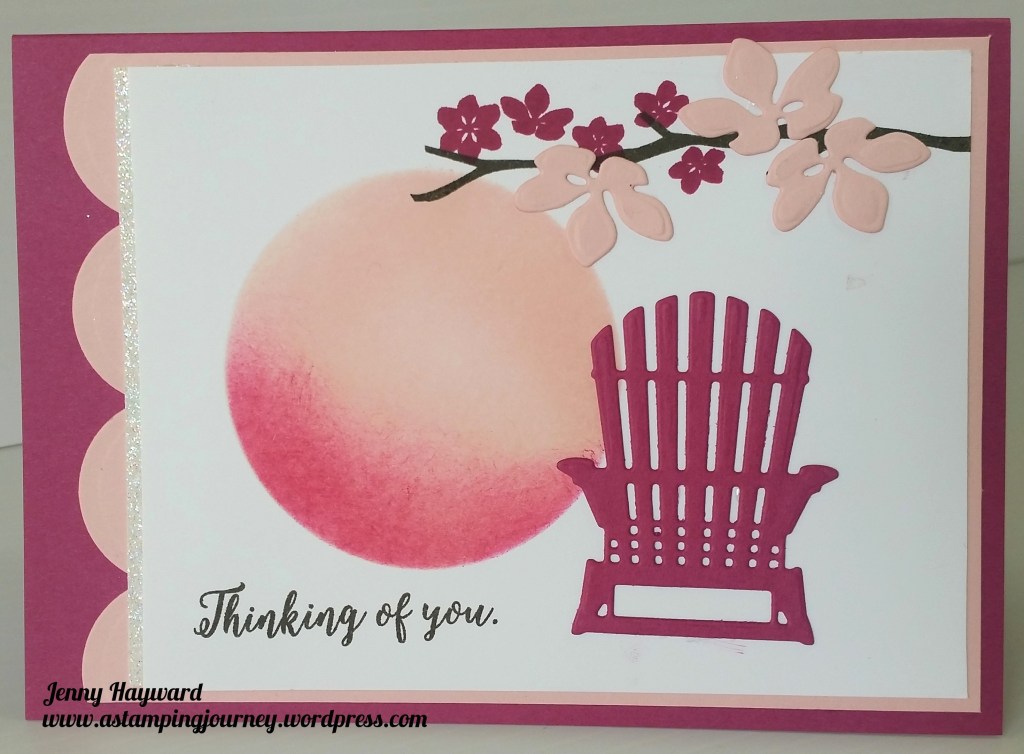
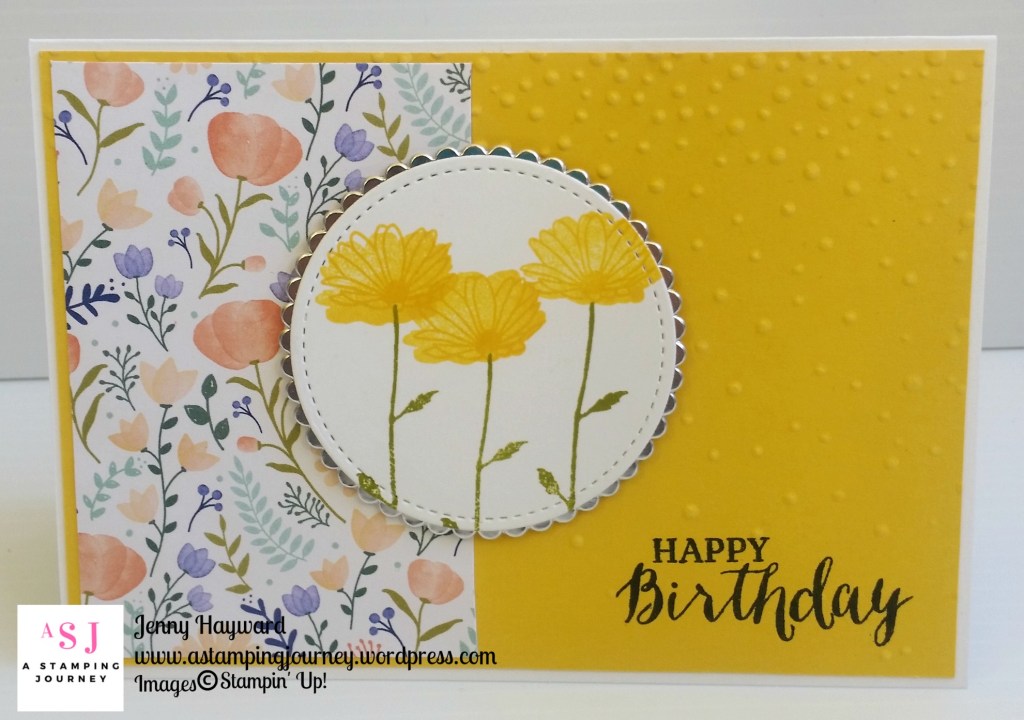
What about the fantastic bundle Daisy Delight.  With a matching punch to the stamp set you can create some very quick cards with this Bundle.

Make it a fun Flap Fold.  The original post is -> HERE.

Or a nice sunshine-y card like the one below.The original post is -> HERE. 

There are a number of other retiring bundles you can see in the image right at the top of the post including the Coffee Cafe Bundle, Happy Birthday Gorgeous Bundle, Hold on to Hope Bundle and Label Me Pretty Bundle just to name a few.

Do you like these?  Are they on your Wish List?  Then maybe you should grab them now before June 1st to save 10%.

See them in store -> HERE You can shop there or contact me directly.  If shopping online please use the Host Code: FRS6ZZ6G

Thanks for stopping by.

Jenny


cards, Catalogues, Stampin' Up!

FRIDAY FAVOURITES – GOOD-BYE TO THE 2016-2018 INCOLORS!

Each year we say Good-Bye to the 5 Incolors that have been with us for the past 2 years.  Some of these colours become favourites.  It’s hard to let go of them.  This year we are saying Farewell to colours like Sweet Sugarplum and Dapper Denim!!  So for our final Friday Favourites for this current catalogue let’s look at these colours.

These little mini cards I made back in June 2016 to show the colours but I don’t know if I shared them on my blog as I can’t find the post now.  Here you are though.  They were using my favourite set at the time Swirly Birds.  (Note to self: I really must use that set again soon).

While these colours are nice I have really loved the Dapper Denim and Sweet Sugarplum colours.  I have used them a bit.

Dapper Denim is a great colour for “boys” cards.  I couldn’t find the original post for this z-fold card below but it worked well for a special 40th card.

Another “boys” card using the Happy Birthday Thinlits with the Color Theory paper stack.

I cut 2 of the Thinlits for this one in black and one in white and when adhering them together I offset them slightly.  The white makes the Black ‘POP’.

Dapper Denim even for a wedding card.  So elegant!  This one uses the Floral Themes set.

Sweet Sugarplum – what a lovely shade of colour.  Using a short lived bundle back a couple of years ago, Thoughtful Branches.  

One with the Sale-A-Bration 2017 set Avant Garden.

Sweet Sugarplum worked well with Peekaboo Peach. 

Another Swirly Bird card.  I heat embossed the swirls with White Embossing Powder before sponging over the colours.

We won’t miss Flirty Flamingo as that is now coming back as a core colour.  That’s pretty exciting!

Have you got these colours?  What is your favourite?  Now have you stocked up on your cardstock, ink refills, inks etc.  If you haven’t you better get on to it.  Some of these items have sold out already but you might be lucky.  Please don’t go looking for them after the 31st as you might not get them.

You can order them in my online store -> HERE.  Please use the Host Code: XQZEJREH  Thank you.  I do appreciate your order and be sure not to mark it anonymous or I can’t send you a little card and gift to say Thanks. 🙂

This is the last of Friday Favourites for this outgoing catalogue.  Don’t worry I think I will be back with Friday Favourites for the new 2018 Catalogue.  Not long now to wait!!!  I’m getting excited that you will be able to see it soon.

Thanks for stopping by today,

Jenny

Have you received your 2018 Stampin’ Up! Catalogue yet?  If you haven’t got one and you are in Australia then you can request a copy from me by completing this form -> HERE. 

3D projects, cards, Techniques, Tutorials

WEDNESDAY’S WOW! #26 – SPINNER CARDS!

I have a fun Spinner card for you today for Wednesday’s WOW! #26  I made this recently as a request from a friend.  The same one who requested the 1st Birthday card in the last post.

I thought you might like to see how to put one together.

I was asked to make a Baby Shower card in yellow/cream colours.  I wanted to make something a little different so created it as a Spinner card.

This is the card using the set A Little Wild.  It was the first time I have used this set – and I have had it sitting there for a while! The great thing too is that it has a back stamped image so this works great for the Spinner Cards PLUS it has matching Framelits so you don’t even have to hand cut it. 

This is the front of the card.  I coloured the cute little lion with the Stampin’ Blends.

And we have the back of the Spinner.


HOW TO CREATE A SPINNER CARD

1. Cut a card base to a standard card size.  I used Whisper White here. Cut a piece of So Saffron card slightly smaller and a piece of Whisper White smaller again.  For metric I reduce the card size measurements by 4mm on each piece.  For US card sizes you might like to reduce the size by 1/4″ on each piece.  Of course it’s totally a personal preference.

Cut a circle using the 2nd largest Circle Framelit in the Layering Circles Framelits set from your smaller piece of Whisper White card.

2. Layer all the pieces together starting with the card base then the So Saffron piece then the Whisper White.  Place the next size down circle Framelit inside the already cut circle on the white.  See the photo below.

3. Carefully place the card pieces in the Big Shot to cut your circle out.  You may carefully remove the top white card piece if you like without disturbing the position. (Just a tip: If you are unsure you can lightly tracing the inside of the circle Framelit with pencil so you can see where to line it up if it moves before cutting it).

4.  Take the White card base with the right side facing upwards.  Place a length of twine or even fishing line across the cut out circle.  Adhere both top and bottom with tape.  I have used the thin White Baker’s Twine which has now retired on this one.  Be sure that the twine is pulled tight when you are taping it down.

5. Adhere the So Saffron card piece over the top of the white card base.  Before adhering the top white card piece run that through your Embossing Folder if you like to.  I used the Sparkle Embossing Folder. 

Stamp and colour your images and then cut them out. On the back of your images run a length of Snail Adhesive on them. Place the front one over the centre of the twine.  Turn your card over and adhere your other image directly on to the first one. You can now spin your images around and let it go and watch it spin.

—–

I made a Christmas Spinner card a while ago which you can see -> HERE.  This was based on a similar idea but I used Designer Series Paper and one layer with the card base.

Have fun spinning.  I would love to see your versions. Share your Spinner cards you create by emailing me them or tagging me.  I would love to see them.

Jenny

cards, Personal Ramblings

HAPPY 1ST BIRTHDAY CARD!

I was asked recently by a friend to make a 1st Birthday card for her Grand-daughter.  All the requirements was that it was to be bright and fun.

So this is the result.  She was pleased with it.  It’s not her Grand-daughter’s birthday yet but I know that it is safe to post here.  You won’t tell right … 😉

I used the Number of Years set and the Large Numbers Framelits.  I am sad both these are going.  They are great for special numbered birthday cards.  I also used the Balloon Celebrations set for the bright, fun balloons.  They are easily cut with the Balloon Bouquet Punch.  The colours used for the balloons are Tempting Turquoise, Melon Mambo, Pear Pizzazz, Pumpkin Pie and Daffodil Delight.  The card mat is Tempting Turquoise and the card base is Melon Mambo.  The Tempting Turquoise is a retiring colour.  A great big ‘1’ was cut from Silver Glimmer Paper.

The card was inspired by one on Pinterest.  I am not sure by whom now.

I hope you have had a wonderful weekend and maybe some stamping time??

Have a great week.  Visit again soon,

Jenny


cards, Catalogues, Masculine, Stampin' Up!

FRIDAY FAVOURITES – FOR THE BOYS!

As we say Good-Bye to lots of favourites from this current catalogue we can’t forget the boys can we!  I think a lot of people have trouble creating cards for the men-folk.  Below are a few of my favourite sets that are great for them.

NB: The quality of these photos aren’t great.  I do apologise.  These were a few years ago and I hadn’t watermarked most of them either so do be kind.  But I hope it gives you some inspiration for your own projects.  And looking past the cards you might realise that you DO need these stamps in your collection. 🙂

GUY GREETINGS!

I can’t believe this one is going.  It has been around for a couple of years but it is a great manly set.  Here are some of the cards I have made with this set.  You can click on the link for more details.

This one was I made for swaps for a Stampin’ Up! event.  You can see the original post -> HERE.

Just after I made these cards I made a box which I realised matched perfectly.

You can see the details of the box -> HERE.  This would be a great set for the man in your life.

I loved how these cards turned out.  Simply adding the fun paper but you don’t need the fuss for boys.

You can see the post -> HERE.  This post has a few other cards for boys too.

Lots of fun images and sentiments in this set.  You can find this in my store HERE now. (Clear $61 AUS)

BADGES AND BANNERS

I think this set is overlooked.  It’s a great one for the boys.  It adds a fun sentiment to any cards and you can have the matching Badge punch to punch the shape out. (Edited: I see that the punch has already sold out!).

See the full post ->HERE.  I know the Nailed It set went last year and both these cards use this set but you could use any other set.

Details for this card below are -> HERE. 

See the Badges and Banner set in store HERE  (Clear $33).

Below are just a couple more stamp sets that would be great for the boys – big and small.

SEASIDE SHORE

What a cool set this one is.  (projects courtesy Stampin’ Up!)

See this in store HERE (Clear $37 AUS)

SUPER DUPER

Go retro for the boys (projects courtesy Stampin’ Up!)

See it in store HERE (Clear $33 AUS)

——-

Retiring products are selling fast and there is less than 2 weeks left. So you might want to be quick about ordering if you intend to. 🙂

If ordering online, Please use the HOST CODE this week: XQZEJREH

Thank you kindly.  I appreciate all orders AND I send a little something in the mail to say thanks so be sure not to mark it anonymous or how am I going to know where to send it to. 🙂

Jenny


Blog Hops, cards, Catalogues, Stampin' Up!

STAMPIN’ DREAMS BLOG HOP – ANNUAL CATALOGUE SNEAK PEEK!

Today I am joining in the Stampin’ Dreams Blog Hop.  It is all about the new Annual Catalogue Sneak Peek so you are in for a treat.  I am sure there are some lovely creations everyone will share today.  You might be starting here or you have just come from Elaine’s blog -> HERE.

Today I am focusing on the new Bundle Sitting Pretty.

I have created 2 cards with this Bundle.  I really like the seat Dies in the Pretty Park Framelits set.

I have used the gorgeous Share What You Love Designer Series Paper.  The card base is the new Incolor Grapefruit Grove.  For both of them I used sentiments from the set Eastern Beauty stamp set.  I kept the layout similar for both cards.

For the top card I cut the bench seat in Black Cardstock.  For the little bird I stamped it in black and stamped the inside of the bird in Mint Macaron.  You don’t even need to colour it with the markers or pencils.  Just a tip though: I stamped the inside of the bird twice turning the stamp slightly each time to give a little more cover in the inking.  It’s a little hard to know how to stamp it. Now don’t bother trying to cut this tiny bird with scissors.  You can cut it with the matching die!

On the card below I have used the lovely Velvet Rich Razzleberry Ribbon. For this set I stamped the ornate seat in Rich Razzleberry ink on Rich Razzleberry card.  This was then cut out with the matching die.  I also cut a heart in Silver Glimmer Paper with the heart die. 

I hope you like them.

You can head off to the next Blog.  Now we have Jessie’s amazing creations.  Click on the NEXT button below.  If that doesn’t work then click -> HERE.

The full list of participants is below though if you get lost.

Not long now for you to wait for the start of catalogue.  June 1st is the day!!

Thanks for visiting,

Jenny

1. Jessie Holton – Australia
2. Vicki Hunter – Australia
3. Pia Gerhardt – Germany
4. Stephanie Fischer – Australia
5. Alejandra Gomez – USA
6. Jo Anne – USA
7. Cheryl Taylor -UK
8. Sandra Roberts – UK
9. Tracy Marie Lewis – Stuff N Thingz – USA
10. Rebecca-Jo Unwin- Australia
11. Teresa’s Happy Place – Australia
12. Vicky Wright – Australia
13. Sharon Dalton – Australia
14. Kayla MacAulay – Australia
15. Angela Meiritz-Reid – New Zealand
16. Karen Farquhar – Australia
17. Joanne Hodge – USA
18. Kim Oliver – Australia
19. Elaine Johnson – Australia
20. Jenny Hayward – Australia
Blog Hops, cards, Stampin' Up!

KELLY’S STAMPING FRIENDS BIRTHDAY BLOGHOP!

Today we have a very special Blog Hop celebrating the lovely Kelly Kent’s Birthday.  She wanted to get some stamping friends together and share our creations with you.  How exciting! I have to say though it is a little overwhelming.  What to create …  It had to be a birthday card of course.

You would either be starting here on your hop or you have just come from Siobhan’s blog -> HERE.  So come and join the Birthday Hop.

Today I am sharing with you a Fun Fold card,  It’s a Pop Out Swing Card. I have made a few versions of this card (see one HERE), but this one is a teeny tiny version.  So cute!  It stand about 10cm (4″) high.  I have used the gorgeous new set available early this month, the Love What You Do stamp set and the Share What You Love Designer Series Paper.

Don’t forget a matching envelope for this card too.  Made easy with the Envelope Punch Board.

The beautiful paper and colours makes this a gorgeous project without too much to it.  That Rich Razzleberry Velvet ribbon is just so soft and gorgeous too.

The Frame on the front of the card is made with the Layering Squares Framelits.  The sentiment inside is from the Southern Serenade set.  The leaf stem on the inside is cut from Mossy Meadow cardstock using the Flourish Thinlits.

You can continue on the Birthday Blog Hop now and pop back again later to get the instructions link.  You will find the instructions for this card on Amanda’s blog -> HERE.

 -> -> ->To continue on the Hop. Click on the ‘NEXT’ image, or you can Head on over to Kathryn’s Blog by clicking-> HERE.

If you get lost, then you can follow the list below.  Thanks for hopping along.  See below the list too for the link for a second round of Birthday Blog Hops happening at same time.  So many wanted to share in the Birthday love that 2 groups were needed. 🙂

  1. Kelly Kent
  2. Lou Kitzelman
  3. Jenny Hall
  4. Denita Wright-Smee
  5. Jackie Aitken
  6. Narelle Simm
  7. Sandra Collett
  8. Monique Fielder
  9. Nicole Wilson
  10. Siobhan Fitzsimmons
  11. Jenny Hayward
  12. Kathryn Mangelsdorf
  13. Josie Dean
  14. Peta Stephen
  15. Kristel Rimmer
  16. Kim Oliver
  17. Denise Buetler
  18. Jacqui Crouch
  19. Tina Gillespie
  20. Jan McQueen


***For Group B of the Birthday Blog Hop you can go to a different post on Kelly’s Blog -> HERE to follow along. 

3D projects, Classes, Stampin' Up!, Techniques

ECLIPSE WELCOME SIGN!

I started making this sign before Christmas at a team meeting and as usual hadn’t finished it. I put it aside and actually forgot about it.  When I was clearing up things the other week I found it and thought it must get finished.  So yesterday, although it was Mother’s Day here I did get some time to indulge in a little creating for me and got about doing it.

I thought you might like to see it.  Nothing fancy but I thought it would  be nice to hang in my studio to welcome all the lovely stampers that come along to classes.

This is using the Eclipse technique with the Large Letters Framelits and the Touches of Texture.

This is the length of an A4 sheet of white but I have cut the width to about 15cm (6″) I think.  I backed the Whisper White card on some thick card from the Foil Sheets packaging we get and then backed that on some Silver Foil.

I think I will add some sparkle with the Wink of Stella pen??

I have classes several times per month in the Wollongong area so come along, and bonus – you can see this in real life and get to have some creative fun with all my other lovely stampers. 🙂

Thanks for visiting,

Jenny

cards, Catalogues, Classes, Stampin' Up!

SHARE WHAT YOU LOVE MOTHER’S DAY CARD!

You might have seen this project in the past week.  This was made for my Mother’s Day class this weekend.  It was a bit hard to see the card so I thought I would show you a little closer view.  Plus it is an opportunity to just take a minute to wish all the Mummies a Happy Mother’s Day.  Whether you are a mummy to humans or to furry creatures or an “adopted” mummy to young ones.  I wish you a wonderful day.  Be sure to take some time to put your feet up, maybe indulge in a little creativity just for yourself.  However you spend it, Have a great day. xx

Onto the card.

It’s quite a simple card but I think the paper is the star.  This is the gorgeous Share What You Love Designer Series Paper.  It is so shiny although you may not be able to see it.  I love the colours.  Ooh! Mint Macaron is back!!!  The white card is stamped with some of the small images from the Love What You Do stamp set.  The sentiment is from the You’re Inspiring set.  You could easily substitute a Happy Birthday which is what I did in one of the cards I made in classes this weekend.

The sentiment piece and the Silver Foil backing is cut from the Layering Oval Framelits and I added some loops of Silver Thread.  It makes such a nice “extra” to a card.  The paper doily is from the current Lace Paper Doilies. 

The Share What You Love is available as bundles as an early release now.  I mentioned that a couple of posts back so just pop back one or 2 posts.  All these will be available individually in the upcoming 2018 Catalogue on June 1st. 

I will be off but thanks for stopping by.  Have a great day xx

cards, Catalogues, Stampin' Up!

FRIDAY FAVOURITES – BUTTERFLY AND HEART DIES!

Each Friday for the last few weeks I have been sharing my favourite retiring products.  We have looked at my favourite stamps, flowers, butterflies and dragonflies.  Today for Friday Favourites is my favourite Big Shot Dies particularly the Butterfly Thinlits and the Bloomin’ Heart Thinlits.

FIRSTLY THE BUTTERFLY THINLITS

I have used the Butterfly Thinlits and the Bold Butterfly Thinlits so much over the years.  Just some of the cards are below.

Create a funky watercoloured background and diecut the large Butterfly Thinlits.  See the details in this post -> HERE.

This one below was a special card I made for my daughter. You can see the full post -> HERE.

It was a simple card and I really loved  how it turned out. Sometimes you don’t need too much. 🙂

This card below was a CASE of a card in the catalogue.  I made it a couple of years ago now.  I can’t seem to find the original post. If I did post it at all??? 🙂

This card below I created for a Bloghop 3 years ago.  I coloured the Silver Foil with the Blendabilities at the time.  You could use the Stampin’ Blends now.  This card has been repinned from Pinterest and viewed so many times over the years since I shared it.  You can see the original post -> HERE.

BLOOMIN’ HEART THINLITS

The Bloomin’ Heart Thinlits are so detailed and delicate.  You don’t need to add too much to a card when you use this Thinlit.

I cut this heart from Designer Series Paper. You can diecut flowers with this Thinlits set too. The background is stamped with the Timeless Textures.  See the card -> HERE. 

Another one cutting the Thinlits again with Designer Series Paper. I used the Timeless Textures set.  See this card -> HERE. 

Do you have these Thinlits yet?  They are delicate and detailed.  They are lovely to add to a card making any card extra “gorgeous”.  Really! You will want them in your stash.

They won’t be available in a couple of weeks though.

The Butterfly Thinlits and the Bloomin’ Heart Thinlits are available in my store -> HERE now.


Thanks for visiting me again.  Why not share what you have made with these Thinlits.  I would love to see them.

See you again soon,

Jenny