cards, Stampin' Up!, Techniques, Videos

WATCH IT WEDNESDAY #3 – WHEN YOU WANT TO STAMP A NUMBER OF IMAGES TOGETHER!

Do you want to stamp a number of images together so they overlap but you end up with them all messing up together.  Try Masking the images.

In this week’s WATCH IT WEDNESDAY you will see: How to mask your images to create scenes.

While in this video they have used the Stampin’ Up! set Sitting Here you could use this technique for many other stamp sets.  It’s especially great with flower images to create a colourful garden.

The Masking technique might be something you have been aware of for some time, but if you like me you tend to forget these simple ideas.  That’s why I thought I would share this with you today.

Thanks for visiting,

Jenny


cards, Catalogues

A FUNKY ENGAGEMENT WITH LEMON LIME TWIST!

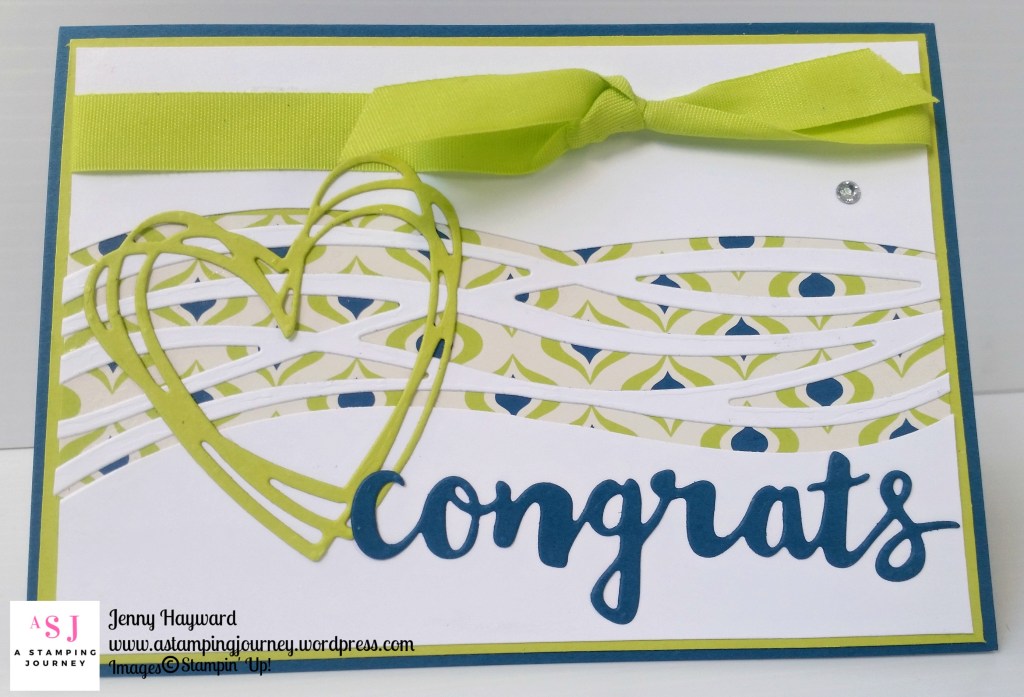
I was asked by a friend to make a Funky Engagement card.  Mmmm??  My first thought was Lemon Lime Twist.  That is a funky colour.  What else though??

As I thought about it I though the Swirly Scribbles Thinlits or the Sunshine Wishes Thinlits might work.  I did a little searching on Pinterest and found an idea there.  I changed a few things around and … Well I think the result was funky enough.  My friend was very pleased with it anyway so that is what counts.

I cut the wavy lines from the Swirly Scribbles Thinlits from the the White card and used both the waves and the outside white pieces.  Behind it I adhered a piece of the Eastern Palace Specialty DSP.  Some of the cool Lemon Lime Twist Ribbon was wrapped around the white card before adhering it to the Lemon Lime Twist card mat and then to the Dapper Denim card base.

The heart is cut from the Sunshine Wishes Thinlits in Lemon Lime Twist  and the “congrats” from Dapper Denim.  I couldn’t help myself.  I had to add a Rhinestone. 🙂

So you can make a funky engagement.

Thanks for visiting,

Jenny

cards, Catalogues, Christmas

BRIGHLY LIT WITH FRESHLY MADE SKETCHES #278

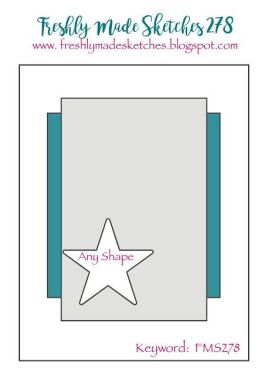
I played around again with the Brightly Lit Bundle.  If I am not sure where to start with a card I take a look at some card sketches to see what grabs my attention and how I can work that stamp set in with the sketch.  I have a number of sketches on my Pinterest Card Sketches board (See the board HERE).

I chose the Freshly Made Sketches #278 one.

Here is the card I created.

The paper is the Merry Little Christmas Designer Series Paper.  It is a bit hard to tell but I heat embossed the sentiment and the bow in Gold.  The lamp post is cut with the Christmas Lampost Thinlits die. I did trim the lamp post down a little to fit closely within the rectangle.  It needed something extra (of course!).  I added a few loops of the Gold Thread under the sentiment.  I do love this bundle.  Must play more …

Thanks for visiting today.  Have a wonderful weekend.  I hope it is a creative one for you.

Jenny

cards, Catalogues, Classes, Stampin' Up!

BOGO SALE ON THIS WEEKEND IN WOLLONGONG!

I have to get rid of all this stuff and I need you to help me out.

I am selling off all my retired Stampin’  Up! products.  It’s a BOGO Sale. For every $1 you spend you receive the same Free of new stuff from the new catalogues.  How cool!

Here is a little tour to show you what you can see at the sale.

Stamps
Christmas
Bundles
Big Shot
Handmade boxes and cards

If you are in Wollongong come along.  Help me get rid of all this!

Saturday 9th 2pm – 3.30pm and Sunday 10th 2.30-3.30pm

If you are not local, stay tuned.  I will list what I have left after the weekend.

Jenny


cards, Catalogues, Christmas, Stampin' Up!, Techniques, Tutorials

MASKED BRIGHTLY LIT!

I finally had a chance to quickly play with this new stamp set Brightly Lit. I like it as it is something a little different for Christmas.  Not that we have lamp posts like these ones but that’s OK.
Usually when I first play with a set I head to Pinterest and CASE a card.  For this card I CASED one of Amanda’s cards at the Craftspa.com.  You can see her card HERE.

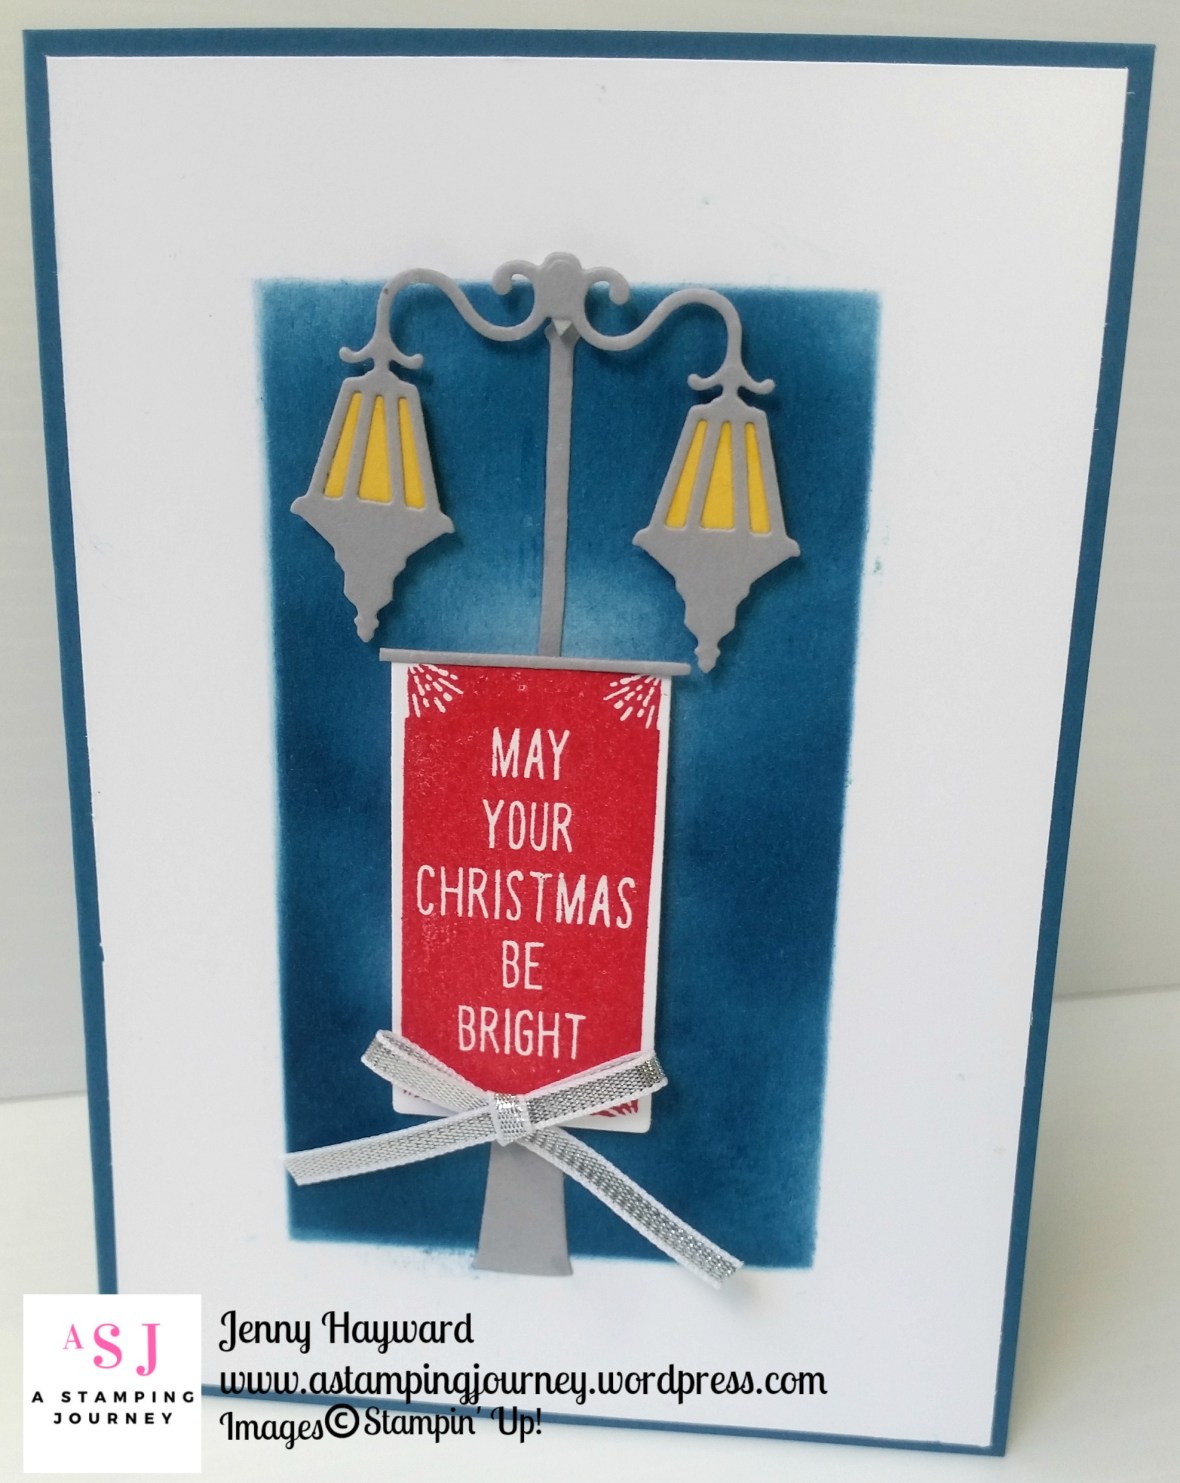
I liked it as it had a masked sponged background. This was my version.

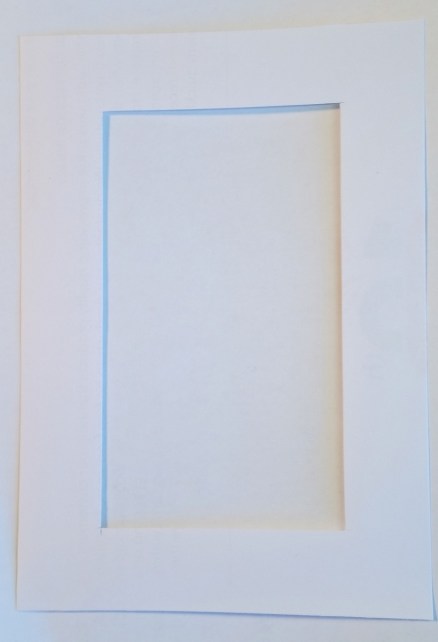
To create your sponged area: first cut a rectangle in your piece of copy paper.  I used the Stampin’ Trimmer to do this.  You could cut any shape you like with the Framelits too.  Below is the rectangle I had.  It is 2cm border each side (or 3/4″). Have the piece of Copy paper the same size as your card mat (whisper white) to be sure you cover the whole piece.  You can adhere the piece on your card with some non-permanent adhesive in a couple of spots or hold the frame in place where you are sponging at the time so it doesn’t move.

I will try to do a video soon but just a note with the sponging: Start with your lighter colour and start off the inside framed area each time you pick up ink.  Move in a circular motion from the outside moving in and along.  I used Marina Mist.  Then pick up a darker colour and just sponge near the edge in a circular motion once again.  This time I used Dapper Denim.  You can lift off an edge carefully and see how it is looking if you like to.  You want to leave a lighter area in the middle.

To finish the card I adhered this to a Dapper Denim card base.  Then add the light post and lamps cut from Smoky Slate.  The centre lights were cut from Daffodil Delight.  The sentiment stamped in Real Red and then cut with the matching Framelits. I added a Silver Taffeta bow to finish.

I have another card with this set to share next time.

Jenny

The Brightly Lit Bundle is available in my store Now -> HERE for $72.   Please use the HOST CODE:  HSVFAXRX

cards, Catalogues, Christmas, Stampin' Up!, Tutorials, Videos

WATCH IT WEDNESDAY #2

I think many people liked the idea of Watch It Wednesday when it launched last week.  Thanks everyone for your comments and messages.  Each Wednesday I am planning to bring you a video on a fun new project, or product help.

We are back for Watch It Wednesday with #2.  Today I have 2 videos for you.

Since the 2017 Holiday Catalogue has just gone live I thought I would bring you a fun video of one of the Bundles in the Catalogue.  This is the Ready For Christmas Bundle – and you just have to love Bonnie from Stampin’ Up!.  She is so gorgeous. 🙂

What do you think of this Bundle?  That little Dachshund is so cute.  I like that you can see how all the little pieces can go together.  Even thinking out of the box (Carrot???) 😉

This next video is a great one by Stampin’ Up! to see many of the products in the Holiday Catalogue.  I love how they have been putting these videos together recently for the catalogues. I would imagine they would take some time though.

I hope you liked them. Thanks for stopping by today,

Visit again soon,

Jenny

Catalogues, Classes, Stampin' Up!

BOGO SALE ON THIS COMING WEEKEND. BUY ONE, GET ONE FREE!

The BOGO Sale Days have been popular the past few years and it is on again. Why wouldn’t it be when you get brand new Stampin’ Up! products free for the value of the retired products you buy I need to clear out loads of retired products.

WHEN:

Saturday 9th – Any time between 2pm – 3.30pm
and
Sunday 10th between 2.30pm – 3.30pm.

Can’t make these times.  Contact me and I can arrange a time for you to come after these dates.

WHERE: 

My studio in East Corrimal.  Contact me for address.

HOW DOES IT WORK:  

All my retired products are priced near Catalogue price. (Previous years products have been reduced further). Add up  your total order that you purchase on the day and pay for that total. For every $1 you spend you choose up to that total from the new Catalogue (Annual, Holiday and Clearance Rack) and get these items FREE!  WIN! WIN!  

I look forward to seeing you there and grabbing some bargains.

Jenny

cards, Catalogues, Christmas

TWO MORE CARDS WITH CHRISTMAS IN THE MAKING!

Following from the card I shared yesterday I have 2 more cards to show you with the Christmas in the Making set.

I do love the images in this set.  Very retro! I am not sure of the colours I have used though and the colouring is not great but I was pleased with the finished cards.

For both these cards I have used the Merry Little Christmas DSP again on the black side this time.
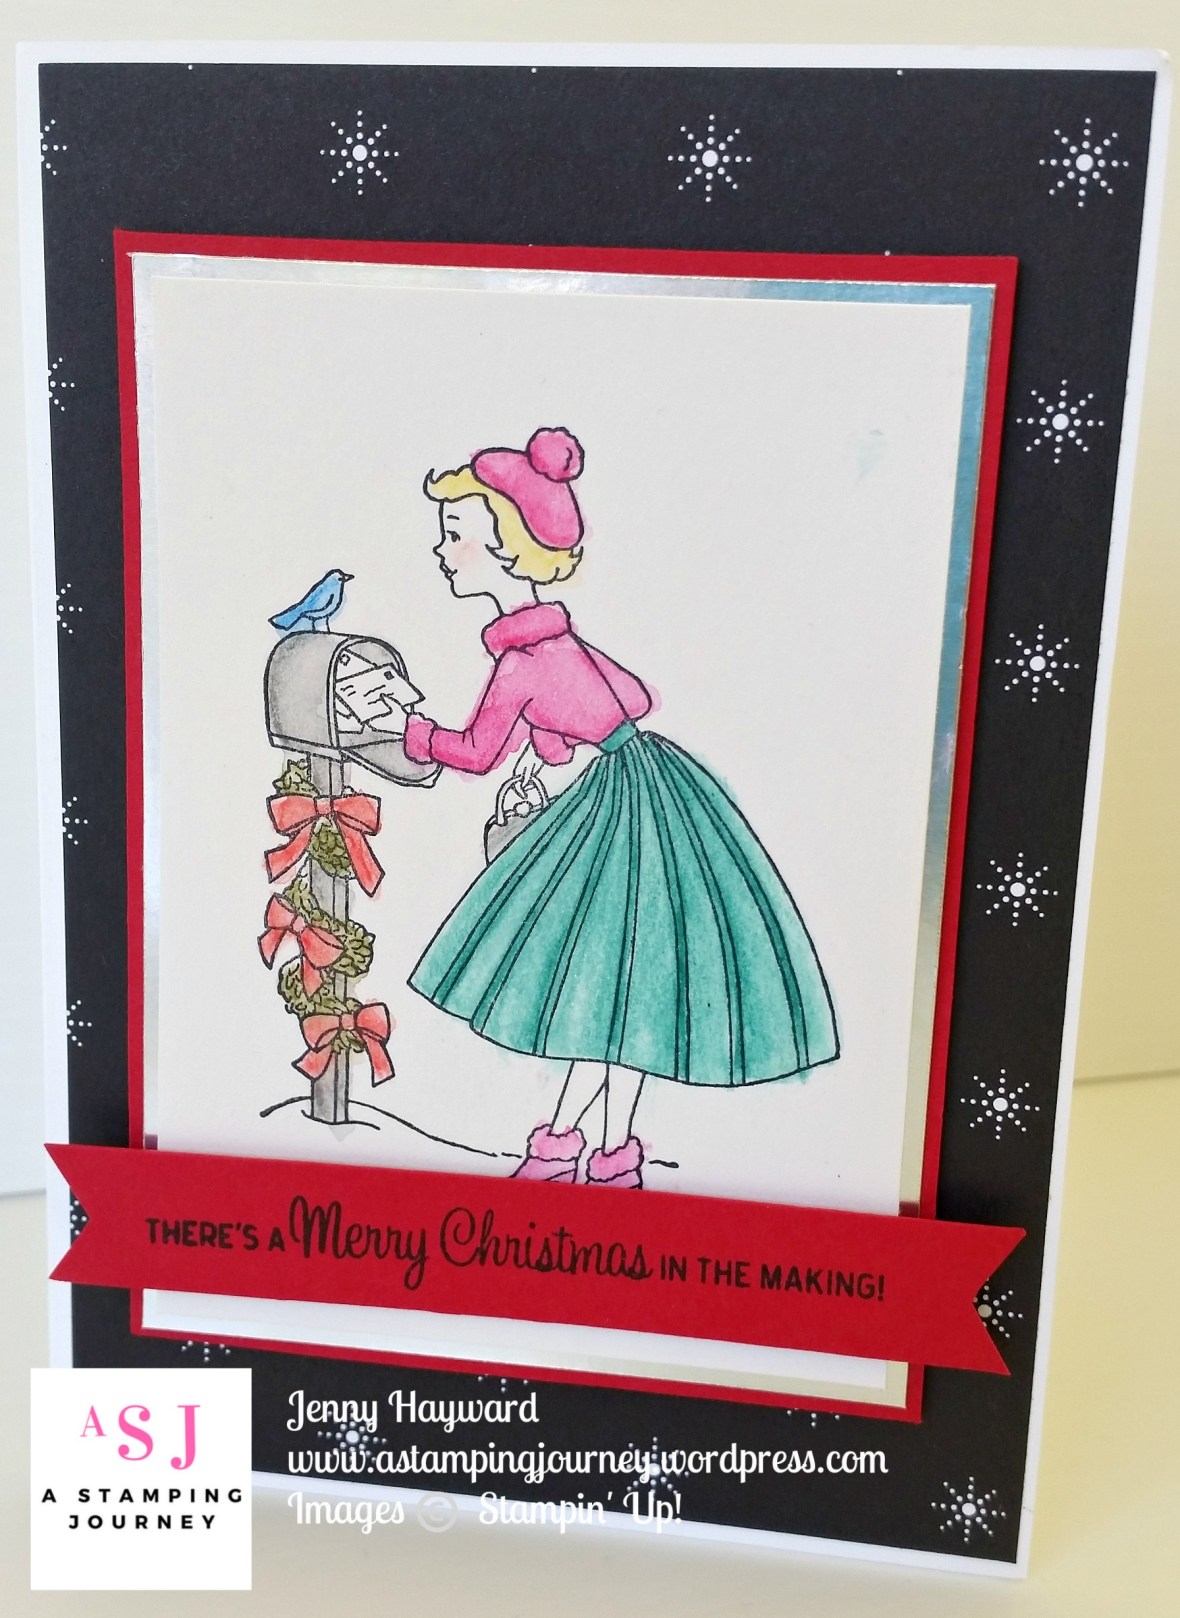
The mailbox image for this first card was stamped on Shimmery White cardstock and coloured with the Inkpads and Aquapainters.  It was then layered onSilver Foil sheet and Real Red cardstock.

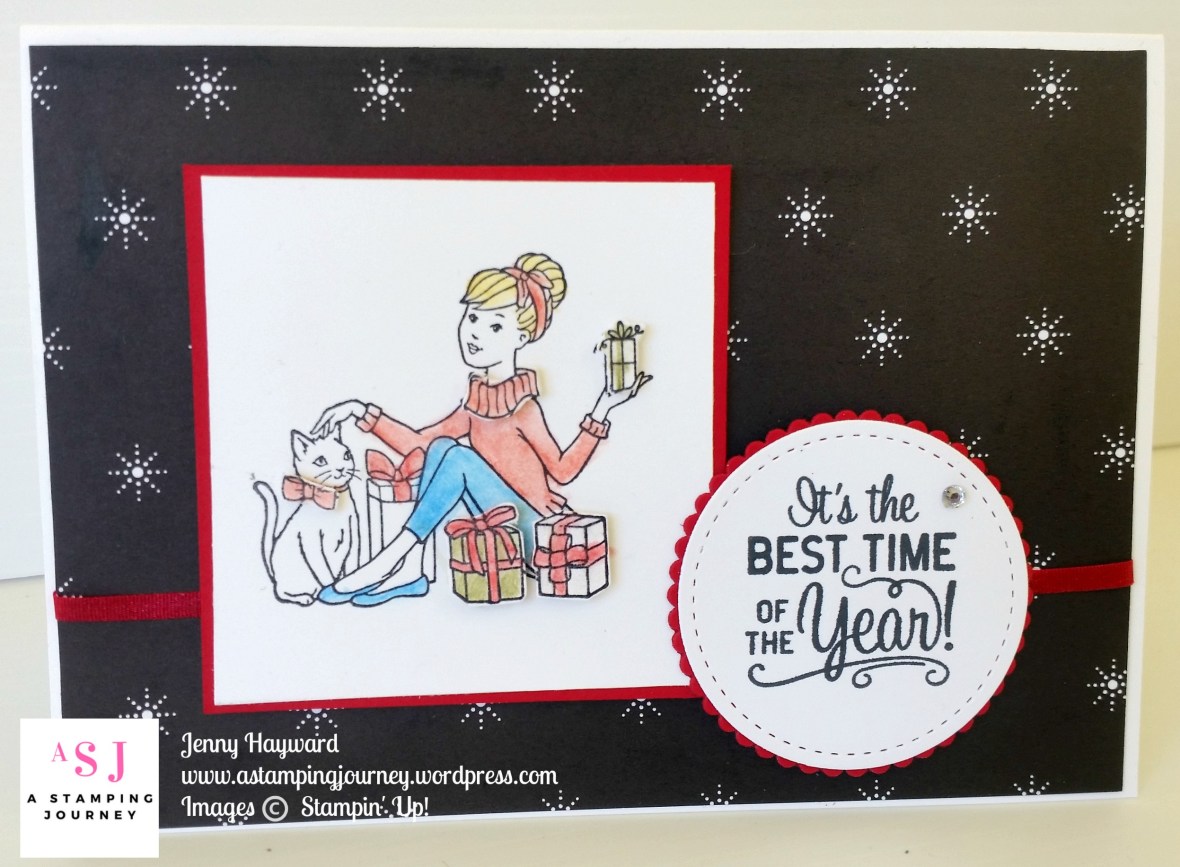
The image for the next card was stamped on Thick Whisper White and coloured again with the Inkpads and Aquapainter.  The sentiment was stamped and then cut with the Stitched Circle Framelits and layered on a Real Red scalloped circle using the Layering Circle Framelits.  I wrapped around some of the thin Real Red Solid Ribbon before adhering the paper to the base card.
I wanted to do something a little different.  Have a close look.
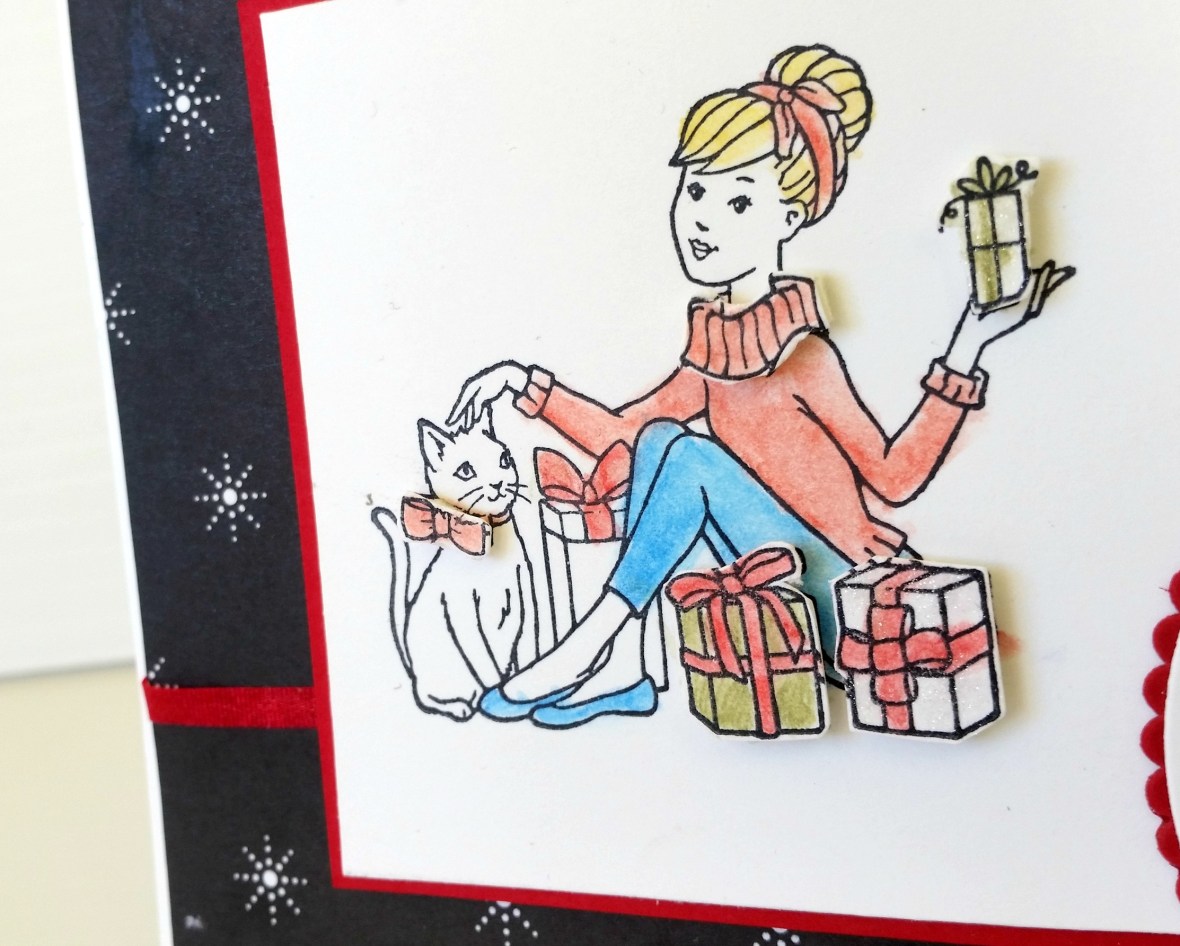
I stamped the image again on Thick Whisper White, coloured just the gifts, the bow and the girls collar and cut them out.  They were then raised up off the card with Dimensionals giving a 3D effect.  The white gifts were coloured with the Clear Wink of Stella pen.

Here are the 3 cards together for you.
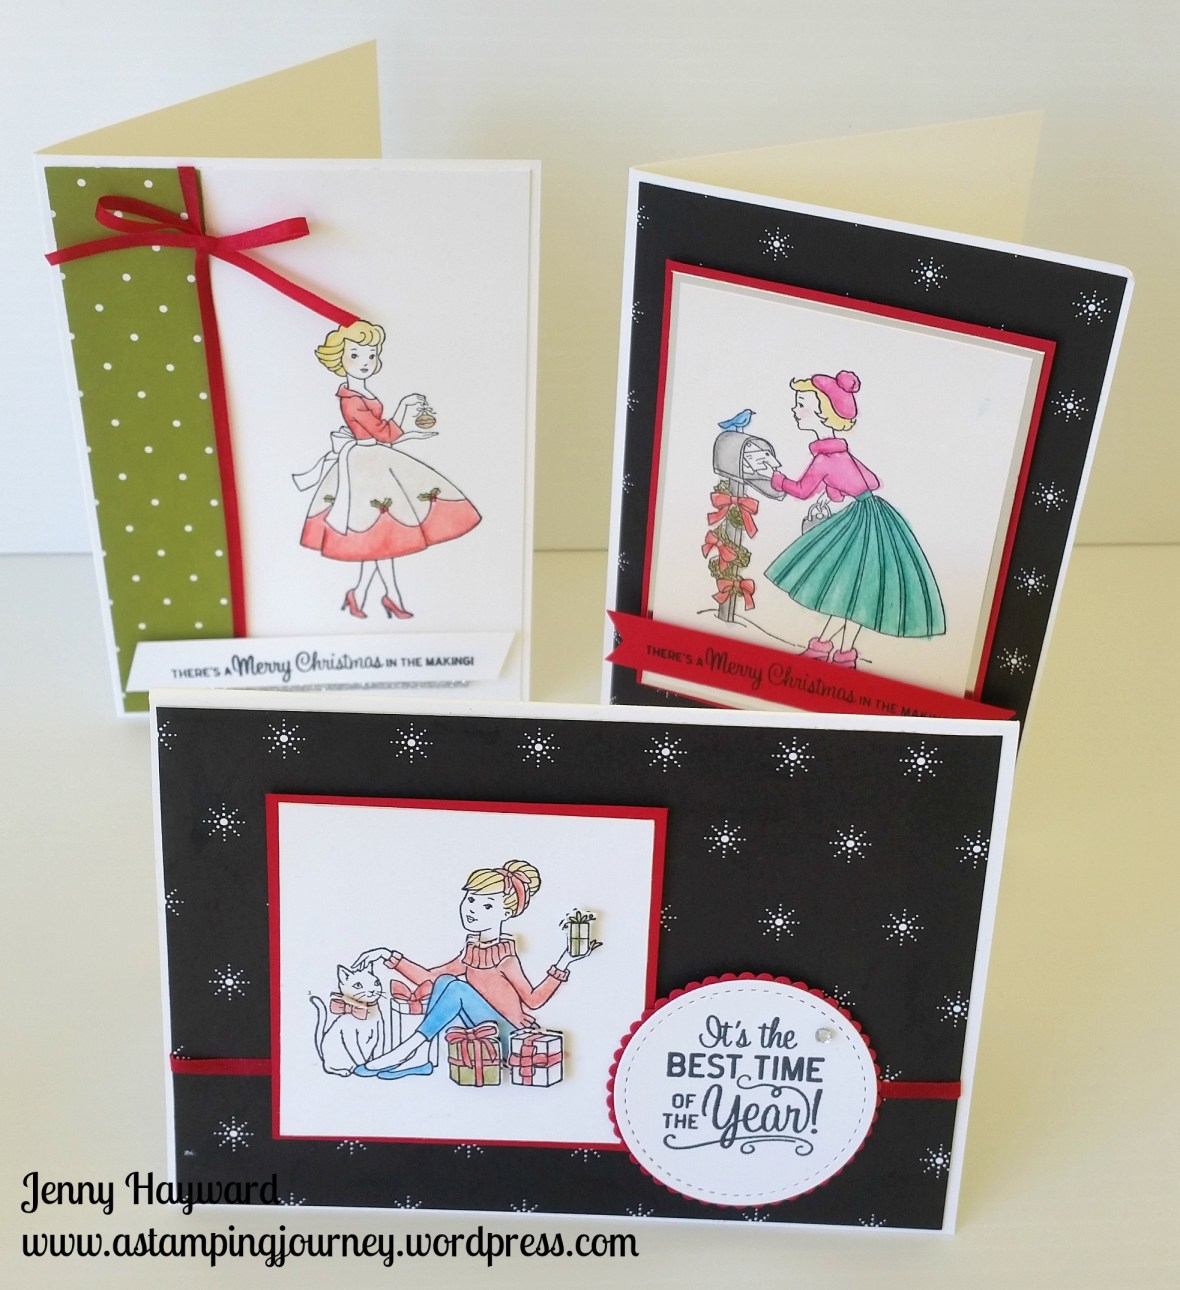
You can grab your own set of Christmas in the Making in my store HERE.  Please use the Host Code: HSVFAXRX

Thanks for visiting today,

Jenny

cards, Christmas, Stampin' Up!

CHRISTMAS IN THE MAKING!

Of all the new stamps I recently ordered from the Holiday Catalogue I pulled out this set first; Christmas in the Making.  I was looking at doing some watercolouring so I thought I would have a go with it.  I must say in advance I am not great at watercolouring.  But as I tell my daughter you can only get better at something if you keep trying. 🙂  Anyway, apologies in advance.

This is the first card I made with one of the images in the set.

The image was stamped with StazOn on Thick Whisper White card. I coloured the lady with the Watercolor Pencils and blended it with the Aquapainter.  I will show you a close-up of the skirt.  I coloured that with the Clear Wink Of Stella brush.  It is a little hard to see in the photo.  It gives it perhaps the look of Organza fabric, very soft and shimmery.  That was the effect I was going for anyway.  I went over the ornament too with the Wink of Stella to give it a sparkle.

I used the Olive side of the Merry Little Christmas DSP pack (p 12). I don’t think this paper is shown so well in the catalogue but it has some really lovely prints and I think will be versatile for occasions other than Christmas.  Have a look at this below. It comes in 12″ x 12″ sheets.

To finish the card off wrap around some of the fine Real Red Solid Ribbon.  For the sentiment I stamped it on a strip of Whisper White and angled the ends.  It needed something so I added some Silver Glimmer paper.

This is the stamp set, Christmas in the Making if you had missed it in the catalogue. (p 16)

W $44   C $31

Tomorrow I will show you cards with the other 2 images.

Jenny


Catalogues, Christmas, Classes, Stampin' Up!, Workshops

MERRY PATTERNS CHRISTMAS SET FOR FREE!

What do you think of this Merry Patterns Stamp set?? Pretty cool Hey!  It’s a special free bonus during September and October.

If you hold a cardmaking event whether it is a party, private card class, catalogue order or even your own order (Ssh! I won’t tell), and the total of the orders are over $450, it is your’s for Free!  

It wouldn’t take much to get to that amount with everyone keen to get started on their Christmas cards and a fantastic Holiday Catalogue released today.

Who do you think you could invite over to make cards?? I am sure you can think of a few people.  Invite them over, I show some ideas and we all make cards and sit and have coffee and –  not get interrupted by family members … 🙂  Grab a date and let me know so I can book you in.  Can’t wait!!  I always love sharing cardmaking with others.

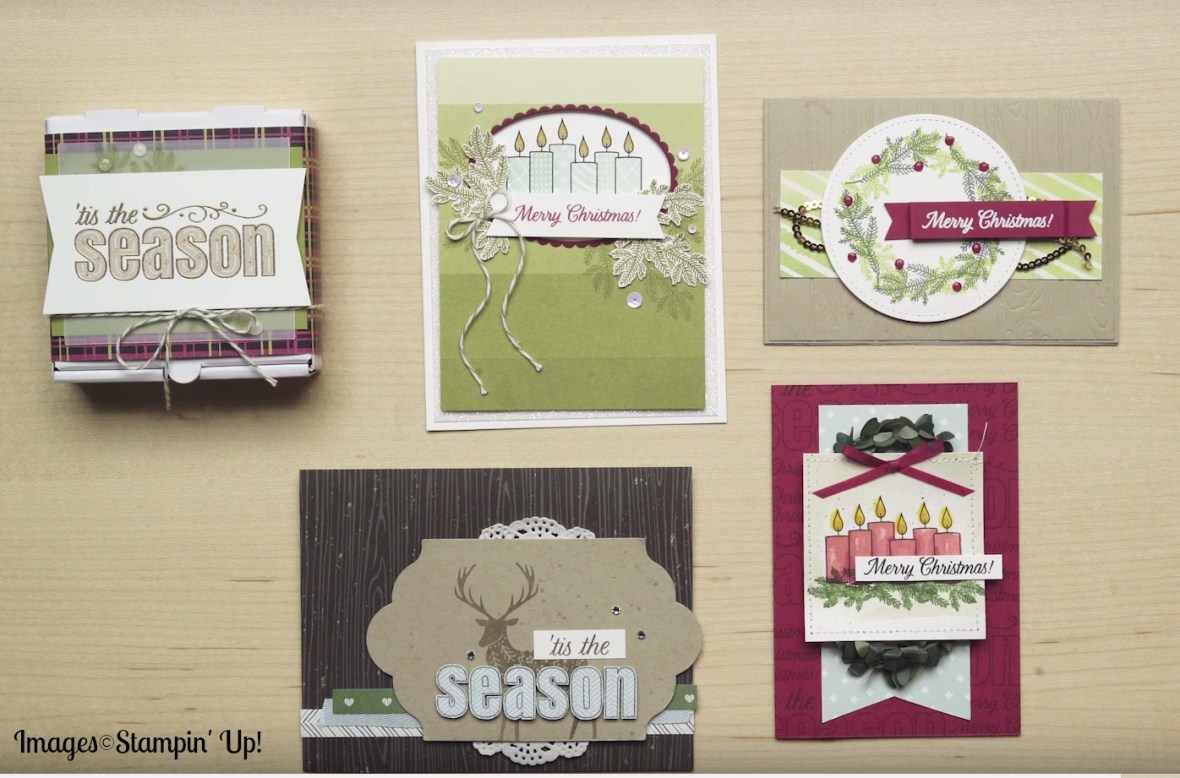
To show you just some of the ideas you can create with this set here is a group of projects created by Stampin’  Up! artists.  Such a diversity!

I look forward to creating cards together with you and your friends. Book me in ASAP.

Jenny