cards, Catalogues, Stampin' Up!, Techniques, Tutorials, Videos

WATCH IT WEDNESDAY #5 – BLENDER PENS VS AQUAPAINTER!

Welcome to Watch It Wednesday #5 edition.  I have been playing a little with watercolouring lately.  (still much to learn!).  I have had a few questions from customers asking what the difference is between the Blender Pens and the Aquapainters.  I came across this video from Stampin’ Up! so thought I would share it with you.  Perhaps it will help you too with your watercolouring.  Don’t miss the fun tip at the end.

NB: If you receive this blog post update via your email the video link may not show up.  Just click on the blog post title in your email and it should take you to the blog post and you can view it there.

What did you think??  I liked the tip with the Reinkers.  Must try that sometime.  I think the effect looks great.

What do you prefer to use when you are watercolouring?  I prefer the Aquapainter but it also can depend on what you want to colour and how you want it to look.  The Aquapainter gives a lighter, washed look whereas the Blender Pen gives more a look of colouring with Markers.

Just a note too:  In the video she stamped with Stazon.  Stampin’ Up! doesn’t carry Stazon any longer.  You could use the Black Archival ink pad. Be sure to let that dry a bit or give it a blast with the Heat Tool. Also, she suggested stamping on Watercolour Paper.  That is very important to stop pilling but you can also use the White Shimmer paper or even the Thick Whisper White if there is not too much water used.  I mostly use the White Shimmer paper.

The Aquapainters and the Blender Pens are available in my store now for your watercolouring.  The Aquapainters are $20 for 2 available HERE.  The Blender Pens come 3 per pack and they are dual ended (even more value).  They are $21 available HERE.  

Thanks for stopping by today for this week’s edition of Watch It Wednesday.  If there is something particular you would like to know about or to see a video of then drop me a comment and I will see how I go.

Jenny

cards, Catalogues, Challenges, Christmas, Stampin' Up!

FRESH COLOURS FOR CI17 COLOUR CHALLENGE!

I had a little play today with the Colour INKspirations Challenge (CI17).  I have missed a few rounds lately so it was good to take time out to play.  I really like to have a go at these challenges as it really extends your creativity.

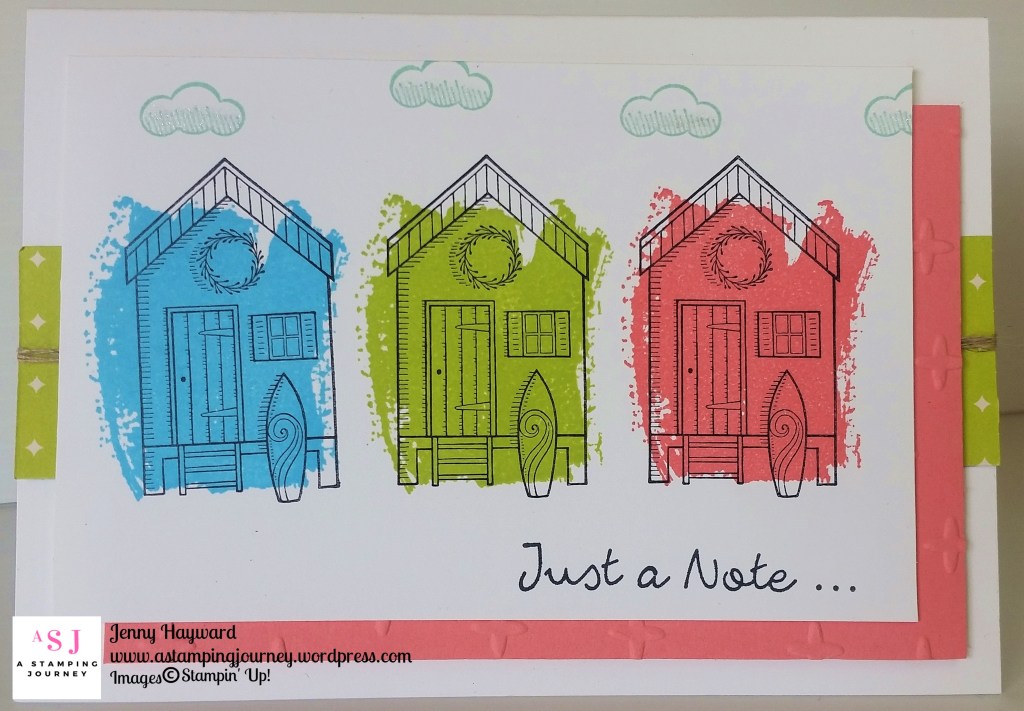
The Colours for this week are: Pool Party, Lemon Lime Twist, Tempting Turquoise and Flirty Flamingo.  What fun, fresh colours!

I had in mind to use the Beachy Christmas set in the Holiday Catalogue.  I hadn’t got around to using this set yet.  And you don’t need to use this just for Christmas …

For this card I used the sketch from Freshly Made Sketches #261

I was going to watercolour the houses with just a wash but then saw the Work of Art set.  One of the larger “block” type stamps covered over it nicely.  I did do a test run on scrap card to mist the colours after I stamped but I liked it better just to leave them.

The Flirty Flamingo card mat was embossed with the Sparkle Embossing Folder.  I added a strip of the Eastern Palace DSP.  I love that Lemon Lime Twist!  The sentiment I used was from Better Together set.

The clouds were from the Lift Me Up Bundle stamped in Pool Party.  I wouldn’t have necessarily stamped them in that colour but had to add it somewhere.  I did add some sparkle with the Wink of Stella pen.  It’s a bit hard to tell though.

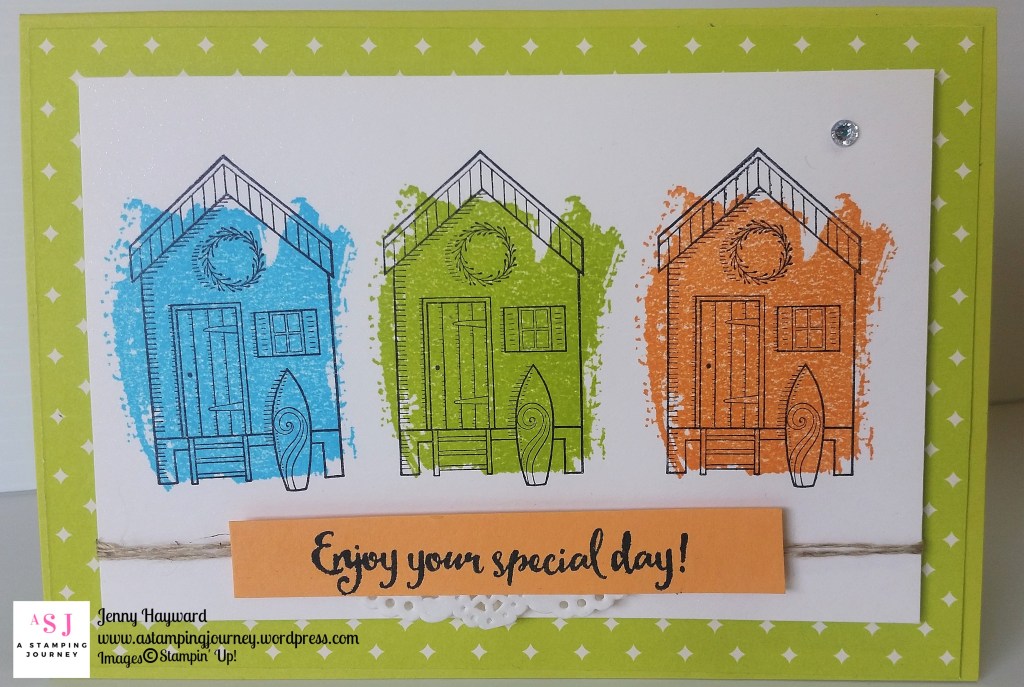
Now when I made this I first used the Peekaboo Peach instead of the Flirty Flamingo.  So I had to put that one aside and redo it with Flirty Flamingo. Once I had finished the card I then went back and finished this one.  I thought I would show you that one too.

I used more of the Eastern Palace DSP.  I played around with the sentiment a bit to cut angles and all kinds of things but ended up just trimming it down and adding some doily underneath.  The sentiment is from Dragonfly Dreams.

I think I like this version better.  What do you think?

Thanks for looking.  I hope your weekend has been great and you have had a chance to be creative,

Jenny

3D projects, Blog Hops, cards, Classes, Stampin' Up!, Techniques, Tutorials

SINGLE STEP CARD TUTORIAL WITH NIGHT IN BETHLEHEM!

Yesterday I shared my Step Card I had created for the Stampin’  Dreams Blog Hop.  As time was limited yesterday as you were all on the Hop I thought I would share the tutorial for you in a separate post.  So here it is for you.

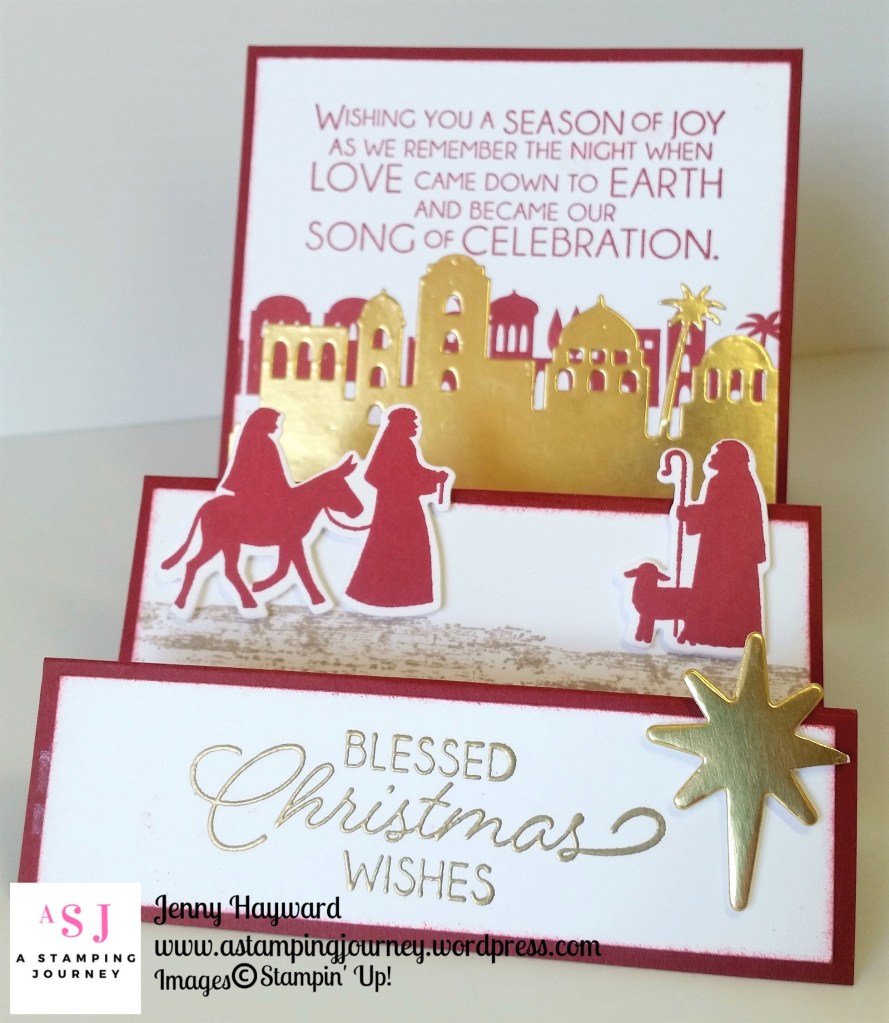
Firstly,  to refresh you this is the Single Step Card.  I have used with the Night In Bethlehem Bundle.  

The original card design I found on Patti’s blog HERE.  While it has the Imperial measurements I have worked out the Metric for you and added the Imperial measurements for you also.

SINGLE STEP CARD TUTORIAL

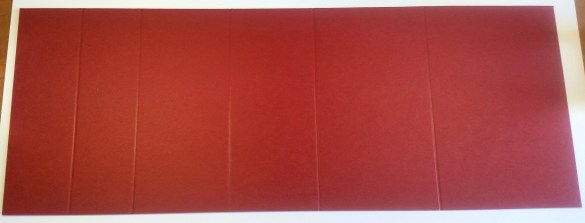
** Cut card to 28cm x 10.5cm  (11″ x 4 1/4″)

On the long side score at 3.2cm, 6.3cm, 10.8cm 15.2cm and 21cm     (1 1/4″, 2 1/2″, 4 1/4″, 6″ and 8 1/4″)

For back panel piece: Cut card 10.5cm x 10.5cm (4 1/4″ x 4 1/4″)

** The White mat pieces are:

Back mat piece – 10.1cm x 10.1cm (4″ x 4″)

Middle mat piece – 10.1cm x 4.1cm (4″ x 1 5/8″)

Front mat piece – 10.1cm x 2.8cm (4″ x 1 1/4″)

** To fold the card:

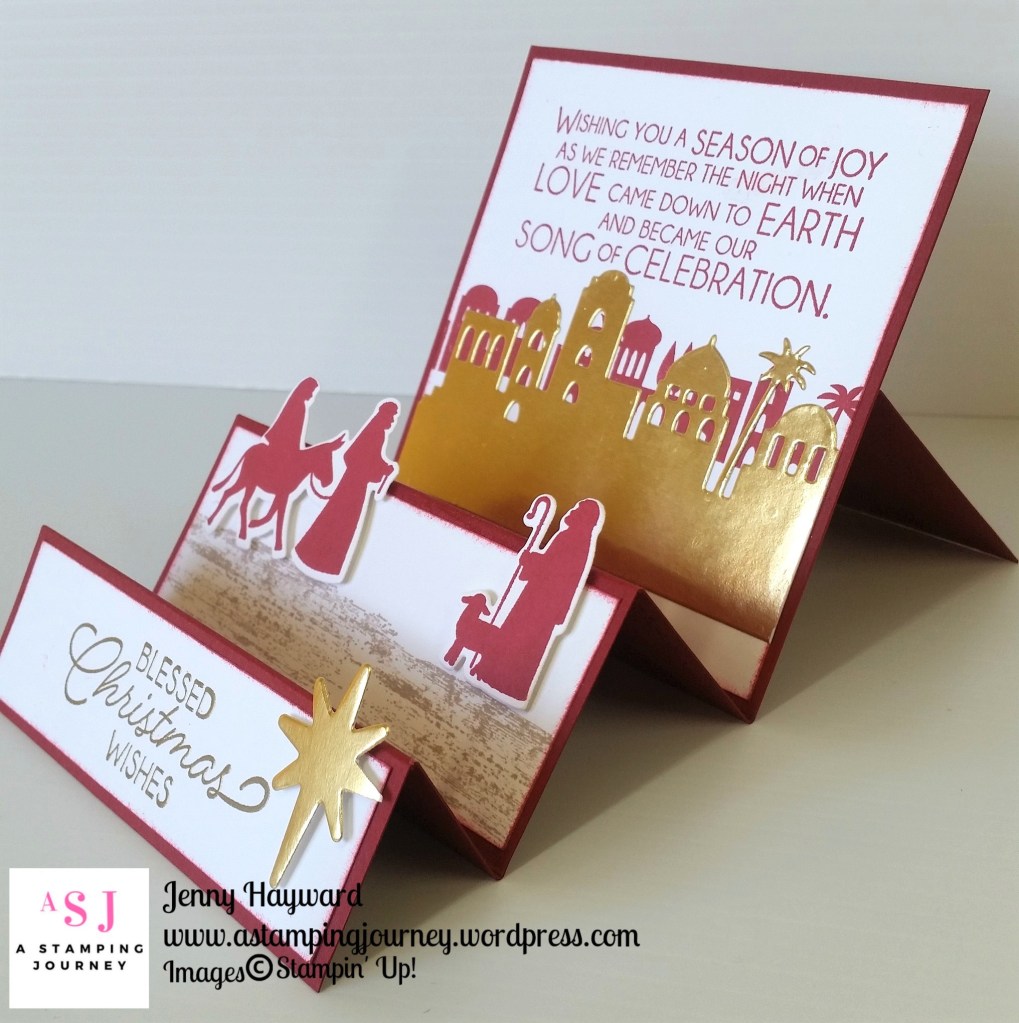
With the narrowest scored section on the left end start folding it concertina style.  On the score lines fold into a mountain fold, then next one a valley fold, then a mountain fold, then a valley fold, then a mountain fold.  See the photo below.

Then you can decorate the card as you like.

I hope you like it.  It’s a very simple card. I would love to see your version if you create one.  Do send me an email. 🙂

Thanks for stopping by,

Jenny

3D projects, Blog Hops, cards, Catalogues, Christmas, Stampin' Up!, Tutorials

STAMPIN’ DREAMS BLOG HOP – SOMETHING DIFFERENT!

I am joining in with the Stampin’ Dreams Blog Hop today.  You would have come from Jenny Hall’s blog (HERE) coming all the way from the US. Or you have just started here. Thanks for stopping by either way.

The theme this month is Something Different.  A fold, a technique, something we have been wanting to try but haven’t as yet.  Really! That’s an open minefield.  I like doing different card folds so thought I would try a different.

This Fun Fold really is simple but I think it is fun.  This is a Step card and  I haven’t done a Single Step card before.  For this I used the Night In Bethlehem Bundle.

I love how you have the stamps and the matching dies in the bundle making it so easy to create your images.  No scissors required Thank you very much. 🙂  I lightly sponged around the edges of the white card to soften the edges.

The sentiment on the bottom panel has been heat embossed in Gold. For the ground under the figures I used a stamp from the Timeless Textures set.  I like the effect that created.  Edited to add: The base card and the stamping is Cherry Cobbler.  It is a bit hard to tell in the photo. 🙂

As you are all busy hopping today I don’t want to take up much of your time.  Stop by tomorrow and I will have a tutorial for you to create your own step card.

For now you need to continue on with the Hop.  You can head off now to Sue’s blog HERE.  She creates amazing projects so be sure to stop by.

See you tomorrow for the Step Card Tutorial.  

(Edited to Add: The tutorial is now available at the next post.  You can find that HERE.)

Jenny

3D projects, cards, Techniques, Tutorials, Videos

WATCH IT WEDNESDAY #4 – TYING THOSE PESKY BOWS!

#4 WATCH IT WEDNESDAY is all about tying those bows.  If you come to my classes you can hear the groans every time I say we have a bow! 🙂 🙂

If you are groaning at the mere mention of tying bows yourself then never fear. I have put together a short video to show you how I tie my bows. I hope it is helpful.

NB: I am just starting out on this video venture so be patient with me.  I do appreciate your feedback though (good or bad) and hope that I can share more videos with you with a little more practice. 🙂

TYING BOWS THE EASY WAY!

Did you find that helpful??  Yes / No / Maybe / Perhaps stop this video gig before you get started???  😉

Thanks for stopping by today,

Jenny


3D projects, cards, Christmas, Classes, Stampin' Up!

NIGHT IN BETHLEHEM CANDLE CLASS THIS WEEK!

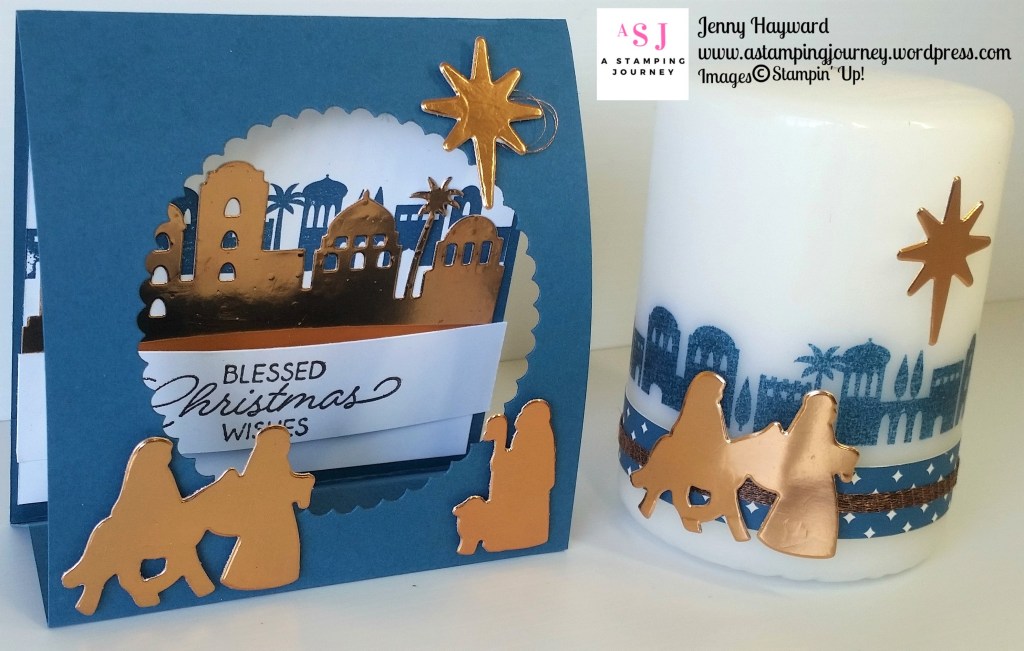
I have a special class for you this week if you are a Wollongong local.  We are making a lovely Tent Card and a stamped candle using the Night in Bethlehem Bundle.  I am sure this would look lovely sitting on your shelf over the festive season.  This would be a special gift to give someone too.

Here are the details.

NIGHT IN BETHLEHEM CLASS

WHEN: This Friday 22nd 10am or Saturday 23rd 2pm.
Can’t make this time?? Let’s make another time to get together (or invite your friends along too).

COST: $20.  Please bring your own scissors and adhesives.

RSVP:  Wednesday 20th.
It’s important to RSVP early to be sure there is enough candles.

I hope you can make it.

Jenny


Uncategorized

SWEET SUGARPLUM DAISY!

Another Daisy Delight card for you today.  This one was CASED again (from Anne’s blog HERE).  Time was running out to get my samples made for the Craft Show.

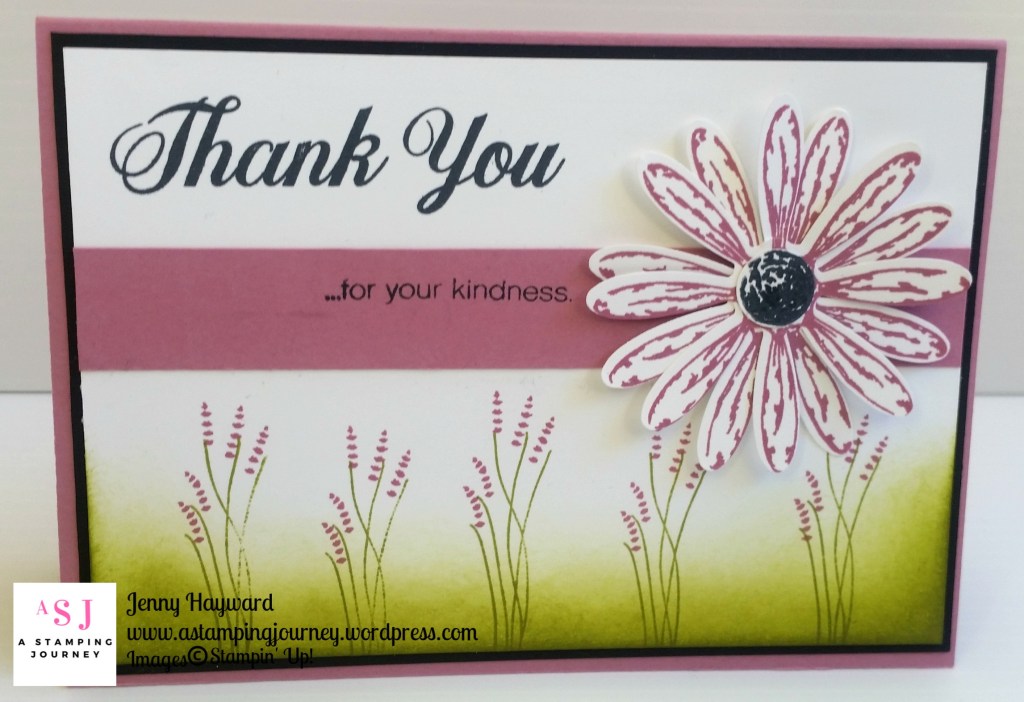
This was my version. I made a few changes to the original.

I like how some of the other flowers from the set are used.  For my card I matted the white on black and the base is Sweet Sugarplum.  I stamped and punched out 2 Daisy flowers in Sweet Sugarplum.  I like the fuller flower.

Along the bottom I stamped the little stems and flower heads.  I was a bit worried how they would line up but really that is they style and it doesn’t matter if they are a little off-set.  I have sponged Pear Pizzazz (I am pretty sure it was) along the bottom and up into the flowers.  I like the softness it brings.

Have you got this set yet?  I have to say I really didn’t need this at first.  I have lots of flower stamps. Then I just bought the punch because you know, I saw some great cards with it. But….Well it’s great having the punch but there are so many options to the flowers. So I had to buy the stamp set then. Don’t be a silly nong like me (an Aussie term for being a twit or an idiot).  Get the bundle straight up and save 10%.

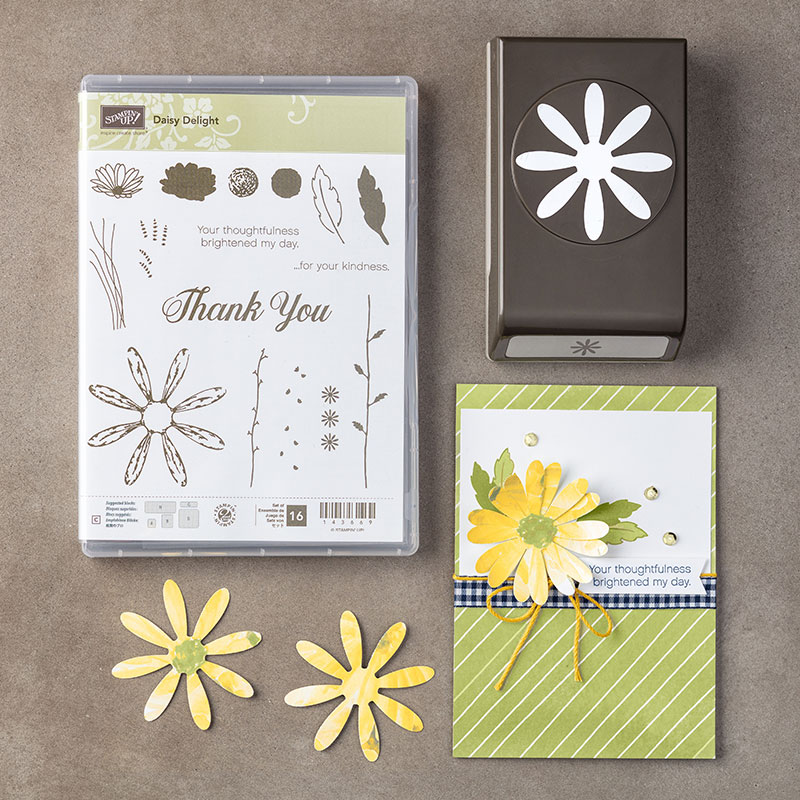
Here is the Daisy Delight Bundle for you if you haven’t already checked it out.

If you are in Australia you can buy the bundle (don’t resort to just the punch!!) by contacting me directly or see it in my store HERE now for $54.75 in Photopolymer.  Please use the Host Code: YN7BVYYQ

ALSO, I always seem to neglect to tell people that you can collect one punch out on my VIS (Very Important Stamper) Loyalty card for every $50 order.  Once you collect 10 you get free products up to the value of $24.95.

Thanks for visiting today.  I hope your weekend is going awesome.

See you again tomorrow,

Jenny

cards, Catalogues

TWO MORE DAISY CARDS!

I have 2 more cards using the Daisy Delight bundle.  These cards were made for samples to show at the Craft Show that we did last month.  We focused on this bundle and it was only the day before that I got to make a few cards.  So they had to be quick.  No time trying to work it all out.

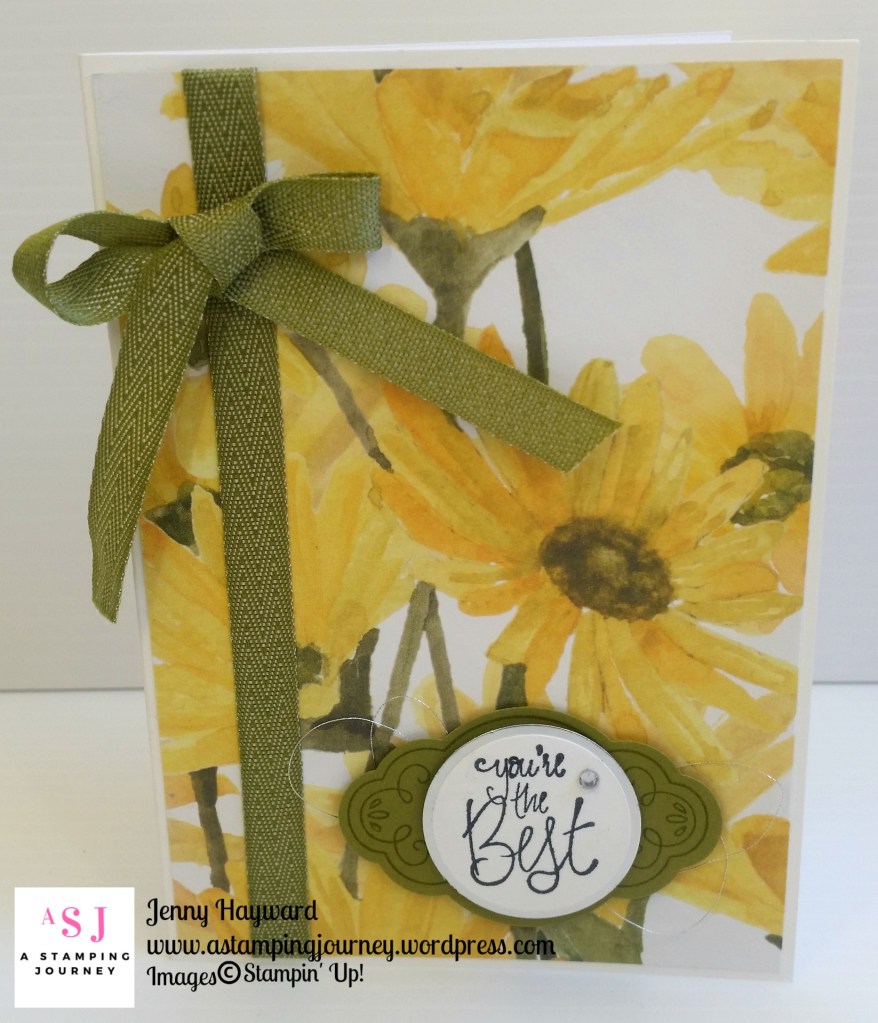
Firstly, you can’t go past the gorgeous Delightful Daisy paper.

For this card, cut a small piece of the Designer Series Paper smaller than the front of the card base.  Don’t be afraid to cut into it. It’s there to enjoy not to store on a shelf. Wrap some ribbon around the paper.  This is the Mini Chevron ribbon in Old Olive.  Instead of trying to tie a bow on the paper it is a bit flimsy, I adhered a strip down the length with snail adhesive and adhering the ends over the back of the paper.  Then tie a bow from some of the ribbon and attach that separately with a glue dot.  That is so much easier. Adhere that to the White card base. Almost done!

The sentiment is from the Label Me Pretty.  Stamp the sentiment in black and punch it out with the 1 1/4″ circle punch and punch a circle out from the Silver Foil with the 1 3/8″ circle.  Stamp the flourish label in Old Olive on Old Olive card and punch out with the pretty Label Punch.  Of course I added some silver thread under the sentiment and a Rhinestone.

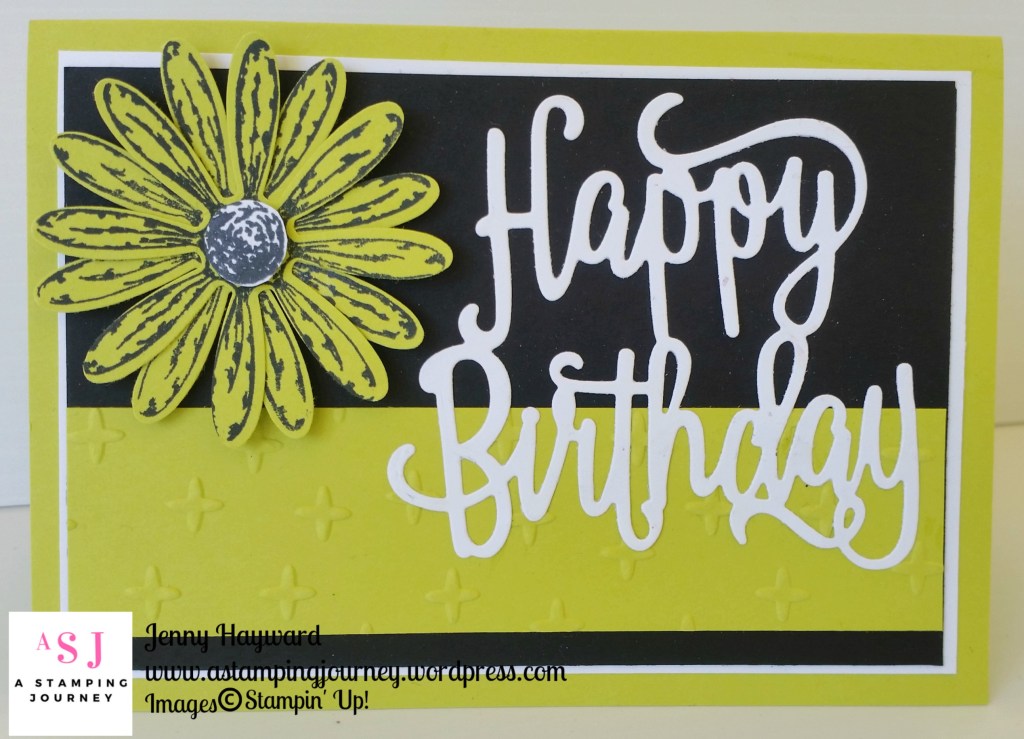
The next I CASED from Claudia’s blog HERE. 

Have you got your sunglasses handy??  Got to love the Lemon Lime Twist.  I stamped the flower in black on Lemon Lime Twist card and punched it out. A strip of Lemon Lime Twist card was embossed with the Sparkle Embossing Folder.  Then you can cut the Happy Birthday from the Happy Birthday Thinlits.

Stay tuned for more Daisy cards to come.

Jenny

cards, Stampin' Up!, Techniques, Tutorials

A FLAP FOLD DAISY CARD!

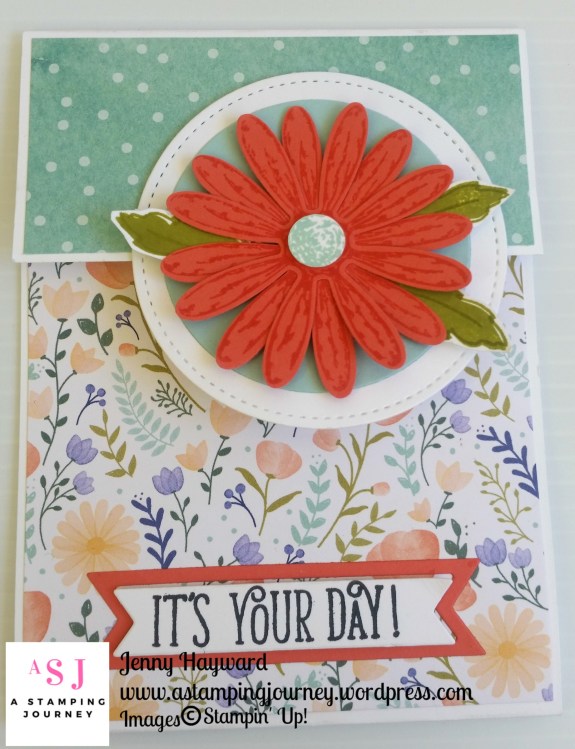
This card I am showing you today was actually the first card I made with the Daisy Delight Bundle.  Usually my first couple of cards with a new set I turn to Pinterest and CASE a card.  I liked the idea of this card.  It is a Flap fold card.  Just a little different to the standard card.  I CASED it from Janet’s blog HERE.  I will give you the measurements shortly.  Janet has just the imperial measurements for her card but I will give you the Metric as well as the Imperial. First I guess you want to see the card.

Isn’t the Delightful Daisy Designer Series Paper just gorgeous??  On the top flap I stamped the Daisy in Calypso Coral twice and punched them out.  They were layered together and off-set slightly.  The centre was stamped in Pool Party and punched with the 1/2″ circle punch. I stamped the leaves in Old Olive for the outline and the solid image.  These were hand cut. The Daisy was then layered on a circle cut with the Layering Circle Framelits in Pool Party and then a larger one with the Stitched Shapes Framelits.  

The sentiment is from the Happy Birthday Gorgeous set. I made a discovery when I cut the sentiment out using the Straight banner die from the Bunch of Banners Framelits.  I cut the white card which I had stamped the sentiment on and it had left the centre where that was stamped but also a banner frame. So I cut another Banner in Calypso Coral to create a frame.  Cool trick!

Here is the inside of the card.  Just a simple “happy birthday” from the Happy Birthday Gorgeous set.

I think I have to make some more of these cards.  Do you want to make one?  Here is how.

FLAP FOLD CARD

Metric: Cut an A4 sheet of card lengthways in half.  This will measure 29.7cm x 10.5cm.  Score on the long side at 10.5cm and 14cm.

Imperial:  Cut standard card lengthways to measure 11″ x 4.25″.  Score at 2″ and 7.5″.

Your Designer Series Paper pieces for the front panels are cut just slightly smaller.

Thanks for visiting.  Have a great weekend,

Jenny

cards, Catalogues

DAFFODIL DAISY DELIGHT!

I realised I hadn’t shown you all my Delightful Daisy cards.  I started sharing them a couple of weeks ago but then there was something about a new catalogue coming out …:)

So I shall show you a few over the next couple of posts.

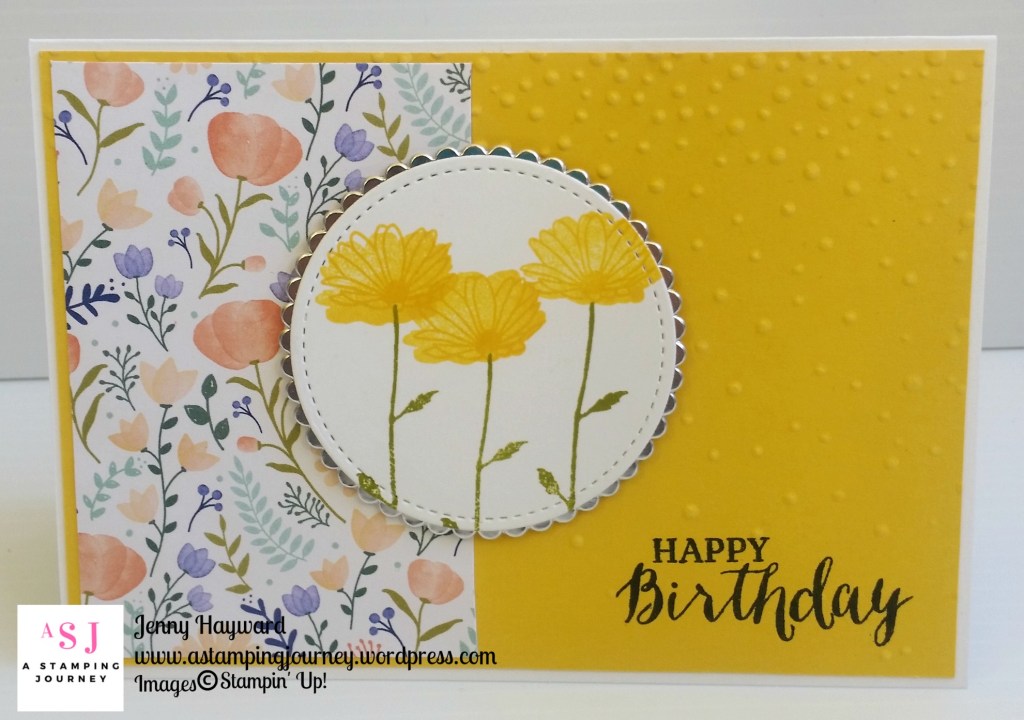
Today’s card is so bright and sunshine-y.  I love the gorgeous Delightful Daisy Designer Series Paper. The prints are so lovely.

This was the first time I had used the small flowers from the Daisy Delight stamp set.  I cut the circle from Stitched Shapes Framelits first so I could see where to position the flowers. The flower outline image and the filler image was stamped in Daffodil Delight and the stems were stamped in Old Olive.  I cut a scallop circle using the Layering Circle Framelits in Silver Foil.

The sentiment is from Butterfly Basics stamped on to Daffodil Delight card mat which was then embossed with the Softly Falling Embossing Folder.

So happy and bright.

Thanks for looking,

Jenny