I’m not a baker. And really not that great a cook. I will admit it. But I might be able to handle this one.
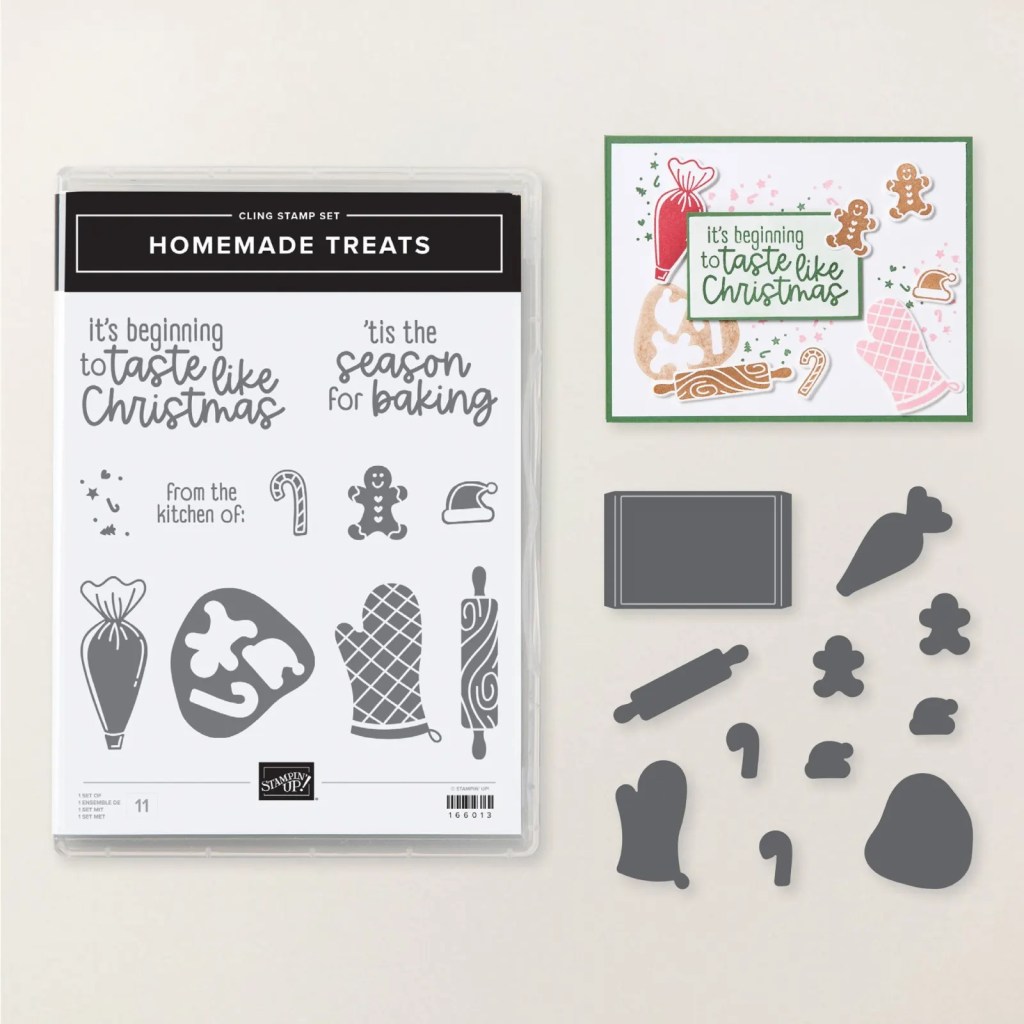
The Homemade Treats Bundle is a cute one. It has the Dies to cut little gingerbread men, and candy canes and other baking goodies, even a baking tray. How fun!
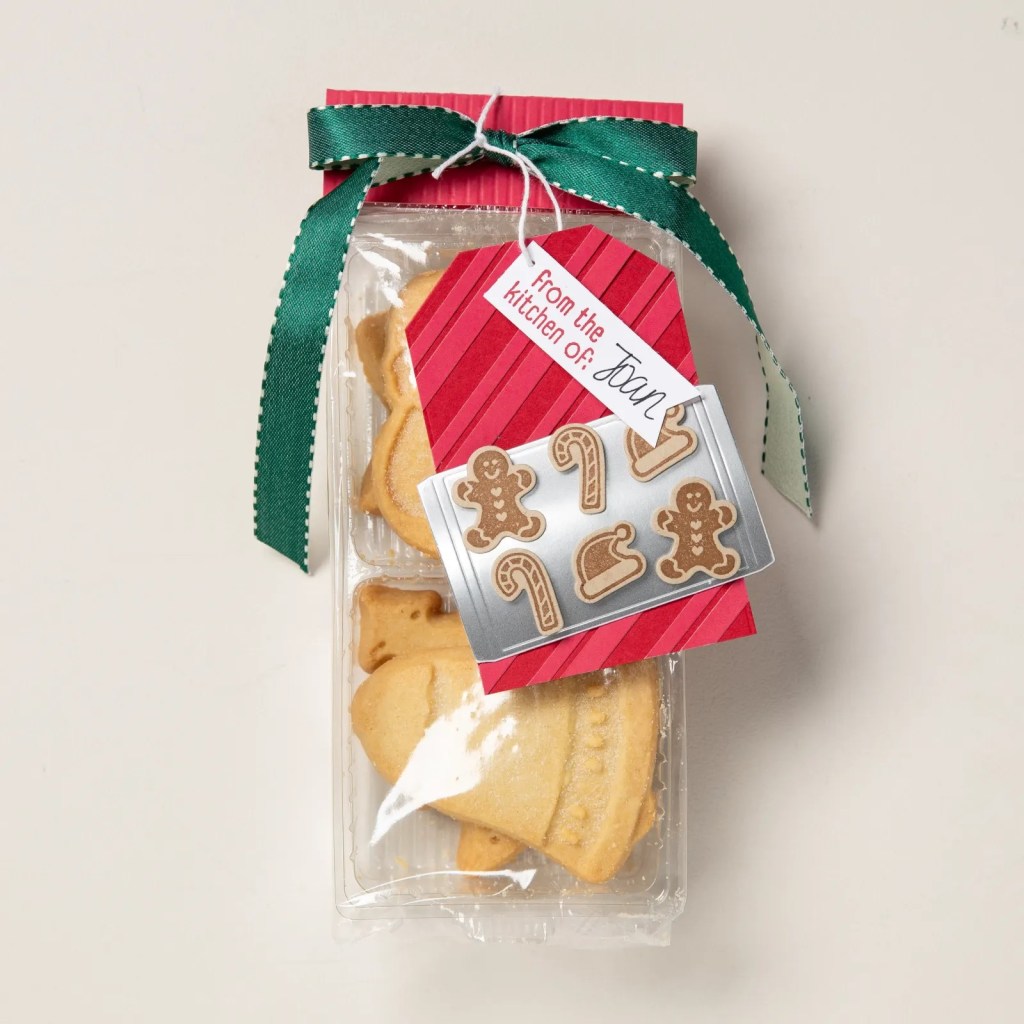
This would make great cards but how great would this be to dress up some cookies to give at Christmas. In my case maybe I can dress up some store bought cookies. 🙂 I will stick to making the cards and tags.
This is the Homemade Treats Bundle.
Even fun little sentiments for your baked goodies.
The card is cute but dress up some cookies too.
You can see the Homemade Treats Bundle in my store -> HERE.
If you need this one for your baked goodies or for cards for a wannabe cook (raising my hand), then you can grab it there OR contact me.
It’s Week 11 for our 12 Weeks of Christmas Series. The time has flown by. Here we are nearly at our last week.
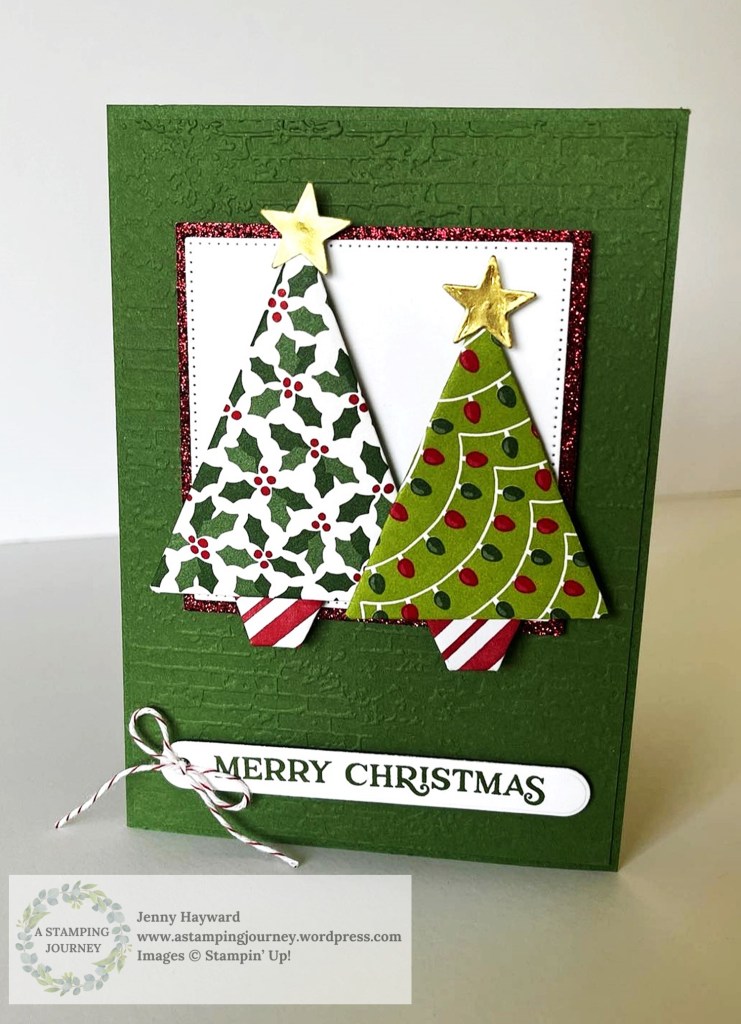
Our project today is using some of those scraps of Christmas Paper you have. I’m going to show you how to make Paper Folded Trees. They can be added to a card or to a tag.
They are very easy to do and you can create them in any size. Just be sure it is a square piece of paper. You can fold little bases for them too.
Check the video to see how to fold them.
Have fun making them.
If you need any products and you are in Australia. Do stop by my store-> HERE or Contact me directly. I would love to help you out.
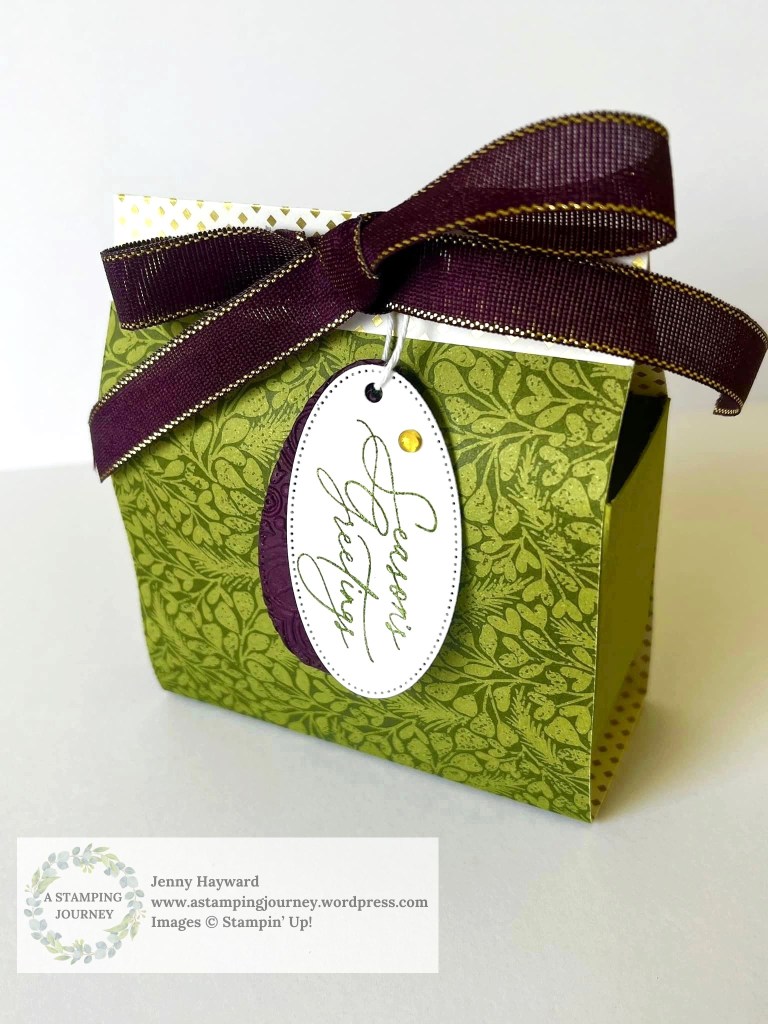
It’s Week 8 for 12 Weeks of Christmas with an easy Christmas Gift Bag to make. This cute bag could be used for any occasion.
I have used the Season of Green and Gold Specialty Paper on this bag. I created some other version and I will share them later.
You can follow along with the video here. If it isn’t shown then head straight to my Youtube Channel and you can find it.
It’s hard to see but I have some extra texture to the Blackberry Bliss card on the tag. I have used the Distressed Tile Embossing Folder. This is a close up of the tag.
I send out a written tutorial to all my newsletter subscribers with the full measurements and details. Are you a subscriber yet? I send out a free tutorial each week. You can find the link to join my subscriber list in the tab on the right hand column on my blog.
Thanks for following along.
Happy Creating,
Jenny
You can PIN it Now to Pinterest to come back to later.
Need to order and you are in Australia? I would love to help you.
You can shop in my store Online -> HERE. Please use the Host Code: EXSTTBB6
OR contact me directly.
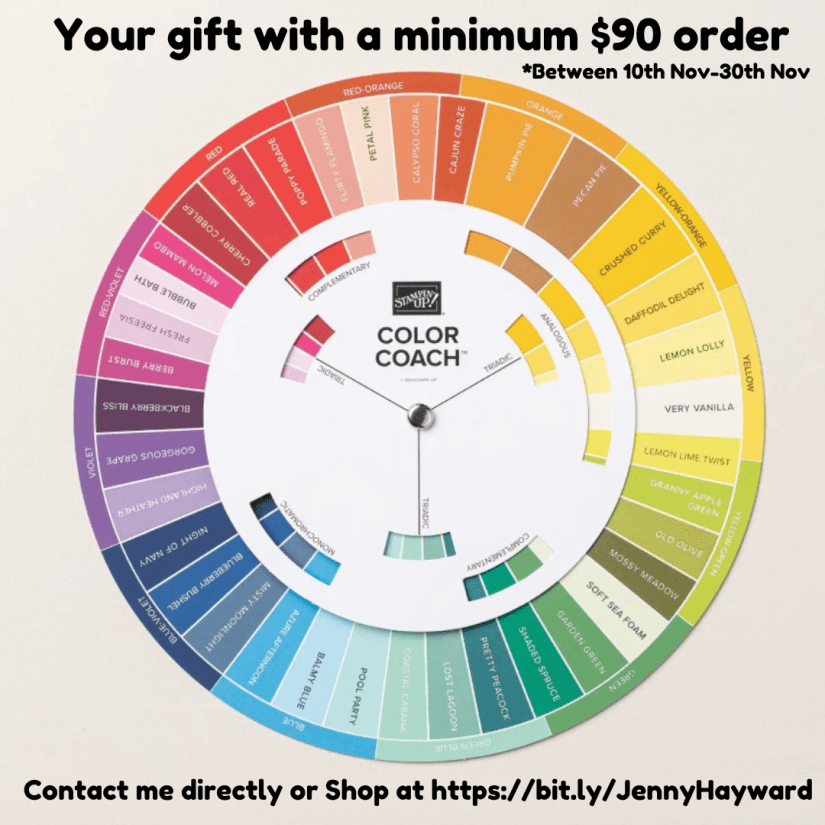
And don’t miss out on your Color Wheel as a gift this month. All orders over $90 with me will receive one.
It’s Week 6 of our 12 Weeks of Christmas Series. Can you believe we are half-way through already!
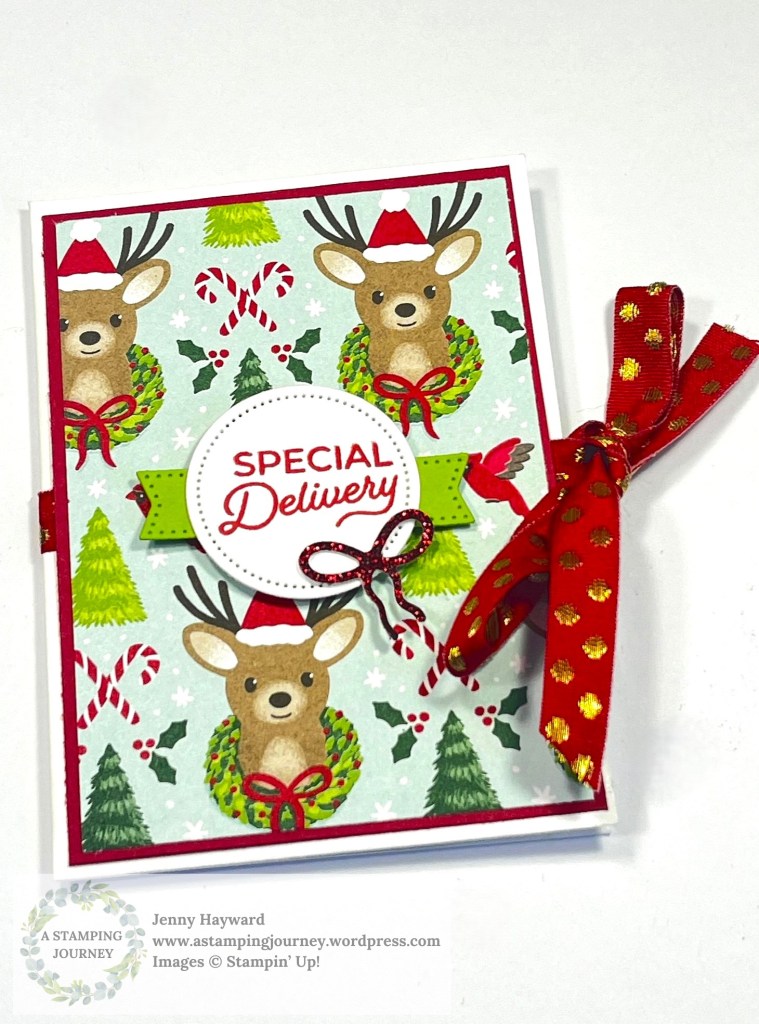
This week’s project is a Gift Card Holder. It is so easy to create. It’s made with a standard White Envelope, some festive paper and matching ribbon.
You can see how to make one in the video below. Gift Cards are a popular gift for Christmas so I hope you get to make one for yourself.
This is the Gift Card I created in the video. I will share some other versions in a later post.
I decorated this one with the Reindeer Days Designer Series Paper. The words on the front are from the Trucking Along Stamp Set. The inside is one from the Greetings of the Season Stamp Set.
You can PIN this now on Pinterest to come back to.
If you have missed out on past projects from the 12 Weeks of Christmas then be sure to head back some posts on my blog here Or head to Youtube. They are all on my Channel.
If you would like the written tutorial for these projects then be sure to subscribe to my newsletters. I send out a free tutorial each week. You can find the link to subscribe in the right hand column on my blog.
Have fun creating,
Jenny
Do you need supplies and you are in Australia? I would love to serve you.
You can head to my store -> HERE. Please use the Host Code: EXSTTBB6 Or contact me directly.
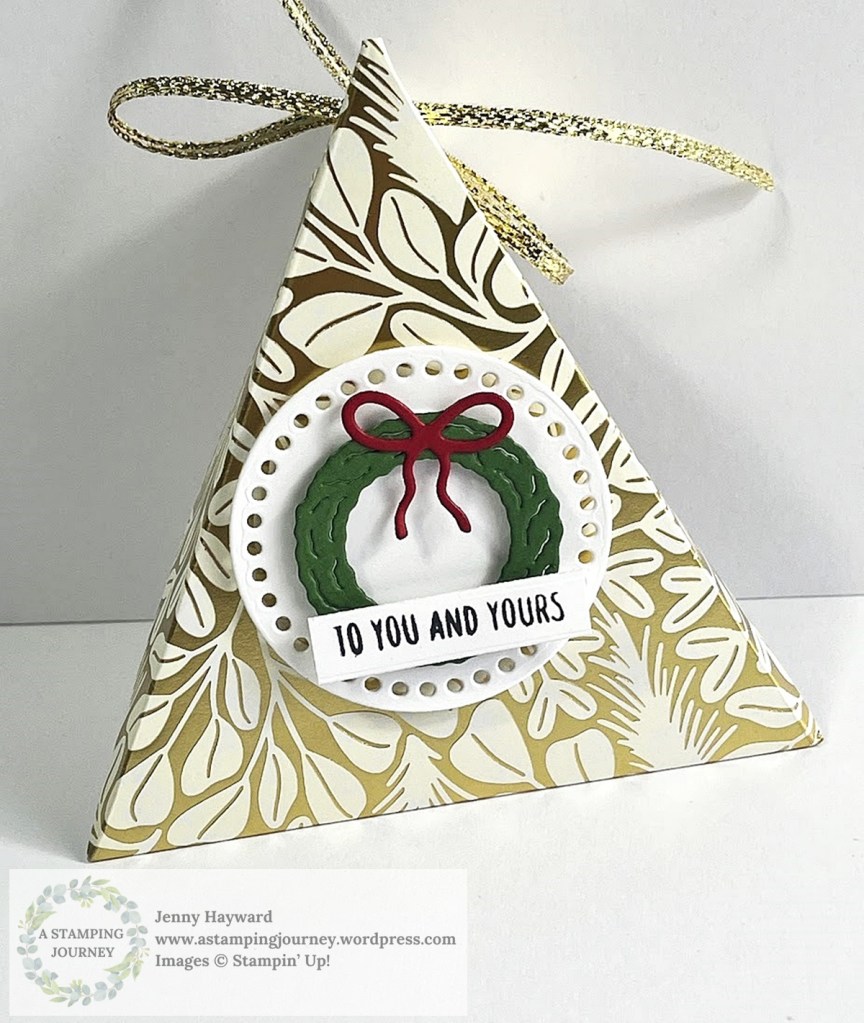
A Triangle Box would have to be one of the easiest type of boxes to make I think. No gluing. Just cut and score and fold.
Triangle Boxes have been around for some time. I used to make them a lot way back when I first started with Stampin’ Up! – 16 years ago!
I was reminded of them recently so pulled it out to make for a recent class. I wanted to share it with you.
These are using the Green and Gold Specialty Designer Series Paper. Seen Here.
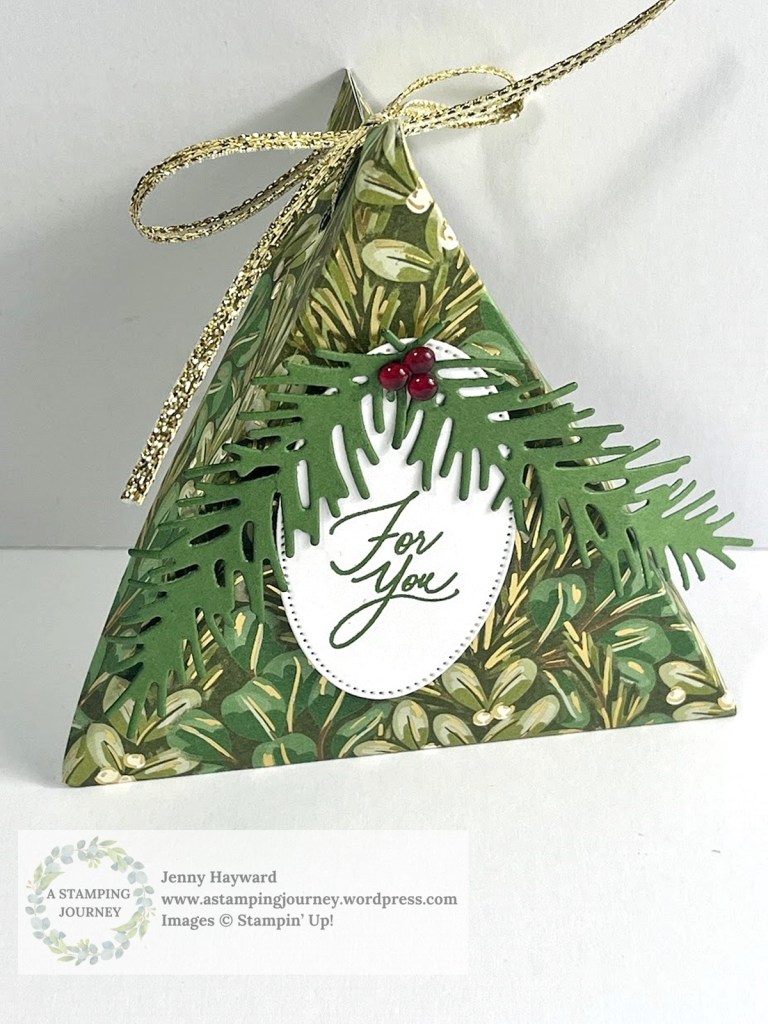
The Green one was decorated with the Golden Greenery Dies and the sentiment from the Greetings of the Season. The Gold one was using the Reindeer Dies available in the upcoming Mini Catalogue.
With this particular Triangle Box you can make it any size you like. The length needs to be double the width. For this one it is 20cm x 10cm (8″x4″).
You can follow along with the Video. Find it on my Youtube if it is not showing here.
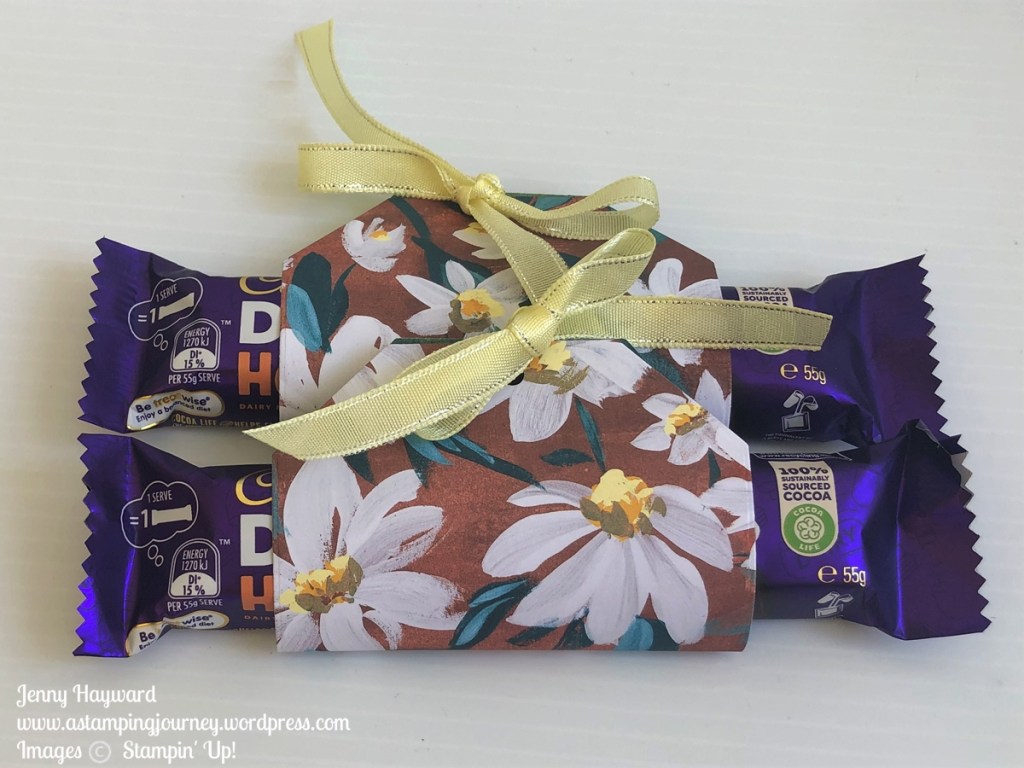
I made up some really quick and simple Treat Holders for all those who came along to my Catalogue Launch recently.
I didn’t have a lot of time but they were just the right size for a small chocolate treat.
Here it is a little closer.
I used a mix of the Countryside Inn Designer Series Paper and the Fresh as a Daisy Designer Series Paper. Then diecut the piece with the largest size die from the Countryside Corners Dies. Punch a hole in the top and add some ribbon.
Sweet, simple and fast. That’s all you need though right.
Of course, it would have been good to have a cute tag BUT, time ran out.
Maybe you can create your own to give a little treat to someone.
Happy Crafting,
Jenny
In Australia and need some crafting supplies? I would love to serve you. You can head to my store -> HERE and shop. Please use the Host Code: 4RY72TBP Or contact me directly.
AND – are you a VIS (Very Important Stamper) Loyalty Club Member? Every $50 earns a Point. Collect 10 and receive $25 of products of your choice. Happy Shopping.
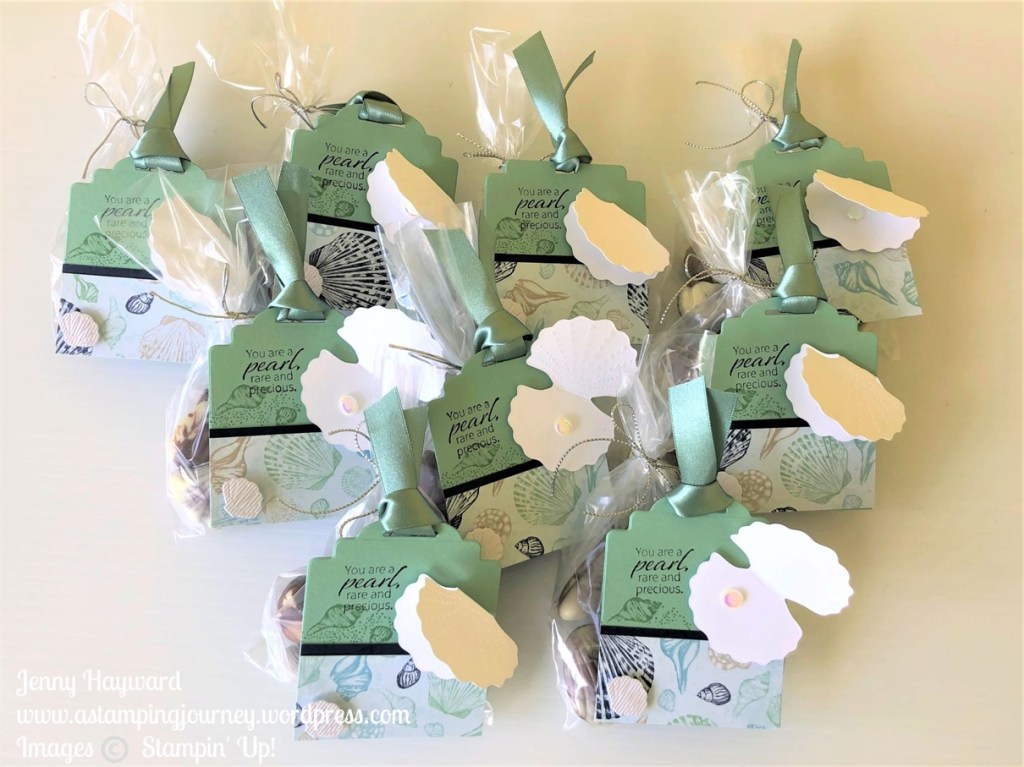
We had our Summer Craftastic Event this past weekend. I will share some of the creating fun with you over the next few posts. Of course I did forget to take a photo of the groups on each day. Too busy creating and chatting. But I will share the projects.
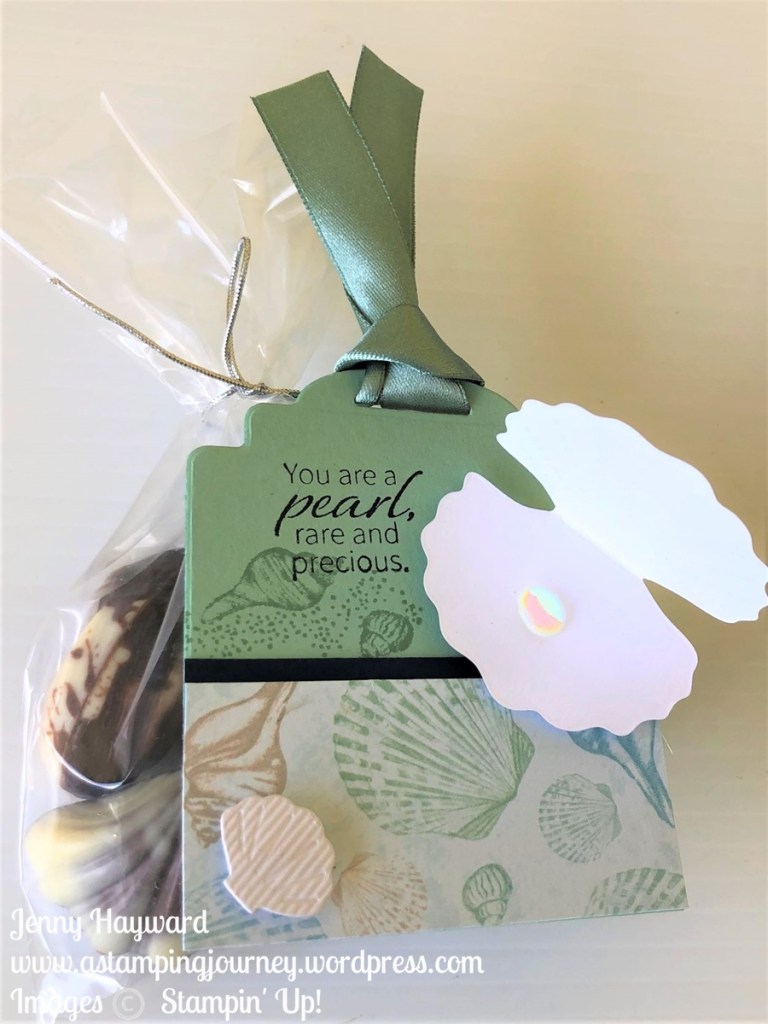
Firstly, I want to share the little Chocolate Treat Bags I created for each guest.
The tag was cut with the Designer Tags Dies. I trimmed off the bottom edge and added a strip of the By The Bay Specialty Designer Series Paper. It’s lovely paper with the shiny images on one side and prints on the other side.
Being “seaside” paper the Shell Chocolates suited well for these little treat bags.
And of course the lovely sentiment for each person with a clam and a Flat Adhesive Pearl. The diecut shell added was diecut with the Shimmery Textured Paper.
Be sure to check back to see the projects shortly. Some I have used the By The Bay Suite.
Happy Crafting,
Jenny
Need to order and in Australia? I would love to serve you.
You can stop on by my store -> HERE. Please use the Host Code: 73TFR9BD
Christmas is getting closer and I’m sure you are getting frantic. Well I am anyway. Still haven’t finished the Christmas shopping – and as for cards …
Anyway, if you are in a rush but you need a speedy little treat bag for someone then I have one to share with you today. These are just the size for some chocolates or jewellery or even a Gift Card.
I shared the Snowflake Vellum bags I created for my class attendees on my Facebook last week. And everyone loved them. I thought I would put together a video to show you just how easy they are to make so you can whip up some yourself.
These are the SnowflakeVellum Treat Bags if you missed them on Facebook and Instagram.
Now here is the little bag created with the Storybook Gnomes Designer Series Paper.
The Gift Tag is one we created in class at our Tags and More class last week. I just thought it would work well with this paper. It uses the Merriest Moments Stamp set and the dies. Unfortunately the stamp set is now sold out.
These bags were inspired by ones I saw on my lovely friends Sam’s blog on Pootles. I couldn’t find the original when I went back to them. I did change these a little. But if you haven’t checked out Pootles yet you really should. Sam has some quick, easy gift bags and treat holders to create. You can find Pootles -> HERE.
You can catch the video here or now on Youtube.
Do you want to make your own?
Here are the measurements for you.
CHRISTMAS TREAT BAG
Designer Series Paper – 19cm x 13.5cm 7 ½” x 5 ¼”
Score on the long side at 6cm, 9cm, 15cm, 18cm
2 3/8”, 3 ½”, 5 7/8” and 7”
Score on the short side at 10.5cm 4 1/8”
I hope you like these little bags. Believe me when I say they are really quick to create.
If you need any supplies and you are in Australia head over to my store. I would love to help you out.
Head to my Online store -> HERE. Please use the Host Code: 4T4CRRTK
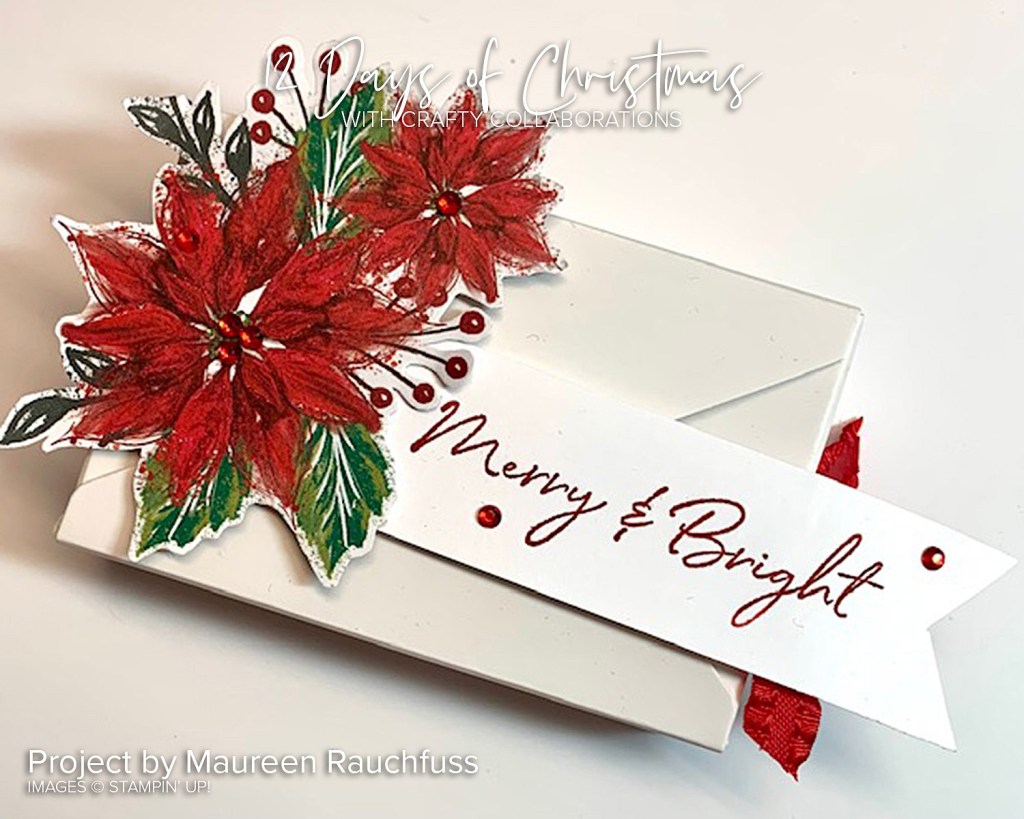
Day 11 of 12 Days of Christmas is a super quick Christmas Treat Box.
This treat box couldn’t be any quicker. It is created with an Envelope Treat Boxes and fussy cutting poinsettias from the Boughs of Holly Designer Series Paper.
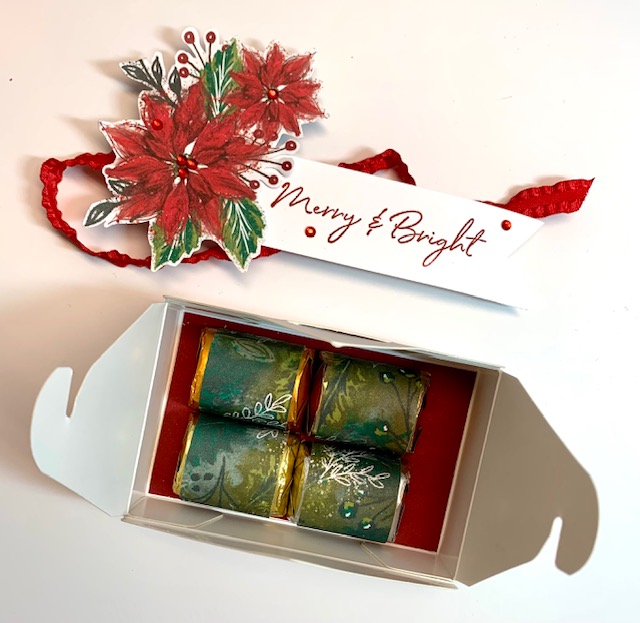
Here is the inside. Make it fancy by lining a piece of DSP on the bottom of the box.
This box is filled with Hershey Nuggets (sad we don’t get them in Australia). Wrap each one in other DSP.
Create your own by following along with the Tutorial -> HERE.
Looking for some supplies to get you creating and you are in Australia?
You can stop by my store -> HERE Please use the Host Code: JCBE3B2U
Or
Contact me directly. I would love to serve you.
Now you can make lots of these quick little boxes to give out at Christmas.
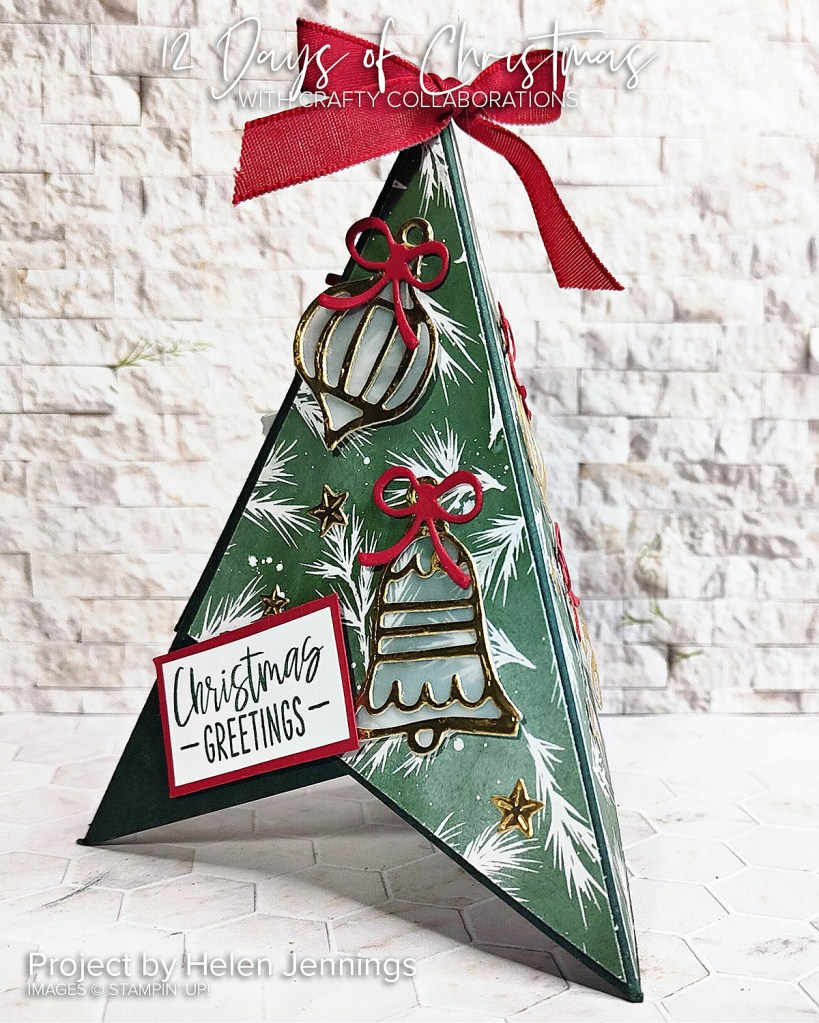
Day 10 of 12 Days of Christmas. It’s a Christmas Pyramid Card. Sometimes called a Teepee card.
I love making these cards. This one is created by Helen.
This one is using the Decorated with Happiness Bundle and the Painted Christmas Designer Series Paper. You could recreate it with any of your gorgeous products.
I created a video for a Pyramid card back a few years ago. You can view that -> HERE. Excuse the quality. I have learnt a lot since then. (and still learning!).
As always, if you need supplies and you are in Australia I would love to serve you.
You can stop by my store -> HERE Please use the Host Code: JCBE3B2U