These are the fun cards we are making at my Saturday Stampers class this Saturday 15th August. (2pm). Cost $15 If you are local to Wollongong do come on by. You just need to let me know by Thursday so I can have all the card cut. They might look a bit tricky but they are really not hard to do. I think you will like them.
Tag: Card Folds
SPRINKLES OF LIFE TENT CARD!!
Are you ready for another Sprinkles of Life card?? I hope you are not getting sick of them yet. Here is another fun card I made yesterday. (lighting is not the best – sorry!)
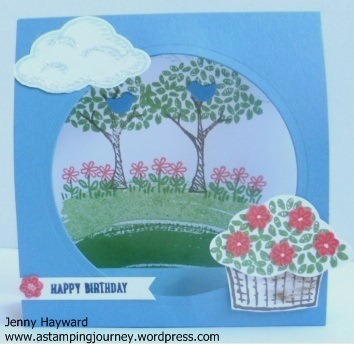
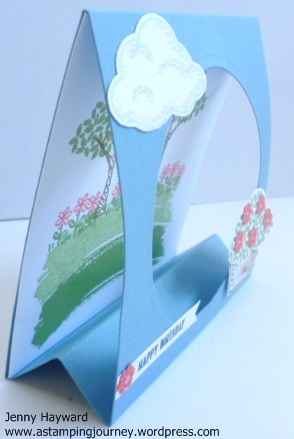
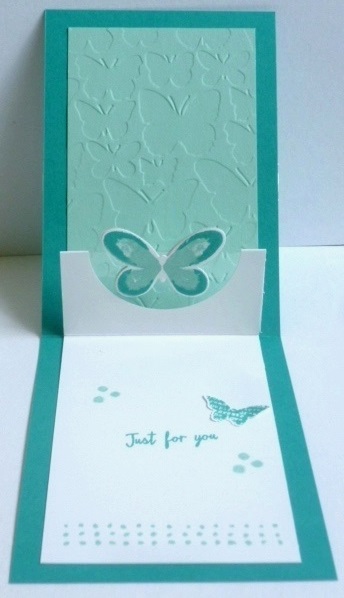
This is called a Tent card. I will explain how to make it below. I found the original idea of the card on Stampin’ Connection which is a Demonstrator site and has THOUSANDS of samples (and I am not lying about that!!). I don’t visit it often but it is always full of inspirational ideas. Anyway, this style of card was on there that I found a couple of years ago I think and I filed it away. I thought it would be great to try it out with this stamp set.
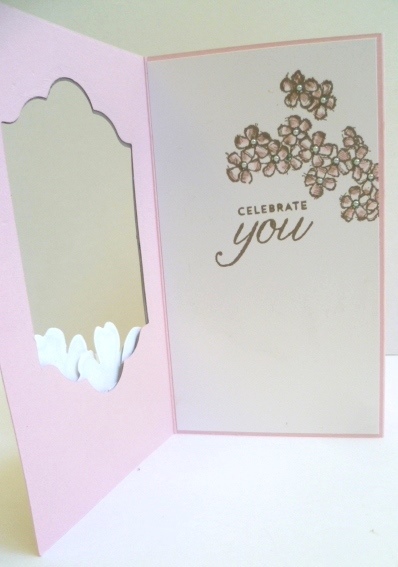
The base is Marina Mist (lighting is not the best). Inside the card I created a sweet scene using a number of images in the set. Then I added the basket and a cloud on the front. You have to have sparkle on that cloud!
So how do you make it??
Here are the instructions for you to make your own TENT CARD.
1. Cut your base card to measure 10.5cm x 29.5cm. (4 1/4″ x 11 5/8″)
2. Score on the long side at 2.5cm, 5cm, 7.5cm, 18.5cm. (1″, 2″, 3″, 7 1/4″). Fold on the score lines.
3. Cut your window from the front using your Framelit of your choice.
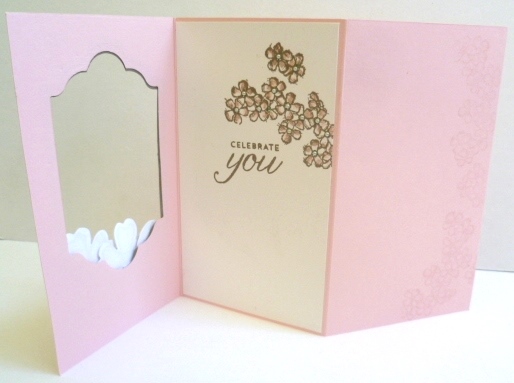
4. Add adhesive onto the small tab and adhere to the inside of your folded card at the back. (Just fold up the card first to work out the best place for your adhesive). I had the tab to attach to the back of the card so you can’t see it inside the front).
5. Cut a piece of Whisper White 11cm x 10.5cm. (4 1/4″ x 4 5/16″). Decorate this piece as you like. Adhere to the back of the card on the inside.
I hope these measurements make sense??? 🙂
Enjoy making one of these. What stamp sets can you make this with??
Have a good day,
Jenny
STACKS ON WITH SPRINKLES OF LIFE!
This was a a fun card I made a couple of weeks ago at our stamping weekend – and using ‘Sprinkles of Life’. I couldn’t wait to show you it.
Do you like lots of scoops on your ice-cream?? 🙂
How about some more!
Hehe!! The card lifts up. Look at all those colourful ice-cream scoops. I don’t really know what you call this type of fold – Fold out top card??? I found the idea for it on Pinterest and thought the ‘Sprinkles of Life’ set would be great for this.
It is very simple to make. Cut your sheet of card in half vertically and score in half and then on one side score in half again. Then fold on the score lines so a “v” shape is at the top – if that makes sense. I hope I have explained it clearly. Then you can decorate the card how you like. When assembling the card I didn’t really know how many “scoops” I would need and how many colours so I just kept adding to it. I layed them all out without sticking them down and rearranged them several times. I didn’t want to have 2 of the same colour when you fold it up. Once I had that sorted it gently slid them off the card and stamped around the edge with the “sprinkles” and then adhered each scoop on top of the icecream cone.
Of course we had to have the bling. I used Dazzling Diamonds with 2 way glue on each scoop. What a sparkly mess that was! The sentiments were stamped and then cut with the ‘Lots of Labels’ Framelits. I added a Dazzling Diamond label underneath each of the sentiment labels. Then finished it off with adhesive rhinestones.
You could try this type of card with lots of different images. See how you go.
Have a great day,
Jenny
BIRTHDAY BLOSSOMS TRI-FOLD CARD!
Here is one of the cards we made at our stamping weekend. I like the way this turned out. Andrea first made it and had CASED it from Pinterest. (Sorry I don’t know who the original creator was). Of course, we all really liked it and had to copy. 🙂
The base card is Pink Pirouette and the frame is Tip Top Taupe. To make the frame I used the ‘Lots of Labels’ Framelits using 2 framelits together. I used the smaller framelit that I used for the frame to cut a window in the front of the card. I stamped the flowers and leaves in Tip Top Taupe in scrap white card. The great thing is the flower matches the Pansy Punch – no cutting!!! You do have to cut the leaves out but that is OK. I went around the outlines on the flowers and leaves with the Markers (Pink Pirouette and Mint Macaron) and I coloured the centres in. I added some pearls for some glam. The small flowers were inked in Pink Pirouette and then stamped off before stamping on the base card in the bottom left corner.
Now open wide …..
The smaller flowers were stamped on a piece of Whisper White in Tip Top Taupe and coloured with the markers again. The greeting was stamped in Soft Suede. You can’t quite see but I added tiny pearls to all the centres.
Now open it out….
I inked up the small flowers again in Pink Pirouette and stamped them off on scrap paper. Then I stamped them on the next flap along the edge on the right side. I repeated this a few times of inking, stamping off and stamping on the card.
Do you want to know the dimensions??? It is basically a standard base card and score the card in 1/3rd’s. If that makes sense?? I did make this card a little taller though (15.4cm x 21cm). It is easy to make your own and just a little different to the standard card.
Thanks for visiting me today. Have a super wonderful day today 🙂
Jenny
HALF CIRCLE POP-UP!
Here is one of the first cards I will share from my Stamping Weekend. Each of us had a Make and Take to share. I chose this one. I completely CASED it, but that’s OK Right??? 🙂 I came across this cool Half Circle Pop Up Card by Julie Davison and loved the idea of it. The other girls liked it this weekend too. I will give you the link for it further down. Here is the card.
On this card I have used the ‘Watercolor Wings’ stamp set and ‘Tin of Cards’ set. I love this set for the sentiments even if you weren’t making the kit. The colours are Bermuda Bay and Pool Party. The fun part is when you open the card. Check it out.
Surprise!!! The butterfly pops up.
I love how the butterfly pops up. You can see how that works in the close-up in the photo below. You have a little strip of acetate across the circle. Love it!!
The Pool Party piece at the top of the card is embossed with the Fluttering Embossing Folder. I didn’t realise I had embossed this on the opposite side until I was putting the card together but I don’t think it matters. I still went with it. The little butterfly is from the ‘Butterfly Basics’ set.
If you would like to make this type of card yourself, then head over to Julie’s blog HERE and she has a video and the PDF instructions. It is such a WOW card – and it really is very simple to create.
Have fun making them. I can’t wait to try this card again. My mind is buzzing with all the different stamps you could try this with.
Come back soon. I have lots more projects to share.
Jenny


