cards, Christmas, Classes, Stampin' Up!

CHRISTMAS IN JULY WITH STAMPIN’ UP! FROSTED FOREST!

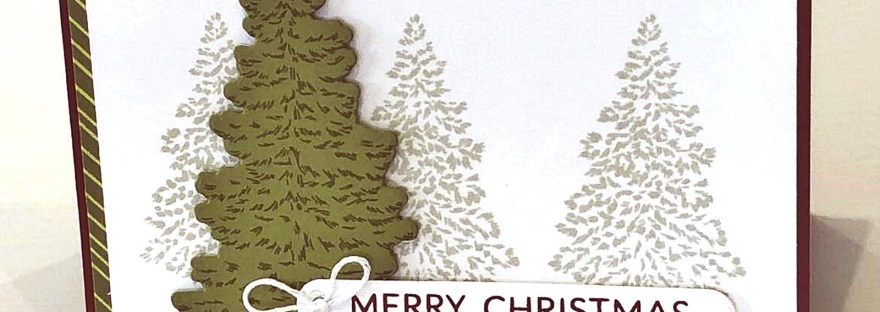
This card is one of the cards we made at our Christmas in July event last weekend. This one uses the Frosted Forest Bundle.

While this bundle does have the masks this card just uses the stamps and dies.

Firstly stamping 3 trees on the white card mat. Basic Beige has a subtle green tinge to it making it work really well with the colour tones on this card. Just a tip: Stamp the centre tree first and then stamp the other 2 either side. That helps them to be more centred.

The larger tree was stamped on Old Olive card in Old Olive ink and then diecut. The sentiment is from the Greetings of the Season stamp set and diecut with one of the dies from the die set.

Adding a little strip of patterned paper adds an extra element to a very simple card. The paper is from the Flowering Zinnias Paper pack.

This is the Greetings of the Season Bundle. There are a variety of greetings for the festive sesason you can put together or use just on there own. They are in 2 different font styles. I particularly like the die shapes. You can use them for any occasion. And they have a stitched edge!! Don’t we like that.

This one is the Golden Greenery Bundle. With traditional images of greenery and bells and berries. There are a number of co-ordinating dies for these too.

These are available as Online Exclusives. They can be ordered online or ordered directly in my store. HERE

Happy Crafting,

Jenny
cards, Catalogues, Christmas, Classes

CHRISTMAS IN JULY GOODIE BAGS~

Last weekend was my Christmas in July event. Lots of festive fun and crafting.

I will share the projects over the time but in this post I thought I would share the Goodie Bags everyone received.

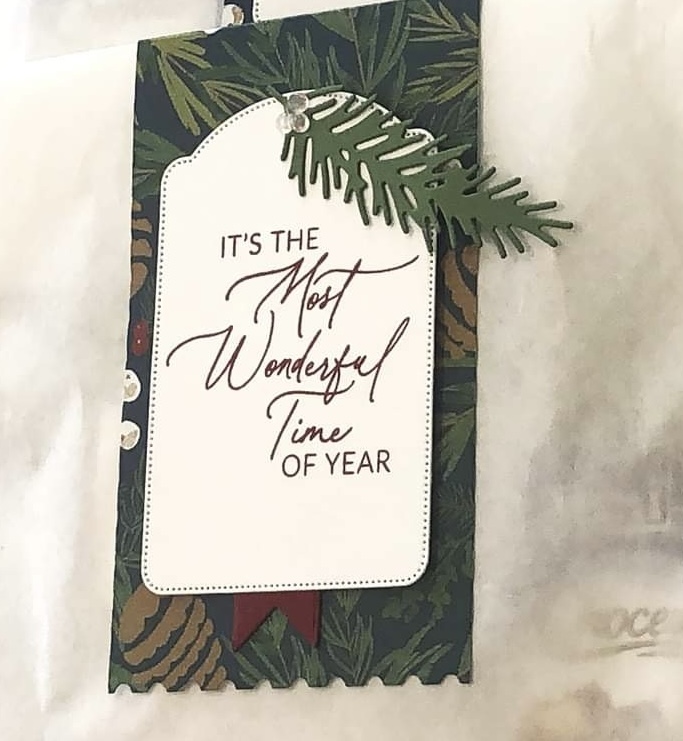
They were just simple white Lunch Sack/Paper type bags. They had some of the Graceful Greenery Vellum and Berries and Pearls Adhesives. Along with some Christmas goodies. And chocolate. Must have chocolate. 🙂

For the bags I diecut the paper using the Perennial Postage Dies. It was a wide enough strip that was to have the bottom edge over the paper and the rest of the strip went through the inside of the die to lie on top. If that makes sense. Just so the bottom edge would be cut. The paper was retired paper from last year.

The label was diecut from the Greetings of the Seaon dies and the words were from the stamp set. To finish I diecut a green leaf spray with the Golden Greenery Dies and a Pearl to finish.

Stop back again and I will share the projects.

Happy Crafting,

Jenny

In Australia and need supplies? I would love to serve you. You can head over to my online store -> HERE. Please use the Host Code: HS2PWG6Q

Or contact me directly.

cards, Catalogues, Stampin' Up!, Techniques, Tutorials, Videos

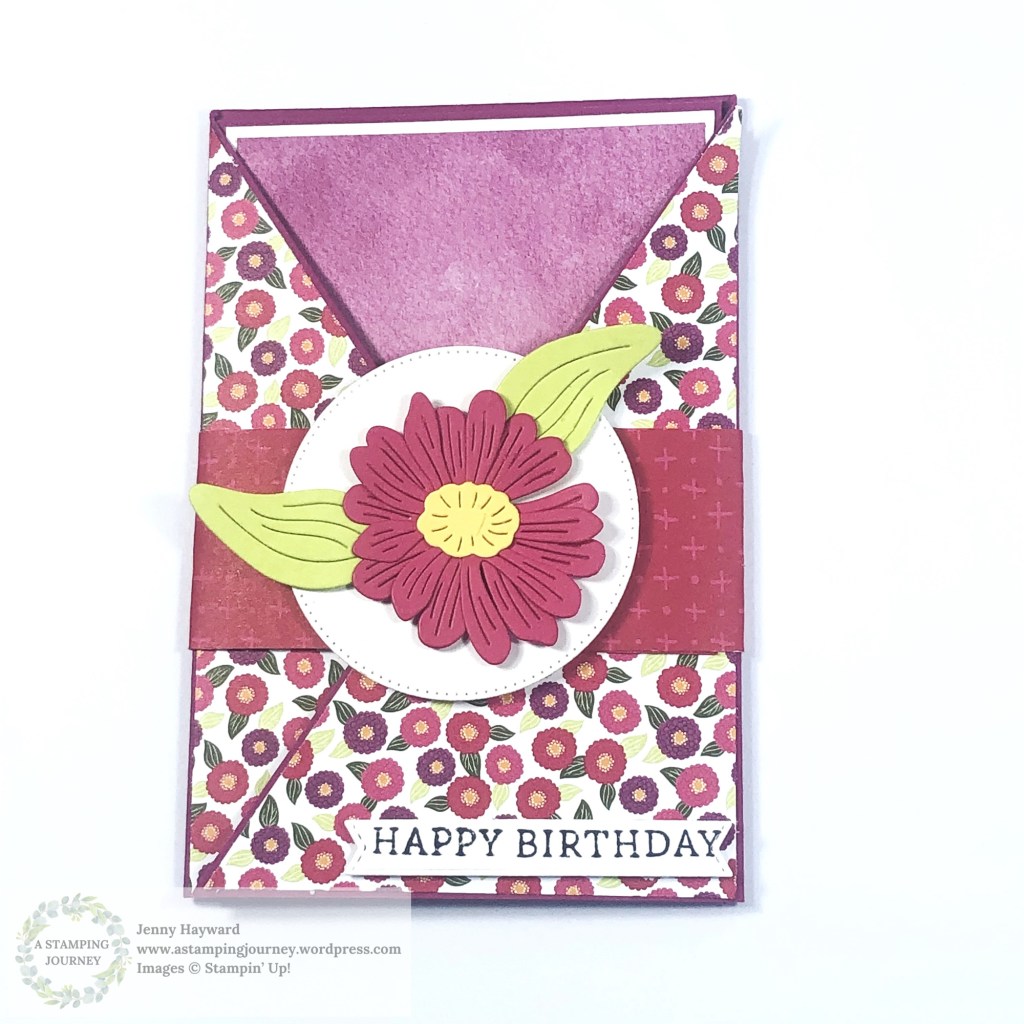
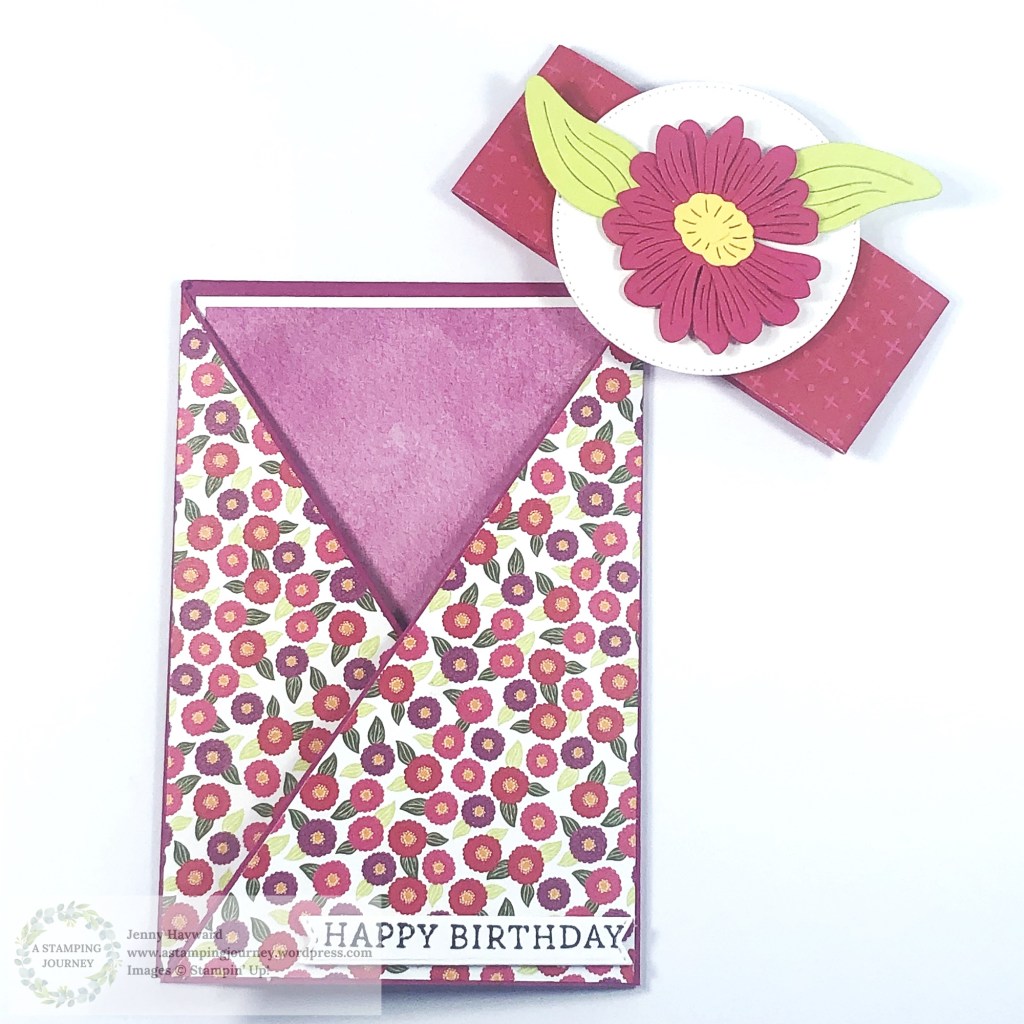
DIAGONAL GATEFOLD CARD WITH A WRAPPER – PLUS VIDEO!

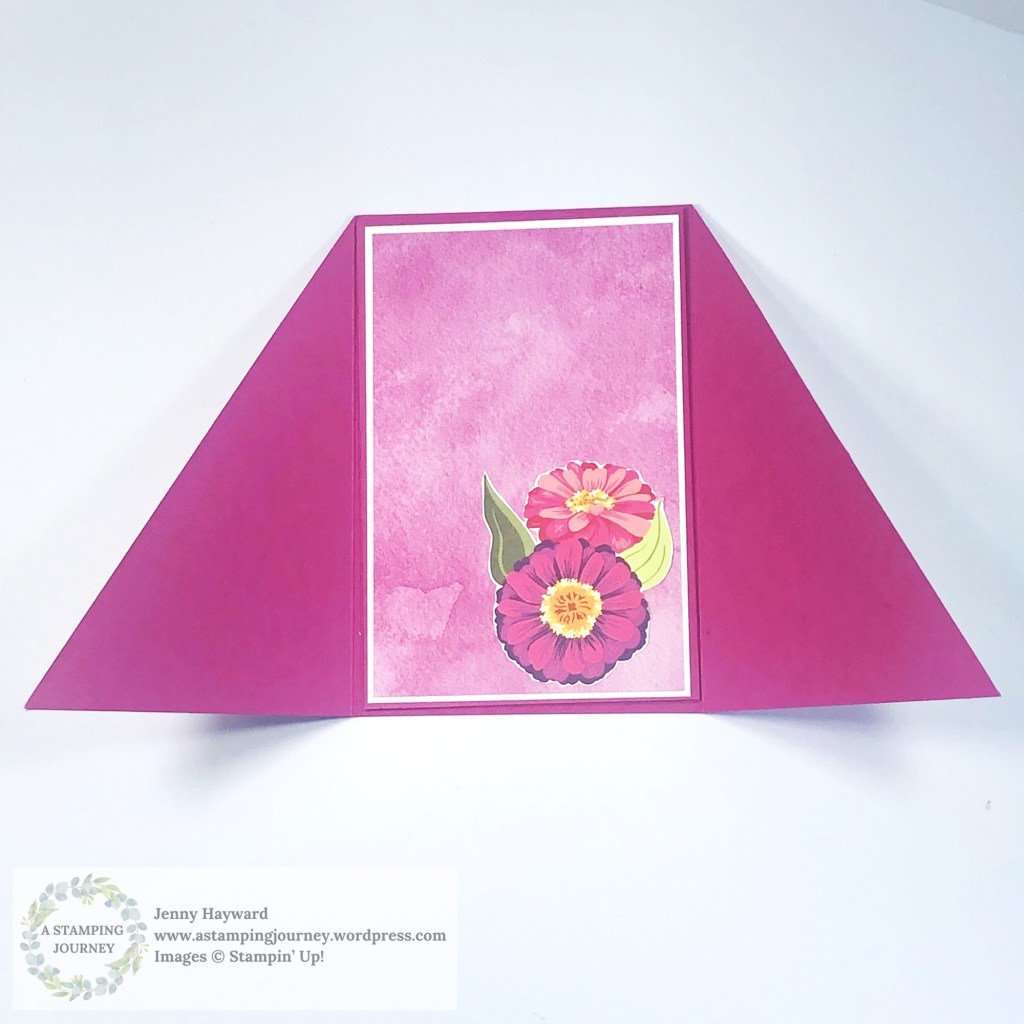
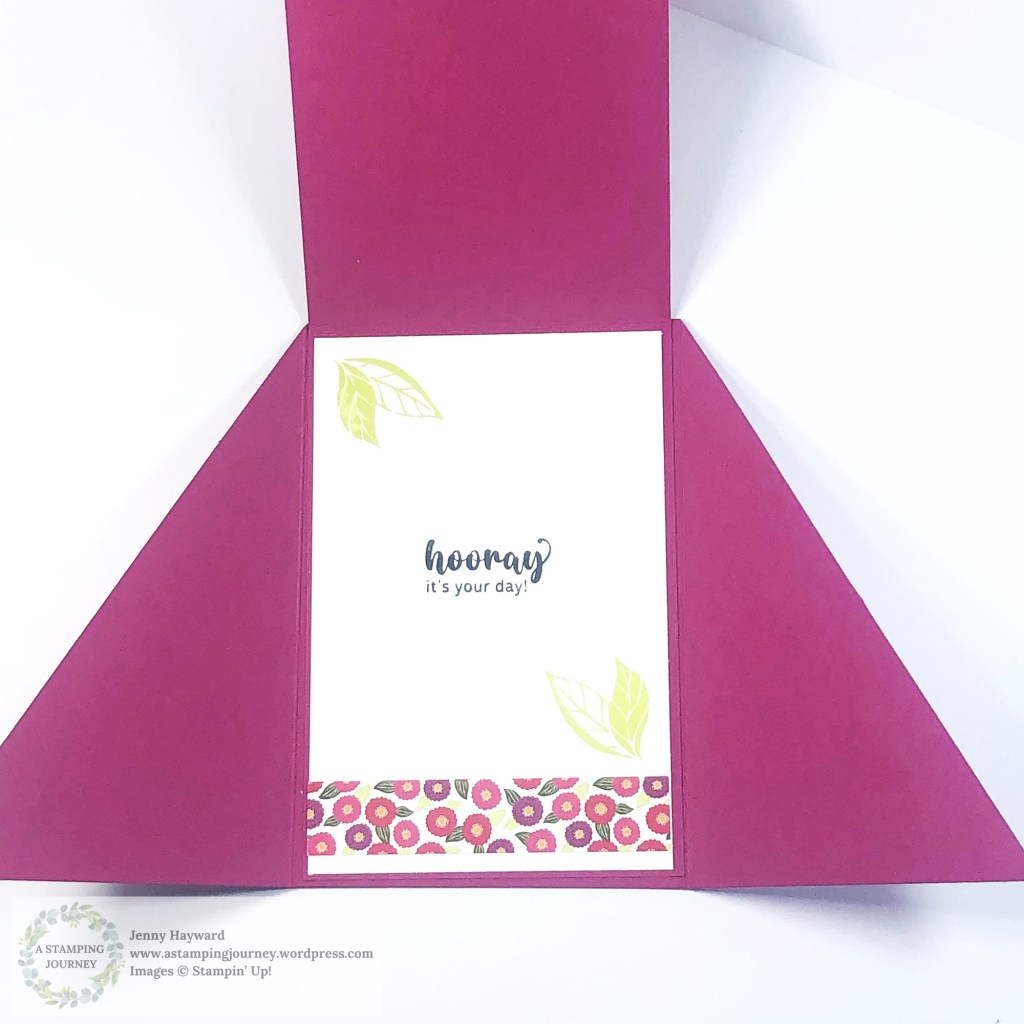
Have you made a Diagonal Gatefold Card before?

Here is the card.

You can make a wrapper to keep it closed up – or you can leave it off.

But then you open it…

Here’s the video to follow along with.

The written Tutorial will be sent out in my newsletter next week. Have you subscribed to my newsletter yet? I send out a Free Project Tutorial each week to keep you inspired. You can find the link for that in the right hand column. And there is a bonus Tutorial when you first subscribe.

Happy Crafting,

Jenny
Need some crafty supplies and you are in Australia? Head to my Online Store -> HERE.

Or contact me directly and I can help you out.

Don’t forget it’s Bonus Days this month.

Thanks for shopping with me.

cards, Catalogues, Classes

FUN WITH KITS – CARD BUFFET!

Come along for this easy, fun creating in class this week with a KIT CARD BUFFET.

Classes held in my studio in East Corrimal (Wollongong).

Create 4 cards in total (plus a bonus tag). You choose 1-2 each from a selection of kits.

COST: $25

WHEN: Friday 5th July 10am and 7pm

Let me know by Thursday.

I can’t wait to share them with you,

Jenny

cards, Cards by Mail, Catalogues, Christmas, Classes, Stampin' Up!

Celebrate Christmas in July!

Celebrate Festive fun at this Christmas in July event.

If you are local come and join in or if you can’t make it then Grab the Class By Mail.

Join in the fun with Christmas Crafting, treat yourself to a Hot Chocolate Bar, and enjoy a festive time with crafty friends.

WHEN: Saturday 27th July 2pm – 5pm

WHERE: The Studio, East Corrimal

COST: $38 (Get a discount for Early Bird Registration. See below)

Cost includes all materials to make 3 projects, Treats and Giveaways.

Plus a Goodie bag of new Christmas products including:

  • 6- 6”x6” Graceful Greenery Vellum and
  • 1 pack of Adhesive Cherry Cobbler and Pearl Berries.

RSVP: Early Bird Registration – Friday 12th July. Save $3 (=$35)

All registrations and payment by Thursday 18th July.

*No refunds after Thursday 18th July but you will receive the Class Pack and Goodie bag sent out to you. (stamped images not included).

CAN’T MAKE IT?

CHRISTMAS IN JULY – BY MAIL.

Can’t attend in person. Receive the Christmas in July By Mail.

Includes Card Kits (no stamped images), Goodie Bag and alternative treats.

COST: $38 (Receive a $3 discount booking by 12th July).

Additional Cost for postage of $3.80

I look forward to spreading some early Christmas magic with you!

Jenny

cards, Catalogues

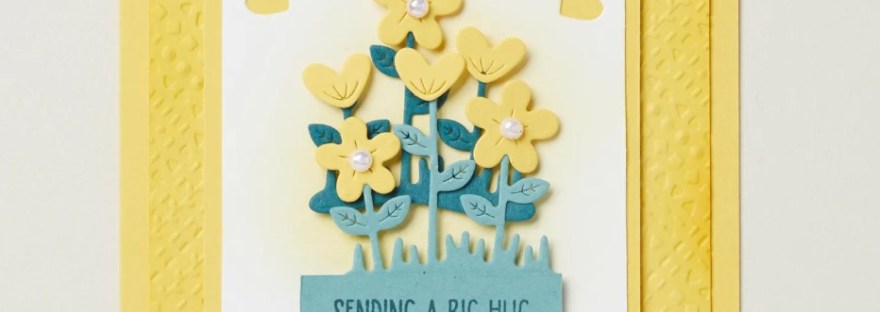
SWEET SUNDAY WITH HEARTS AND HUGS!

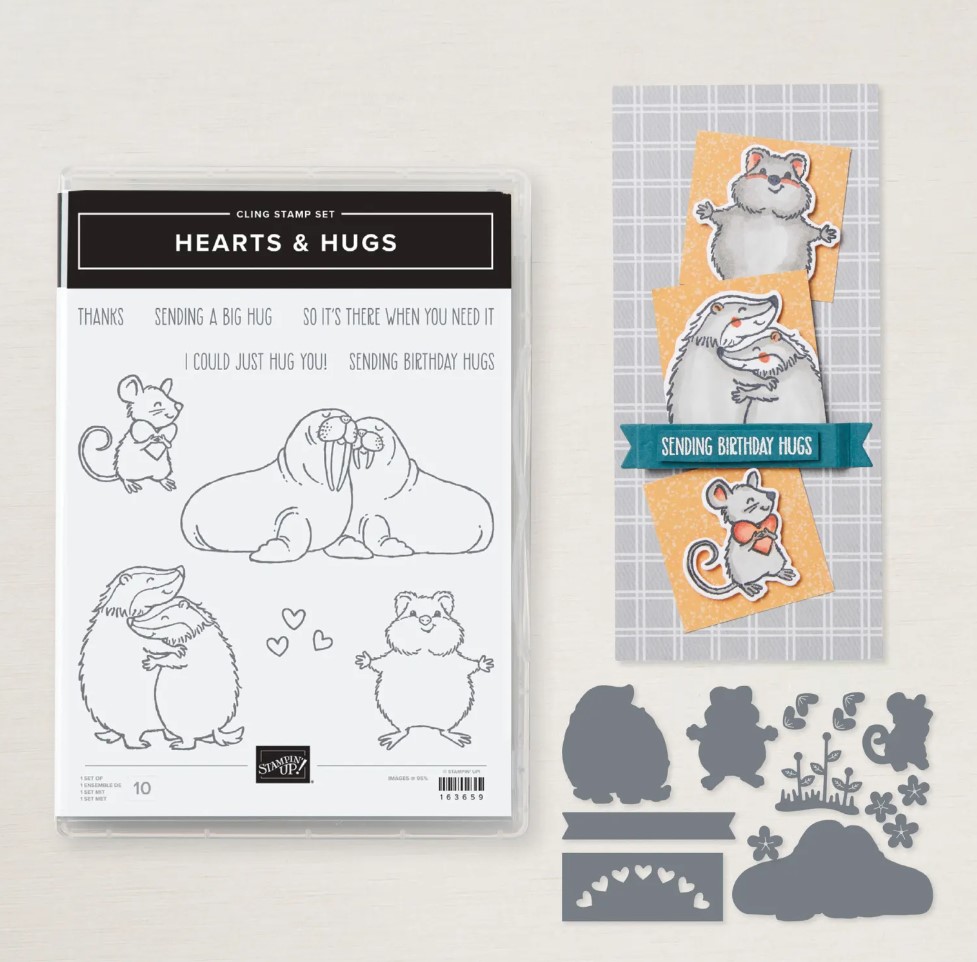
You might have seen the cute Hearts and Hugs Bundle around? It’s a sweet one. So today – let’s check it out for Sweet Sunday.

This one is a bright, cheery, heart flower hug for you. (That’s a mouthful isn’t it!).

This card is created by Stampin’ Up! Artists but there are some features I just love – and it might inspire you with some ideas for your next project.

  • Use a mini heart punch to create flowers. Add some additional flowers and leaves too.
  • On the white card sponge a little ink to create a background.
  • Instead of just a card mat to lay your feature piece on, cut strips of card and emboss them before adding the pieces evenly on your card base. And give those edges a little sponge to help highlight them.

Are there ideas you could use?

This is the Hearts and Hugs Bundle. (It is reduced this month too which is a bonus savings).

You have the cute critters too.

You can see it more online -> HERE.

If you would like to order it or any other supplies and you are in Australia head to that link above. Please use the Host Code: 7M7V93KG

OR you can contact me directly.

Happy Crafting,

Jenny
cards, Stampin' Up!, Techniques

SPOTLIGHTING TECHNIQUE WITH THE LAYERS OF BEAUTY!

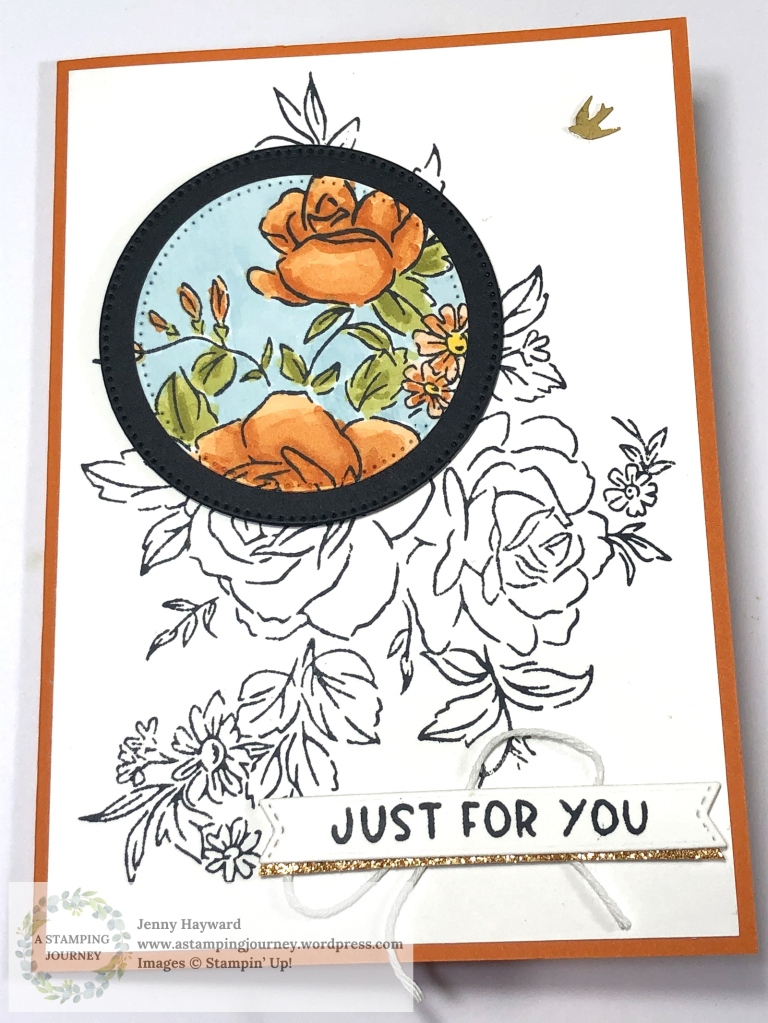
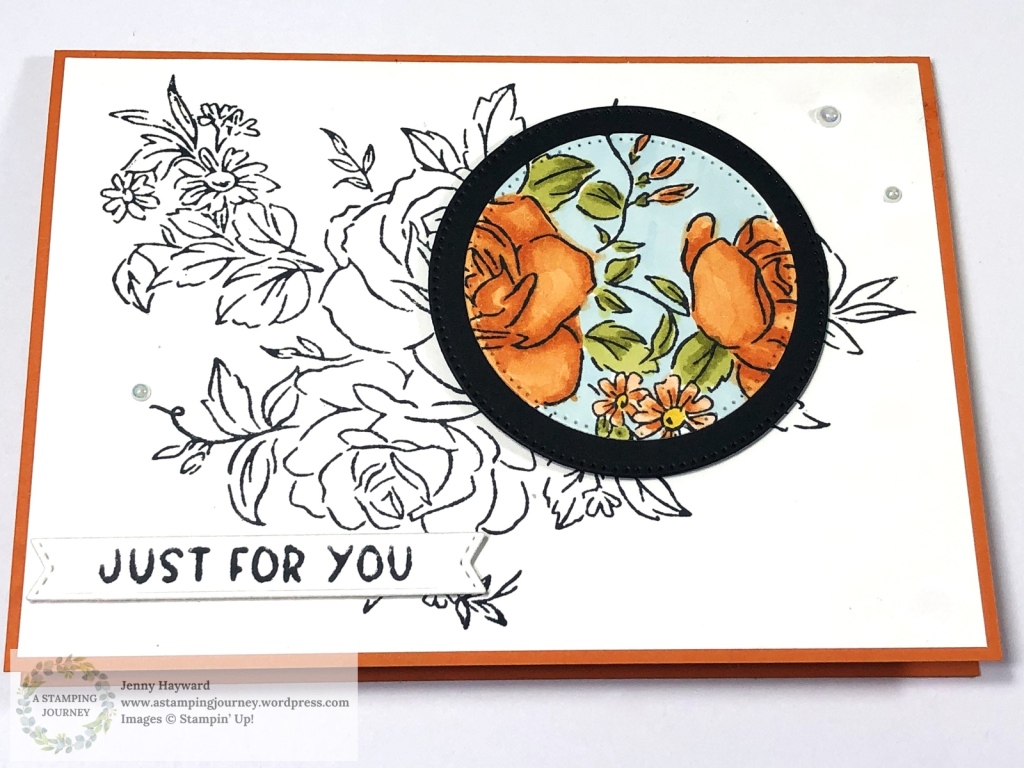
For one of our cards in our “Beauty Class” last week we played with the Spotlighting technique with the Layers of Beauty.

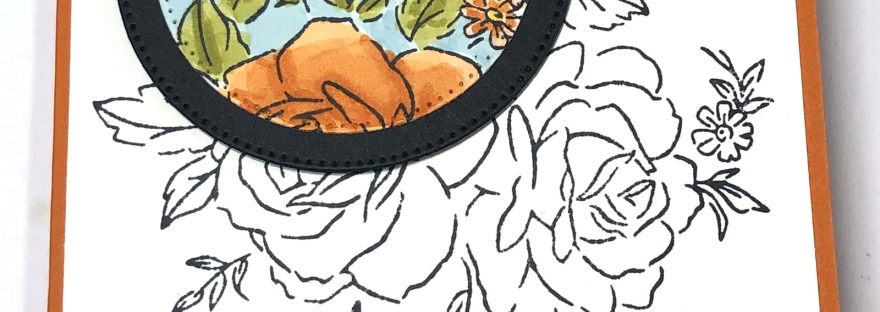
To create the Spotlighting Technique, firstly stamp the large flower and diecut a circle out in an area on the flower. The Stylish Shapes dies were used for that. Instead of using the masks to colour the flowers on the diecut circle we coloured them with the Stampin’ Blends.

Colouring the background area with the Balmy Blue Stampin’ Blends helps to make the flowers POP. Adding a black circle mat behind the coloured circle part helps to make it POP too.

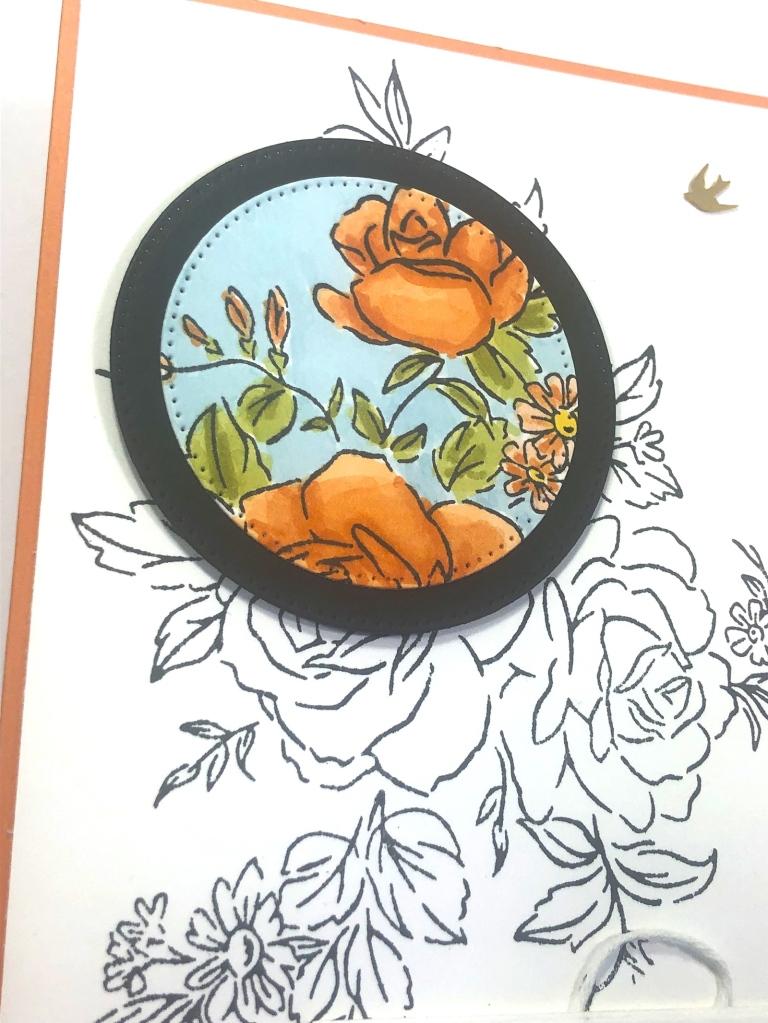
During the class while others were working on their projects I created a different version of the card by turning the card the other way.

This one has added sparkle too with the In Color Glimmer Specialty Paper.

Here is a close-up of the Spotlight area.

What do you think? Maybe try the Spotlighting Technique yourself.

The Layers of Beauty is a lovely bundle. For this one I have only used the Stamps which work so well in themselves.

You can see the full bundle in my store -> HERE. BONUS – They are 10% off this month which is awesome!

If you are in Australia you can shop for them directly there if you would like to add them to your crafty supplies. OR Contact me and I can help you out.

Happy Crafting,

Jenny

cards, Catalogues, Stampin' Up!

WEDNESDAY’S WOW! 162 – USE YOUR CATALOGUE FOR INSPIRATION ~

Wednesday’s WOW! #162 – Use Your Catalogue for Inspiration.

Do you struggle with creating sometimes?

You can find so much inspiration with the projects in the catalogue.

  • Copy them as they are.
  • Give them a twist in direction.
  • Change the colours.
  • Use a different stamp set or other products.

I was looking for ideas for the Unbounded Beauty Suite and came across this card on page 53 of the catalogue. Then changed it a little for my card.

I created a larger frame and added a sparkly leaf spray with the In Color Glimmer Specialty Paper. I used a piece of the Unbounded Beauty Designer Series Paper for the mat behind the white card. The sentiment is from the Simply Said Stamp set.

So next time you are stuck with inspiration, pull out your catalogue.

Don’t have a catalogue?

You can view the catalogue online now -> HERE.

OR contact me and I can send you a paper copy out. (Australian residents only).

Happy Crafting,

Jenny
cards, Catalogues, Classes, Masculine, Stampin' Up!

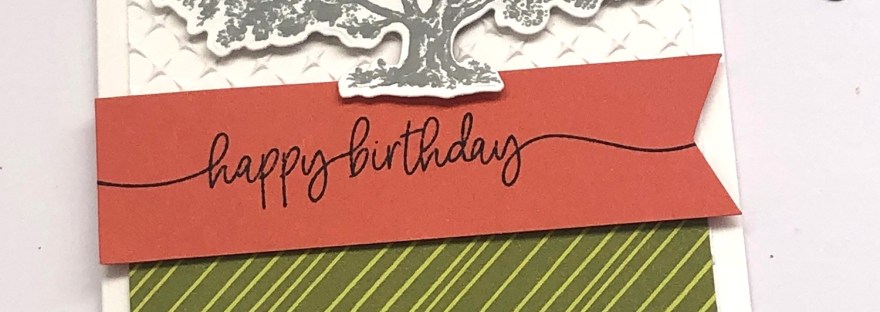
A SIMPLE LOVELIEST TREE BIRTHDAY CARD!

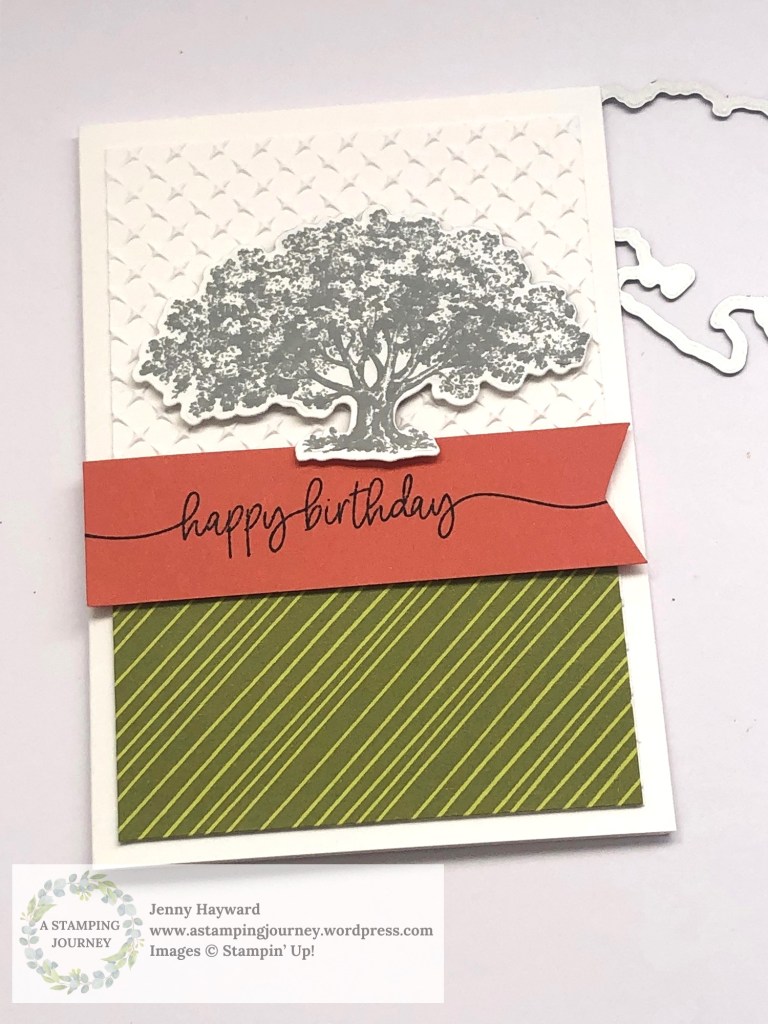
I have been playing with the Loveliest Tree Bundle recently. This is one of the cards we made at our Loveliest Tree class last month.

I went simple on this card. Embossing the white card with the Metal Place Embossing Folder gives it added texture.

The paper is from the Flowering Zinnias Designer Series Paper.

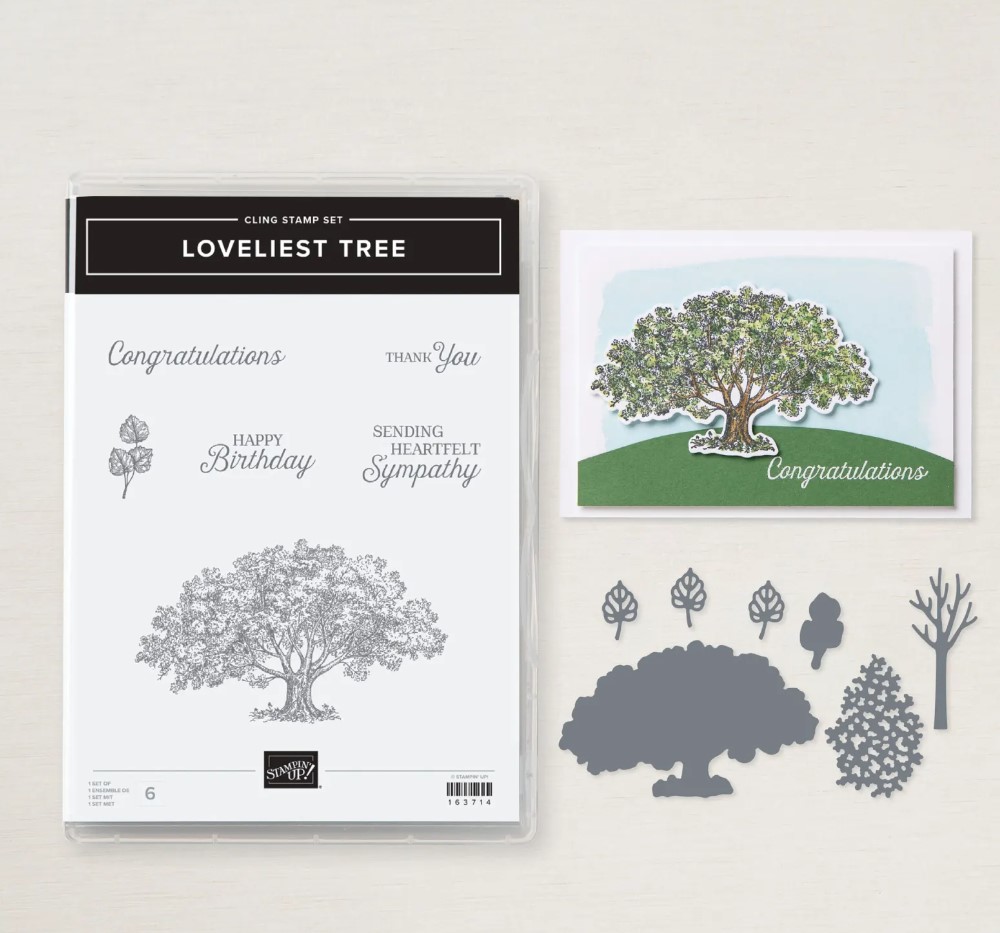
This Loveliest Tree stamp set is very similar to the Lovely as a Tree Stamp set from years back. But this one has dies! Which is so good.

This is the Loveliest Tree Bundle.

You can see more of it in my store -> HERE.

You can order at the above link (if you are in Australia). Please use the Host Code: 7M7V93KG

Or you can contact me directly and I can help you out.

Happy Crafting,

Jenny
cards, Catalogues, Stampin' Up!

STAMPIN’ UP! LAYERS OF BEAUTY ~

I have been playing with the Layers of Beauty Bundle – the stamps, Dies and Masks. I have seen some beautiful creations with these.

I’m still not sure of this card I created. I thought with this one I would stamp the outline in Basic Gray but looking at it afterwards you can see the lines and I’m not sure I like that. I added the colour through the masks. Perhaps I went a little heavy handed with the ink colour blending.

Still a work in progress. But here’s the card.

I added the strips of the Unbounded Beauty Designer Series Paper for something a little different.

The Masks are easy to use I will say that. There are 5 masks all numbered. You use them from 1-5 to build up your layers. I would suggest starting off with the light colours first and getting darker to 3. 1-3 are the flowers. Then the 4 and 5 are for the leaves. So start with the lighter colour for 4 and darker with 5 for the highlights on the leaves.

I think I will head back to the craft room and work on these a little more. They are fun to work with.

These are the Layers of Beauty Bundle. Great Bundle to get all 3 of the products together – and to save. You can get them separately too.

You can see this Bundle in store -> HERE. I see that it is low inventory so you may want to be quick with this one.

If you would like to shop for any products head to that link above to order

OR

Contact me directly and I would love to help you out. (Australian residents only sorry).

I do hope you get to play with them.

Happy Crafting,

Jenny