Did you know you can create your own textured background with dies?
For this card I diecut lots of white Berries and Holly leaves from the Reindeer Fun Dies and adhered these together. Then I added them to a white card mat. It adds a subtle texture.
Here’s how to Create this effect:
Diecut lots of Holly Leaves and Berries from the dies on white card.
Adhere the Holly and Berries together.
Lay all the Holly/Berry pieces out on the white card mat to position them how you like. Have some overhanging the edges.
Adhere them down to the card mat. Turn over the card and trim off the overhanging pieces.
Then complete the card as you like.
I added a strip of Reindeer Days Paper and a strip of the Green Glimmer Paper along with the bells coloured with Stampin’ Blends. I finished it off with a bow from the Real Red and Gold Ribbon.
Try this idea with some dies you have. It takes a little diecutting and sticking together but it is a fun way to use them.
Hope your Christmas Creating is going along well.
Jenny
If you need some crafty supplies and you are in Australia you can stop by my store -> HERE. Or Contact me directly. I would love to help you out.
It’s Week 11 for our 12 Weeks of Christmas Series. The time has flown by. Here we are nearly at our last week.
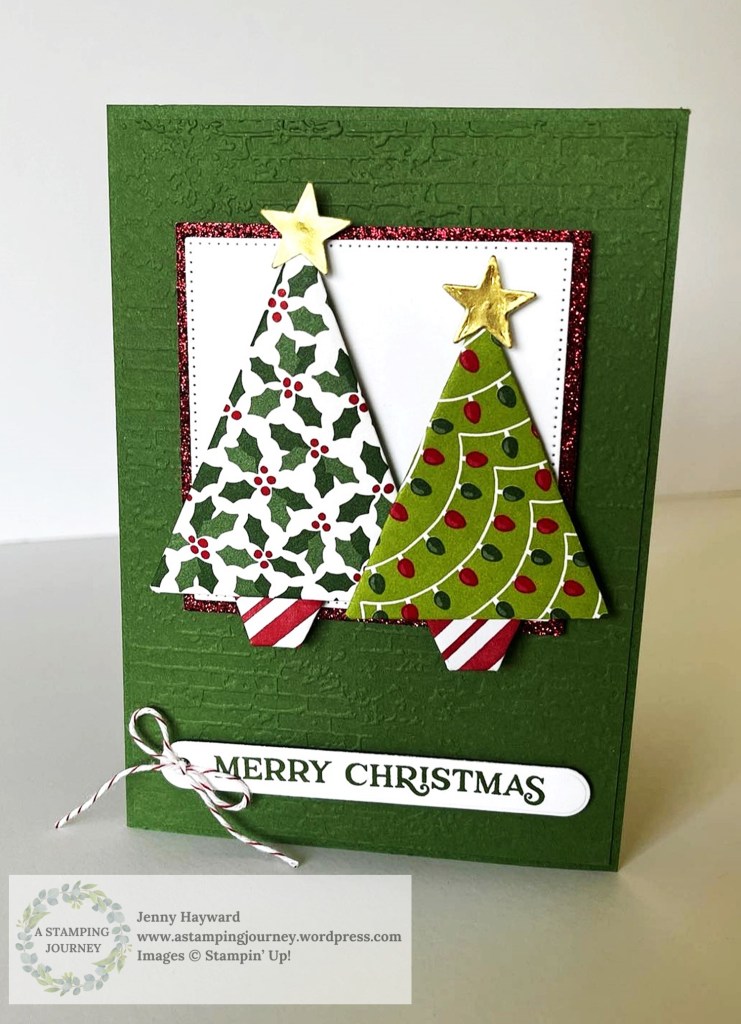
Our project today is using some of those scraps of Christmas Paper you have. I’m going to show you how to make Paper Folded Trees. They can be added to a card or to a tag.
They are very easy to do and you can create them in any size. Just be sure it is a square piece of paper. You can fold little bases for them too.
Check the video to see how to fold them.
Have fun making them.
If you need any products and you are in Australia. Do stop by my store-> HERE or Contact me directly. I would love to help you out.
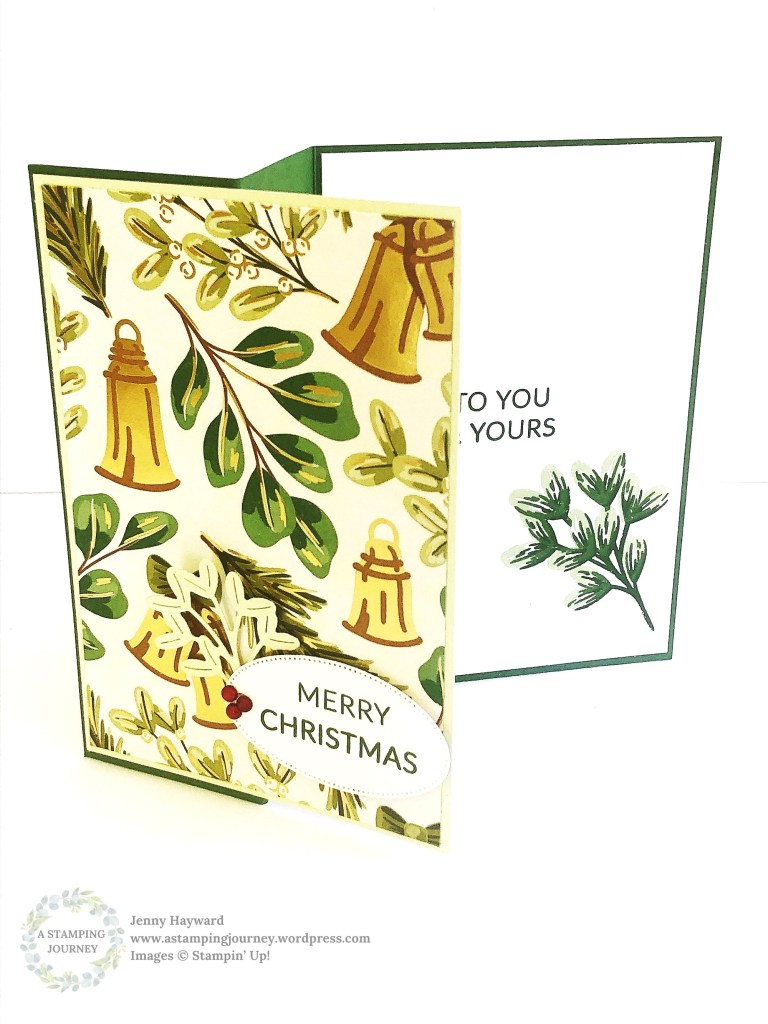
With just a simple scoring on the front of the card and folding it back you create a Z-Fold Card. Then instead of adding your card mat and paper to the front of a card you can adhere it just to the left hand side panel.
The gorgeous paper is the Season of Green and Gold Specialty Paper. I have used so much of this beautiful paper already. Maybe even on to my second pack … The Paper is available as an Online Exclusives online and can sometimes be missed. You can check my store.
The stamps are the Golden Greenery stamps and dies also available online. I love how these ones work and I think you could use these leaf images for any occasion card. That would work. The sentiments are from the Greetings of the Season Bundle.
This is the paper if you haven’t noticed it. You can see it more -> HERE.
Try this idea to mix up your crafting. It’s an easy variation to try.
Happy Crafting,
Jenny
Need some crafty supplies and you are in Australia?
I can help you out. Head to my store -> HERE Please use the Host Code: 7BBQ9BKK
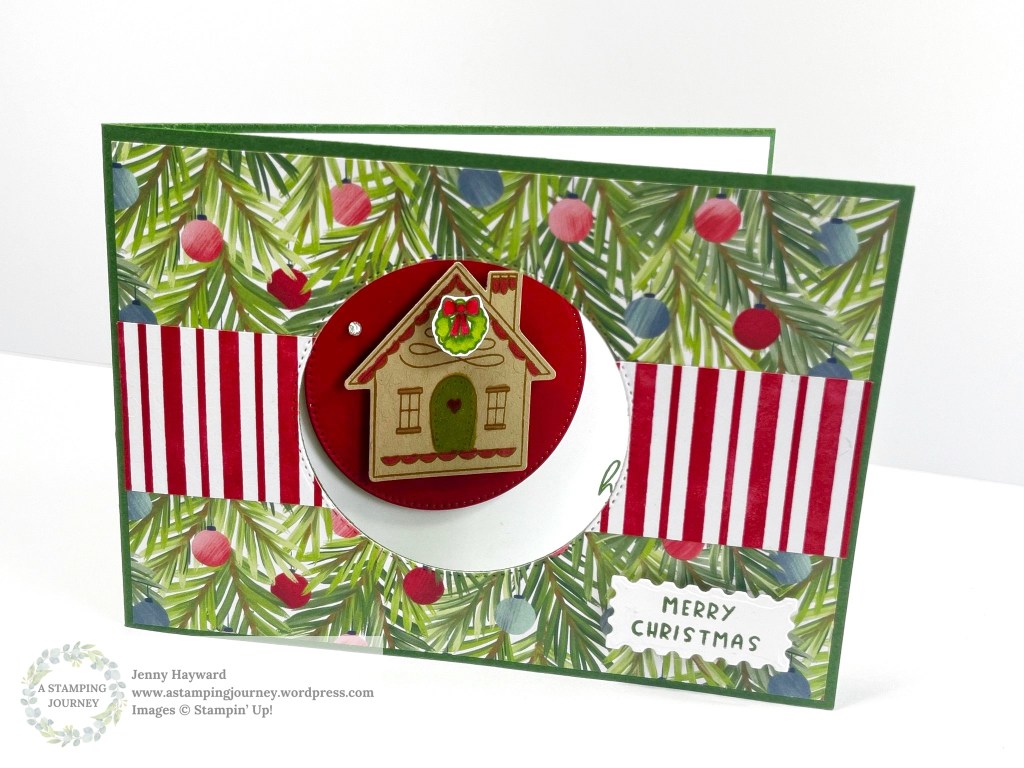
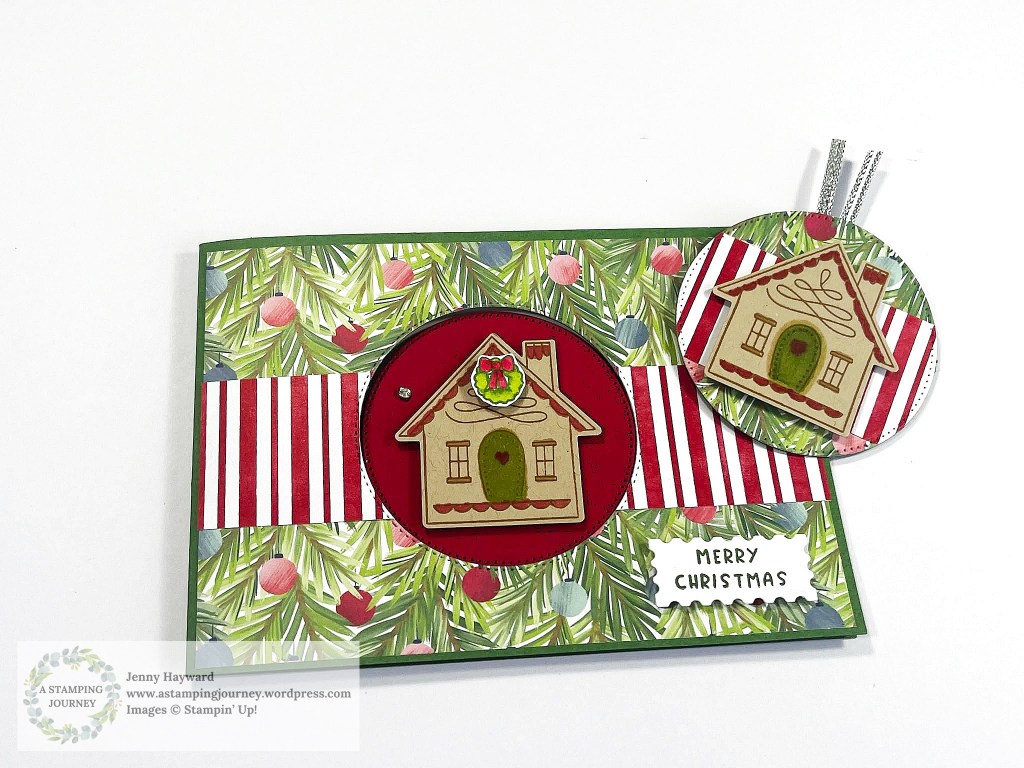
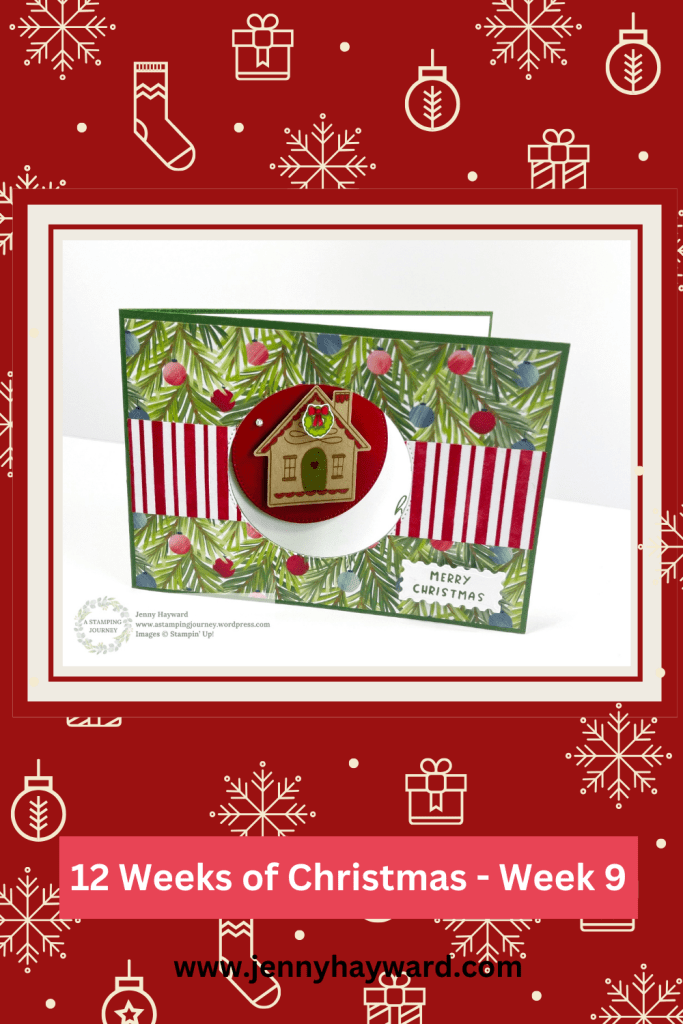
Today’s project is a Window card and it’s using the cute Humble Home Stamps and Punch. I have just recently bought this bundle so it was fun to play with.
This is the card I created. I have used the ‘A Little Bit Festive’ Specialty Designer Series Paper.
This is the inside of the card.
Don’t forget the Mini Tag you can create with the Circle cut out.
Follow along with the video below (or you can find it on my Youtube). The Full Tutorial with the measurements and directions will be sent out in next week’s Newsletter. Have you subscribed Yet? Find the link in the right hand column on my blog.
If you have missed any of the past 12 Weeks of Christmas Projects be sure to check back on my blog. Click on the Tags for the name and it will come up with the posts. OR head to my Youtube and find them there.
Happy Christmas Creating,
Jenny
PIN It Now to come back to later.
Need any products for your crafting and you are in Australia? You can head to my store -> HERE. OR contact me directly.
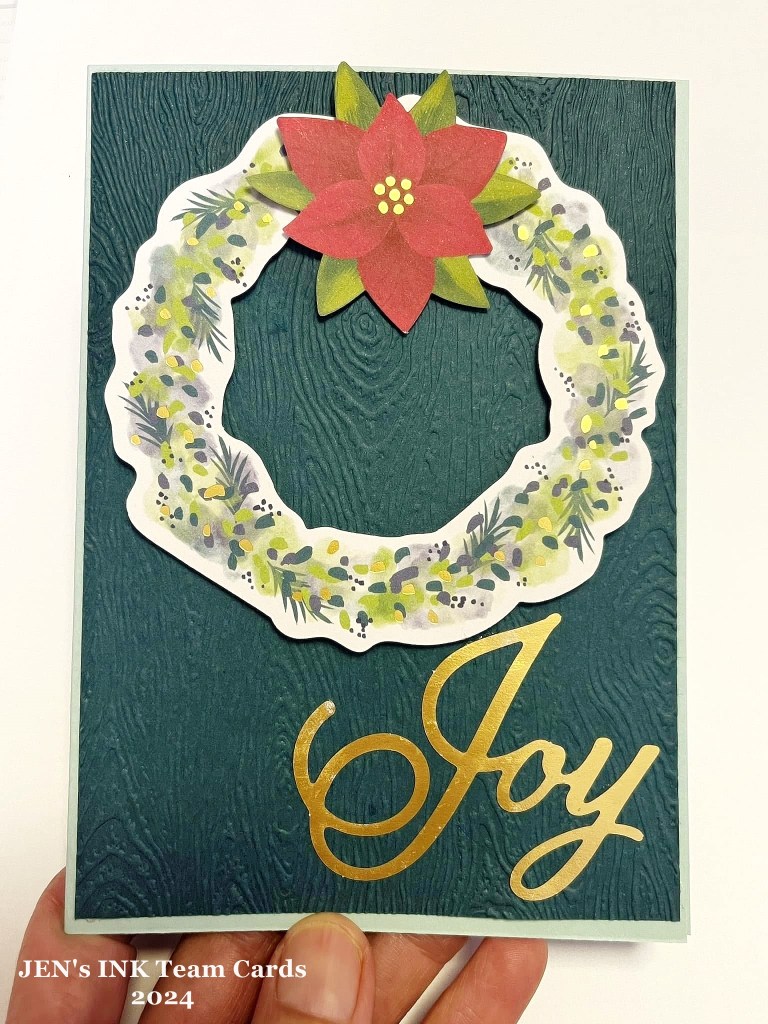
We had our JEN’s INK Team Christmas Get Together last weekend. It was a great time to celebrate my lovely team, to chat, to dwell on the new Mini Catalogue coming and of course to create. It was a Mystery Card.
I gave everyone an envelope with some pieces from the ‘A Little Bit Festive Specialty Paper Pack’. This pack has 3 sheets of 12×12 paper, a 12×12 frame/image sheet. and some sheets with different elements in them.
The envelope included a different type of wreath and other pieces. They could also use co-ordinating card I had with any other stamps or embellishements. As well as the Joyful Sayings Ephemera Pack. They didn’t have to use all their pieces.
These are the cards created. Aren’t they great??
And I was so busy chatting and sharing with them that I forgot to take a photo of them all having fun. At least you get to see all their lovely creations that I snapped a photo of just before they left.
These ladies are so great. I appreciate each one of them and love that we can create together. If you want to know more about my JEN’s INK team and to join in other activities next year do ask me. You can also click on the page on my blog titled JOIN NOW.
Stampin’ Up! is not just selling the products, it’s having fun together crafting with people that “get it”. I’m sure there may not be many in your household or among your friends that “get” what you do. 😉 And it’s great to glean over the catalogue with others. Always an inspiration too to share with others. Do come and join in the fun.
Have a great day,
Jenny
Just some of my great JEN’s INKer’s from Onstage this year.
Sunday Suites today with the absolutely gorgeous Season of Elegance Suite Collection.
This suite oozes elegance. From textured paper and gold accents to stamp and die-cut images and sentiments. This is a large Suite Collection with all the elements beautifully coordinating creating artistic outdoor scenes, warm Christmas wishes with elegant greetings and labels, and sophisticated details through foiling and satin textures. Did I say gorgeous???
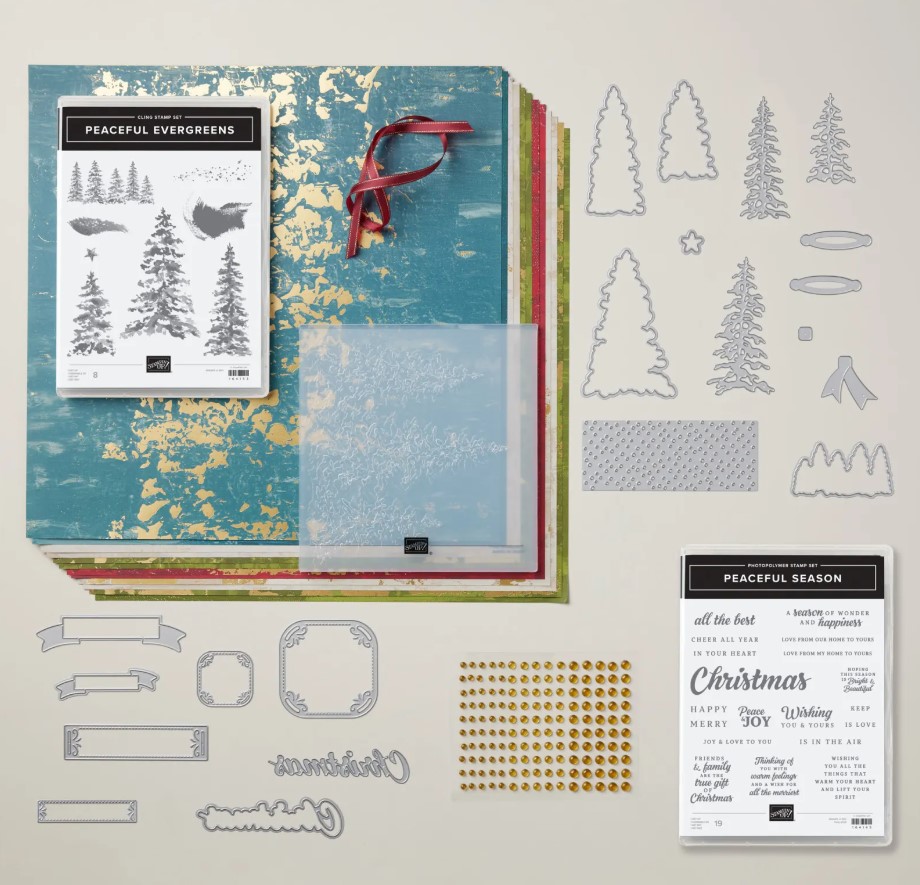
This is what the full Suite Collection includes.
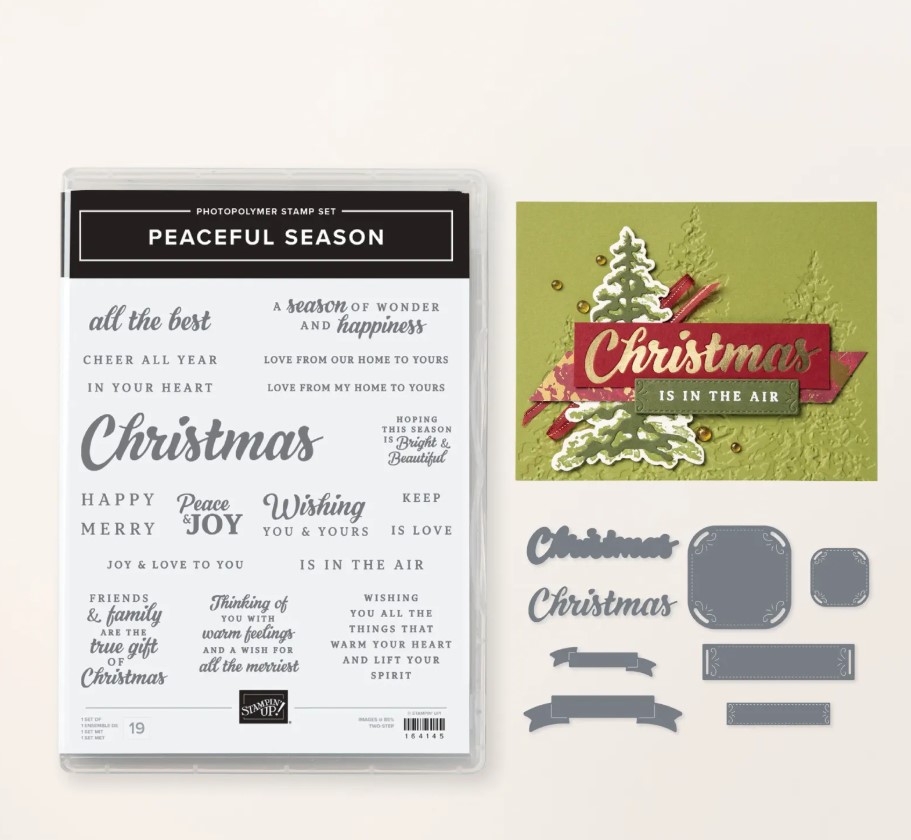
Peaceful Season Bundle
Peaceful Evergreens Bundle
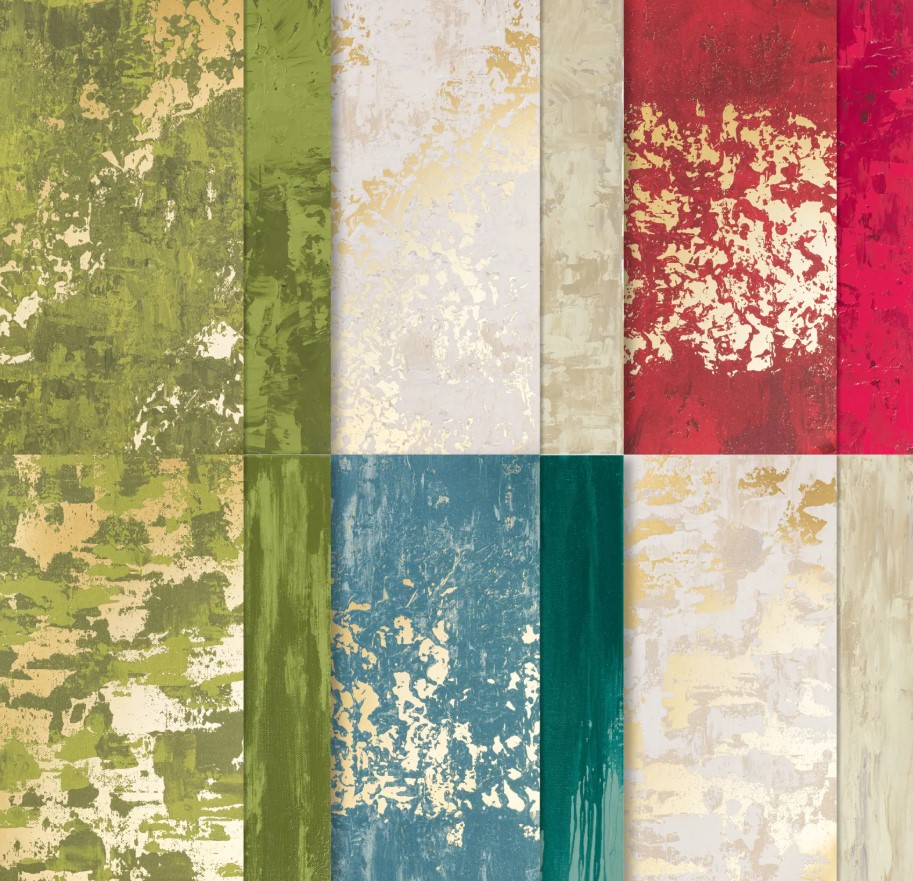
Season of Elegance 12″x12″ Specialty Designer Series Paper
The Peaceful Evergreens Bundle. In the Die set there are a number of tree shaped dies. Some diecut the stamped trees with other dies giving more detailed diecut trees. There is a also a dotty diecut shape to add a “snowy” effect on your projects. And notice the funny oval and tail shape dies? They create little bows to add which is fun.
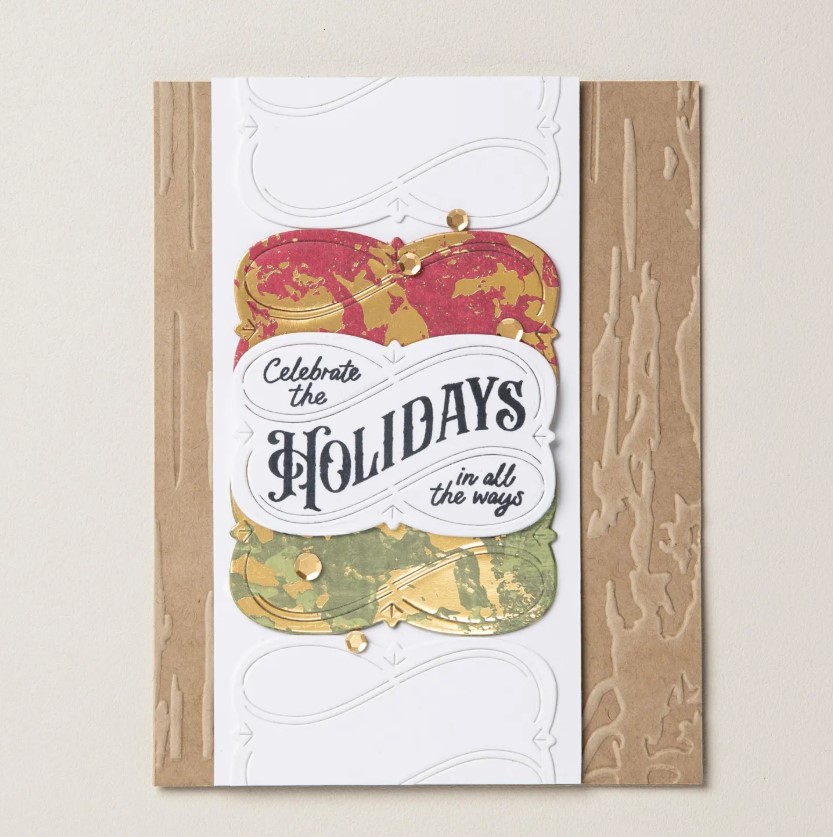
The Peaceful Seasons Bundle. The stamp set contains numerous sentiments. Some you can combine together or use them on their own. There is the option to stamp the “Christmas”and Diecut it and layered. Or you can diecut the “Christmas” word and layer together. There is also some elegant label and banner shape dies.
The Season of Elegance Specialty Designer Series Paper. Featuring beautiful gold foil along with textured backgrounds in neutral and Christmas colours, this paper was hand painted to give your projects an artistic look, great for the Christmas season and other special occasions.
The colours in this paper are Basic Beige, Cherry Cobbler, Crumb Cake, gold, Gray Granite, Lost Lagoon, Mossy Meadow, Old Olive, Pretty Peacock, Real Red.
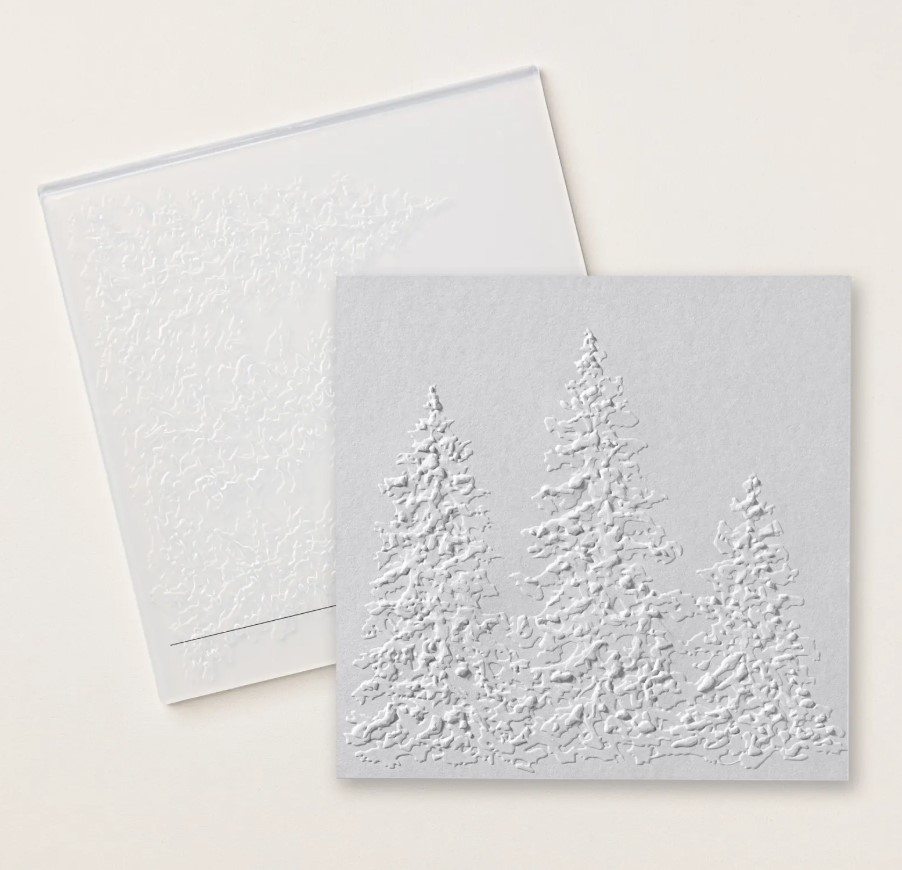
The Painted Trees Embossing Folder adds such detailed texture to your projects. The embossed card created with this folder can be used as a background look or as a statement in itself on a card front. It is beautiful.
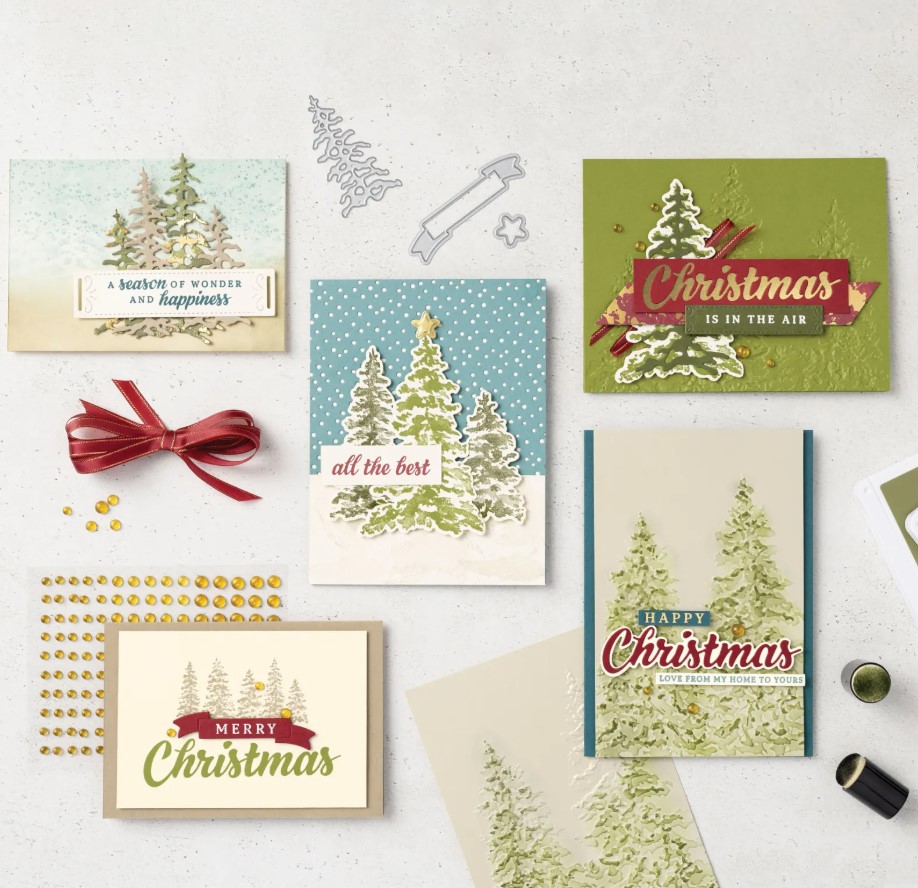
What about some projects with this. These are created by Stampin’ Up! artists.
Just a tip with using the Embossing Folder. When you have embossed your card. Try daubering on some ink over the raised trees to give the trees some coloured definition.
The “square” shaped diecuts can be layered together to add directly to the front of the card.
Or layer the other elongated shaped diecuts.
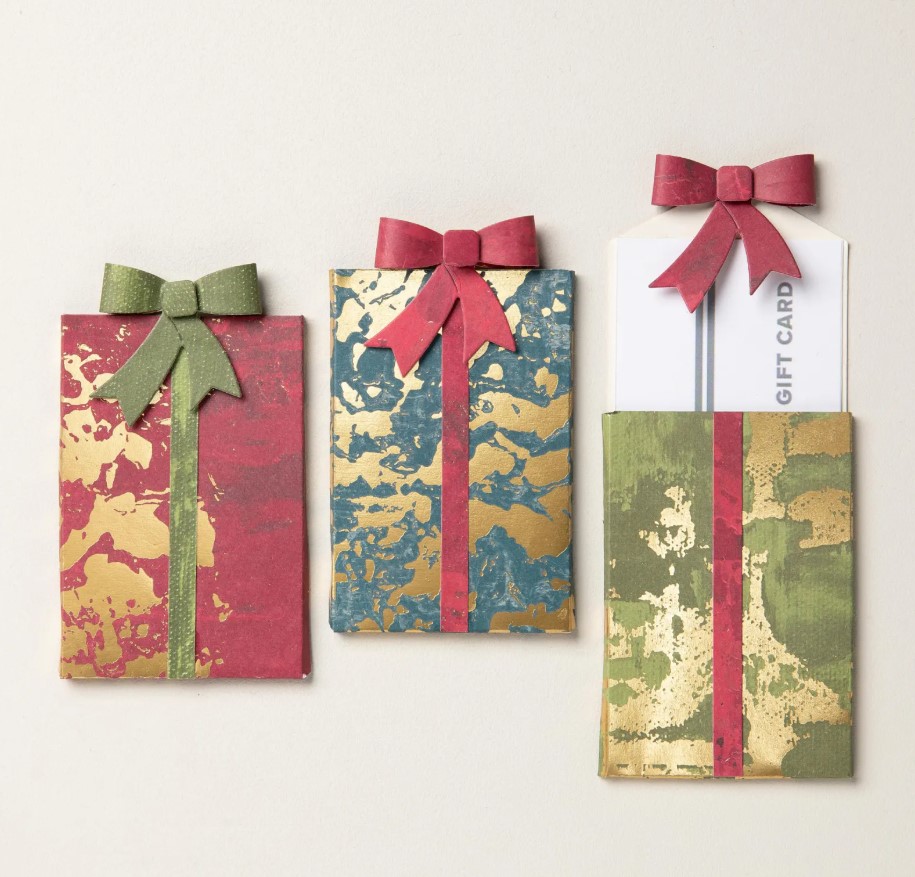
These little Gift card pockets are dressed up with the diecut bows.
What do you think of the Season of Elegance Suite? So much to love.
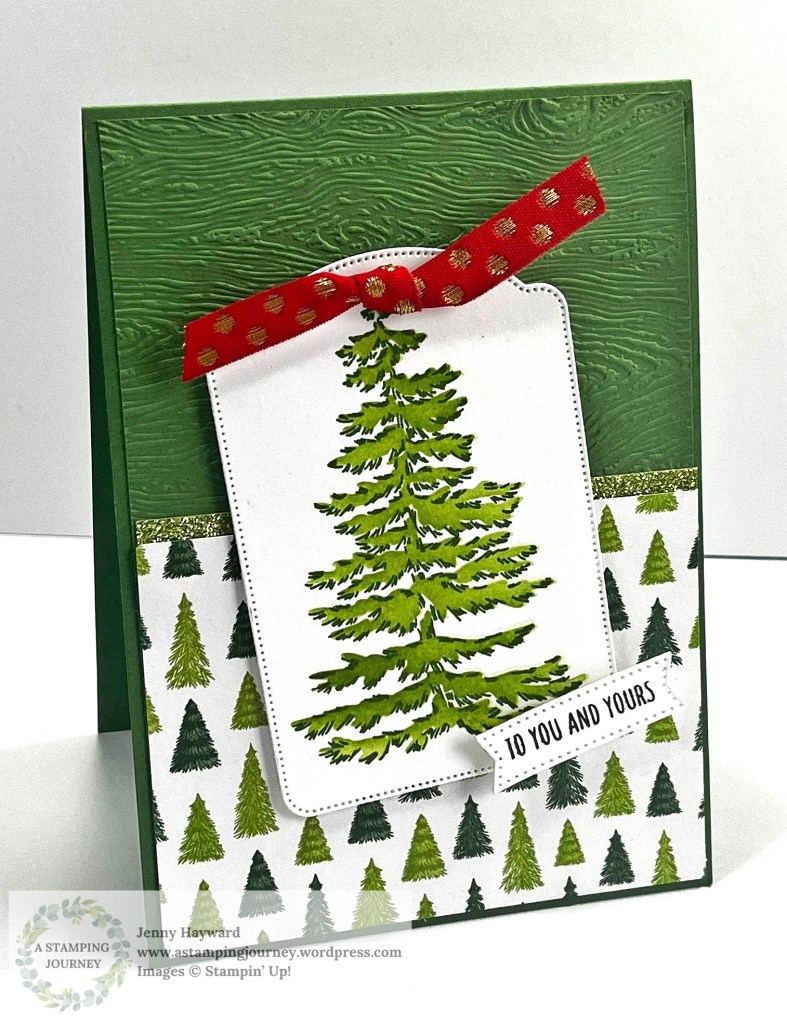
This week’s card is using the Frosted Forest stamps and masks. You could use this idea with any tree stamp.
This is a Portrait Fold card. That’s what I’m calling it anyway. I’m not sure if it has a particular name. The fold is at the top of the card.
You can follow along with the video below. The full tutorial will be sent out in next week’s newsletter if you are a subscriber. If not check the side bar on my blog.
I have used the Reindeer Days Designer Series Paper and some sparkly Glimmer Paper.
I used just one mask in the Frosted Forest mask set. You can add other layers of ink if you would like to.
This is the card.
Embossing the card mat adds some extra texture. I have used the Timber 3D Embossing Folder on this one.
Hope you enjoy it.
Happy Crafting,
Jenny
You can PIN it Now to Pinterest to come back to later.
Need to order and you are in Australia? I would love to help you.
You can shop in my store Online -> HERE. OR contact me directly.
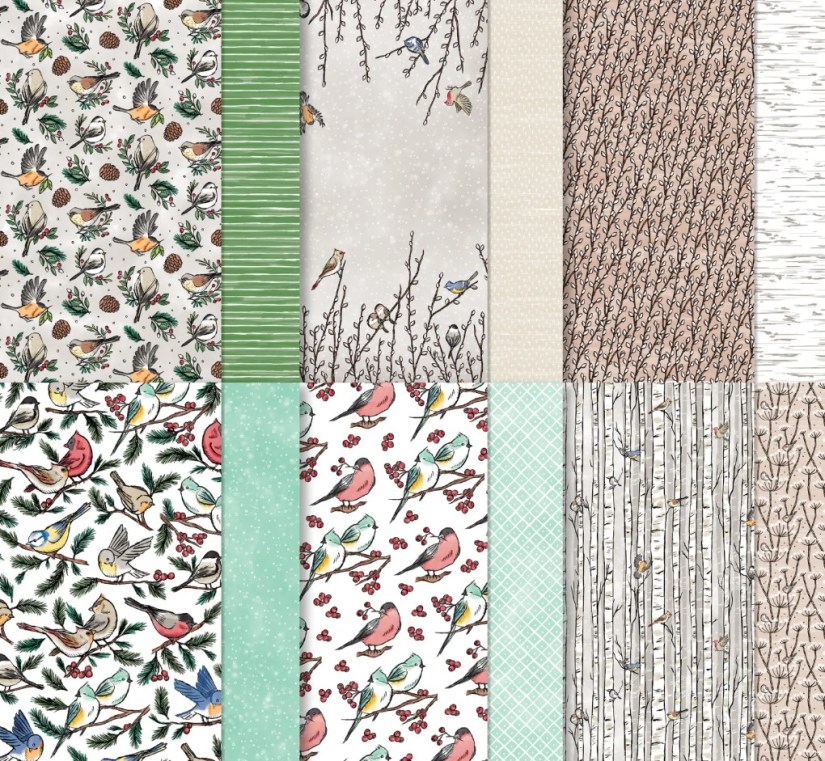
This is a simple card with the Nests of Winter Designer Series Paper.
The paper has such pretty bird images. This one you don’t need too much with. I added the Love and Joy from the Greetings of the Season Stamps and diecut it with the Nested Essentials Die. I added a smaller one diecut with Red Glimmer Paper. It just adds a little sparkle to the simpleness.
This is one of the cards we made at our recent Nests of Winter Class. I usually start off with a simple card and then move on to more detailed ones. Such fun! If you are local in Wollongong come along. Or you can have the Card Kits mailed out to you if you are in Australia.
This is the Nests of Winter Designer Series Paper.
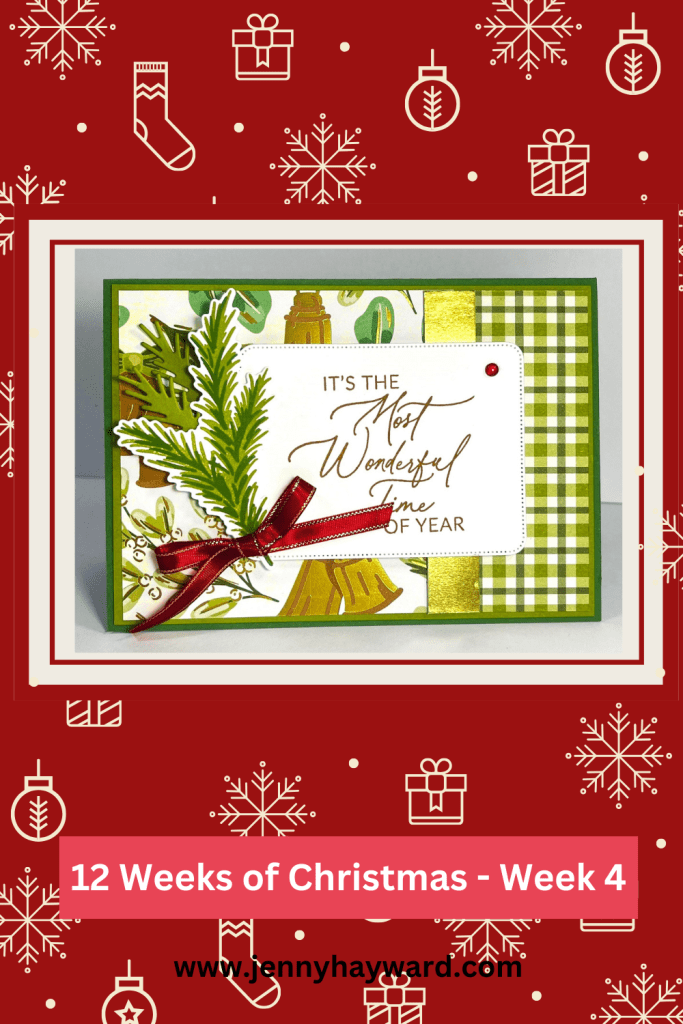
Back with Week 4 for our 12 Weeks of Christmas series.
This week we are looking at the Cut and Flip Method for our Christmas cards. This method can be a great one for making multiple cards at one time too. It’s very quick and easy.
You can just use this idea to make as a single card too.
You just need some gorgeous paper with co-ordinating patterns on each side of the paper. Watch the video below to find out how.
I have used the Season of Green and Gold Specialty Designer Series Paper on this one. And also used the Golden Greenery Stamps and Dies and the Greetings of the Season Stamps and Dies.
At the end of the video I share another version with different papers.
I will send out the measurements in next week’s Newsletter. If you would like the written version you can sign up for my free newsletters. You will see the link in the right hand column on my blog.
This is the card that was made.
Happy Christmas creating,
Jenny
You can PIN this now.
If you need some supplies and you are in Australia I would love to serve you.
You can stop by my Online store -> HERE to order. Please use the Host Code: JDH3D9KQ
Or Contact me Directly and I can assist you.
Have a large Wish List? It would be better value to join the Stampin’ Up! Community. Get a large number of products ticked off your list quickly and then get a discount each time you order after that for as long as you stay around. Find out more ->HERE.