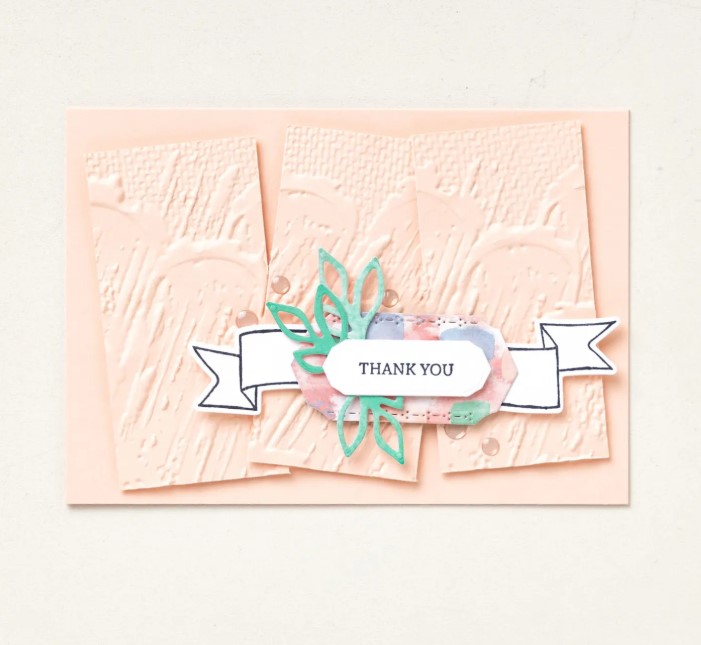
I made this card for our Retiring Class last week. But then I had to cancel it as I was unwell all week. But I can still show you.
This is with the Translucent Florals Bundle. It is leaving us soon.
It’s such an easy stamp set to work with. It does give it a a “translucent” effect on the flowers when you stamp them and you don’t even need to add any other colour.
You can’t really tell too much in the photo but part of the front of the card is cut off so the front panel hangs over the inside of the card. This shows the card closed.
And the inside of the card.
The embossing Folder I used on the front is leaving too. (Actually I just checked and it is already sold out sorry).
Be sure to check out all the Last Chance items before they go. They are only while supplies last.
You can see all the Last Chance Items -> HERE. If you are in Australia and need to order you can Order in my store at that link OR contact me directly. I am happy to help you out.
Don’t miss out on any of your favourites from your Wish List. Some of these are greatly reduced too so check them out.
This week for our video we have … aTrifold Arches Card.
You can make them any shape you like though if you don’t have the Everyday Arches Dies. Try with Oval or Rectangle Dies or cut your Rectangles with the Paper Trimmer if you don’t have any.
Here is the card folded up.
You can also decorate it as you like. I have used the Wildflower Birthday Specialty Paper which has the gorgeous paper with gold touches and the Diecut pieces so no colouring involved.
The card is very easy to make. In the video I show you the measurements in Metric and Imperial. If you would like the written Tutorial I will be sending that out to my newsletter Subscribers next week. (Tuesday 15th April).
I send out a Tutorial each week to my lovely Subscribers so be sure to be on the list. You can find the link in the Right Hand Side Bar on my blog.
Here’s the video for you.
I hope you get to make one. If you have any questions then don’t hesitate to contact me.
These are the Everyday Arches Dies. There are 10 Dies in total you can use one on their own or layer them together.
If you need any supplies for your crafting and you are in Australia I would love to serve you. You can head to my store -> HERE Or Contact me directly.
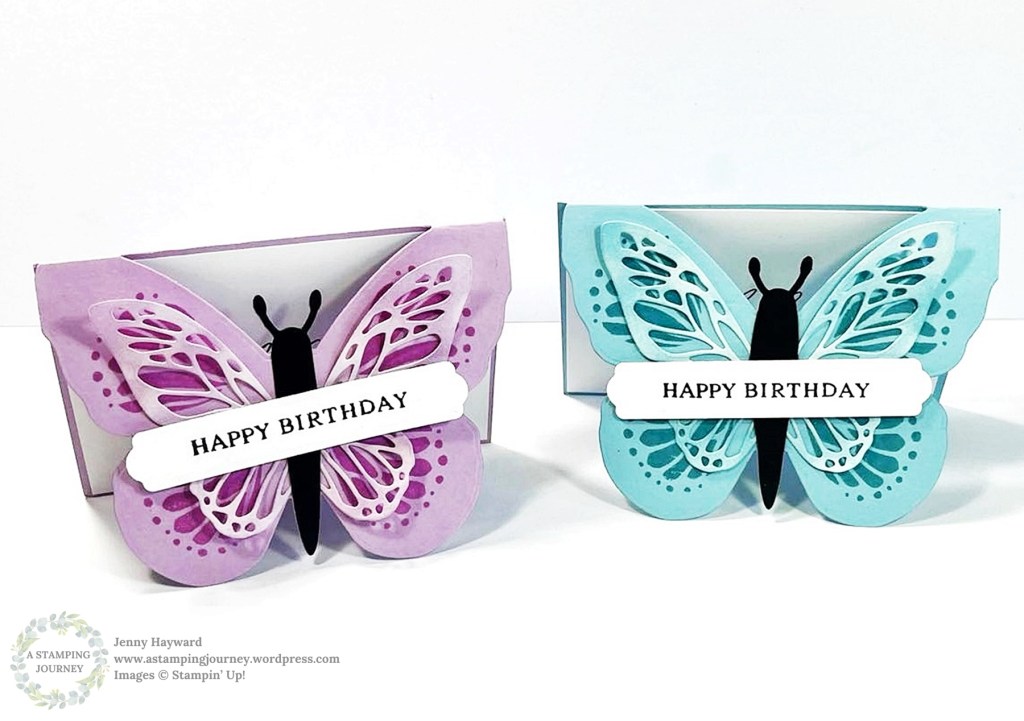
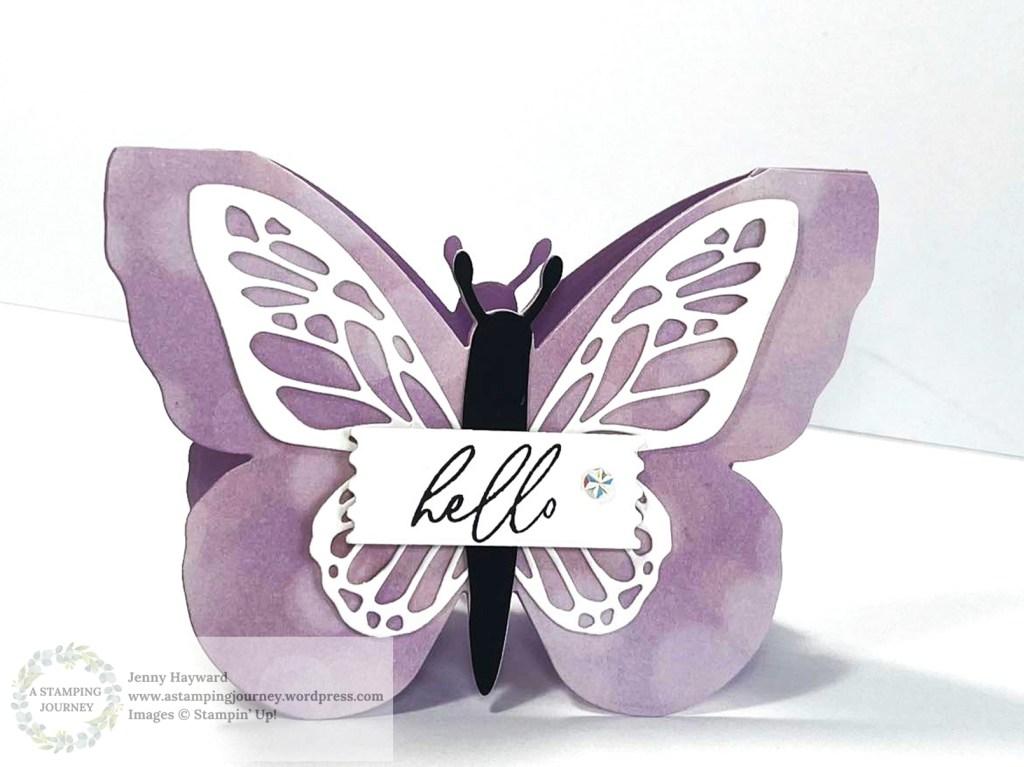
Some time ago I shared a video of 5 Ways with the Stampin’ Up! Beautiful Butterflies Bundle. It has been extremely popular. BUT I realised I hadn’t actually shown you the card created in the video.
So here it is. I made the Balmy Blue version in the video but had the Fresh Freesia one made. Which colour do you like?
This is the inside.
You can see the measurements to create this version in the video.
I have recently sent it out to my newsletter Subscribers. I send out a Tutorial each week in my Newsletter. Be sure to Subscribe so you can receive a Free Tutorial each week. You can see the tab in the Right Hand Column on my Blog.
If you missed it you can Follow along with the Video -> HERE.
Thanks for following me along.
Happy Crafting,
Jenny
Are you in need of some crafty Stampin’ Up! Supplies and you are in Australia? I would love to help you out. You can contact me directly OR head to my Online Store -> HERE.
Recently we had the Thankful Garden Class. I showed different ways of using the Stamps, Dies and Masks. Everyone created 3 cards.
I like to start off with a very simple card. Then step them up and then usually a different technique or Fun Fold.
This was the Simple card. Just stamping the big flowers on the card and adding some pretty paper from the Unbounded Beauty Paper.
This is a great one when you don’t feel like colouring. But if the colouring urge grabs you it’s an easy one to colour. It has Masks in the Bundle which you can colour with ink and the Blending Brushes. Or you could colour them with the Stampin’ Blends or other colouring mediums.
I have to point out the sentiment rectangle piece. These are my new favourite. They are the Textured Notes Dies. I have talked about these previously but they are gorgeous. They have different edgings around the rectangles. You can use them on their own or layering them together.
If you are in Australia I would love to help you grab your latest crafting goodness. You can head to my Store -> HERE.
Don’t miss out on the Last Chance retiring items though too. Great discounts there.
AND, if you are a Wollongong Local and would love to get together with some new found friends and be creative I would love you to join my classes. We always look forward to people joining us. Drop me a Comment or an email and I can tell you about it.
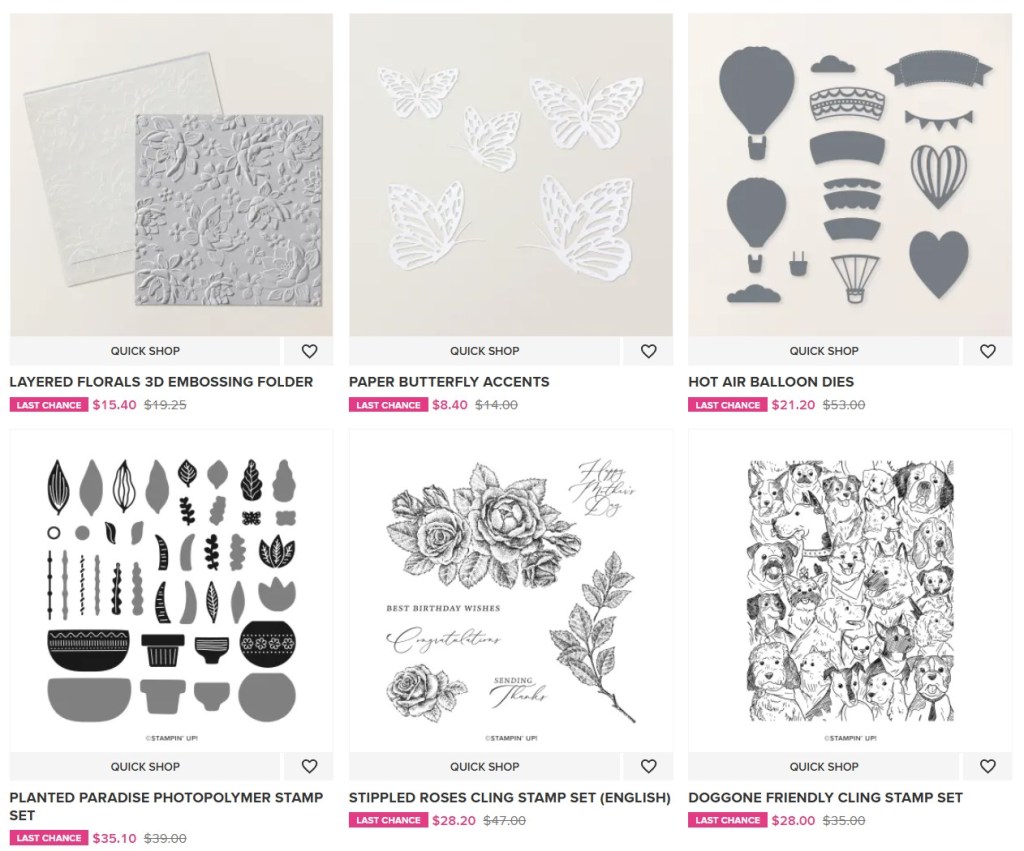
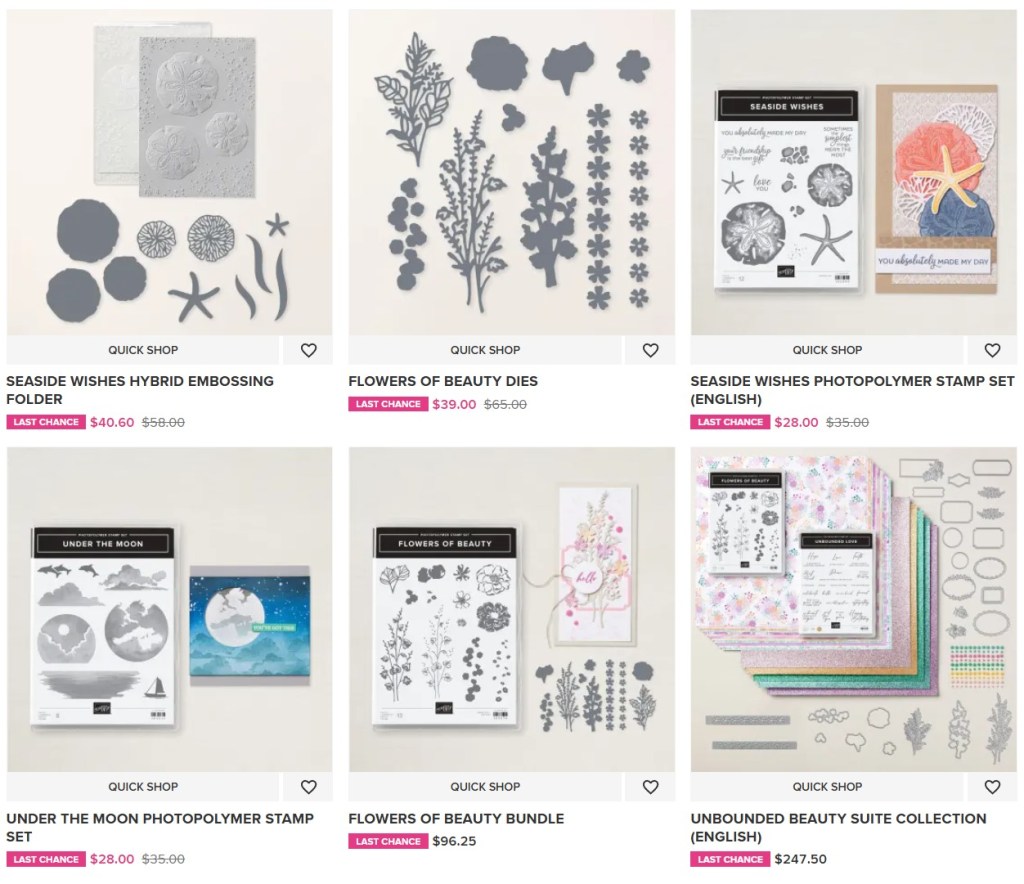
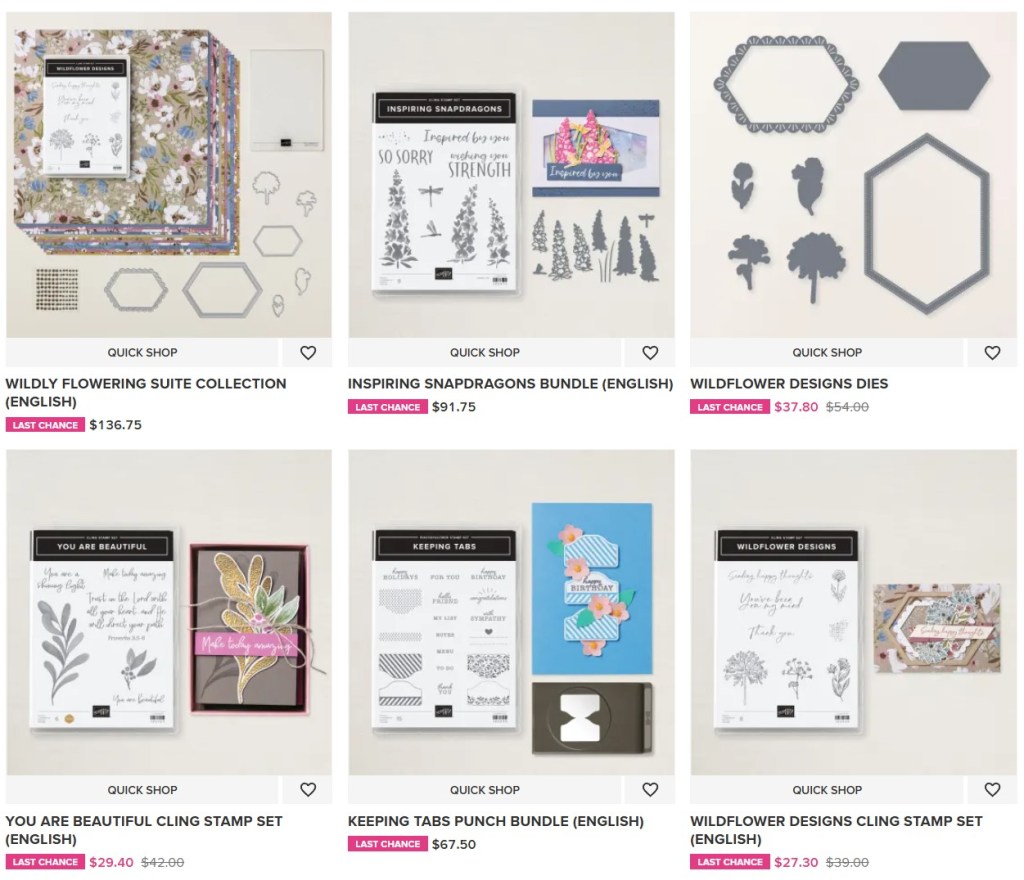
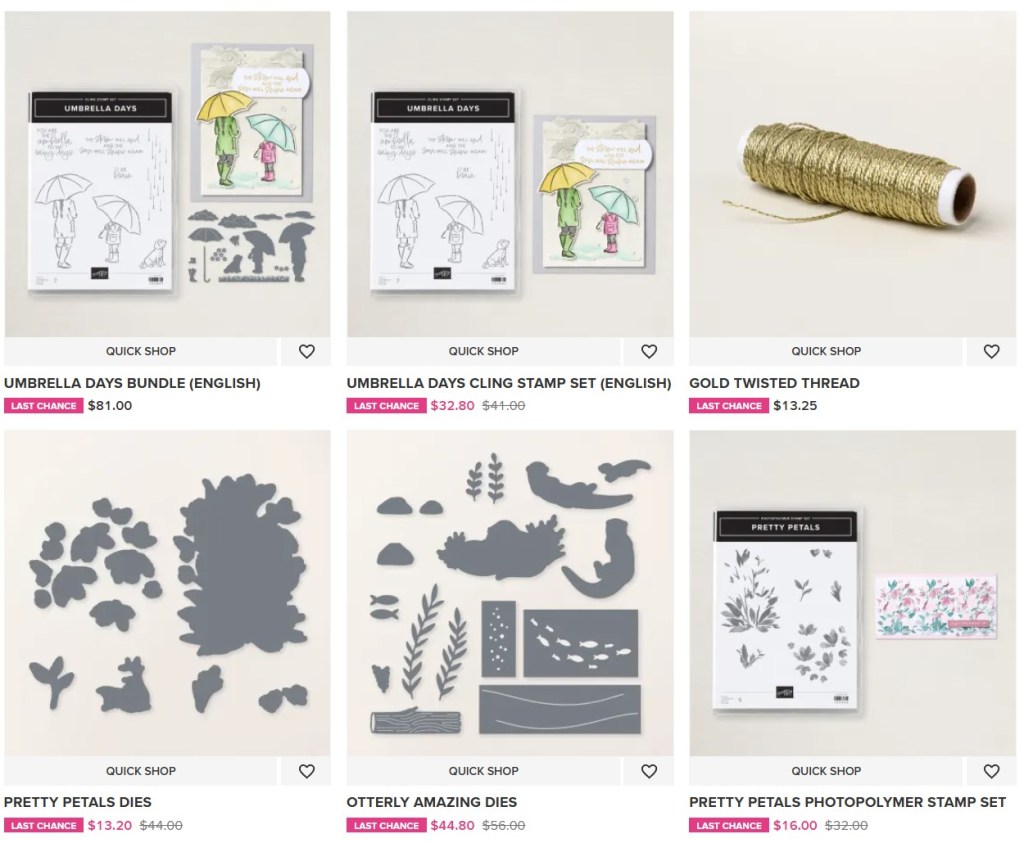
With a new Catalogue coming next month the retiring ‘Last Chance’ product List has just been updated. See what is going from the Annual Catalogue and the Mini Catalogue.
Here are just some of the items going. (Note for my International Readers the products will most likely be the same but the prices will differ so do check your own local Stampin’ Up! website for the current prices. These begin April 1st).
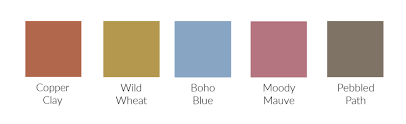
So check out what crafty bargains you might pick up. There are a lot from Paper, Stamps, Dies and Embossing Folders, PLUS the retiring 2023-2025 In Colors.
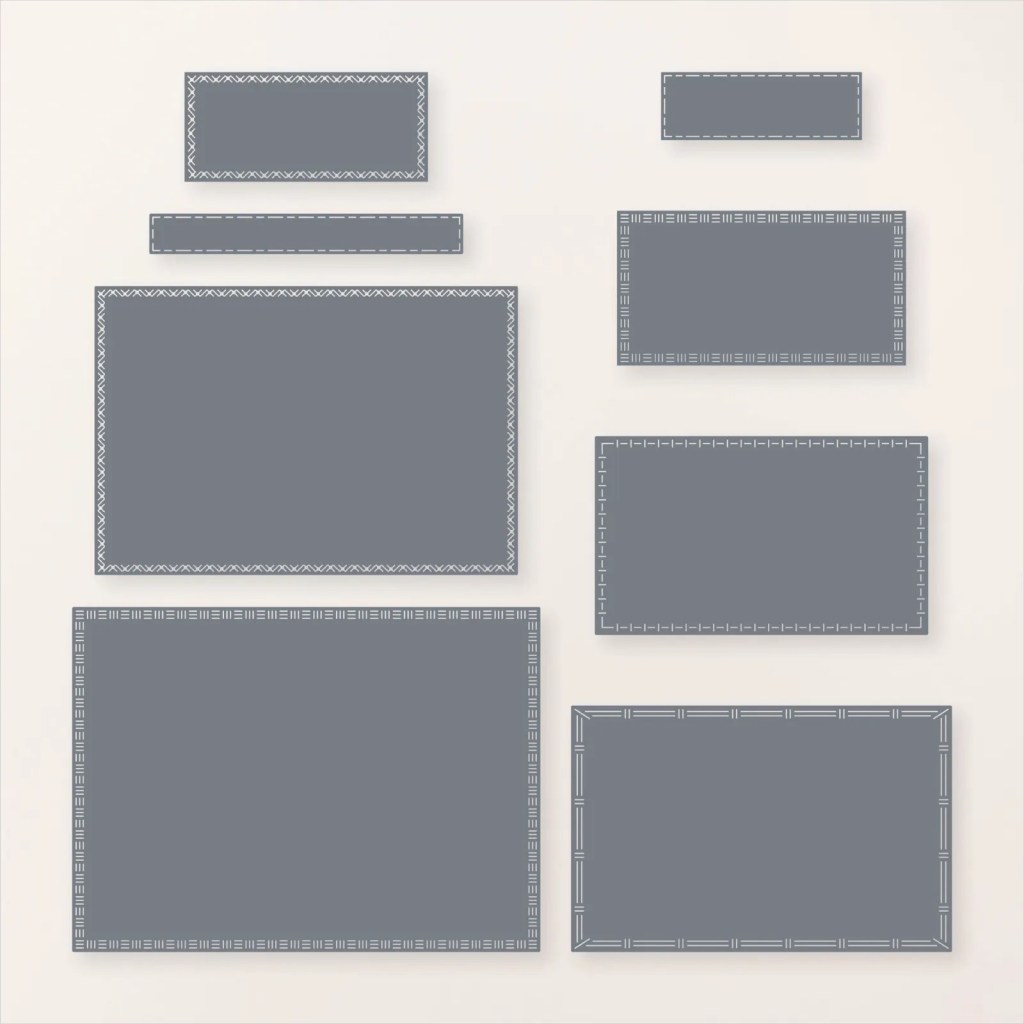
Wednesday’s WOW! #167 – What’s the sizes of the Textured Notes Dies??
People often ask the sized of the Textured Notes Dies. And that’s a good question. You want to know how they will fit on your card.
So here you go. I put together this little chart that shows the sizes. Save it for future reference.
These dies are part of the Textured Notes Bundle but I particularly like the Dies. They have different markings on the edges that create embossed look on the edge of your card. Use them to create a frame or to add an image directly on them. They are very versatile on their own or layer them together.
The Dies and stamps have just been released as an Online Exclusives this month.
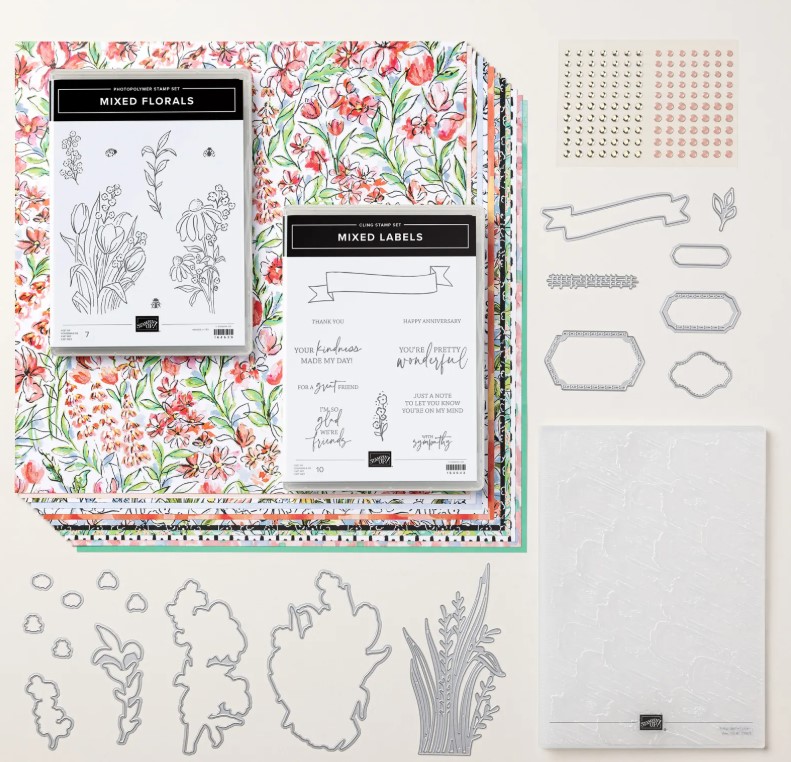
It’s Sunday Suites Time. Today with the Mixed Media Florals Suite.
There is a lot included in this suite so let’s check it out.
The Mixed Media FloralsSuite consists of:
The Mixed Florals Bundle
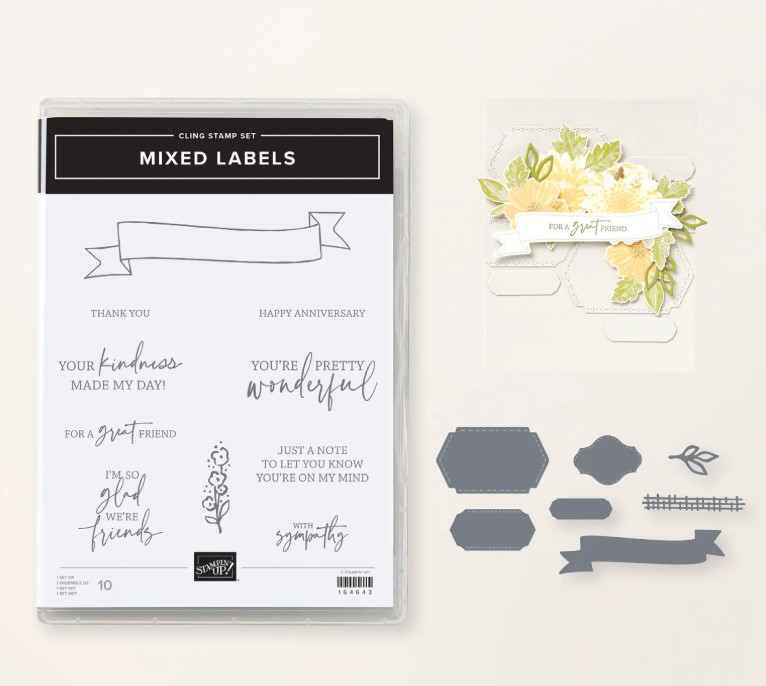
The Mixed Labels Bundle
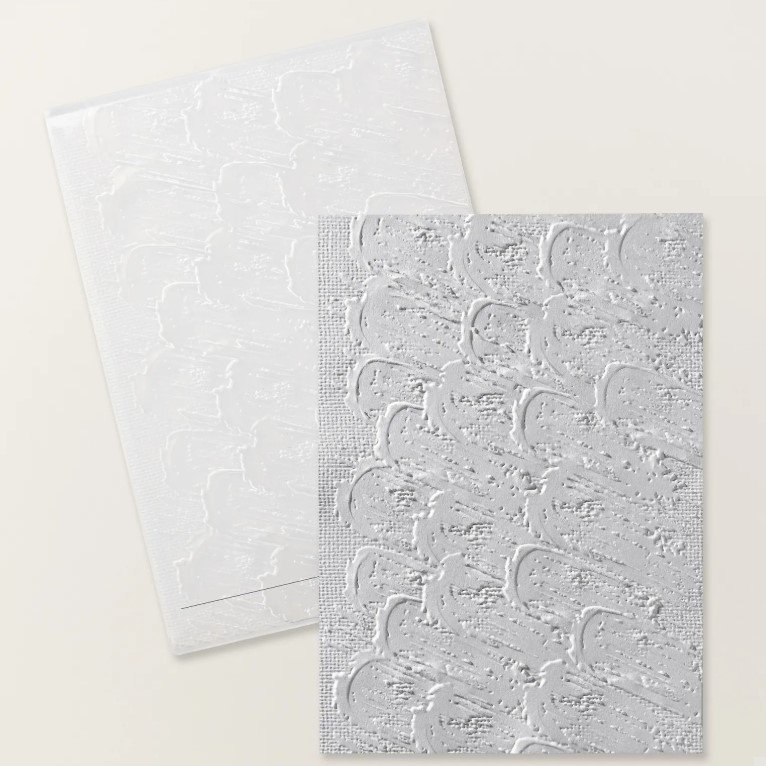
Plaster Painting 3D Embossing Folder
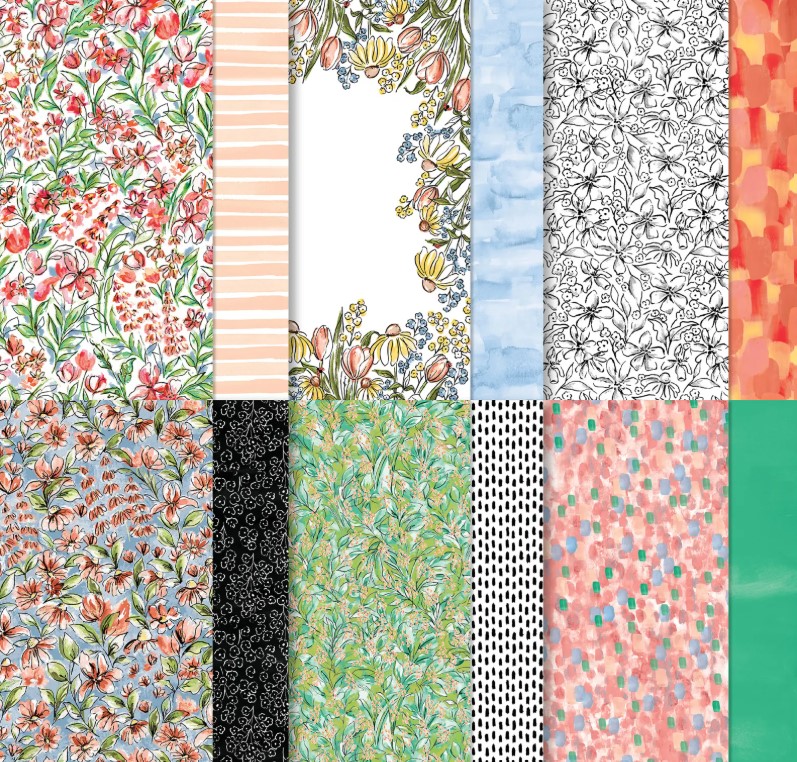
Mixed Media Florals Designer Series Paper
Low-Profile Dots (140 in total in 2 sizes) Petal Pink and Gold
Let’s look at these a bit closer.
The Mixed Florals Bundle
The Mixed Labels Bundle
I have to say the Dies on their own are even great. You can use them for a number of different sentiments if you don’t want to use these.
The Plaster Painting Embossing Folder
The Mixed Media Florals Designer Series Paper
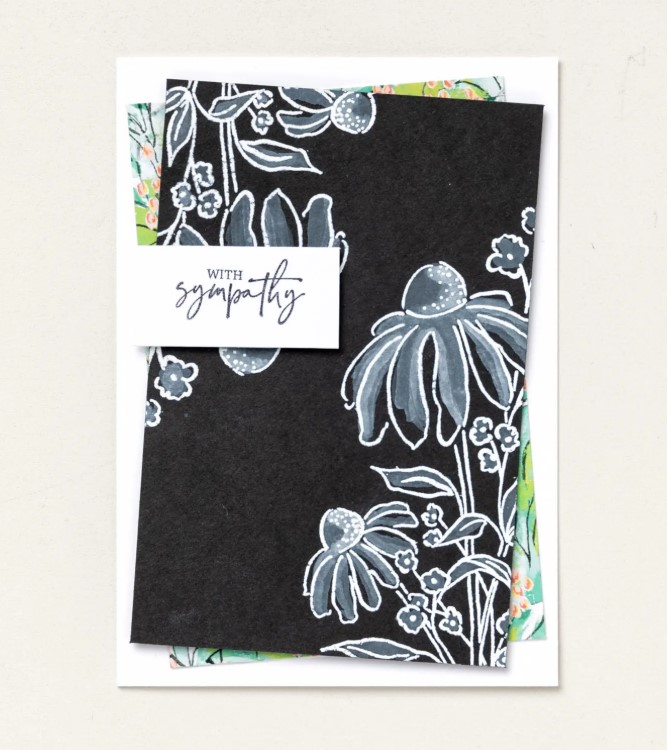
The paper has a number of different Mixed Media techniques in the paper. According to Stampin’ Up! it includes gouache, watercolour, and digital art. It’s sounds all impressive and looks even more impressive. I had to look up gouache. This is a water-Based paing that is opaque and has a matte finish. It’s made from natural pigment, water, and a binding agent like gum arabic or dextrin. Gouache is similar to watercolor but is more opaque and less transparent.
The colours are gorgeous together. You can colour the Black and White prints if you wish to.
The colours in this paper are Basic Black, Boho Blue, Calypso Coral, Daffodil Delight, Flirty Flamingo, Granny Apple Green, Mossy Meadow, Petal Pink, Poppy Parade, Shy Shamrock.
So let’s see what Stampin’ Up! has created with these great products.
Lots of diecutting for this one.
The paper background gives the impression of a sunny sky. It’s pretty.
Try a little White Heat Embossing and then colour the image with White ink. It gives a chalkboard effect perhaps.
This one let’s the deep texture with the Embossing Folder stand out.
And create a small gift box with some of the pretty paper.
This Suite of products is an Online Exclusives. You can buy the full Suite ($225.00 AUD) or buy each of the items individually.
You can see more of this Suite in the Store -> HERE. You can Order them directly there or Contact me to help you.
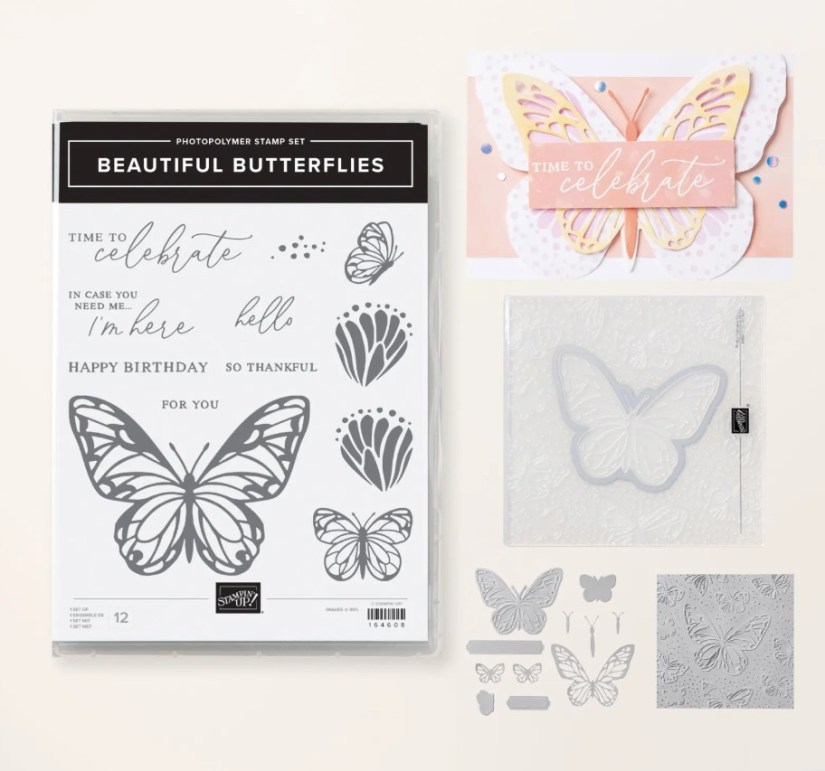
I have been sharing a lot with the Beautiful Butterflies Bundle. It is a gorgeous one. You might have caught the 5 Ways with the Beautiful Butterflies Video I posted just recently. You can find this in a previous post on my blog or now on Youtube. But I will also have the link below if you missed it.
This is one of the cards I created. It is a Mini Beautiful Butterflies folded card in Fresh Freesia.
MAKE IT YOURSELF:
To create this place your die on the fold line of your card base with the little score marks on the die lining up on the fold. Diecut it out. You will have a fold card. If you want some pretty paper on the butterfly adhere your paper to the front of the card first. I used the Beautiful Bokeh paper for this one.
I added a detailed diecut body in white on the front of the card.
If you missed the tip on how to cut the black body then be sure to check on my page or on the video ->HERE.
If you have the Beautiful Butterflies I hope you get to make one similar. Have a play with it. It’s lots of fun.
This is the Beautiful Butterflies Bundle. You can see it more in my store -> HERE.
If you are in Australia and need some crafty supplies, please stop by my store -> HERE. OR Contact me directly.
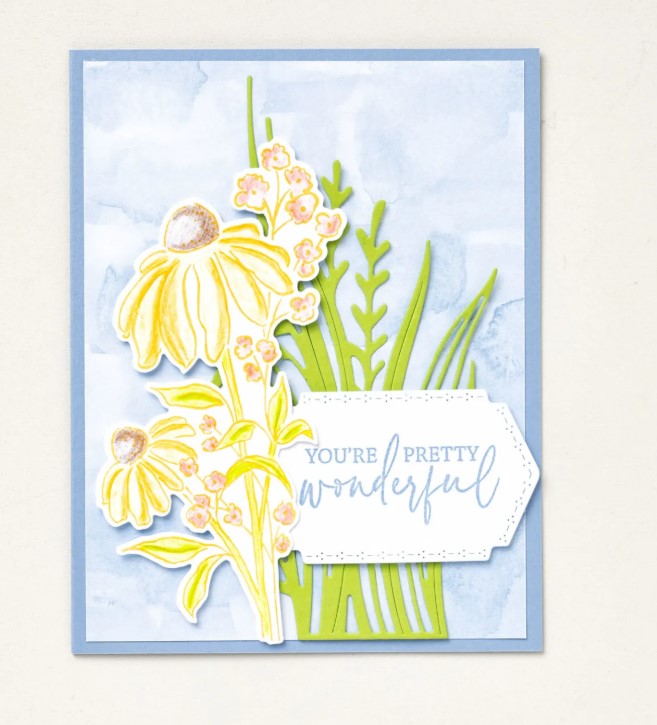
I came across the Faux Watercolour Technique recently. I was intrigued and had to try it. I thought you might like it too so I put together a video. You can follow along and give it a try.
As you watch you might see it is a bit like the Smooshing Technique. But there are some differences.
Here is the video.
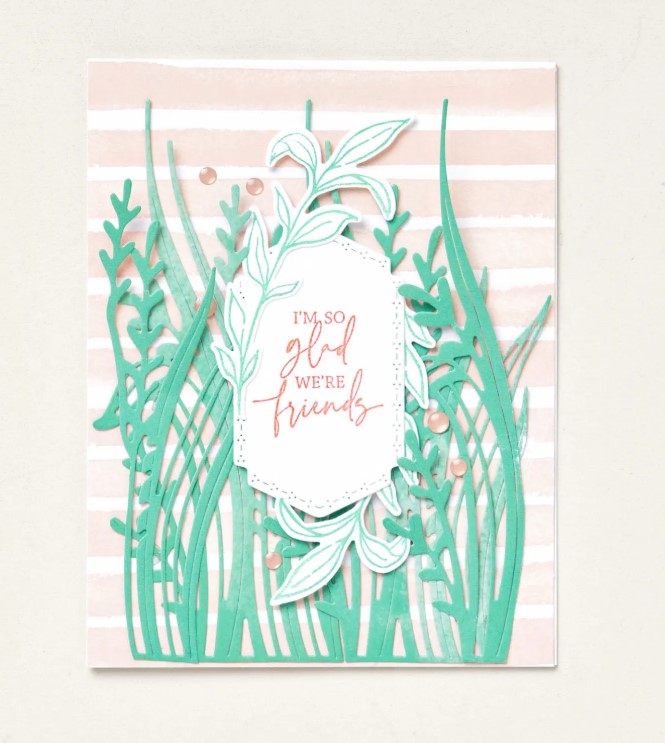
Here is the card I created.
The Thankful Garden Bundle includes Stamps, Dies and Masks and is an Online Exclusives.
If you have missed it you can see it online -> HERE.
I have also used the Soft Waves 3D Embossing Folder which adds a nice, curvy texture. Also, using the Arched Dies for the sentiment adds a different element.
Hope you like it and get to try the technique yourself.
Happy Crafting,
Jenny
If you are in Australia and need some supplies I would be happy to help you. You can visit my store -> HERE OR contact me directly.