cards, Catalogues

ANIMAL OUTING “SELFIE” CARDS!

With a new catalogue very soon I don’t often like to share projects with new products quite yet.  You know, there are still so many lovely products that we have in our current catalogue to use.  BUT, well I had to make this card – and share it with you right now.  It’s just such a cute set I couldn’t help myself.

This new set is the Animal Outing set.  So darn cute! And it is nice to see some Aussie animals.  So these animals had to take a selfie. 🙂
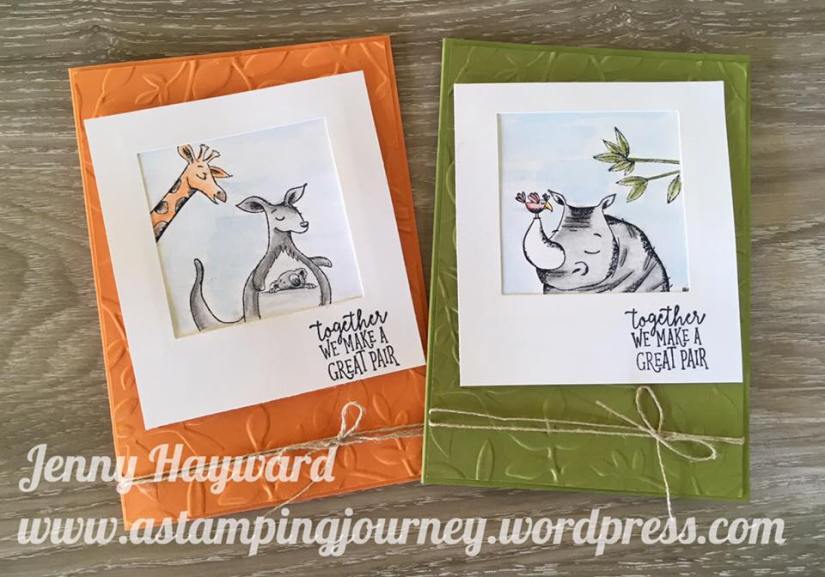
I stamped out the images and then coloured them with the Watercolor Pencils.  For the sky (which I think could have been a little darker on looking at it now),  I lightly brushed over a clear block with the Aquapainter to wet it, then coloured on the block with the Pacific Point pencil.  Then picked up the colour with the Aquapainter and washed over the background. I have to say these were the second images I coloured.  For the first ones I coloured the images then the background with the Pacific Point pencil and lightly and washed over it. I wasn’t happy with how streaky it looked.  So I redid the whole image. For the second time I coloured the sky first before the animals so I didn’t waste all that time … 🙂

Just a tip too when colouring:  Lightly colour your images first with your chosen colour and lightly brush over with the Aquapainter.  Leave it to dry and then go over parts of the image with the pencil adding highlights.  It is much more effective.   Also, Shimmery White card is the best for watercolouring I think.  Watercolor Paper can be used but it is a lot more textured.

From another piece of card (9cm x 10cm) I cut a square from the centre using I think the 3rd largest square Framelits from the Layering Squares Framelits.  I adhered the coloured piece behind it.  On a card mat ( I used Pumpkin Pie on one and Old Olive on the other) I embossed those pieces with the Layering Leaves Embossing Folder.  Tie around some Linen Thread and adhere this to your card base.

OK,  I will get back to some of the awesome current products we have – and they are retiring very soon.

Hope your weekend is going great and you are having time to create.

Jenny

Catalogues, Sale-A-Bration, Stampin' Up!

SALE-A-BRATION ENDS TOMORROW!

IT’S DOWN TO THE LAST DAYS FOR SALE-A-BRATION!

The time when you get free products whether you shop or join is running out. If you want any of these FREE products then grab them NOW! There are some beautiful and fun free choices.

See all the Sale-A-Bration items -> HERE.  Recently added is some select current catalogue products you see below that you can choose for your free items.

HOW DO YOU GET THEM FOR FREE??

With orders over $90 (or $180) you choose one item for Free.   That easy – really!  AND this week it’s double loyalty points**.  

**If you recall my VIS loyalty card.  For every $50 order you receive a little punch out on a card I keep.  When you collect 10 you get free products up to $24.95.  So this week you will get 2 punch outs for every $50 order meaning you will get more free products earlier.

See further below how to order.


BUT $240 OF FREE PRODUCTS WHEN YOU JOIN???

During Sale-A-Bration you will get extra free products when you join the Stampin’ Up! Family. It’s great being with this fun company and getting a discount every time you order. Not to mention all the other perks.

** Order $235 products -> Pay $169.  Pay No Shipping.   PLUS for Sale-A-Bration choose 2 extra stamp sets for Free up to $174.
TOTAL FREE PRODUCTS = $240.

Come and join me on my JEN’s INK team whether you just want the free stuff, you want the discount each time or you want to share stamping with others.  Either way it’s a WIN! 

Want to know more?  Head to my Blog -> HERE to see 10 reasons Why you need to be part of the Stampin’ Up! family.

Join -> HERE online straight away once you have your joining order together.
—————

HOW TO ORDER 

Grab one (or more) of these Free Sale-A-Bration products? (and get double loyalty points).   **ORDERS MUST BE IN BY 8PM SATURDAY 31st.

Order in my store – HERE.  This week’s Host Code: FSX2YS39

OR

Order by emailing me directly. 

Thanks in advance for  your orders.

Jenny


Personal Ramblings, Stampin' Up!

JOIN ME ON FACEBOOK!

So I have done it! I have finally made a Facebook group just for you.  Of course you can see my projects I share with you here but why not join me in my own little group where I will not only share what I am up to BUT I hope to inspire you and encourage you in your own crafting.  I will keep you up to date with all the Stampin’ Up! news and it can be a great place to ask questions and share ideas.

Do you want to know the most exciting part?

You can join in ‘Share a Card Sunday’ where it’s your turn to shine. Sundays is the day for you to share your own creations and get cheered along by everyone there.  It is a positive group so don’t be shy.  Occasionally we will have giveaways too.

So come and join in the fun.  Head to my Facebook group -> HERE and ask to join.  

I look forward to welcoming you there.

Jenny

Catalogues, Sale-A-Bration

SELECT CATALOGUE PRODUCTS NOW AVAILABLE AS SALE-A-BRATION CHOICES!

As if Sale-A-Bration isn’t exciting enough but Stampin’ Up! keep on giving!  Just announced: Stampin’ Up! have released some new choices for Sale-A-Bration AND they are catalogue products.  Check them out.

As already for Sale-A-Bration there are 2 levels of products.  Level 1 is for orders from $90 (green circle choices).  Level 2 are orders from $180 (orange circle choices).  I know the products aren’t too clear in this image but you can see them in the catalogue.

So have you stocked up on your cardstock and ink?  What about the reinkers for the retiring incolors?  Throw in some adhesive and you are at least at $90 before you get to stamps and dies.  As a bonus you choose something for Free!

In Australia?  Head to my store -> HERE now.  Go shopping and then choose your Sale-A-Bration item.  If you want to choose one of the above items you will need to use the item numbers on the image above.  As they are a little hard to see, drop me a message or comment to ask me.

If shopping online Please use the HOST CODE:   UUDCYQDV 

OR

You can contact me directly to place your order.

Thanks for shopping with me,

Jenny

cards, Catalogues, Sale-A-Bration, Stampin' Up!

WEDNESDAY’S WOW #16 – BLOOMING BASKET BUNDLE!

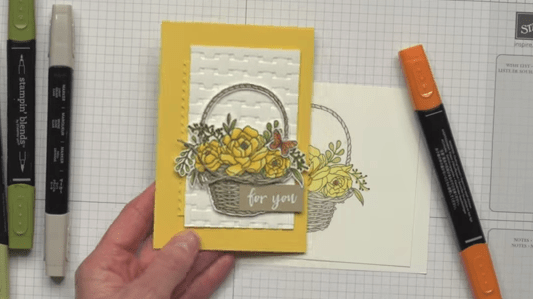
You have probably seen the new release Sale-A-Bration items especially the Blooming Basket Bundle.  I have just received this bundle so I was interested to see what can be done with it.  I thought I would focus on this bundle for Wednesday’s WOW! today.

I came across this video from Stampin’  Up! that highlights this set and shows some gorgeous ways to colour it.  I will share the cards featured in it further below.

Isn’t this colouring gorgeous???

How do you feel about cutting around the basket?  Just a tip in cutting the handle:  If you snip the handle down near the flowers on one side it is much easier to cut inside the handle area.  Then when you adhere it down you can tuck the handle back behind the handle and no one will even know.  Saves so much aggravation. 🙂


How clever is this idea in the card below?  Snip the flowers and leaves off the basket and add them to the card in a different way.  Gorgeous!!!

Now I am excited to play with this bundle.  Stay tuned to see what I get to do.

Jenny

You can grab this bundle FREE as a Level 2 Sale-A-Bration choice.   Which means for orders from $180 AUS you can pick up the stamp set and the Basket Weave Dynamic Embossing Folder.  Do you still need to stock up on card and ink?  Head to my store -> HERE, shop away and then remember to select your Sale-A-Bration choice. 

Please use the Host Code this week: SBZEJCNH

cards, Catalogues, Techniques, Videos

BRUSHO LONG WEEKEND DAY 3 – A SPECKLED BUTTERFLY!

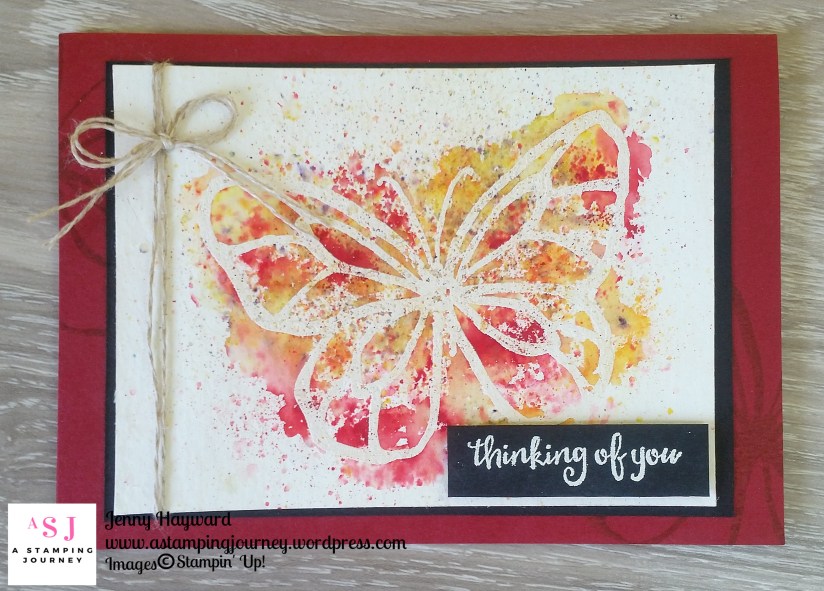
I think this is my favourite card.  I really like how it turned out.  Can I say that??  Sometimes I am hesitant to say that about something I have made.  But I like the effect of it and I have to say it is just chance really.  When you use these Brusho Crystals you don’t know how it will work.

The butterfly is from A Beautiful Day set.  For the sentiment I masked the first word in the sentiment from the set to just stamp the “thinking of you” and heat embossed it in white.

To find out how to create this effect I have a video for you.

So what are your thoughts on the Brusho Crystals?  Have you tried them?  Do you think now you might give them a go?  Let me know what you think.  I would love to hear.

Just a reminder that my 15% off the Brusho Crystals ends at 8pm tonight. If you want to grab them and save money on then just drop me a comment or email me and I will get that sorted for you.  Included is an information sheet to help you use your set of Brushos.  I hope you will give them a try.  I don’t think it is the last you will see of these from me.

Thanks for joining me in this.  I hope you have had a great weekend.

Jenny

cards, Catalogues, Stampin' Up!, Techniques, Tutorials, Videos

IT’S ALL ABOUT THE BRUSHOS THIS WEEKEND + GET15% OFF!

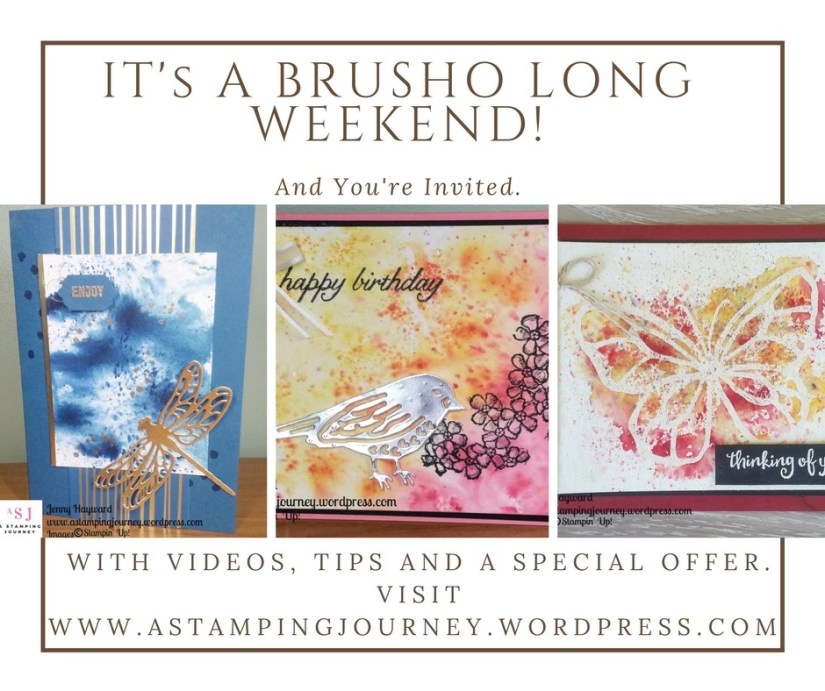
It’s coming this weekend.  It’s a Brusho Crystals Long Weekend and I am inviting you to be my guest.

I have been busy experimenting, preparing, creating and videoing ready for you. I have 2 face-to-face classes happening tomorrow and Saturday but I have some projects to share with you too. It all starts on my blog here tomorrow so be sure to stop by.  If you haven’t already subscribed to my blog to get updates then click on the link in the right hand bar so you won’t miss out on the updates.

So what do I have in store?

I have 3 projects to share with you including some videos of different ways to use the Brusho Crystal Colours. The projects I share will be different to the ones I am doing in the classes but they will be special.

In addition, I have a special on the Brushos for Australian residents only. (sorry folks!).

**Receive 15% off the price. RRP is $52    Take  off $7.80    Weekend price = $44.20 (+S&H).  This is for Australian residents only.  Special not available in store.  Contact me directly.  Includes an information sheet on using your Brusho Crystal Colours.  Offer ends 8pm Sunday 11th Feb.**

So stop by tomorrow for our first project.

Jenny

3D projects, Blog Hops, cards, Catalogues, Stampin' Up!, Tutorials

STAMPIN’ DREAMS BLOG HOP – IT’S A LOVE THEME!

We are back with the Stampin’  Dreams Blog Hops for 2018.  We start off the year with a Love theme.  You might have come from the super, talented Juana’s Blog or starting here with me.  Either way, enjoy the Hop.

I don’t do a lot of  “lovey dovey” stuff and don’t usually do anything for Valentine’s Day but lately I have had to do a lot of wedding and engagement cards so maybe this Hop would be a good one for me. 🙂

For my project I have created a “love” Panel card and Gift Card Holder.  

I just received the Bubbles and Fizz Designer Series Paper which is a Free choice for Sale-A-Bration.  I noticed in the pack this sheet with the circled hearts in Calypso Coral so I thought I would use that.  It looked pretty cool! The Panel card idea was inspired by a card from a recent papercrafts Magazine.  I thought it was a little bit different to the standard card.

Here is a closer view of it.  The middle section of the base card is cut off and a separate card mat adhered to the front.  I will give you details to make your own further below.

I added the hearts from the Sunshine Wishes Thinlits in Calypso Coral and Dazzling Diamonds Glimmer Paper.  It needed something else when I had finished so I added a little bow with the Calypso Coral Sheer Ribbon.

The Gift Card holder is created with the Envelope Punch Board with the Gift Card size and scoring instructions on the board (the first one listed).  I added a strip of the Designer Series paper around it.  Just a note on that:  As the card holder is made in card it is a little thicker so the flap can’t tuck in to the envelope without  squishing it.  So I just left it open.   The “for you” is from the Mini Treat Bag Thinlits.

CREATE YOUR OWN PANEL CARD.

– Cut a standard size Card base.  From the front panel cut a piece off the front at 3cm (1 1/4″) down from the front score line.  On the piece you cut off, cut a piece off that at 3cm (1 1/4″).  **NB: For Imperial do check the measurements.  Basically you are cutting off a section down from the top of the fold line and then cutting a piece of that cut off section the same measurements.  You can vary the measurements to however you like.

– Make the panel piece the size you like.  This piece, the Calypso Coral mat measures 8cm x 12.3cm (3 1/8″ x 4 7/8″).  The Designer Series Paper piece is just slightly smaller.

– To assemble the card.  Lay down the White card strip that you cut off previously.  Line it up with the bottom edge of the back of the card base.  Adhere the panel on to the top and bottom edge pieces remembering to only place adhesive at the top and bottom at the back of the card mat for the panel.  I hope that makes sense. 🙂


NOW CONTINUE TO HOP

Now you can continue on your way around the Blog Hop to see the other “Love” projects.   Head on your way to Alejandra’s Blog -> HERE.  (I can’t add the list of participants on my hop as I have a WordPress blog but you shouldn’t get lost, just keep following the links on other blog posts).

Enjoy,

Jenny

Sale-A-Bration, Stampin' Up!

SALE-A-BRATION AND THOSE PANDAS!

Sale-A-Bration is well under way now.  Have you seen all the gorgeous projects around?  I thought I would give you a few updates – and show you some more Pandas. Make sure you read further below. 🙂

Sale-A-Bration runs until March 31st and it is all about you getting Free products.  Who doesn’t want free Stampin’ Up! products.  

How does it all work then?  Whether you Shop, Host or Join – You can get some Free products.

TO SHOP: Every $90 order select a Free product from the Sale-A-Bration choices. (also available this year special choices for $180 orders).  There are some lovely choices.  It will be a hard decision I tell  you.

TO PARTY: Who loves to party??  Especially a stamping party.

Receive an additional $40 for parties over $400. Get some friends together now for your own private stamping event.  Contact me before January 16th to book your exclusive event and receive a special gift to say THANKS – an additional $10 to spend.

TO JOIN: This is for those of you who love it all and have a long wish list.  Is that you??  For $169 you will receive $235 of products PLUS an additional TWO Free stamp sets up to the value of $174.  Plus you don’t pay shipping.  AWESOME VALUE!! That’s $240 of free products.  Crazy!!!   AND any orders you add later you will get a minimum 20% off.  More savings!

Do you feel it is a bit scary to commit though? 

Just a couple of notes that might put your mind at ease.  

– No, you don’t have to join up forever.  You can leave at anytime. 

– No, you don’t have to do parties/classes/sell.  Enjoy all the discount for yourself.  But it’s crazy not to share what you love.  That’s OK though. 

– No, if you leave you are not penalized and you don’t have to give everything back.

– No, you are not on your own.  I am here to help you discover your creativity and encourage you in any way you like.  Plus, Stampin’ Up! provide lots of resources to help you along the way. 

Ask me for more information.

NOW FOR MORE PARTY PANDAS!

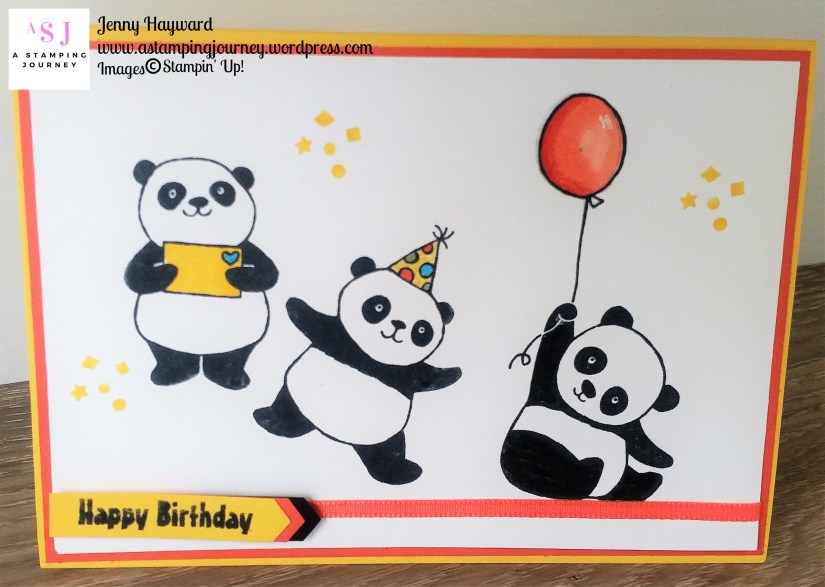
I showed the Peekaboo Pandas in last post.  Let me say first, they have had a huge response over on Pinterest.  Lots seems to love those cute guys.  As I was making that card I was lining up the inside pandas in the wrong place.  I didn’t want to waste them as they were still OK.  Just not for the projects I was making.  So I have made up a couple more cards.  I will show you this one and then stop by again next post and I will show you the other one.

I coloured the balloon and the envelope with the Stampin’ Blends and the hat was coloured with the Stampin’ Write markers.  

I added some Calypso Coral Sheer Ribbon and the sentiment was stamped on Daffodil Delight and punched with the Classic Label Punch and also punched in Calypso Coral and Basic Black card and layered together.  Haha! I think it is the cute expressions on these guys that melt the heart do you think?

Enough from me today.  Thanks for the visit.  Enjoy the rest of your day.

Jenny


cards, Catalogues, Stampin' Up!, Techniques, Tutorials, Videos

HEDGEHUGS WITH THE STAMPARATUS!

I have been playing with new products the last few days.  I am loving this new set Hedgehugs coming out in the new Occasions Catalogue on January 3rd.  I think you will love it too.

I have recently got the Stamparatus and have used that to stamp this so all the images are evenly spaced.

Today I put together a video showing how to use the Stamparatus for this.  It’s a different type of video.  I spent the last 2 days to put together one and it just wasn’t happening.  What do you think of this format.  Would you like to see more of this type or would you like the traditional type of videos?  Do let me know.  The video is below. (Please note: If you are receiving this post by email subscription the video might not show up so head directly to the blog post by clicking on the post title above).

If you missed the card size for the Whisper White on the video here are the measurements again.

Metric       14.8cm x 7cm.

Imperial   5 1/2″ x 2 3/4″.

Hope that is helpful.

Other details on the card:

Paper:  Sweet Soiree Specialty Designer Series Paper, Old Olive card base.

Ink: Berry Burst, Old Olive, Marina Mist.

Other: Whisper White Organza Ribbon.

————-

STAMPARATUS RESERVATION

While we are talking Stamparatus, you only have a few days left until the end of the month to reserve your Stamparatus.  This will be shipped out early March.  After that you won’t be able to order one until the new catalogue in June 2018.

To reserve your Stamparatus: Head -> HERE. Scroll part way down the page and click on the box on the right hand side of the page under Stamparatus.

The Stamparatus is $85 plus shipping.  You won’t need to pay until it ships in early March.  You will need add your credit card details when you reserve it though.  If you have any further questions, please drop me a comment or email me.

Jenny