Stampin' Up!

RETIRED PRODUCTS FOR SALE!


sale bright

Thanks to those people who came along to my recent BOGO sale.  It was great to see some of my loved products go to new homes.  BUT I STILL HAVE SO MUCH LEFT!!!!

I have now reduced some of the prices so these are not eligible for BOGO (Buy one Get One Free), but I am sure there are some great bargains for you.  🙂

These are only for Australian residents.  Sorry.

Click on my Page for “Retired Products For Sale” at the top and it will have the links there.

Catalogues, Stampin' Up!

HOLIDAY CATALOGUES ARE BEING MAILED OUT. ARE YOU ON THE LIST??

Holiday catalogue promo photo

It’s getting close for the Holiday Catalogue to go live.  September 1st!  You will be able to view it online BUT who doesn’t love to flick through the catalogue and see the samples and the products close up.  I think you are one of those people am I right??

So, if you are a resident of Australia AND you don’t have a current Demonstrator then drop me a comment/email and I will drop one in the post for you.  I am starting to mail them out so make sure you are on the list.

Have a wonderful day,

Jenny

3D projects, cards, Tutorials

POP UP EASEL CARD!

A customer called in last weekend and showed me a card she had made. She had gone to a class to do it.  (It wasn’t a Stampin’ Up! class and I don’t know who the original creator is). I loved the idea of the card so I had to make one. I had a little time to play around with it the other day. I call it a POP UP EASEL CARD. I used Confetti Celebration on mine.  I will show you the photos of the card (sorry, lots!) and then give you the instructions.

This is the front of the card.  The Rhinestones you see is what holds up the Easel part.  The balloons are suspended on strips of acetate in a folded crease.

Easel front

This is another view front on.  The Designer Series Paper is from the Playful Palette pack. The balloons are punched with the Balloon punch in Bermuda Bay, Daffodil Delight and Melon Mambo.  I sponged around the edges with the sponge and added a small star that from the stamp set.
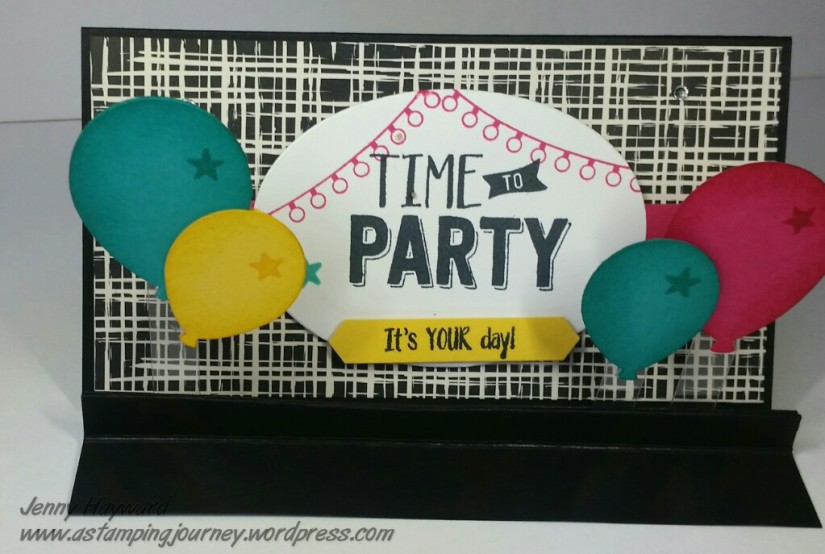
Easel card

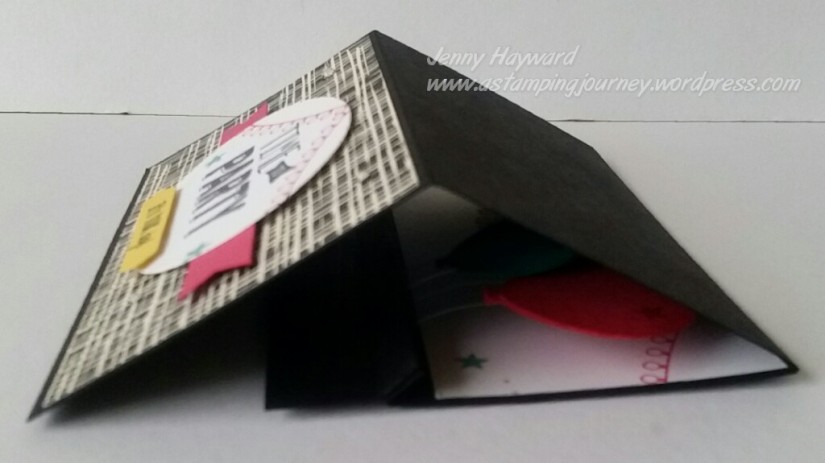
Side on view gives you an idea of the suspended balloons.  I punched 2 each of the balloons and adhered one to the front and back of the strip of acetate to keep it tidy.

You can see the side view and inside of the card with the sentiment that I will show you below.
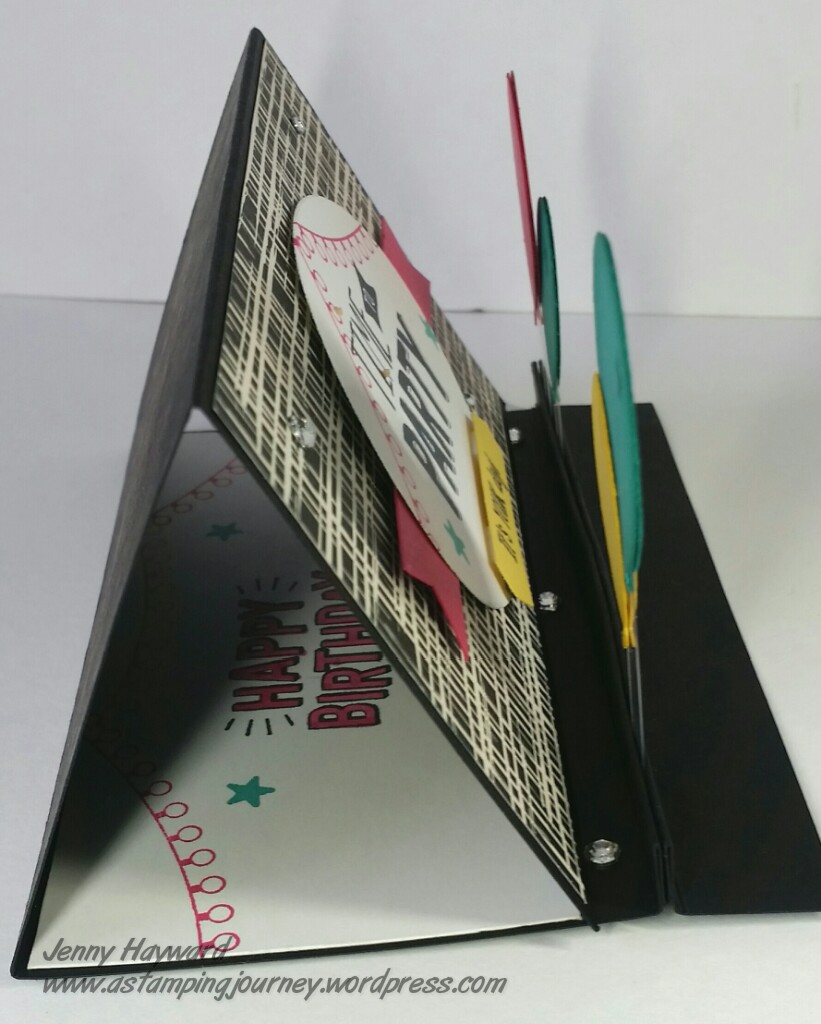
Side view of Easel

The card can fold flat for postage.

folded inside

When it is folded flat it is a square card measuring approximately 15cm x 15cm (6″ x 6″) so you would need to make an envelope to fit but that is no problem with the Envelope Punch Board!

folded

This is inside of the card.  I continued with the sentiments from the Confetti Celebration set.
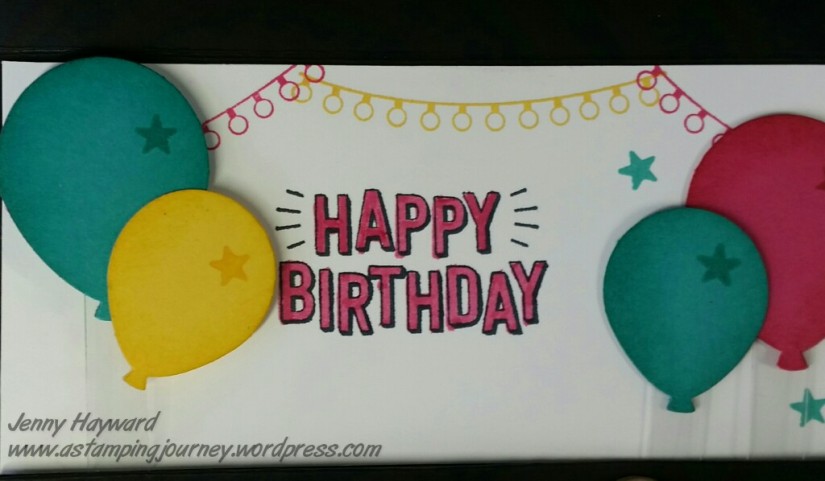
 inside

You can see when it is open that the balloons can fold flat against it.  This is a trick too. Whatever image or shape you have suspended in the front crease, you need to fold it against the inside of the card to test it out first before you put it together to be sure that it will fit below the score line for when it is folded flat.  You can’t have it squashed in. 🙂 Check the photo below to see what I mean. The balloons sit just below the score line.
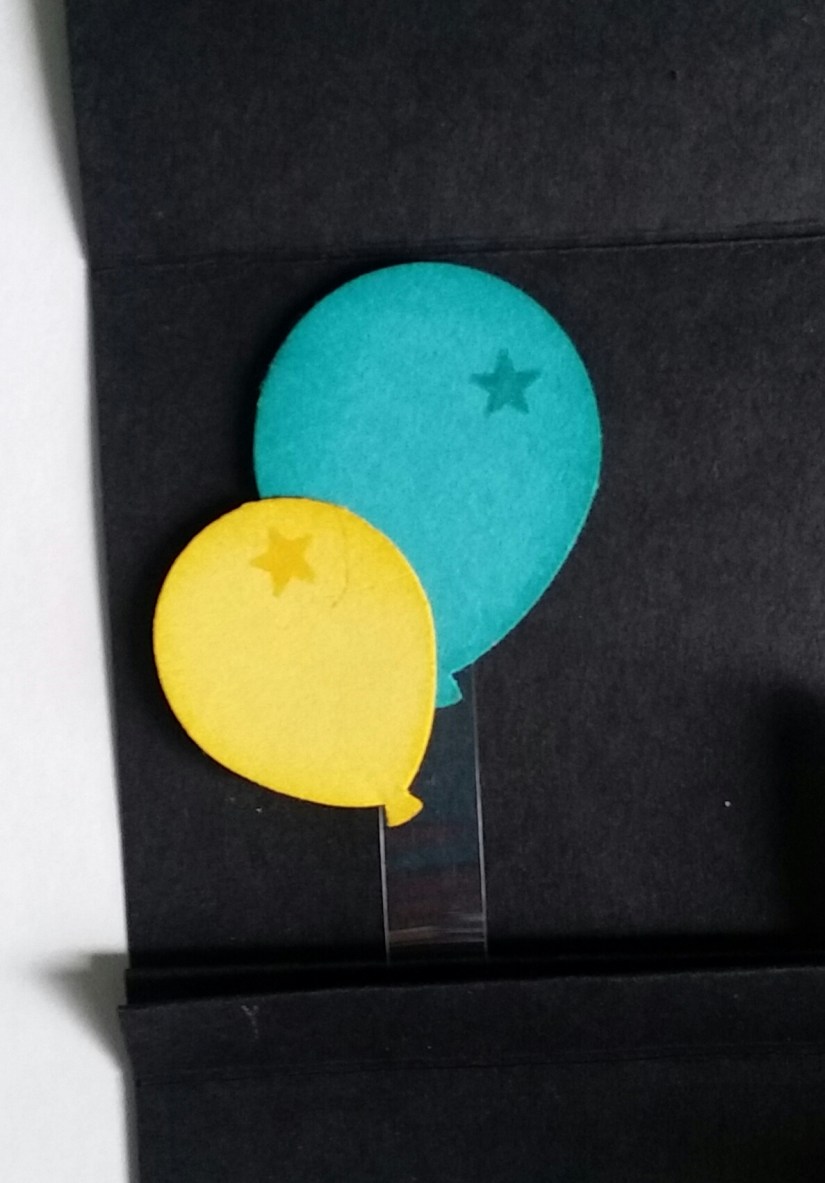
Balloons lying flat

Now I will tell you how to make your own.

POP UP EASEL CARD

NB: I have included metric and imperial measurements.  For those following the Imperial measurements can you please just check these.  Maybe do a test run first. I am just concerned with all the “16th” measurements if they are correct.  🙂

What you will need:

Cardstock for base 14.8cm x 29.8cm (5 7/8″ x 11  3/4″).

Designer Series Paper 14.4cm x 7.6cm (5 7/8″ x 3″)

Whisper White card (inside piece) 14.4cm x 6.6cm (5 7/8″ x 2  3/4″)

Scrap card for your suspended images (Of your choice.  I have chosen balloons for this one).

Acetate strips 1 cm x 4-5cm (1/4″ x 1  1/2″-2″) You will trim these as you make the card depending on where you want your images to sit.

To construct your Easel:

1. On the long side score your card at 2cm, 3cm, 4cm, 5cm, 6cm, 13.8cm and 21.6cm.

(3/4″, 1  3/16″, 1  9/16″, 2″, 2  3/8″, 5  7/16″ and 8 1/2″)  – Please check the measurements.

2. Fold on all the score lines starting as I have shown in the photo in a concertina fashion creating a “M” shape at the beginning and then after folding it as a Valley fold on the next 2 score lines. (ie folding it up towards you). I haven’t shown those folded in this photo.
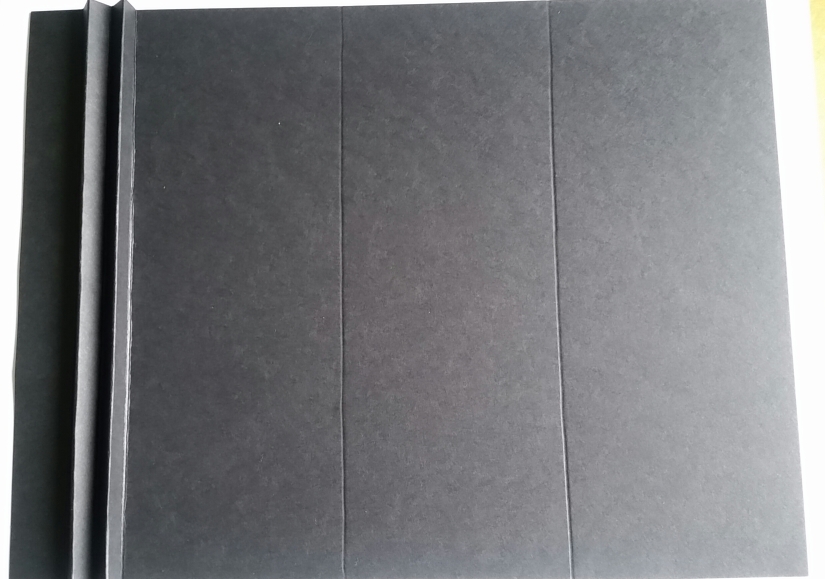
scored card

3. On the back of the card, place adhesive behind each side of “peak” that is formed. in the “M”. Adhere these together.  Check the photo below. (sorry if it is a little unclear).    This is it turned back to the correct side of the card.  It now becomes more a “V” shape which will be your crease for your acetate strips.
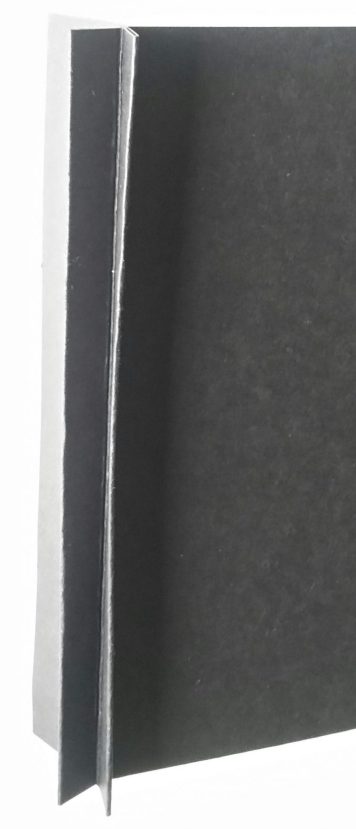
folded piece

4. After you have stamped and punched your images adhere them to the acetate strips. I used Fast Fuse to adhere them but you could use glue dots or other tape. I punched 2 balloons so adhered one to the back and one to the front of the acetate strip. Check the length of the acetate strip with the image to see if it is the right length BEFORE you adhere them in. 🙂 Trim the strip if necessary remembering you want to make sure they fit below the score line as I described above.

Place your adhesive (Fast Fuse or tape) along one edge inside the crease and adhere the acetate strips in place. Once in place then adhere the crease together. See the photo below.
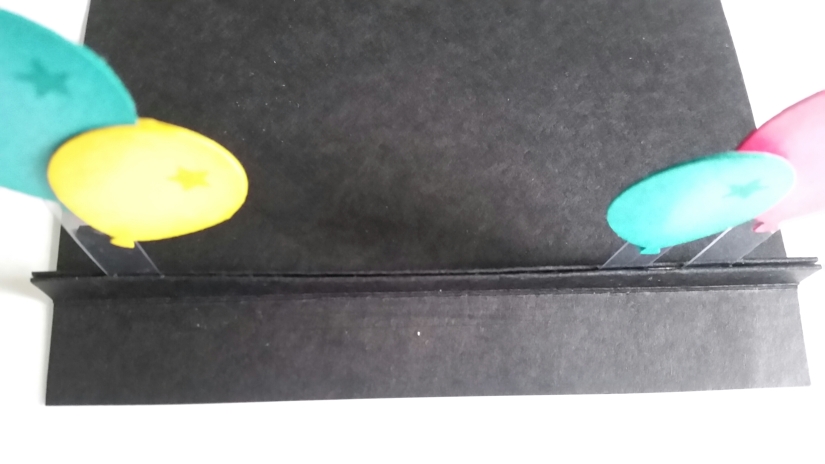
Balloons suspended

5. Now you can create the front and the inside as you like.  I adhered the Designer Series Paper piece on the front.  The Whisper White piece I stamped and adhered inside.

+++

I hope you can follow this.  Perhaps I need to start making videos. 🙂  If you have any questions please don’t hesitate to ask me.

Jenny

cards, Stampin' Up!

SWEET SUGARPLUM THOUGHTFUL BRANCHES!

The delivery of my Thoughtful Branches bundle arrived today as I was creating. I had been waiting with anticipation for this set so I was excited. I had been deliberating what to make next so it arrived just in time!

I had been pinning ideas on Pinterest, so I could have CASED some but I wanted to see what I could create.  So here is what I made.

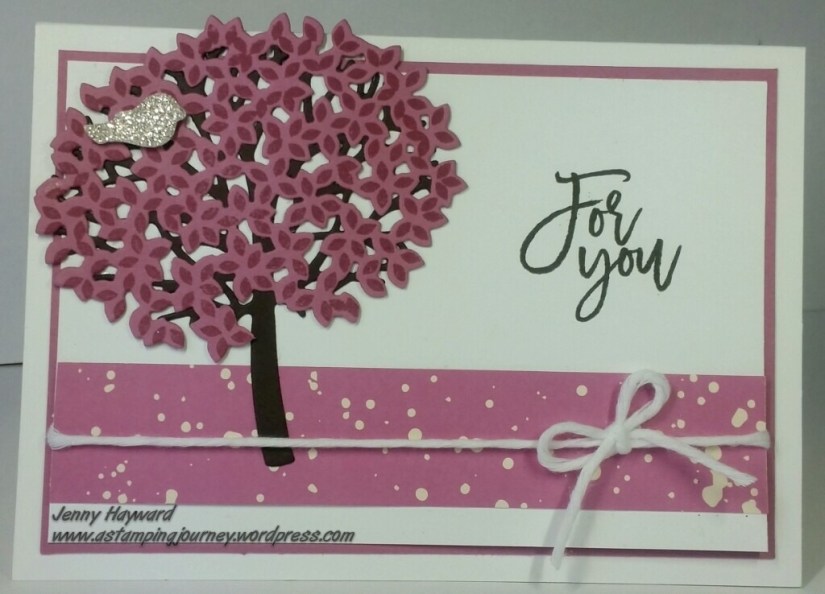
image

The Designer Series Paper is from the Playful Palette paper stack. The tree is cut from Early Espresso. I stamped the leaves in Sweet Sugarplum on the cardstock then cut it out with the Thinlits. The sentiment is stamped in Early Espresso and then matted it on Sweet Sugarplum. I tried several colour card bases but then settled on the Thick Whisper White card base. I think that was the right choice. Before I assembled the card I wrapped around Thick White Baker’s Twine. I think I should have gone with the thinner white though. Too late then though 🙂 It needed a little sparkle to finish so I cut the little birdie from Glimmer Paper.

There are so many elements in the stamp set and the Thinlits so it is very versatile. I think you would get lots of use from these making cards for different occasions. If you haven’t seen the set you can check them out in the previous post.

The bundle is $90.75. Of course you can get them individually but you can save 10% by buying the bundle. You can order this bundle from me. When you order from me You will also receive a PDF of some bonus projects PLUS receive double the VIS (loyalty) Points.

I am looking forward to creating more with these so stay tuned.

Jenny

Classes, Stampin' Up!

THOUGHTFUL BRANCHES BUNDLE FOR A LIMITED TIME!

Stampin’ Up! have released an exclusive Stamp set and Thinlits Bundle available for a limited time.  The ‘Thoughtful Branches Bundle is a beautiful set and available for a limited time from 2nd – 31st August.

Thoughtful Branches Header

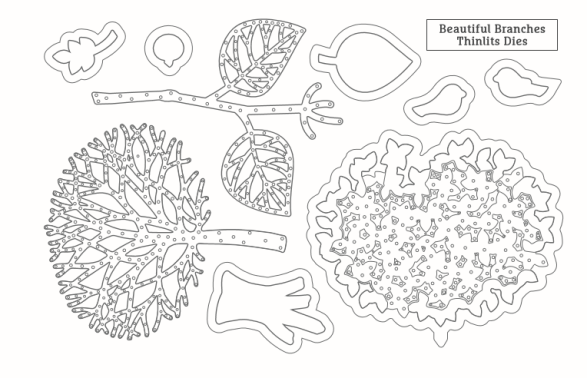
Thoughtful Branches Thinlits

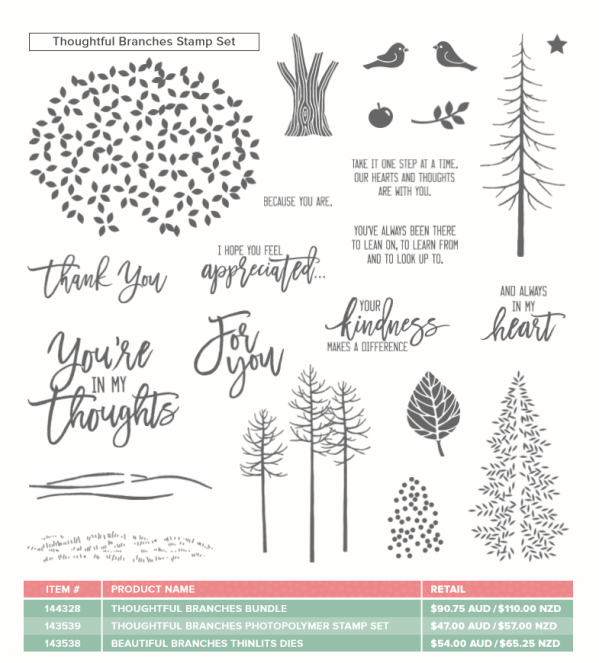
Thoughtful Branches Stamp set

Isn’t this a gorgeous bundle?  The beautiful font in the sentiments will add some elegance to your cards. This is such a versatile bundle with the stamps and the Thinlits making cards for so many occasions. Imagine what you could create with this set!

You can buy the stamp set and the Thinlits separately but why not save 10%. The Bundle price is $90.75.

**BONUS** –

Receive a PDF of some bonus projects PLUS

Receive 2 VIS (Loyalty) points when you purchase this from me. 

You can order this Bundle directly from me OR through my store.  Order HERE at my store. I can ship to anywhere in Australia.

I will be holding a class showcasing this set on the 13th August so mark the date down now.  I will try and offer it by mail too so check back soon.

Jenny

cards, Stampin' Up!, swaps

PINWHEEL TAGS TEAM SWAPS!

I have been on a roll with the Pinwheels lately using the Swirly Bird set.  I needed to make some swaps for our team meeting last night so I decided to make up some quick tags with them.  WELL….. That was the plan.  These tags took hours.  Nothing was going right yesterday.  I was getting ink everywhere, I was cutting things wrong!!! Do you have days like that?  Anyway, I got them done.

swirly tags

I made a few variations of them and a number of each. For the colours on the Pinwheels they are from left: Wild Wasabi and Emerald Envy; Sweet Sugarplum and Peekaboo Peach; Blushing Bride and Peekaboo Peach; Sweet Sugarplum and Elegant Eggplant.  I used some scraps of the Playful Palette DSP stack too.  (I am on a mission to use all of my DSP!).

The white card measures 13cm x 5cm (5 1/8″ x 2″) but you can make them any size you like.  These will fit on a card front to make a full card.  I rounded the tops with the Corner Punch.

The sentiments are from ‘Thoughtful Banners’.  I punched them out using the Classic Label Punch.  It’s cool that you can punch them different ways to create different effects. I coloured the Rhinestones with a black sharpie.

I got there in the end.  I hope you like them.  🙂

Jenny

cards, Classes, Stampin' Up!

SOME MORE SWIRLY BIRDS!!

I have some more Swirly Bird cards to show you today.  This is such a fun set. Have I told you that before 😉

Here they are. These first 2 cards we made at our Swirly Bird class along with others I had already shared. These cards were inspired by ones I had seen on my internet travels.

On this first one, the sentiment is from ‘Butterfly Basics’ and the clouds are from ‘Sprinkles of Life’.  The base card is Dapper Denim with the kite stamped in Dapper Denim and Real Red.

kite

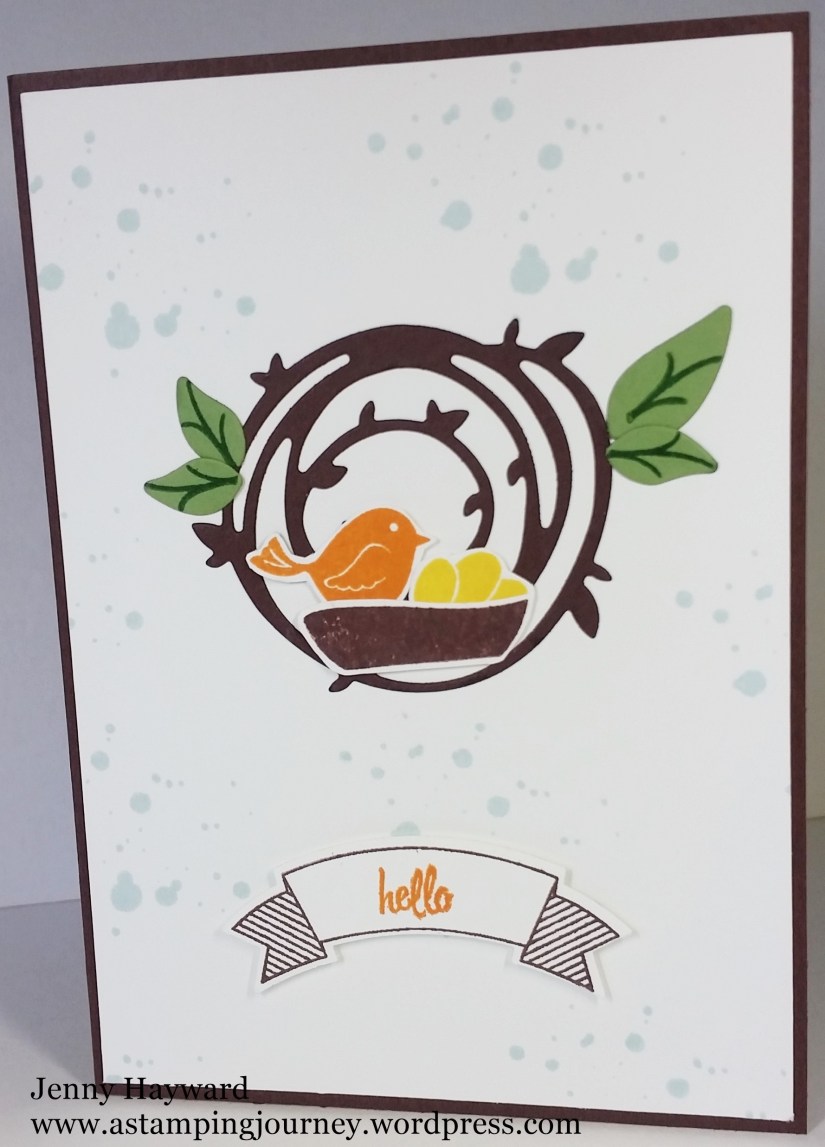
This next one, the card base is Chocolate Chip.  This is a colour I haven’t used in AGES!!! I even dragged out the inkpad! This made a cute image of mummy bird and her eggs.  The sentiment is from ‘Thoughtful Banners’. The background spots are stamped in Soft Sky. This card is fairly simple looking but it did take some time to cut and to put together.

Swirly Bird _ bird

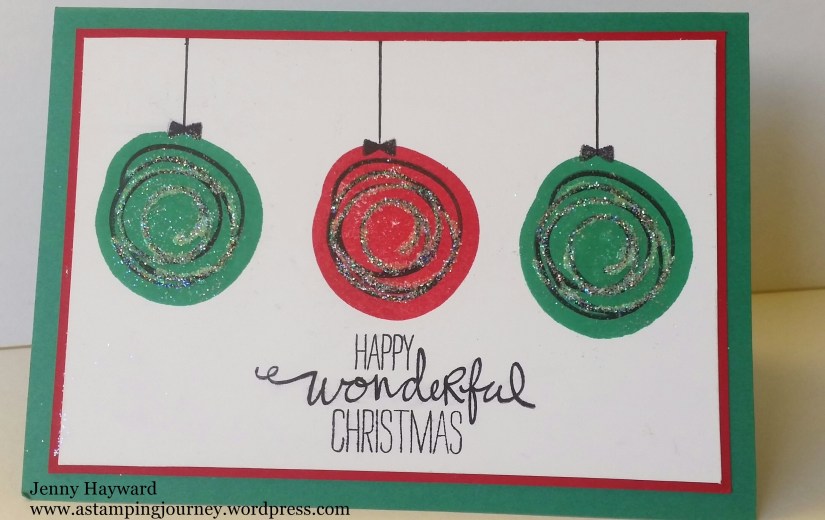
What about a Christmas Swirly card?  Yes I made a Christmas card!  I couldn’t help it.  I wanted to show the versatility of this set at my class. This card was CASED from Beth on a Facebook group I am on.  I just made it into traditional Christmas colours.  I added some dazzle with the Dazzling Diamonds in the centres of each bauble too.  The sentiment for this is from ‘Wondrous Wreath’.

Swirly Christmas

So many ideas for this set.  What have you come up with?? I would love to see them.  Send me a photo and I will share them here on my blog.

Thanks for stopping by.  Today it is FREEZING!!! Is it Summer soon???

Have a great day wherever you are,

Jenny


Catalogues, Stampin' Up!

2016 STAMPIN’ UP! CATALOGUE RIBBON SHARE!

Have you seen the gorgeous ribbons in this year’s catalogue?  You can find them on p178-179 if you haven’t.  I know that at times it is hard to get through a whole roll of ribbon so why not share it around with others!  I have some Ribbon Shares for you to join in.  I only have a few places left so you have to be quick.  Let me know by a comment or email.  This is for Australian residents only.

2016 RIBBON SHARE  

* These prices include Shipping and Handling for the ribbon to be sent to me from Stampin’ Up! There may be a small cost to mail the share on to you so please ask me.

2016 Incolor Ruched Ribbon (3/8” or 1cm wide)

1.8 m of each colour (Dapper Denim, Emerald Envy, Flirty Flamingo, Peekaboo Peach, Sweet Sugarplum)                                                  $14.70

Incolor Ruched Ribbon

Mint Macaron Sheer (3/8” or 1cm wide)      1.8m             $ 2.60

mint macaron sheer ribbon

Whisper White Mini Pom Pom Trim              90cm              $2.60

mini pom pom trim

JOIN ALL 3     FOR $19.00

Thanks for checking in today.  Have an awesome day/night wherever you may be. 🙂

Jenny

cards, Catalogues, Stampin' Up!

STAMPIN’ UP! CATALOGUE LAUNCH – PART 2!

I have some more of the fun from my Catalogue Launch for you.  If you missed out on the first part then head back to the last post I did.  Today I want to share with you some of the stamping fun we had.

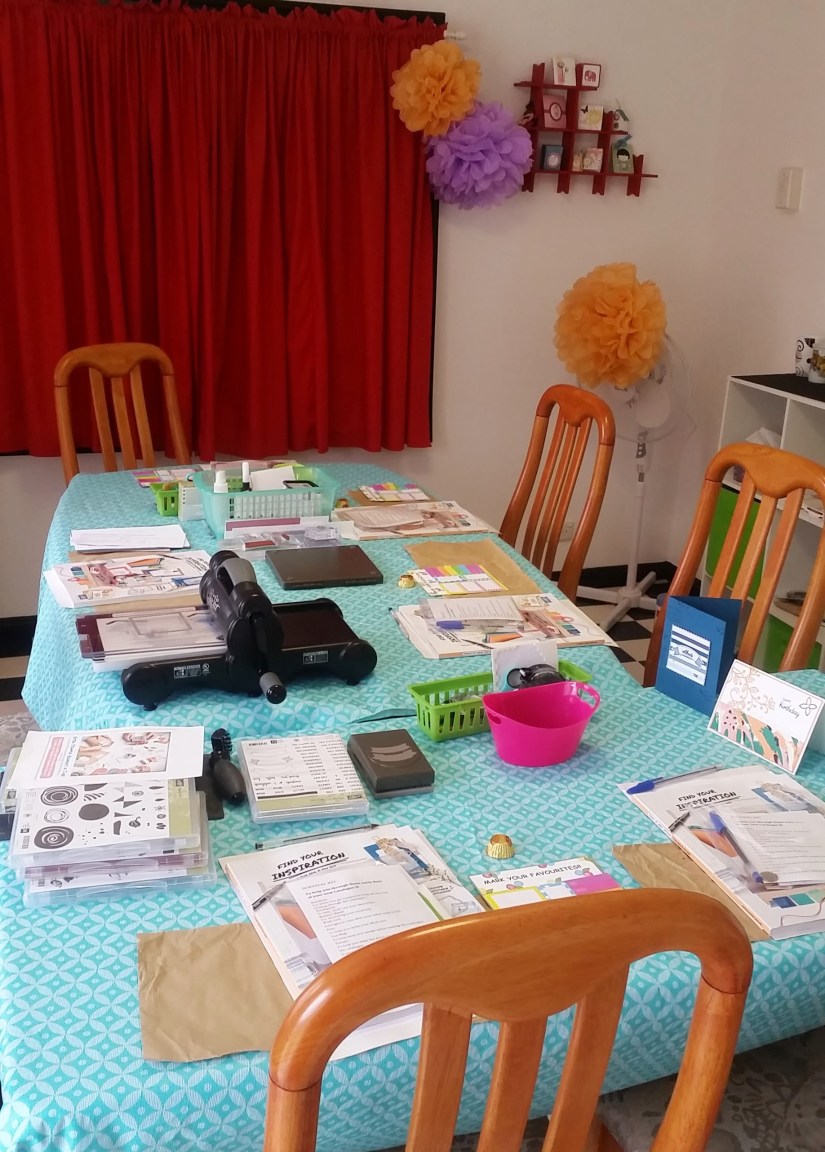
The table all set up ready to go.  I was pretty excited with the Pom Pom Flowers I found that was a fairly close match to some of the new Incolors.

Table

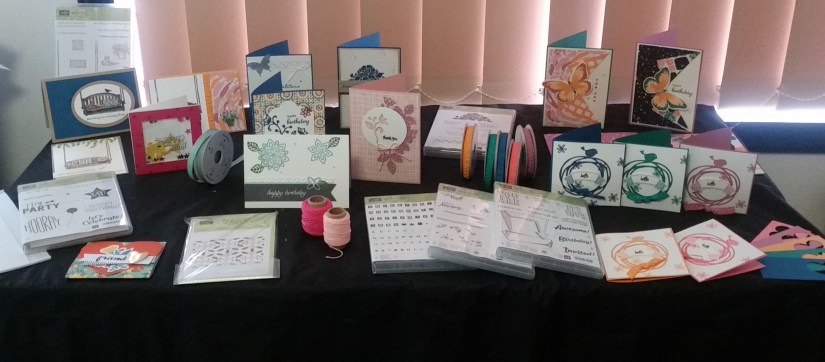
This was a sample of some of the new products and some cards.  I had other new products in the Product Playground that I showed in the last post.

sample table

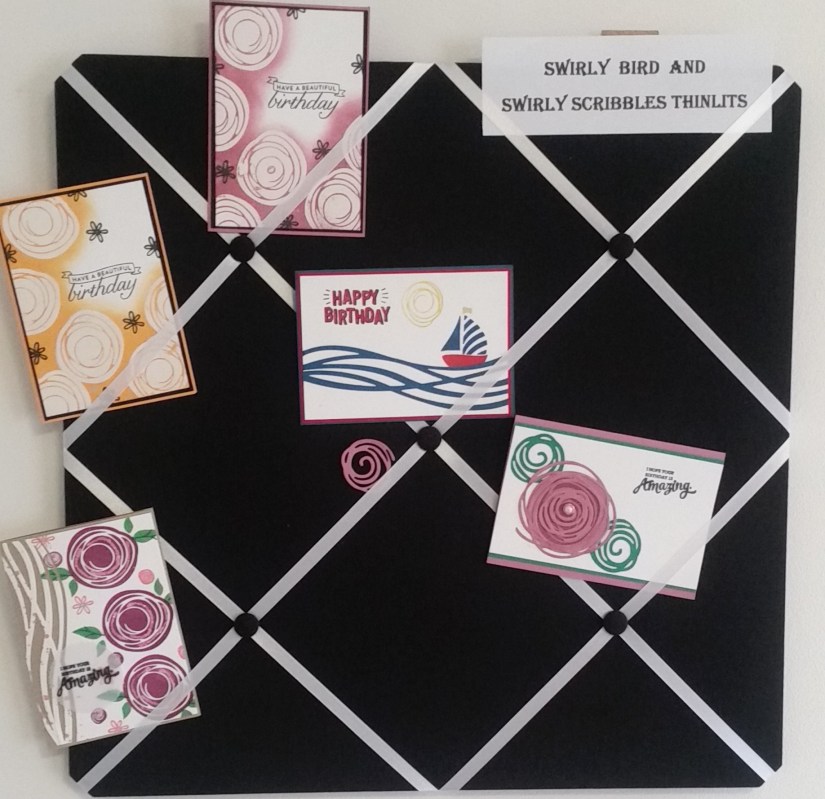
I had some Swirly Bird card samples to share.  I have a class this coming Saturday just with the Swirly Bird stamps and the Scribbles Thinlits.  That should be a lot of fun.

Swirly Board

This was the first Make and Take using the new Flourish Thinlits.  I love the delicateness of these dies.  I found they cut surprisingly easy even with just the regular platform.  I used the new ‘Playful Palette’ DSP stack too.  The sentiment is from the new set ‘Best Birds’.

Flourish _ Peekaboo Peach

The other Make and Take was using the new Dapper Denim Incolor.  I have used the ‘Thoughful Banners’ stamp set. These banners are so easy to punch with the Duet Banner Punch.   I stamped a background on the base card with the Timeless Textures stamp set. The colours of the stripes were from the top – Night of Navy, Dapper Denim, Island Indigo, Marina Mist and Soft Sky.  I cut a scallop square mat for the white stamped card piece with the new Layering Square Framelits.  It just gives a subtle peek of the silver Foil. This card was inspired by a card I saw on a Facebook group I am on.

Dapper Denim thoughful banners

So lots of fun was had by all my lovely ladies who came.  I appreciate each and every one of them.  If you are local make sure you come along to my next launch or class to enjoy the fun.

Thanks for stopping by,

Jenny

Catalogues, Classes, Workshops

STAMPIN’ UP! CATALOGUE LAUNCH!! PART 1.

This week I had my Catalogue Launch for this fantastic new catalogue.  I had 2 sessions. One Friday night and one on Saturday.  Both of them were lots of fun and laughs and of course creating.  I thought I would share some of the fun with you.

Firstly,  I had a Product Playground area with lots of new products that everyone could have a play with.  This was very popular.

Playground sign

Here we had an Incolor bookmark they could make.  A great way to have a sample of the new Incolors for their catalogue.  Then they could use the Ombre Ink pads.  This one is the Bermuda Bay.  I will tell you about the Ombre Inkpads in another post.  They could stamp the flower and add it to a card when they get home.

Playground_1

Of course we had to play with Baby Bear.  I had done a few different colour combinations to show and they could stamp their own Baby Bear.  He (or she) was very popular!  I will tell you about Baby Bear in another post too.:)  I also had the new embossing folder ‘Floral Affection’ which is really lovely too.  So many nice new products.

Playground _3

Now I like to spoil my lovely ones who come.  There was some fun gifts and some very useful product gifts.

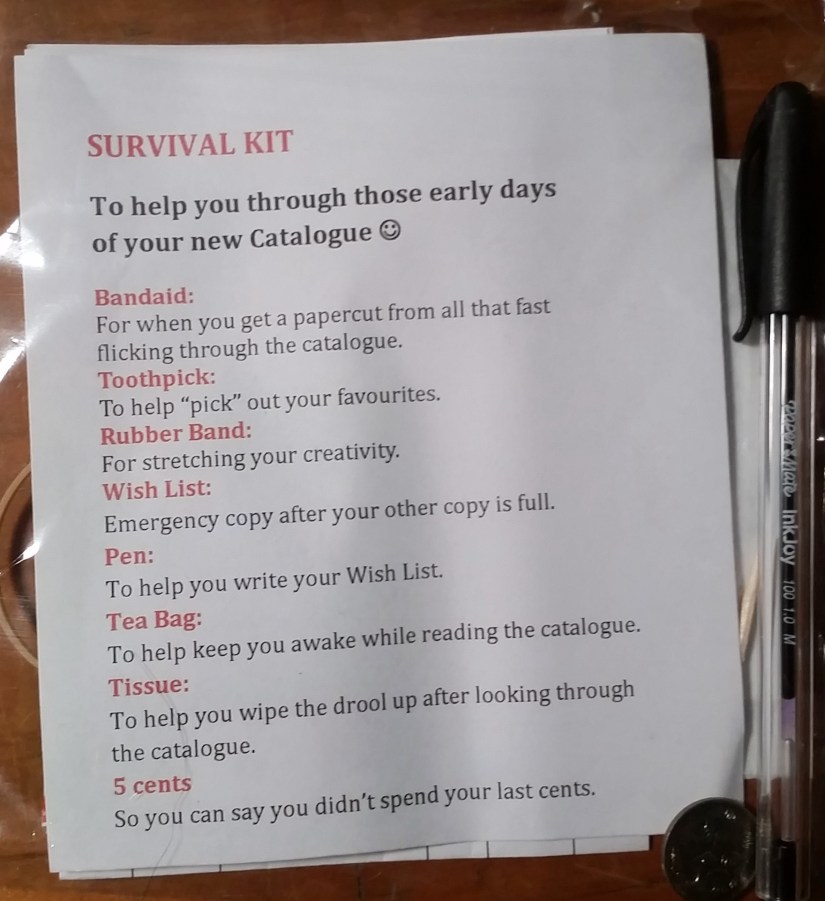
I made up some Catalogue Survival Kits. To help everyone through their catalogue.

Survival Kit

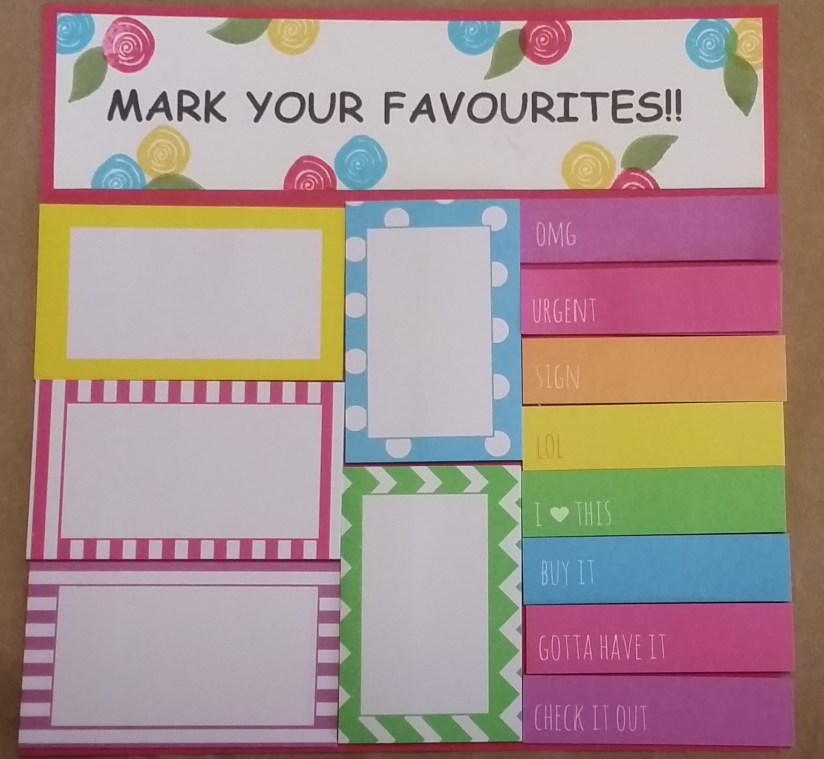
I found these fun Post-It notes and made up these cards for everyone so they can add them to their catalogue. For the header on these Post-It note cards I created the heading on the computer and then stamped around it with the ‘Swirly Bird’ stamp set.

Post it notes

I have so much Designer Series Paper and ribbon and bits from past years so I bagged up a lot to give a special grab bag to everyone.  I think everyone thought it was Christmas. 🙂  It was a lovely way to say Thanks to them not just for coming to my launch but for their loyal support many for some years.  It was so lovely to see the joy in their faces.  That made the day all worthwhile.

Treat bag - 2

It wasn’t a fancy bag but these Stampin’ Up! Bags are a good size for the Designer Series paper – and I have so many of them!  I made a quick tag using the ‘Thoughtful Banners’.

Treat bag _ 1

I have some more photos to share with you but that will be next post so do come and visit.

Thanks for stopping by today,

Jenny