Blog Hops, cards, Catalogues, Tutorials

LATCH FOLD WITH TRANQUIL TULIPS!

Yesterday I shared a Christmas Latch Fold card.  Today I have another version using the Tranquil Tulips set.  OK, I did this card first and then realised for the Blog Hop that it was for the Holiday Catalogue.  I thought I would share it with you today and give you the tutorial for it. 🙂

I have used the Birthday Blossoms set for the front and inside.  I think it works well.  The small flower to hold the flap was punched with the 3/4″ circle and then layered on a circle punched from Cherry Cobbler with the 1″ circle punch.

Here is the inside.  I added a strip of the Old Olive paper from the Color Theory Paper Stack. 

CREATE YOUR OWN LATCH FOLD CARD

** Apologies in advance for Imperial measurements.  I am not too familiar with your standard card size so just check the measurements first for the front and inside card mats 🙂

1. From a standard size card base cut off 2.5cm (1″) off the front of the card.

2. Stamp your front image on Whisper White card. This piece was 7cm x 14.4cm.  (for Imperial, measure a piece slightly smaller than the size of your front panel).  If you like add a strip of Dazzling Diamonds Glimmer Paper. 

3. Cut a strip for your latch which measures 10.5cm x 2.5cm and score it at 8cm.  (4 1/8″ x 1″).  The white sentiment strip is 7.6cm x 2.1cm (3″x 3/4″)

4. For the inside panel cut a piece of Whisper White for the card mat slightly smaller than the inside of your card. (10.1cm x 14.4cm).  (Imperial measure approximately 1/8″ smaller than the inside of your card).  Add a strip of Designer Series Paper (14.4cm x 3cm) (Imperial 1 1/8″ x length of your card).  BEFORE you stick this down to the inside of your card adhere your latch strip by adhering the smaller section of your strip behind your white card mat.

5. Fold this over the front of the card and position your punched circle piece in place that will hold your card closed.  You can add a Dimensional to the back of the circle to raise it up but remember to ONLY ADD IT BEHIND HALF of the circle to allow you to fit the latch under it. 

Hope this makes sense.  Have fun making your Latch Fold card.

Jenny

3D projects, Blog Hops, cards, Stampin' Up!, Techniques, Tutorials

STAMPIN’ DREAMS BLOG HOP – BLACK, WHITE AND 1 OTHER COLOUR!

Today I am joining in with the Stampin’ Dreams Blog Hop.  You might have just come from Jenny Hall’s blog HERE.  This month’s theme for the Stampin’ Dreams Blog Hop is Black, White + One.  Any colour you choose.  There are so many options really.  What to choose??  I really wasn’t sure what to go with until I sat down and started making the card.  My +1 for this Blog Hop is BERRY BURST!  Such a fun colour and I think it really “pops” when added to black.

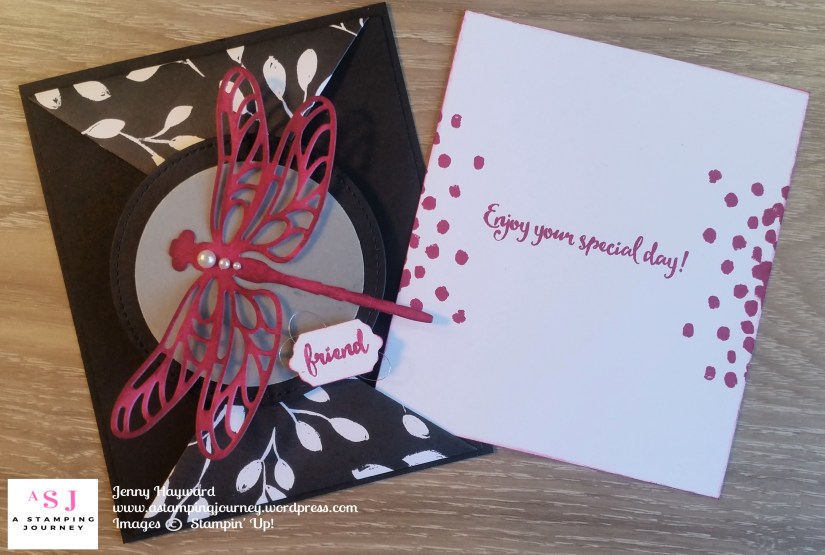
Here is the card I created.  It’s a Triangle Pocket card using the Merry Little Christmas Designer Series Paper.  Don’t think of this paper just for Christmas!

I found the original card inspiration HERE.  I changed the measurements a bit and also how I made it so I will add the tutorial below for you.

You can continue on your Blog Hop now and then come back to see how you make themNow head off to Sharon’s blog -> HERE. 

———————–

CREATE YOUR OWN TRIANGLE POCKET CARD

You will need:

Base card – Basic Black 13cm x 10.5cm (5 1/8″ x 4 1/8″)

Inside card (I used as the inside lining) – Basic Black 12cm x 10cm ( 4 3/4″ x 4″)

Whisper White card  12cm x 10cm (4 3/4″ x 4″)

2 x Designer Series paper (DSP) squares 10cm x 10cm (4″ x 4″)

scrap card for embellishing.

1. Take your 2 Designer Series Paper squares.

2. Turn the papers so that the pattern that you want on the outside is faced down.

On each square fold the top edge in to 2 triangles.  Be sure that both triangles on the piece match.  I found it helped to just hold the mid point on the edge of the square with your finger or the bone folder as I folded it in. Fold up the straight edge over the triangles.  I actually placed the paper on my paper trimmer and scored a straight line just under the triangles to give a crisper fold.


Open up the straight edge fold again. Place adhesive behind the triangles to adhere them down.

3. Place adhesive on the back of the patterned paper along the straight edge and adhere them down to the back of your card lining piece. (for this I used Black card).  I added this step as I liked to hide the edge of the triangles to make it look neater especially as it is a colour I didn’t want showing.

4. Place adhesive on the back of the card lining piece and adhere that to your card base with the triangles sticking out.

5. The triangle pieces don’t meet in the middle but that’s OK.  You can embellish the front.  I added some diecut circles (one in black and one in vellum) and a diecut dragonfly from the Detailed Dragonfly Thinlits.  On the dragonfly I sponged in places with the Berry Burst Ink.  I also went over just the “friend” word from the Dragonfly Dreams set with a Berry Burst Marker and it was then cut with the smallest of the Lots of Labels Framelits. 

6. On the inside white card insert I stamped the sentiment and the spots from the Dragonfly Dreams in Berry Burst and added just a little sponging around the edge.

What do you think?  I think I want to make more of them that’s for sure. 🙂

Jenny


cards, Catalogues, Sale-A-Bration, Tutorials

MINI SCALLOP SQUARE CARDS WITH ANY OCCASION!

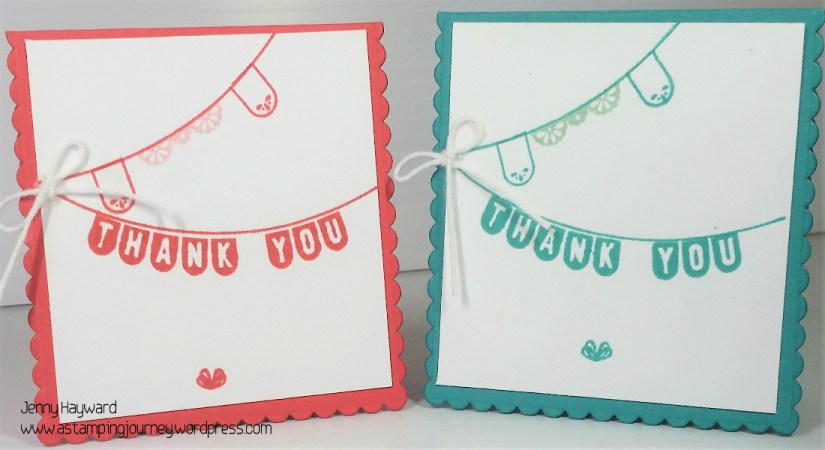
I have been making these mini Thank You cards recently for all my lovely customers who have placed orders with me during Sale-A-Bration.   I used one of the Sale-A-Bration sets ‘Any Occasion’ which I think is overlooked in the Sale-A-Bration catalogue.

The cards are about 7.5cm square (about 3″). They are quite simple cards cut with the largest Layering Squares Framelits.  I will show you how to do that below.

The left one is Watermelon Wonder with a little Blushing Bride for some banners. The right one is Bermuda Bay with a little Mint Macaron.  I added a bow with White Baker’s Twine.  I really should have added some bling I think???

To create your own Mini Scallop Square Cards:

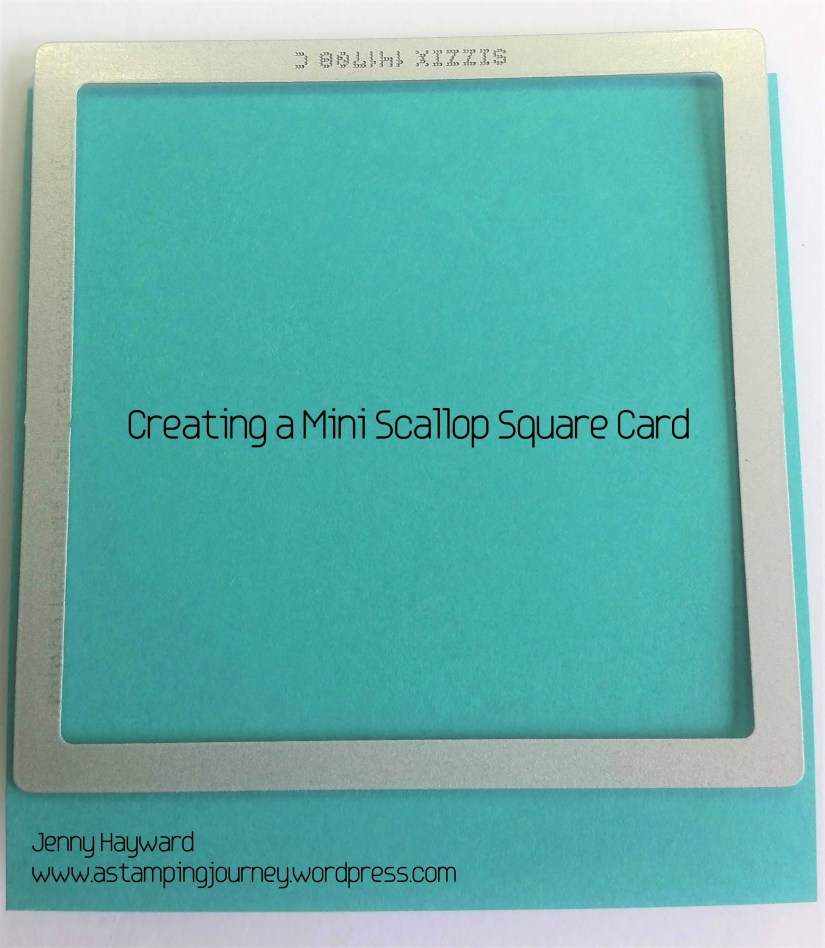
Place the largest Scallop Square of the Layering Square Framelits on your folded card base so as the top edge of the framelit is just off the edge of the fold of the card. This will mean that the top won’t be cut through. See the photo above.

Run the card and Framelit through your Big Shot as you would normally.  Below shows how the card looks after cutting it.

Decorate the card as you like.  I also added a piece of card inside to write on.  They make quick little cards to give with a gift.

Jenny

Less than a week now to the end of Sale-A-Bration.  Make sure you SHOP or JOIN before the end of Friday.  If you love FREEBIES you won’t want to miss out. 

If you want to shop contact me directly or Order Online -> HERE.  Please use the Host Code FUCQ2STG

To JOIN and get up to $245 of products when you order $169 then Head -> HERE.

3D projects, cards, Tutorials

POP UP EASEL CARD!

A customer called in last weekend and showed me a card she had made. She had gone to a class to do it.  (It wasn’t a Stampin’ Up! class and I don’t know who the original creator is). I loved the idea of the card so I had to make one. I had a little time to play around with it the other day. I call it a POP UP EASEL CARD. I used Confetti Celebration on mine.  I will show you the photos of the card (sorry, lots!) and then give you the instructions.

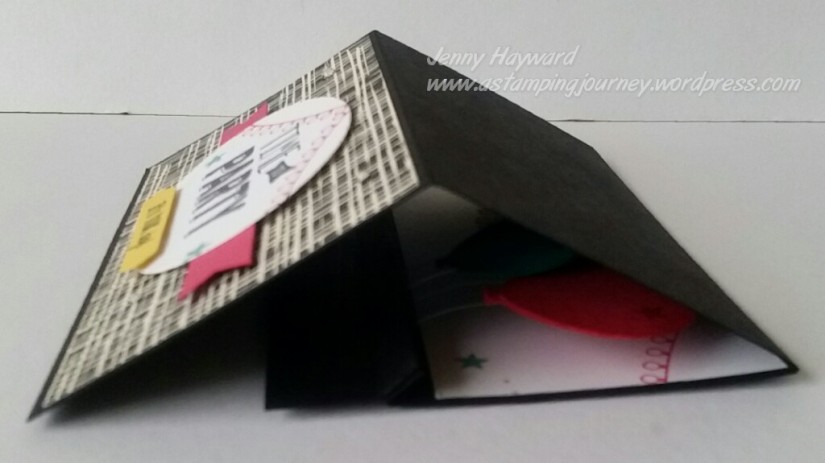
This is the front of the card.  The Rhinestones you see is what holds up the Easel part.  The balloons are suspended on strips of acetate in a folded crease.

Easel front

This is another view front on.  The Designer Series Paper is from the Playful Palette pack. The balloons are punched with the Balloon punch in Bermuda Bay, Daffodil Delight and Melon Mambo.  I sponged around the edges with the sponge and added a small star that from the stamp set.
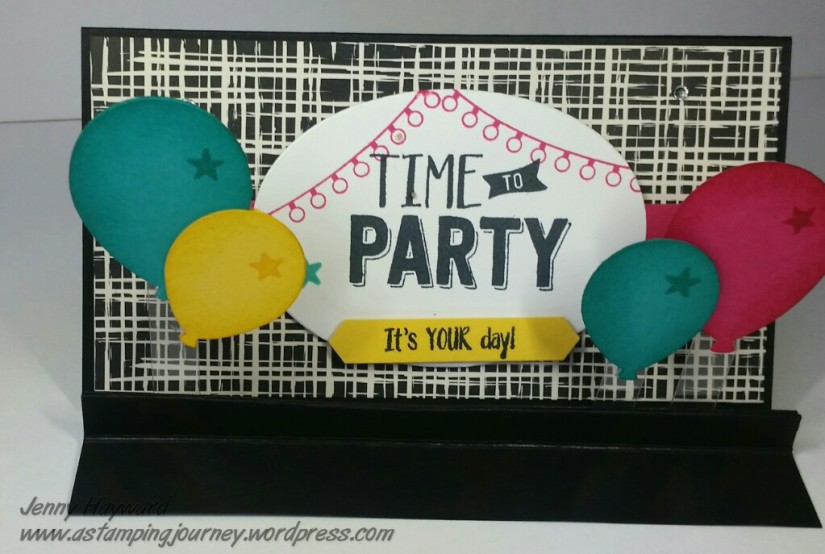
Easel card

Side on view gives you an idea of the suspended balloons.  I punched 2 each of the balloons and adhered one to the front and back of the strip of acetate to keep it tidy.

You can see the side view and inside of the card with the sentiment that I will show you below.
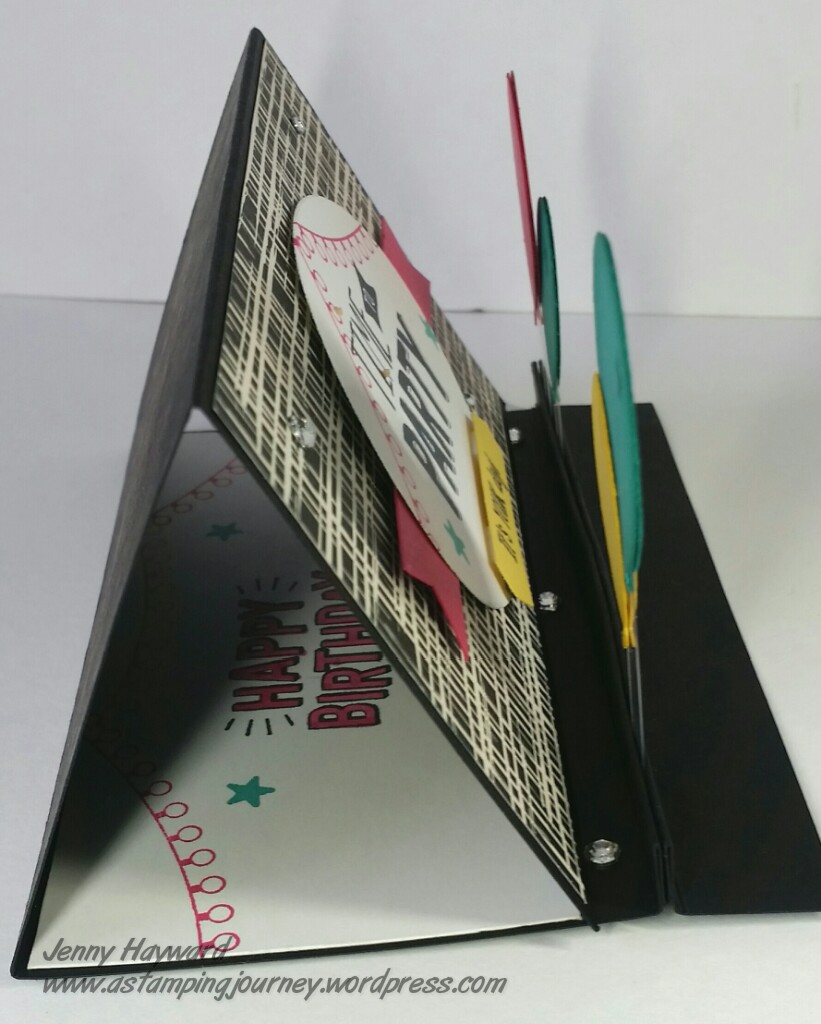
Side view of Easel

The card can fold flat for postage.

folded inside

When it is folded flat it is a square card measuring approximately 15cm x 15cm (6″ x 6″) so you would need to make an envelope to fit but that is no problem with the Envelope Punch Board!

folded

This is inside of the card.  I continued with the sentiments from the Confetti Celebration set.
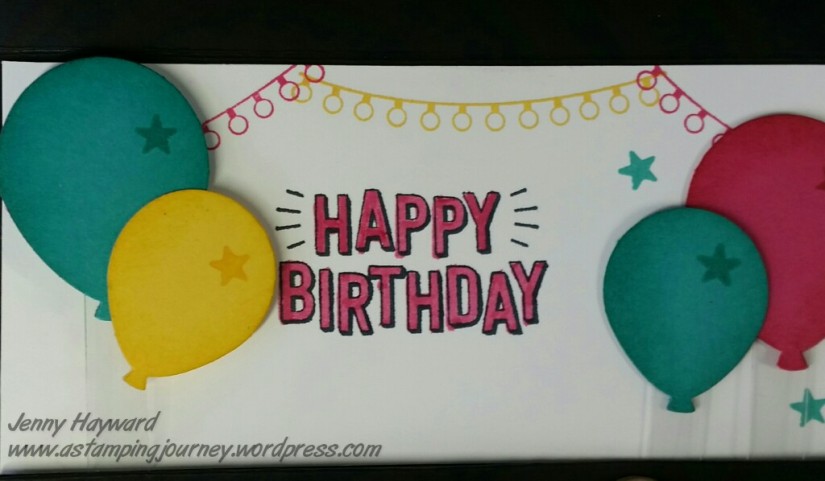
 inside

You can see when it is open that the balloons can fold flat against it.  This is a trick too. Whatever image or shape you have suspended in the front crease, you need to fold it against the inside of the card to test it out first before you put it together to be sure that it will fit below the score line for when it is folded flat.  You can’t have it squashed in. 🙂 Check the photo below to see what I mean. The balloons sit just below the score line.
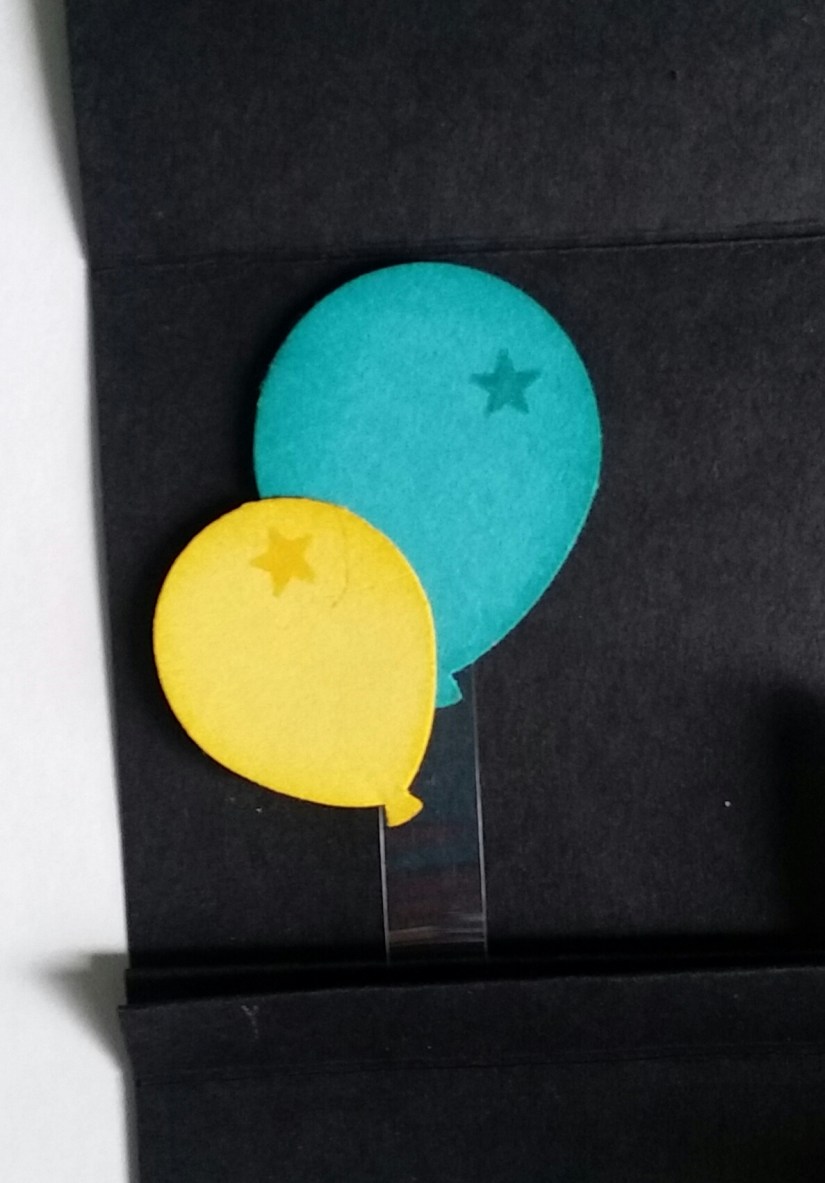
Balloons lying flat

Now I will tell you how to make your own.

POP UP EASEL CARD

NB: I have included metric and imperial measurements.  For those following the Imperial measurements can you please just check these.  Maybe do a test run first. I am just concerned with all the “16th” measurements if they are correct.  🙂

What you will need:

Cardstock for base 14.8cm x 29.8cm (5 7/8″ x 11  3/4″).

Designer Series Paper 14.4cm x 7.6cm (5 7/8″ x 3″)

Whisper White card (inside piece) 14.4cm x 6.6cm (5 7/8″ x 2  3/4″)

Scrap card for your suspended images (Of your choice.  I have chosen balloons for this one).

Acetate strips 1 cm x 4-5cm (1/4″ x 1  1/2″-2″) You will trim these as you make the card depending on where you want your images to sit.

To construct your Easel:

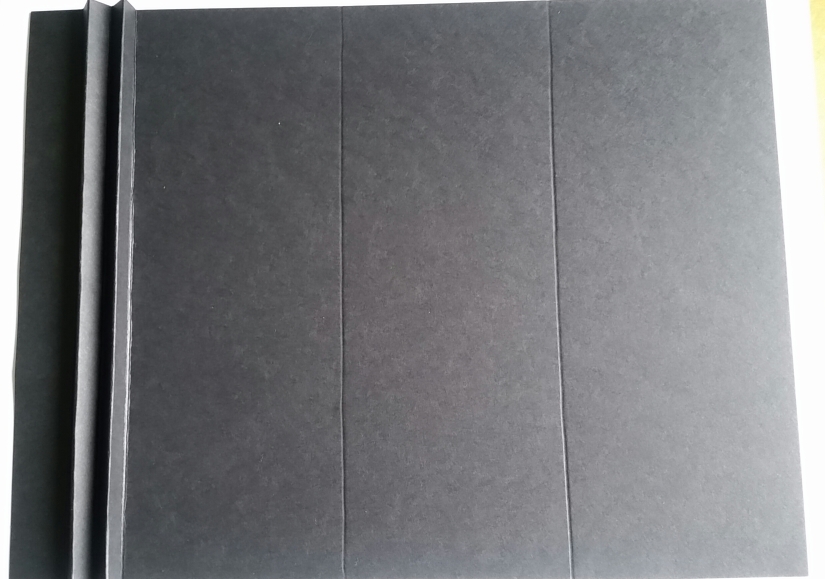
1. On the long side score your card at 2cm, 3cm, 4cm, 5cm, 6cm, 13.8cm and 21.6cm.

(3/4″, 1  3/16″, 1  9/16″, 2″, 2  3/8″, 5  7/16″ and 8 1/2″)  – Please check the measurements.

2. Fold on all the score lines starting as I have shown in the photo in a concertina fashion creating a “M” shape at the beginning and then after folding it as a Valley fold on the next 2 score lines. (ie folding it up towards you). I haven’t shown those folded in this photo.
scored card

3. On the back of the card, place adhesive behind each side of “peak” that is formed. in the “M”. Adhere these together.  Check the photo below. (sorry if it is a little unclear).    This is it turned back to the correct side of the card.  It now becomes more a “V” shape which will be your crease for your acetate strips.

folded piece

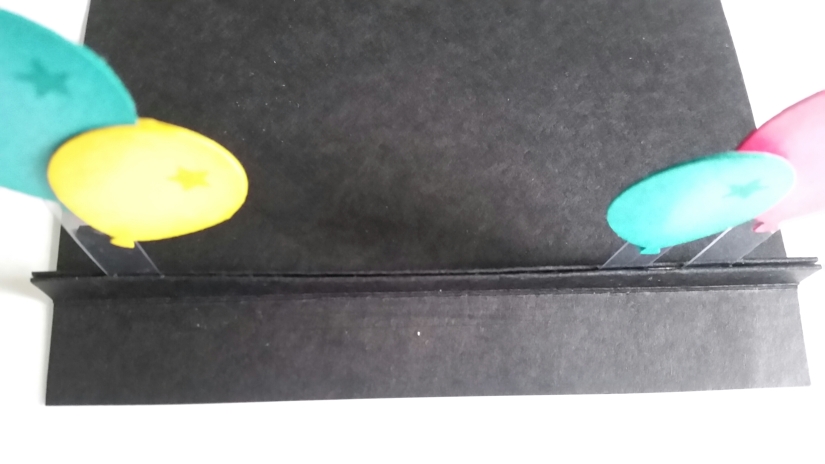
4. After you have stamped and punched your images adhere them to the acetate strips. I used Fast Fuse to adhere them but you could use glue dots or other tape. I punched 2 balloons so adhered one to the back and one to the front of the acetate strip. Check the length of the acetate strip with the image to see if it is the right length BEFORE you adhere them in. 🙂 Trim the strip if necessary remembering you want to make sure they fit below the score line as I described above.

Place your adhesive (Fast Fuse or tape) along one edge inside the crease and adhere the acetate strips in place. Once in place then adhere the crease together. See the photo below.
Balloons suspended

5. Now you can create the front and the inside as you like.  I adhered the Designer Series Paper piece on the front.  The Whisper White piece I stamped and adhered inside.

+++

I hope you can follow this.  Perhaps I need to start making videos. 🙂  If you have any questions please don’t hesitate to ask me.

Jenny