Christmas, Stampin' Up!

CHRISTMAS IN JULY – AND IT’S ALL ONLINE!

Christmas in July 2016

Christmas in July starts tomorrow.  Here is a taster of the projects I am sharing.

collage for Christmas in July

It’s all happening online so you can join in from anywhere – and it’s free! Here are the details for you to join up.

Christmas in July runs from 19th – 22nd July. 

Each day I will be sharing a Christmas project that I hope will inspire you.  We will have time to chat if you are around via Facebook and have some fun.  I will have some great specials through the week too.

There are 2 different ways to follow along. 

1) This will run through a Facebook group.  Please Click HERE to ask to join.  Invite friends of yours to join in too.

2) Not on Facebook? You can receive the projects by email. (address in right tab bar near the top) Please email me to ask to join in and I will send you an email each day with the project and the special. You will just miss out on the chatting.

So come and join in!

Jenny
cards, Stampin' Up!

COLLAR CARDS WITH PLAYFUL PALETTE!

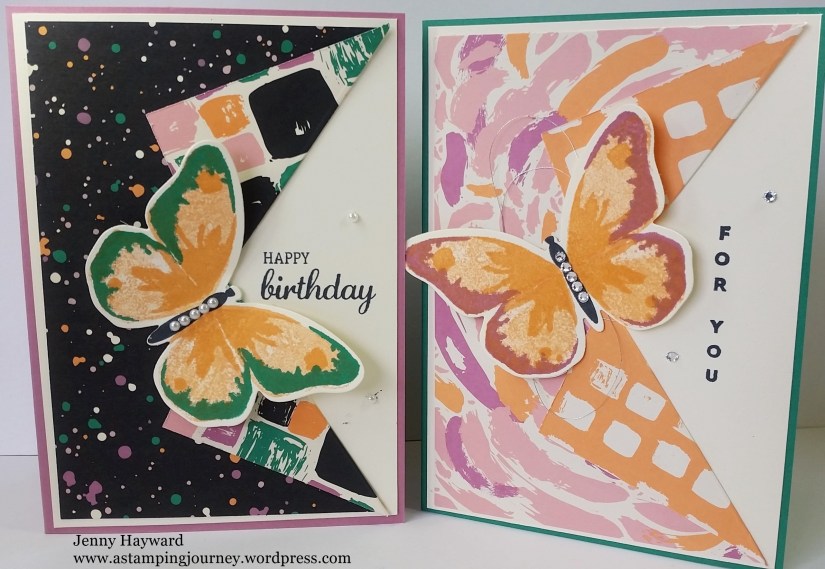
The Stampin’ Up! Designer Series Paper (DSP)  is so beautiful. The problem is you can only show one side at a time on a card. I think these collar cards are a great way to show off both sides. Have you seen these collar cards around?  They can go by other names too. They are very easy to do.

Playful Palette Collar Cards

I saw the idea on Pinterest and using the Butterflies from ‘Watercolor Wings’ on a card on a forum I am on.  Both are great to show the colours.

I am not going to give you exact measurements for your cards of how to make them. Really you can make them any size you want. You have your standard base card, then the card mat which I have in Very Vanilla.  This is slightly smaller than your card base.  Then the DSP is slightly smaller than that. It depends on how wide the border you want too.

(OK if you are metric the base is 14.8cm x 10.5cm.  The mat is 14.4cm x 10.1cm and the DSP is 14cm x 9.7cm).

I have used the ‘Playful Palette’ DSP stack. On your DSP measure along on the long side and mark a point half way. Cut in to your DSP piece by about 5cm (2″).  Then fold back each piece to angle the paper and press to along the score line to crisp the fold. See too easy!

On the Very Vanilla piece I stamped the sentiment.  The one on the left is from ‘Best Birds’. The one on the right is ‘Vertical Greetings’.

For these butterflies:  The one on the left is stamped in Peekaboo Peach (stamped off), Peekaboo Peach and then Emerald Envy.  The one on the right is Peekaboo Peach (stamped off), Peekaboo Peach and then Sweet Sugarplum.

Isn’t it great to be able to see both sides of the paper.  🙂

Have a great weekend.  I hope it is a stamping weekend for you.

Jenny

cards, Stampin' Up!

SINGLE SWIRLY PINWHEELS!

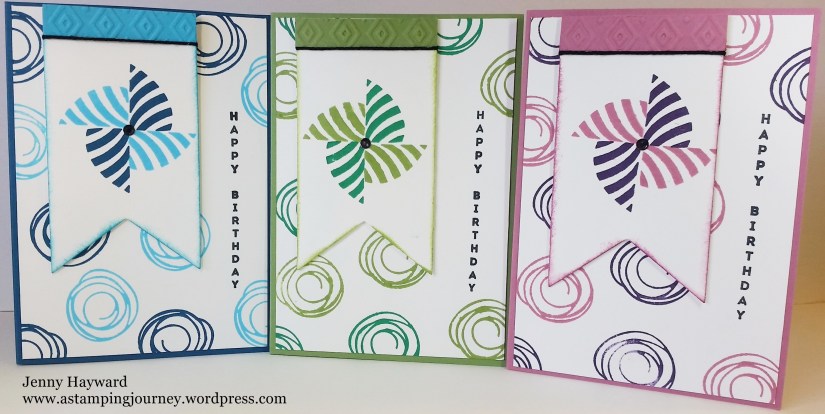
I had to play with the Swirly Bird set again and make some more pinwheel cards.  They are so fun to make.  This time I made single Pinwheels and made some different colours.

Swirly Pinwheels - Group

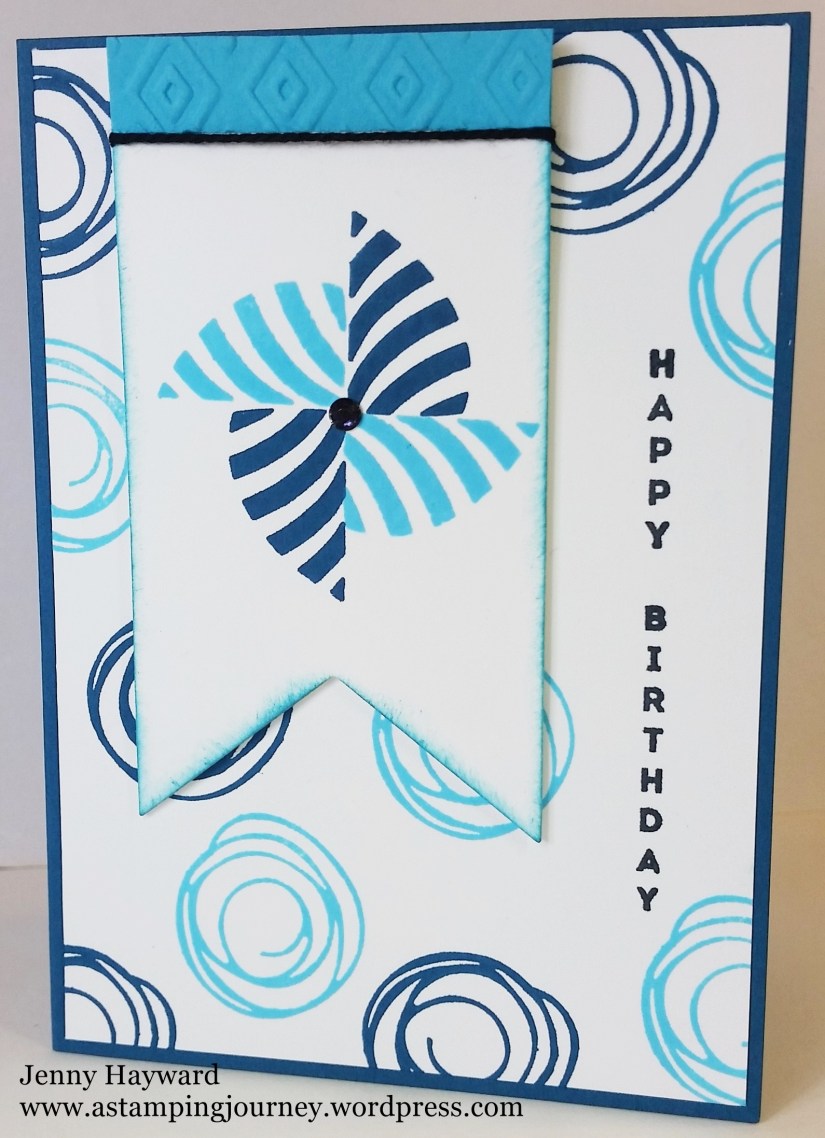
I will show you them individually.  First one is Dapper Denim and Tempting Turquoise.

Dapper Denim Swirly

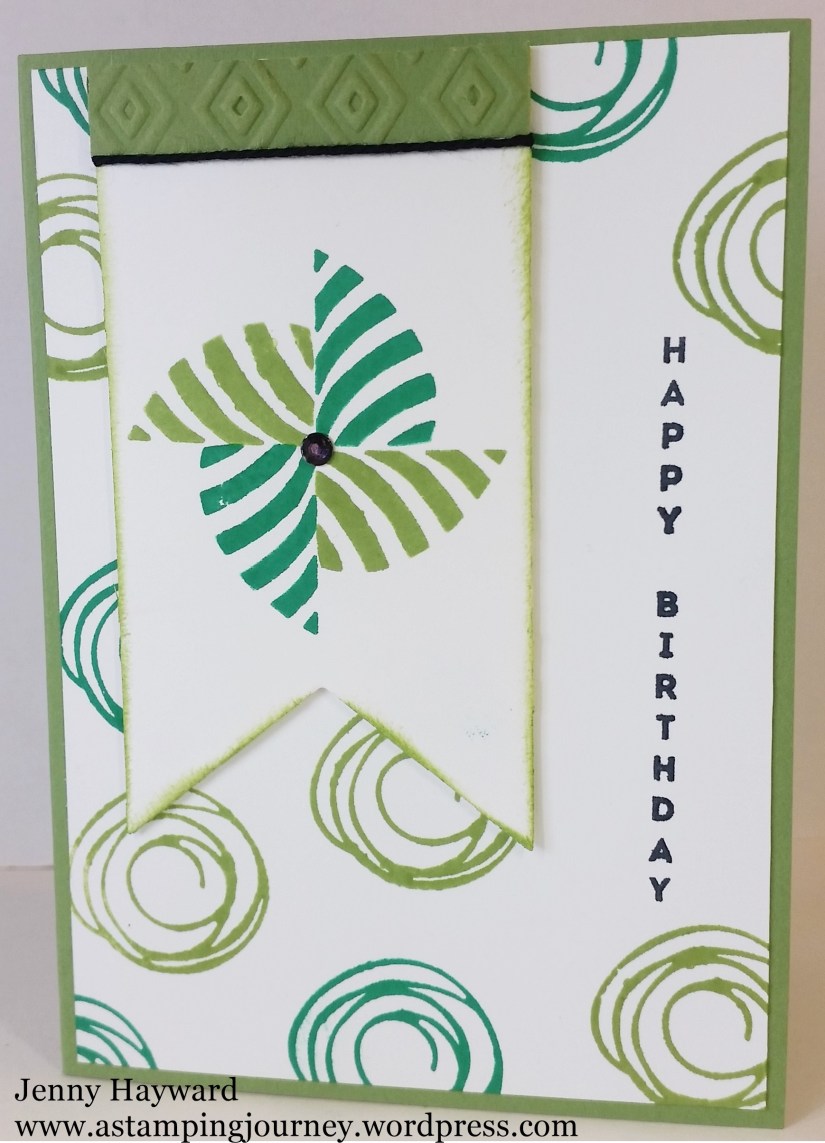
Next one is Wild Wasabi and Emerald Envy.

Wild Wasabi Swirly Pinwheel

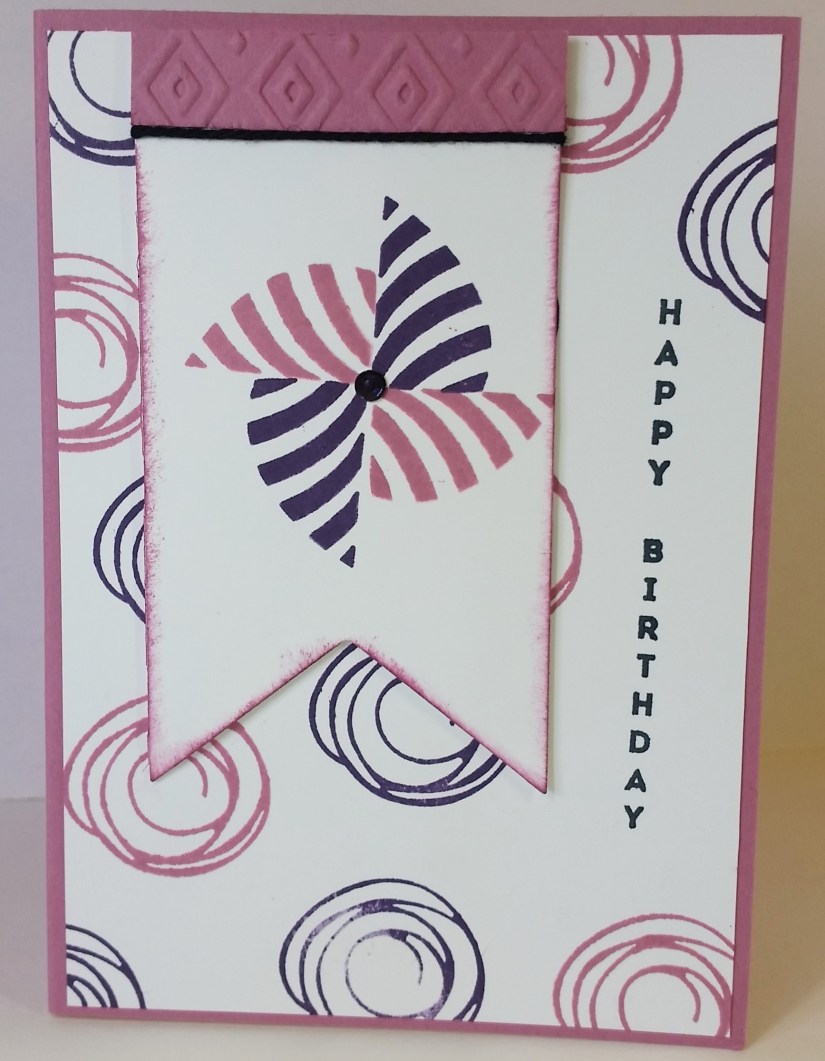
This next one is Sweet Sugarplum and Elegant Eggplant.

Sweet Sugarplum pinwheel

To make them I simply cut a piece of Whisper White card with the Banners Framelits and then stamped the pinwheels in the colours.  I sponged the edge of the banner.  At the top of the banner I embossed a small strip of the colour card with the Boho Chic Embossing Folder and wrapped around some Thick Black Twine.

The sentiment is from Vertical Greetings and I stamped over some Whisper White card with the swirls from the stamp set.  The centre of the banner is an adhesive Rhinestone that I have coloured with a black Sharpie.

You can see the original Swirly Pinwheel card I made a couple of weeks ago in THIS post if you had missed it.

Go and make some pinwheel cards yourself.

Thanks for visiting.   I hope your weekend is going great?? 🙂

Jenny

cards, Stampin' Up!, Techniques

BEST BIRDS IN ROSE RED!

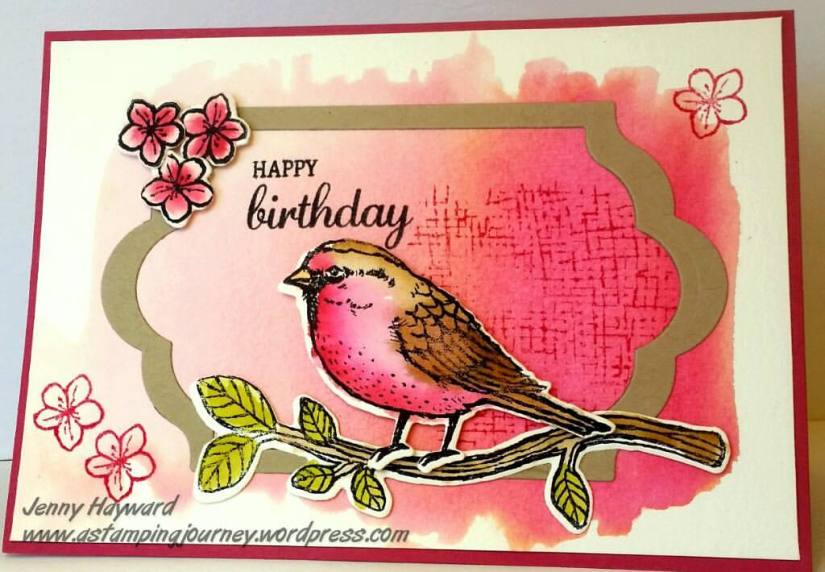
Yesterday was my Mother-in-Law’s birthday.  As she makes cards herself the pressure is always on when I make a card for her.  I thought for the card I would ink up the ‘Best Birds’ set that I have had for a few weeks and have not been able to use yet. I played around with watercolouring it.  I will show you the card and then share a few tips in making this.

Rose Red Birds

I chose Rose Red as the base card as that is my Mother-in-Law’s favourite Stampin’ Up! colour.  Well any of the reds!  (TIP#1) I used a piece of Watercolor paper and firstly washed over the card in the centre area with the aquapainter to lightly dampen the card  I have discovered recently by wetting the card it allows the ink to spread much easier creating a more washed look.  I used Blushing Bride on the left, then Rose Red in the middle section and Cherry Cobbler towards the right end.

(TIP#2) For regular watercolouring you can use the Thick Whisper White card or Shimmery White but if you are creating a washed look you MUST use the Stampin’ Up! Watercolor paper. (TIP #3) You need to be patient and let it dry.  Either you can use a Heat Tool or leave it for a few hours.

I stamped the bird, the branch and the flowers on watercolour paper too Black StazOn and watercoloured them.  (TIP #4) When colouring the bird I gave a light watercolour with the Rose Red and added highlights of Cherry Cobbler.  On the wing I washed over it with Crumb Cake and then highlighted it with Soft Suede.  The branch was coloured with Soft Suede for the branch and Old Olive for the leaves. The flowers were coloured with Rose Red and then darker highlights added in the centre with more concentrated Rose Red.

These were all then cut with the matching ‘Birds and Blooms’ Thinlits.  Too easy with that. No hand cutting necessary!! 🙂

I was going to cut the washed piece with the ‘Lots of Labels’ Framelits. I left the framelit on the card ready to cut in the morning but when I looked at it then I thought it might look OK to have a frame over it.  I cut the frame from Crumb Cake with the 2 largest ‘Lots of Labels Framelits’.  I am really pleased I went that way with it. I stamped the hatch pattern from the stamp set in Rose Red in the middle of the piece and stamped the sentiment in Memento Black.  Then it was all put together and a couple of flowers stamped around the edge to finish.  I was pleased with the finished result – and I think it received approval when I gave it to her today. 🙂

I hope you found these tips helpful when you create your next watercoloured card.  Let me know how you go.

Have a great day,

Jenny

cards, Stampin' Up!

CELEBRATING A 90TH!

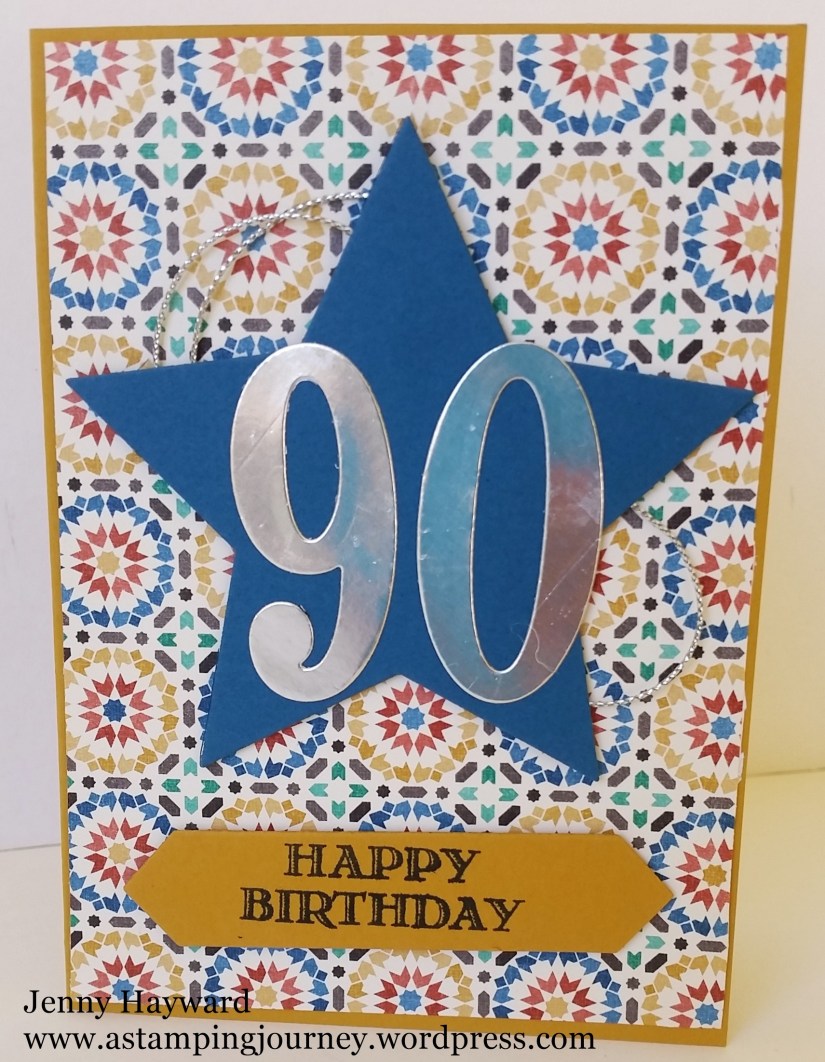
Last week we discovered it was one of my neighbour’s 90th Birthdays.  This is a great occasion so of course I had to make a card.  I didn’t have a lot of time as I was in the middle of class preparation but I whipped one up quickly.  Here it is for you.

90th

I have used the Moroccan Designer Series Paper for this card 1) because it was quick but 2) because my neighbour is Estonian and while they are not near to each other the bright patterns and colours suited the occasion I thought.  Blue is one of the colours in the Estonian flag so the Dapper Denim really worked well.

The base card is Delightful Dijon. The sentiment is from ‘Guy Greetings’ set and cut with the Project life Framelits.  After I cut the star using the Star Framelits I looped behind some Silver cord (retired) and added the Silver Foil number “90” with the Large Numbers Framelits.  I think he was very touched by the card and it was lovely to give it to him and chat about his life in Estonia.  It’s a remarkable age.

Have a great weekend wherever you may be.  I hope it is a crafting one?  I am planning on a little creating myself.

See you again soon,

Jenny

cards, Catalogues, Stampin' Up!

SWIRLY TIME!

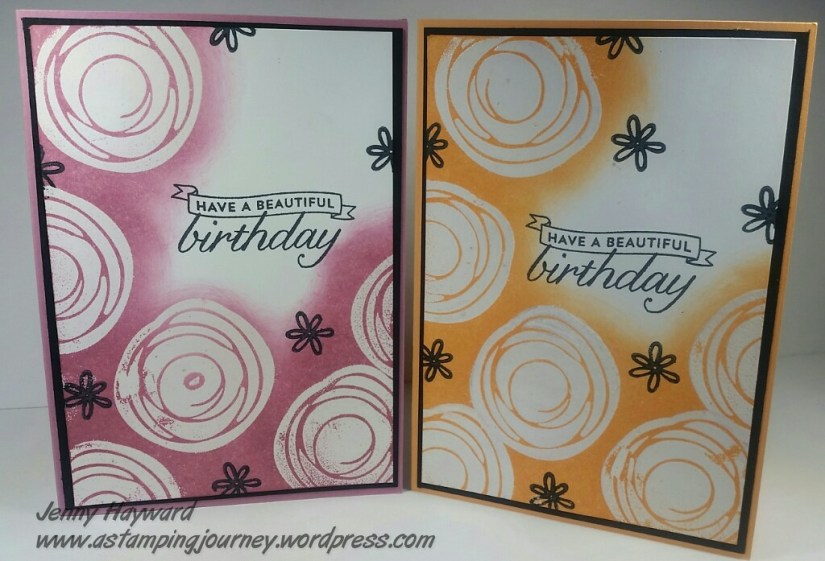
Have you seen cards with the Swirly Bird stamps and the Swirly Scribbles Thinlits on your blog travels? These I think will be one of the top sellers for this catalogue.  I had a play with them the other day and thought I would share them with you.  These cards were inspired by others I had seen on Pinterest using a different stamp set.

These first 2 cards use the Emboss Resist technique.  I love the magic of heat embossing still even after all these years.  Heat Embossing was the first thing I had seen in stamping and I was just amazed.  I still love pulling out the heat tool. 🙂

Anyway, to the cards.

swirly _ emboss resist

I stamped the sentiment first in black.  This is from the set ‘Birthday Blossoms’. I then stamped the large swirl in versamark and heat embossed it.  Then sponged over the ink. The one on the left is Sweet Sugarplum. The one on the right is Peekaboo Peach.  Then I stamped the small flower in black.  The card is matted on to black card and then to the base card either Sweet Sugarplum or Peekaboo Peach.

swirly flower

This next card I was creating a flower with the swirls.  I stamped the large swirl in Sweet Sugarplum on to the Whisper White card and then cut swirls from the Sweet Sugarplum and the Emerald Envy. I added a Metal Rimmed Pearl to the centre. The sentiment on this card is from the new set ‘Mixed Borders’.

I added some strips of Emerald Envy card under the stamped white piece and then adhered it to the Sweet Sugarplum card base.

I can’t wait to play with this set some more.  Not enough hours in the day. 🙂

If you love the look of this set then you can buy your own at my store.  Buy the bundle and save 10%.  Head directly HERE.   Here is the stamp set and the thinlits for you to see.

swirly bird

Have a great weekend.  It is a long weekend here for us this weekend. Time for more creating then maybe?? I hope so.

Jenny

cards, Catalogues

DAPPER DENIM SITTING HERE!

I finally got to play with this set the other day.  I have had it since we received it at Onstage.  I CASED this card off a Facebook group I am on.

?

This is using a new set ‘Sitting Here’.  I coloured the images with blender pen and inkpads and touched it up with the markers.  The card base and oval mat is Crumb Cake. The embossing folder I used on the Dapper Denim card mat is the new one ‘Floral Affection’.  There is 2 in the set.  I love these Embossing Folders.

I think Dapper Denim is fast becoming a popular colour when I speak to people.  What do you think of the colour?

Here is the stamp set if you have not noticed it yet and the Embossing Folders.

sitting here set        floral affection folers

These are available to order from my store now.  -> HERE.

Thanks for visiting,

Jenny

Catalogues, Stampin' Up!

YES! THE NEW CATALOGUE IS LIVE!!!!

I am doing a little jig here.  Can you imagine it.  🙂  Maybe don’t.  Anyway I am just so excited because the new catalogue is out. I LOVE this catalogue.  So many nice lovelies. You will want to see it – and you can NOW!

2016 cover

I will add the link to my side bar but for now head to the website HERE and download it online.  If you would like your very own copy to add your post-it notes too and to flick through those pages (so much nicer!) then ask me for a copy to be sent to you.  (Australian residents only).

Tonight on my Facebook event page I am doing a virtual catalogue tour and having some games.  So come and join in.  HERE is the link to the event page.

Now go and grab your paper and pen and a cuppa, download your catalogue and start making your wish list.

I have to tell you about the specials this month where you can get EXTRA FREE PRODUCTS!!

Stampin rewards

  • As a customer receive an additional $50 of free products on top of your hostess rewards when your event sales are over $450.  Now it is not very hard to do when all your guests see the wonderful products there.  Or you might have a super long wish list and spend yourself!!!!  Dates are limited in June so get your friends together to party. You could invite me or pass the catalogues around and collect order.

———————————

recruiting_header_cust_jun2016_eng

  • You have a long wish list? It is more than $169?  Yes of course! You can join Stampin’ Up! during June and get 2 extra stamp sets for FREE!

Pay $169 –> Get $235 of products + $80 of business supplies including catalogues and order forms ( you can choose to do with those what you want) PLUS 2 free stamp sets up to the value of $178.  Seriously! What are you waiting for! Extra free stamps then a discount every time you order.  Join for a long time or a short time.  So if you have decided you want some extra free stamps, make your wish list then you can head to my website HERE and join.  Too easy!  I will be doing another jig to celebrate you joining with me, but this is OK right. 🙂

recruiting flyer for June

So if you wish to order OR if you wish to join my group of lovely ladies (the JEN’s INK. team) then you can head to my store HERE.

Have a wonderful day and enjoy your reading today. 🙂

Jenny


Classes, Stampin' Up!

2 SPECIAL EVENTS THIS WEEK – SEE THE CATALOGUE ONLINE AND JOIN ME IN A CLASS FOR NEW STAMPERS!

I have 2 special events to tell you about.

catalogue promo

The first is a reminder.  My Catalogue Online event is on THIS WEDNESDAY JUNE 1ST 7.30pm AEST. It’s all happening HERE.  You can join from anywhere in the world.  There are so many great products to share from the catalogue.  Head to the link  just above and click ‘Interested’ and you can click ‘Join’ after that.


SIP AND STAMP FOR YOU!

Maybe you know someone who might like to give cardmaking a go OR you have lost your mojo and need a kick.  If you are local join me on Saturday afternoon for a chat and a cuppa and just some time out.  Here are the details.

Sip and stamp 2016

I hope you can join me for one 0r both or join me soon at one of my classes.

Jenny

cards, Classes, Stampin' Up!

CARD CLASS FOR THIS SATURDAY!

Saturday Stampers is on this Saturday 21st, 2pm My place.  (East Corrimal)  If you are local do join us.  Cost is $15.

This week we are mixing it up with some old and some new products that are leaving us in 2 weeks.  Here are the cards.

?

Please let me know by Thursday. It’s a fun time out just for you. 🙂

Jenny