Did you know it’s World Watercolouring Month?? A month of celebrating and sharing all things watercolouring.
I’m no expert at watercolouring. But I have picked up some tips along the way. And practice makes perfect right. 🙂
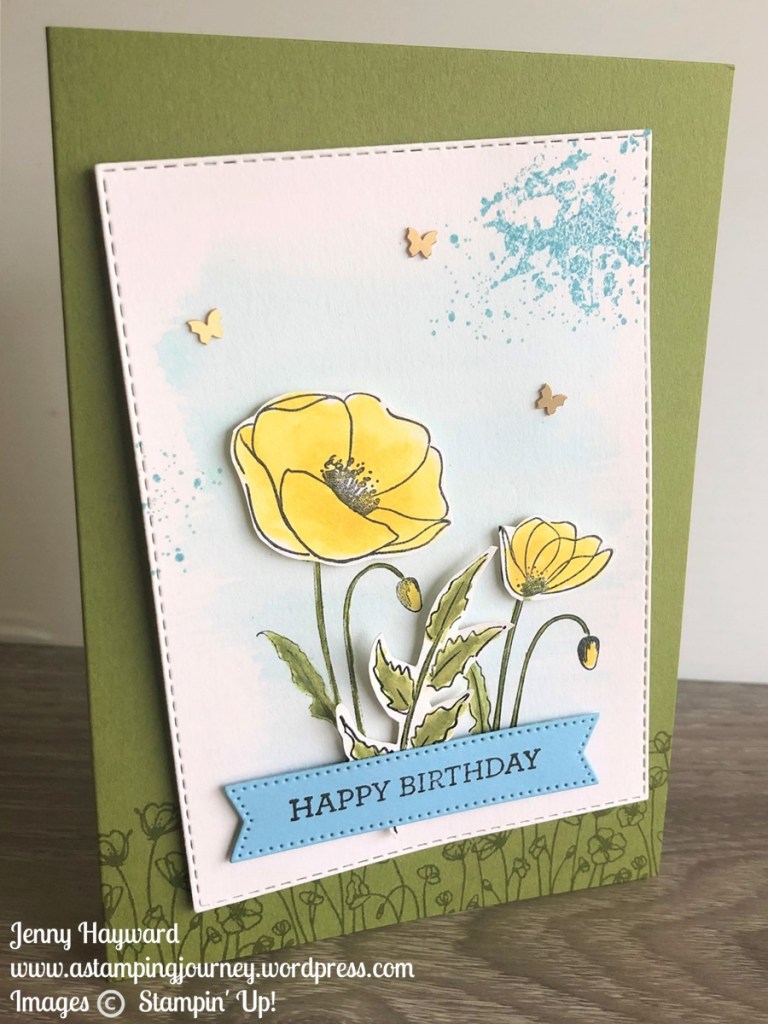
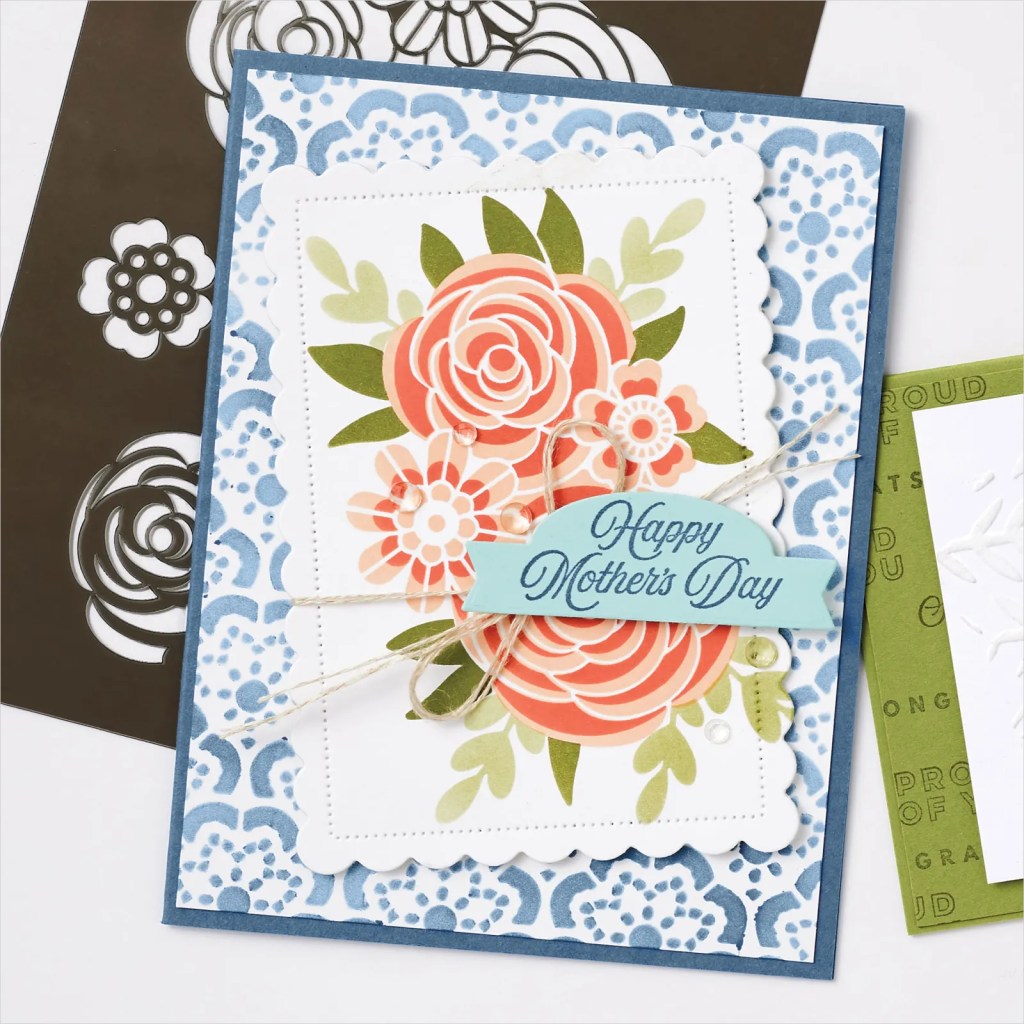
There are lots of different ways to watercolour and different mediums to use. I shared a video recently on using Watercolor Pencils. In today’s video I’m using the Ink Pads and Water Painters to create a watercolour wash and more detailed watercolouring.
I pulled out the Painted Poppies Stamp Set. I haven’t used this in a while.
Check out the video below.
This card was inspired by one in the current Annual Catalogue on Page 29.
I hope you pull out your inkpads and Painters and get watercolouring.
Have a great day,
Jenny
Need some supplies and you are in Australia?
Stop by my store -> HERE. Please use the Host Code: 99CMHTER
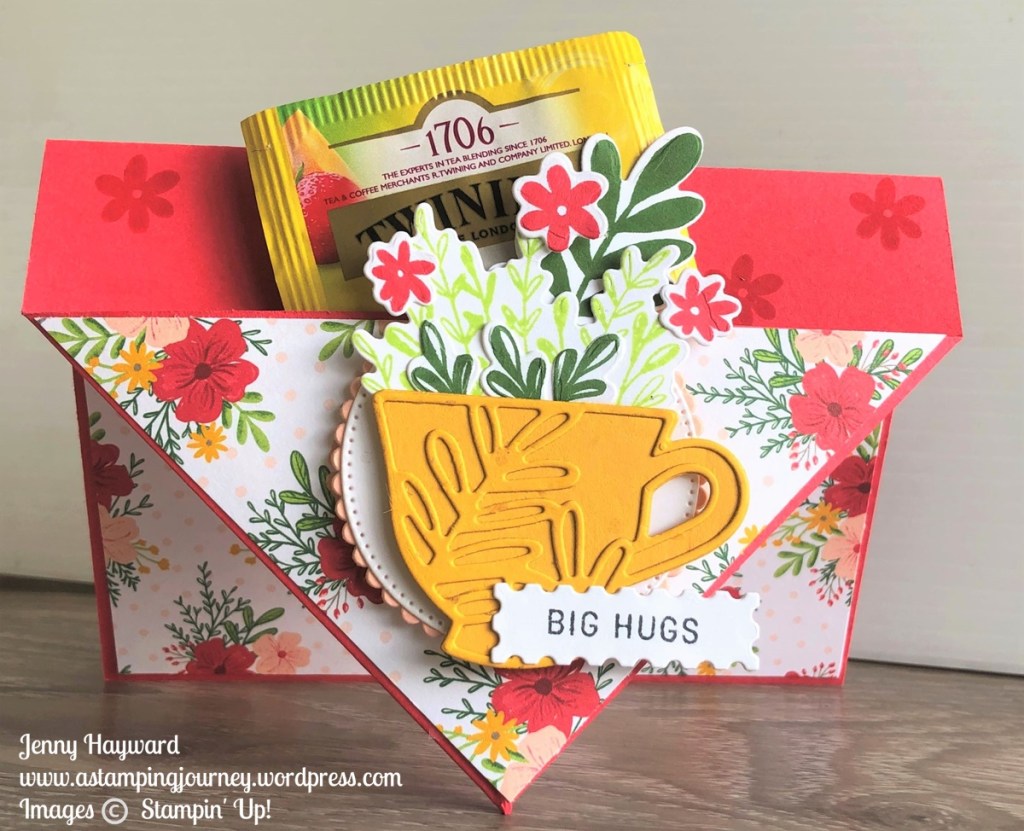
Today’s video is a fun card I think. It’s a Pocket Front card.
It’s a standard size card and with a little folding and scoring creates a pocket in the front. Just the size for a tea bag, Gift Card or even a small chocolate.
I have a video to show you how to make it but also have the measurements below for you so you can recreate your own.
Here is the card for you. We have some different angles so you get an idea of it.
I used the Tea Boutique Collection for this card. Quite an appropriate one to include a Tea Bag in the pocket.
Below is the view from the front with the card standing up. It can stand well just on the point.
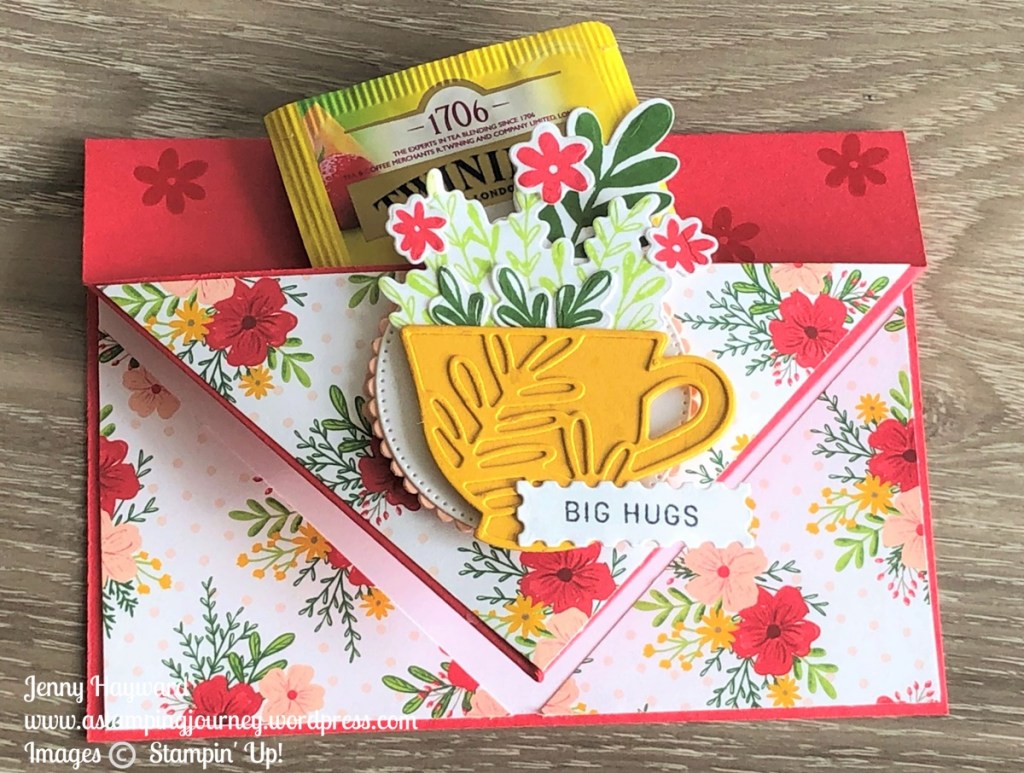
Lying flat.
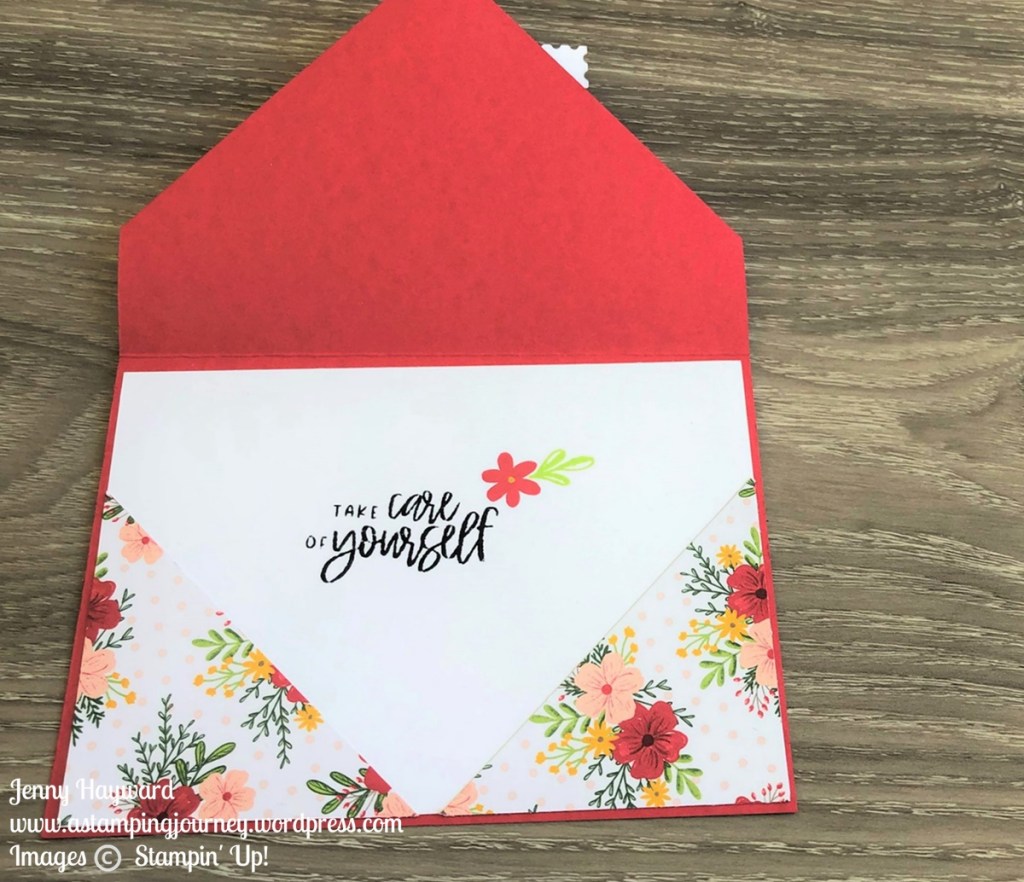
Inside. I added a piece of white card so there is room to write.
Check the video out below.
The original idea came from Splitcoaststampers website -> HERE.
CREATE YOUR OWN POCKET FRONT CARD
Follow along with the video to see the scoring and folding of the card.
Base card 14.8cm x 21cm Score on the long side at 10.5cm
5 1/2″ x 8 1/2″ Score on the long side at 4 1/4″
On the long side place the left hand edge at the 7.4cm or 2 3/4″ point on the Paper Trimmer. Mark in pencil at the little channel on the Trimmer. Alternatively use a ruler to measure in 7.4cm or 2 3/4″ from the left hand edge and mark the point.
Turn card clockwise 1/4 turn. Mark halfway on this side which will be 7.4cm or 2 3/4″.
Score an angled line from the centre mark on the short side to the mark on the long side. Repeat the angled line from the centre to the mark on the other long side.
Fold on the score lines and fold in at the angles. Adhere to 2 angled folds down with tape.
Cut Designer Series Paper to 10cm x 10cm 3 1/2″ x 3 1/2″.
Cut the piece at an angle from one corner to the other. Keep one triangle as a large piece. Cut the other triangle in 2 to have 2 half triangles.
Adhere the large piece to the front of the card.
White card for inside measures 14.4cm x 10.1cm 5 3/8″ x 4 1/8″.
Adhere the 2 smaller triangles on each of the bottom corners. Adhere the white card inside the base card.
Decorate as you wish to.
—
I hope you get to make one. Let me know how you go.
Need any supplies and you are in Australia? Head to my store HERE or contact me directly.
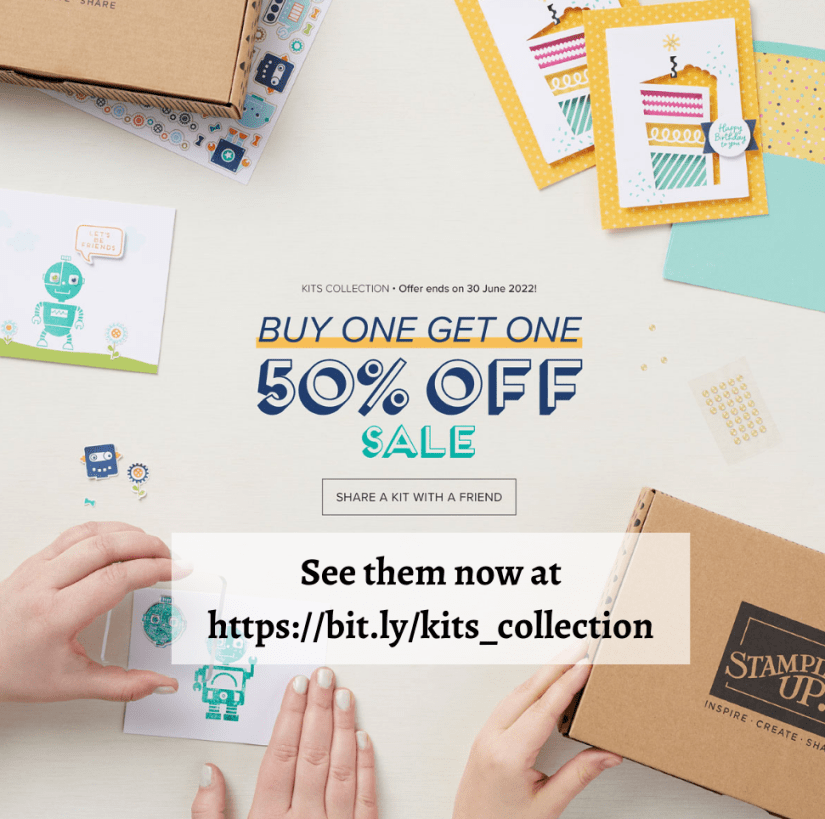
Kits make creating cards so quick and easy. Everything is contained and ready to go. And it’s great this month with BOGO. Buy One Get One Half Price.
Stampin’ Up! has so many kits available for us crafters whatever level. BUT I have to tell you about my favourite. Sentimental Rose.
The cards you create with this kit are so gorgeous.
The colours are so soft and elegant.
The floral image is so detailed.
AND even with all that my most favourite part – the Stamp Set. It is so versatile.
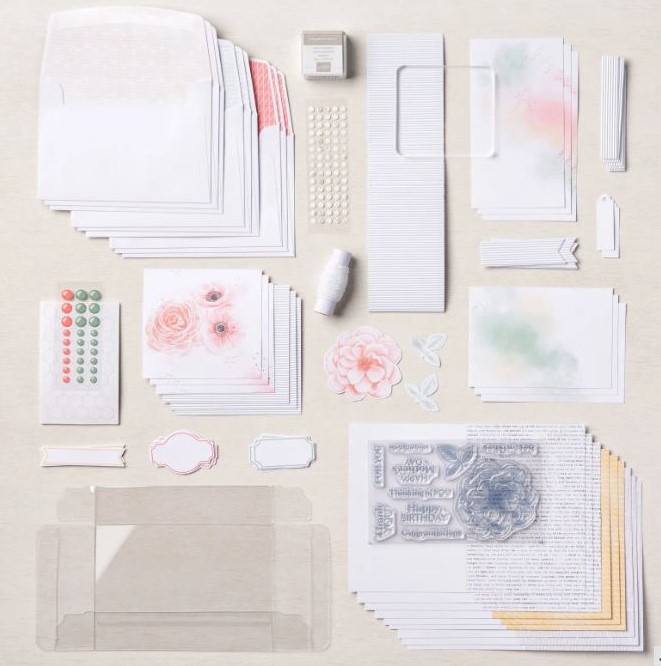
Here is the kit so you can check out yourself.
The Kit contains –
Kit includes * Sentimental Rose Photopolymer Stamp Set * Acrylic stamp block * Gray Granite Classic Stampin’ Spot * Designed projects with step-by-step instructions * Pre-cut pieces * Folded card size: 5″ x 3-1/2″ (12.7 x 8.9 cm) * 9 printed, coordinating envelopes * 1 acetate gift box: 3-3/4″ x 5-1/4″ x 1-1/8″ (9.5 x 13.3 x 2.9 cm) * 1 printed designer box for storage or crafting on the go: 9-7/8″ x 6-1/2″ x 2-3/4″ (25.1 x 16.5 x 7 cm) * Adhesive to complete projects
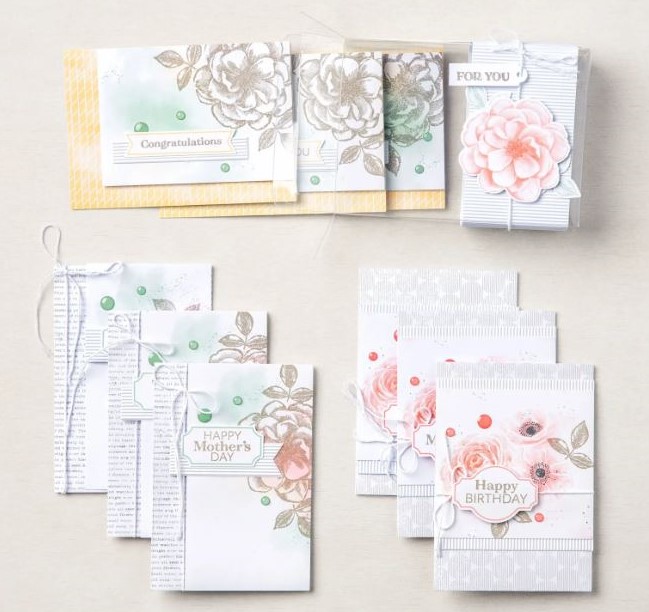
These are your finished cards. The kit makes 9 cards: 3 each of 3 designs.
See the gorgeous stamp set. You have sentiments for many occasions.
You can stamp the flower and leaf as is or colour it with your favourite medium.
With BOGO this month you can Buy One and Get One 50% off.
Maybe it’s 2 of the same. One for you and one for a friend. Or maybe 2 different ones.
There are so many different Kits.
You can see them all in my store -> HERE. Please use the Host Code: 46HJZACA
In Australia? Shop at that link above
OR contact me directly. I would love to serve you with your creative needs.
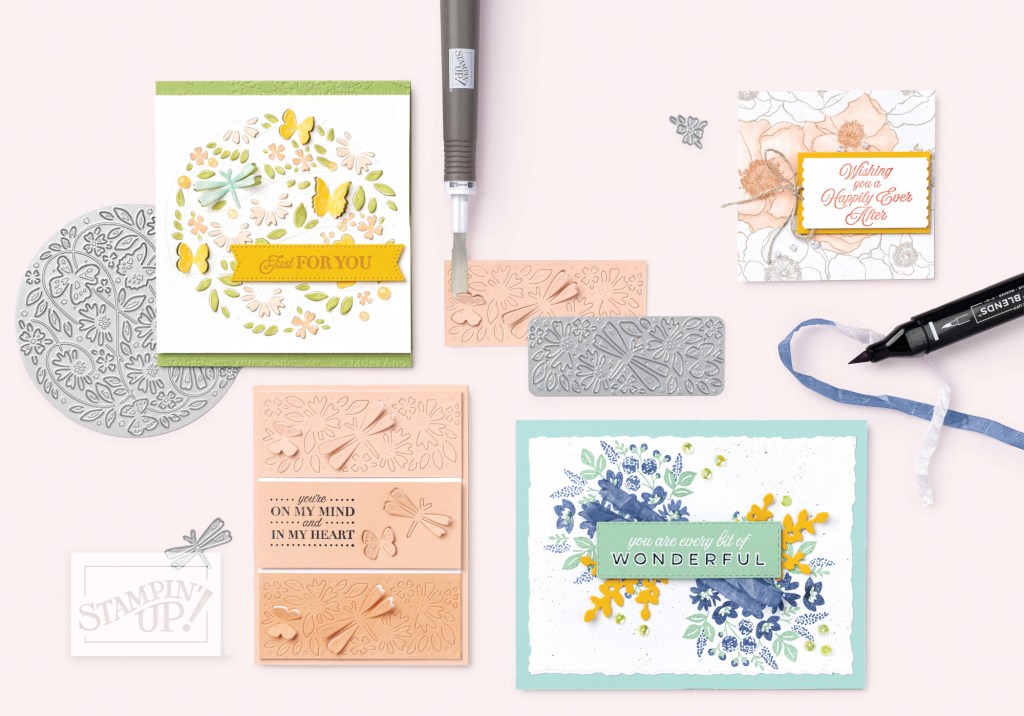
WEDNESDAY’S WOW! #137 – Let’s look at some Pretty Pop-Ups. That is, Pop-Ups Dies!
I have to say I kept overlooking these dies and maybe you have too so let’s check them out. They are a different way of dies but they are – really pretty.
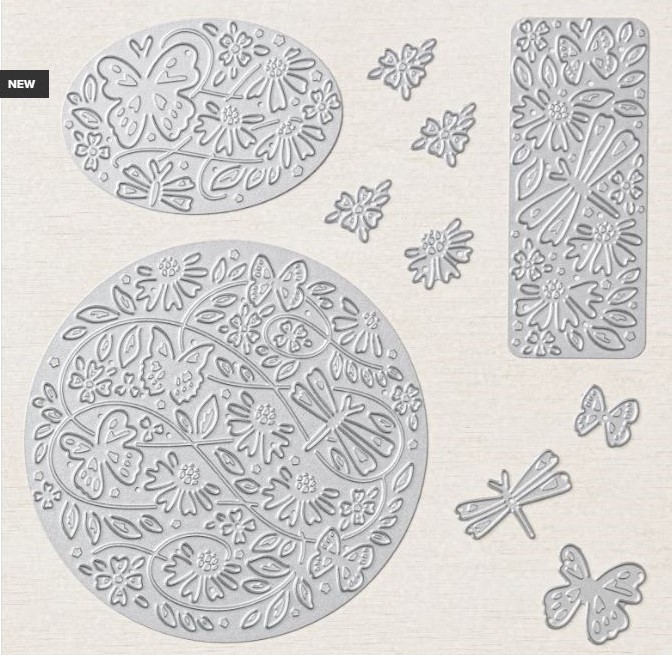
You will find the Pretty Pop-Ups Dies on page 173 on the Annual Catalague.
There are 10 dies in the Pretty Pop-Ups Dies set. The dies include beautifully intricate butterflies, flowers, and greenery designs in circle, oval, and rectangle shapes. You can use the unique intricate designs and shapes as a centrepiece on your handmade projects or as a subtle texture or layer when not popped up.
Aren’t they beautiful?
You can see how they are used.
To lift the little Pop-Up sections you can use the spatula tip on the Take Your Pick Tool or you can use the Paper Piercer.
You can even colour some of the areas with the Stampin’ Blends.
And did you notice? Colour some white ribbon too and you have ribbon to match any project.
The cards can be so simple but they do create such an impact.
You can see the Pretty Pop-Ups Dies in my store -> HERE.
In Australia? You can shop in my store at the link just above. Please use the Host Code: 46HJZACA
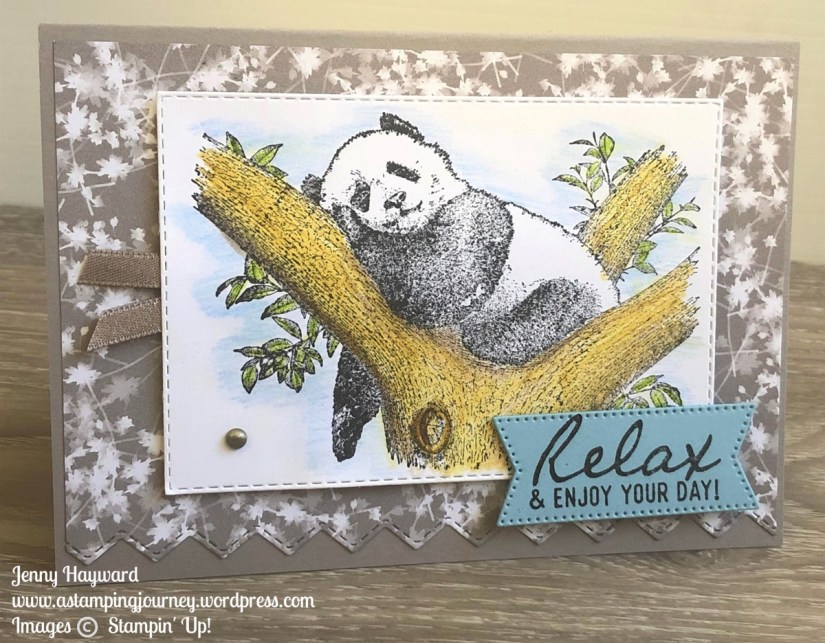
A couple of posts I shared a card with the Panda from the Wild and Sweet stamp set.
I have put together a video on some tips when colouring it. You can check that out now. (Email subscribers the video may not show up in your email so head to the blog post directly).
Here is the card again if you missed it earlier. How sweet is this panda just hanging around??
If you need some of these wonderful new crafting supplies and you are in Australia you can jump on over to my store now.
Head to my store -> HERE. Please use the Host Code: CMDF9NBR when shopping. Or you can contact me directly.
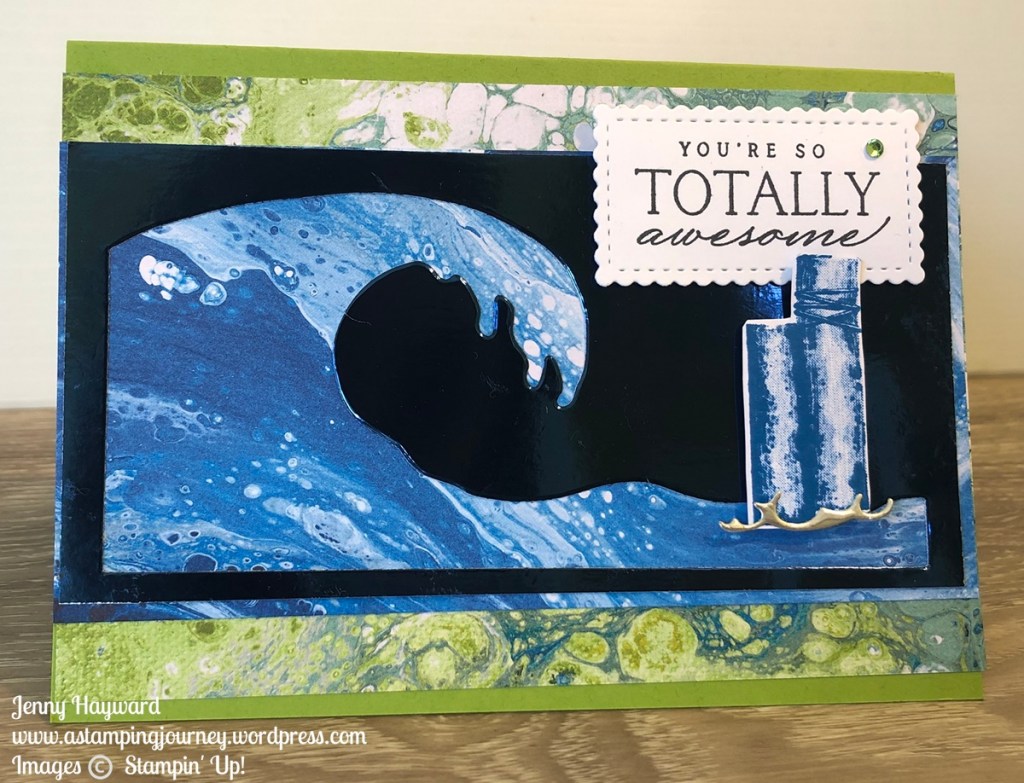
Wednesday’s WOW! #135 –Use the Negative Wave Diecut. Don’t waste the gorgeous Foil when you diecut a detailed wave from the Waves Dies. Use it for another project.
I shared a card recently with the diecut wave. When I finished I saw the negative piece on some paper. It looked cool. So I added it to a card.
And also I used some of the Silver Foil to diecut a swirly edge that you would use to line the clouds. That makes a cool wave under the post. I took off the pelican but I’m thinking I need to add it at the bottom.
The Waves of Inspiration Designer Series Paper is just gorgeous. I hope you have grabbed some of that already.
You can see all the beautiful Waves of the Ocean Collection products in my store -> HERE including the gorgeous paper and the Waves Dies.
In Australia and would like to order? I would love to serve you. Head to my store link just above. Please use the Host Code: 4SEB3FCV.
I shared this card briefly in a recent video of 5 Ways with the Waves of Inspiration. (You can check that video -> HEREif you missed it. And really there were more than 5 Ways…)
I wanted to create a separate video on this card to show how I did the background but particularly the moon effect. You will be surprised.
Here is the card.
You can check out the video below.
(If you receive this blog update by email the video may not show so head to the blog post directly to view it).
There is not much time left to grab the Waves of the Ocean Designer Series Paper so be sure you don’t miss out on it.
See the Waves of the Ocean Collection in my store -> HERE.
In Australia? You can order there directly. Please use the Host Code: 4SEB3FCV
Today’s video is focusing on the Waves of the Ocean Collection of products. It is so gorgeous.
I have had lots of fun creating with these. In the video I share even more than 5 ways. I have created even more than that too… I will share them with you very soon.
Check the video now. (If you receive this update by email you will need to head to the Blog post directly as the video doesn’t usually show. Or it is now on Youtube too.
Here is the card I shared with you.
If you want to get any of these gorgeous products then head to my store -> HERE.
Wednesday’s WOW! #134 – How to Layer and sponge with the Masks.
There are some great masks available especially these gorgeous Butterflies and Flowers Masks. But how do you use them to get the best results? Check the video below.
This is the finished card that was shown in the video. How pretty is it??
There are a number of different masks you could work with. See them all -> HERE.
Here is another sample with the masks.
Have you tried the masks? I would love to know how you have used them.