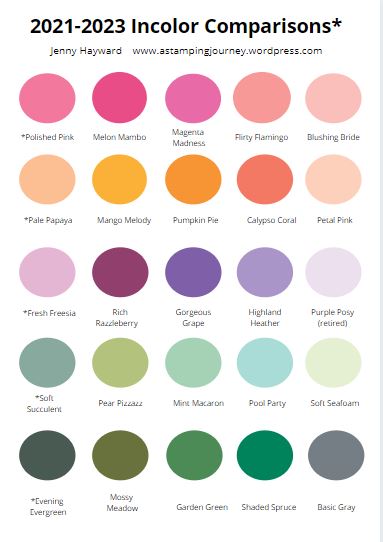
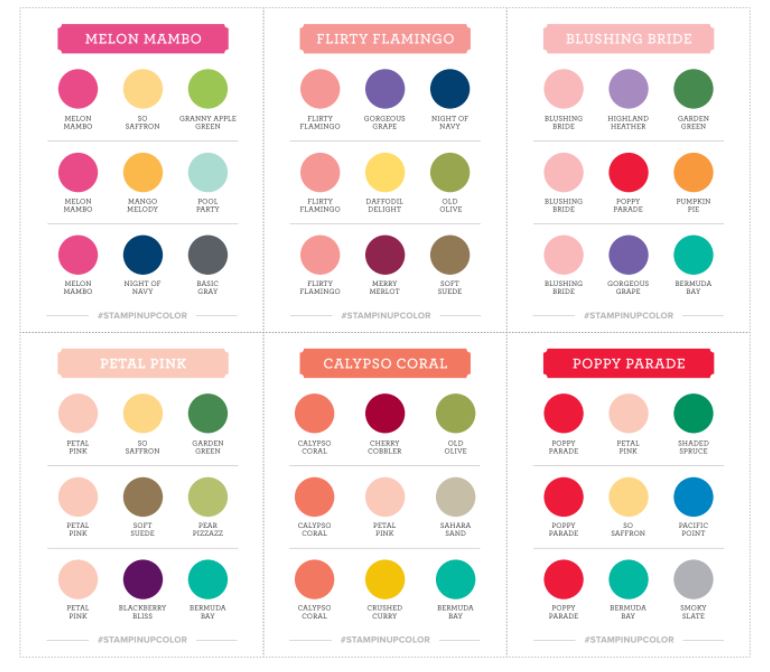
A great resource to help you with some colour co-ordinating when you create your next project. Head -> HERE
Paper, Ink, Marker Chart
They are available for all the colour Collections. Print the chart off and mark off the colours you have so you can keep a track of what you have. It’s a great way to see them at a glance having the chart.
I have a large number of Projects and Techniques on this blog for you to access. Many you will find under the tab at the top of the page under ‘Free Tutorials’. Some I have still to update so also click on the TAG in the right hand column of Techniques or 3D or Fun Folds. Whatever you would like to see.
Blog and Newsletter
Don’t forget to subscribe or follow along on my blog here to be updated when I post.
OR
And also Subscribe to my newsletter list to receive a project tutorial each week to help inspire you in your creating.
Facebook crafting group
Come and join my ‘A Stamping Journey’ Facebook group where we share what we have been doing and occasionally have a challenge. Head -> HERE.
Happy creating now with lots of colour inspiration,
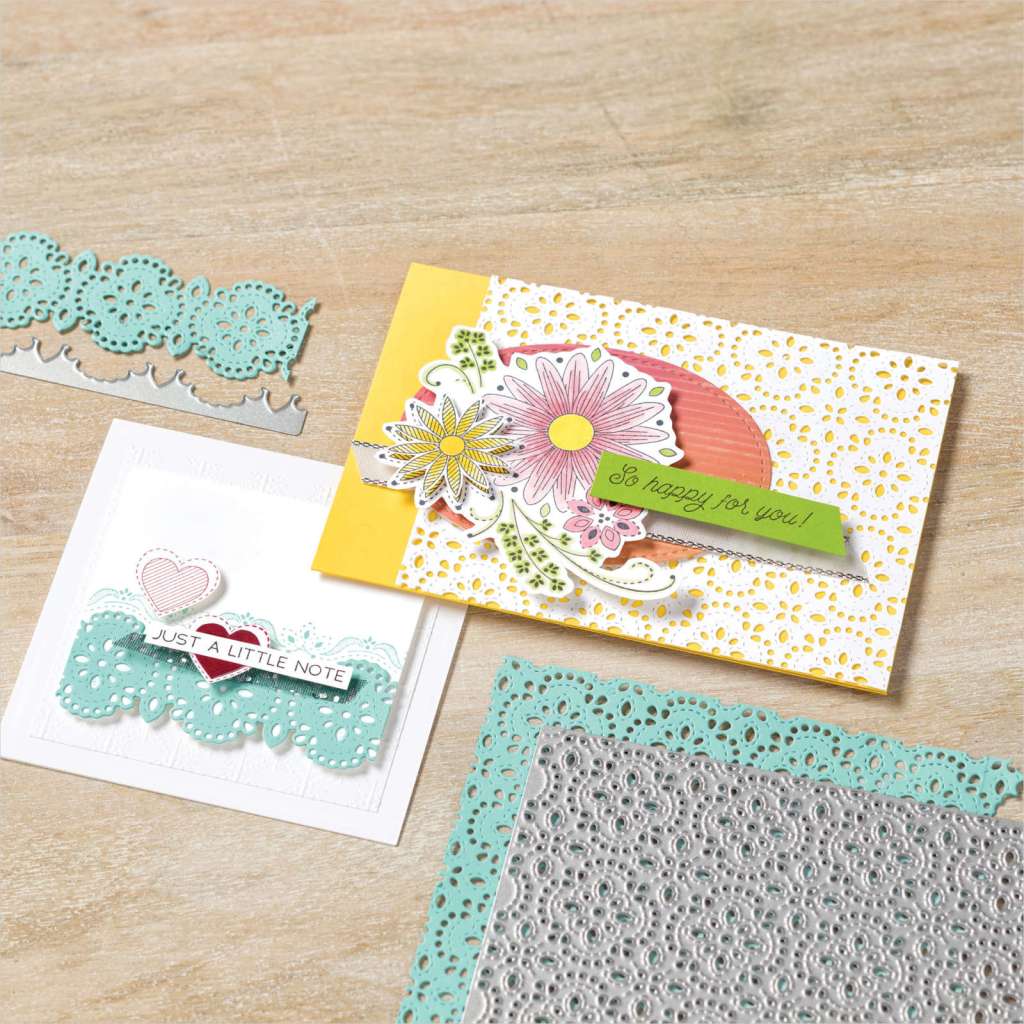
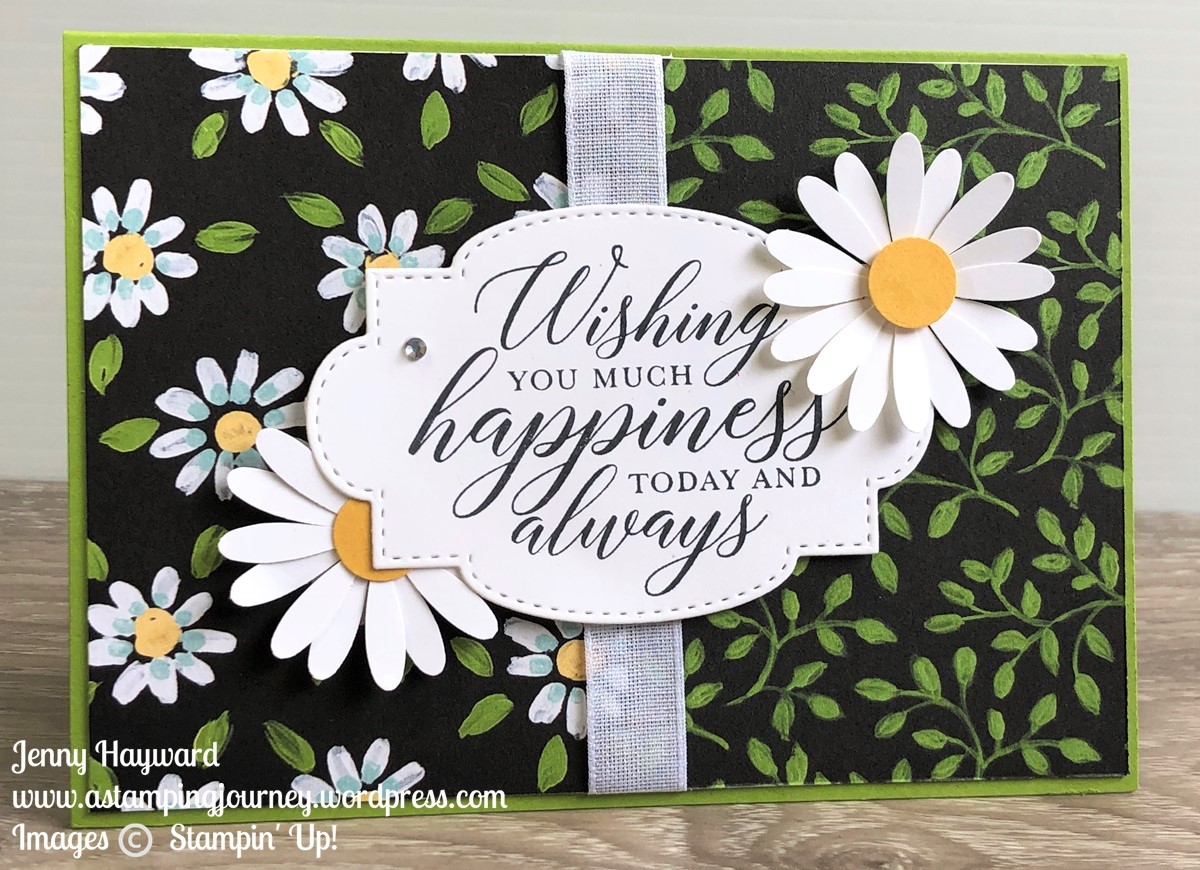
Today I have 5 very simple cards to share with you. I created these as samples for my launch a few weeks ago. I have used the Hand-Penned Designer Series Paper.
They might be simple but let me tell you what they show.
They show a different print of the gorgeous Hand-Penned paper on each card.
They show a decorative edge with a different die from the Basic Borders Dies.
Each card has a different sentiment from the Many Messages stamp set cut with a different shape from the Messages Die.
Each card has co-ordinating ribbon as an accent. The ribbon is the White Crinkled Seam Binding coloured with the Stampin’ Blends. (How cool is it to be able to get matching colours)
To finish I added an Opal Round or an Adhesive Pearl on each one.
I have added a vellum leaf under the sentiment punched out with the Sprig Punch.
Cards in a hurry that’s what they are. Probably the longest part was colouring the ribbon.
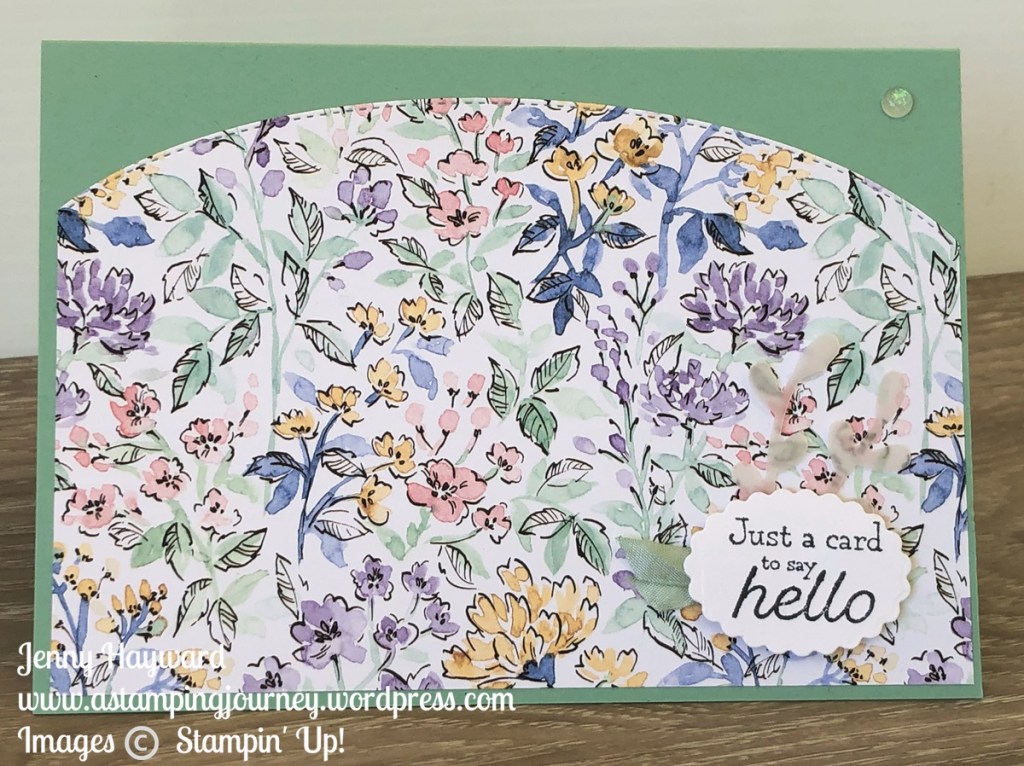
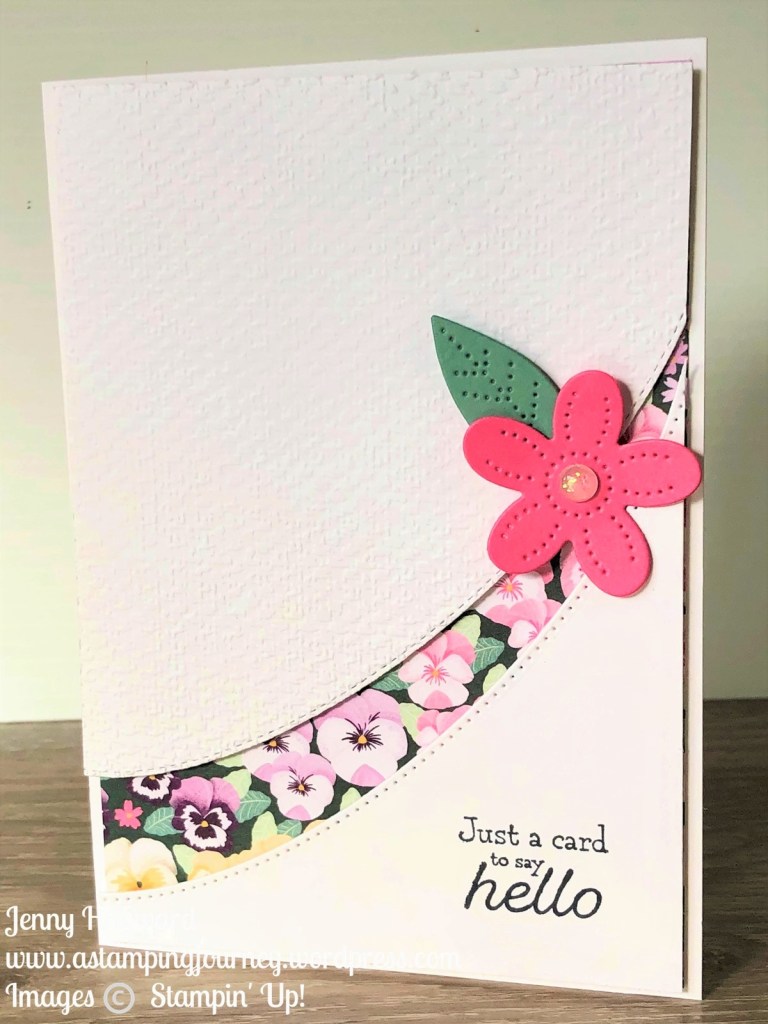
For today’s video I wanted to create some Recessed Panel cards to share with you. In the video I show you how to make one version but I have some other variations to share too. Have you tried this technique? It’s a great way to showcase some beautiful papers.
Check the video. I have the other cards to share with you too.
This is the card created in the video. I think when I looked at it after I should have cut the top curve higher to showcase more of the paper. You just don’t think of that in the middle of filming. 🙂
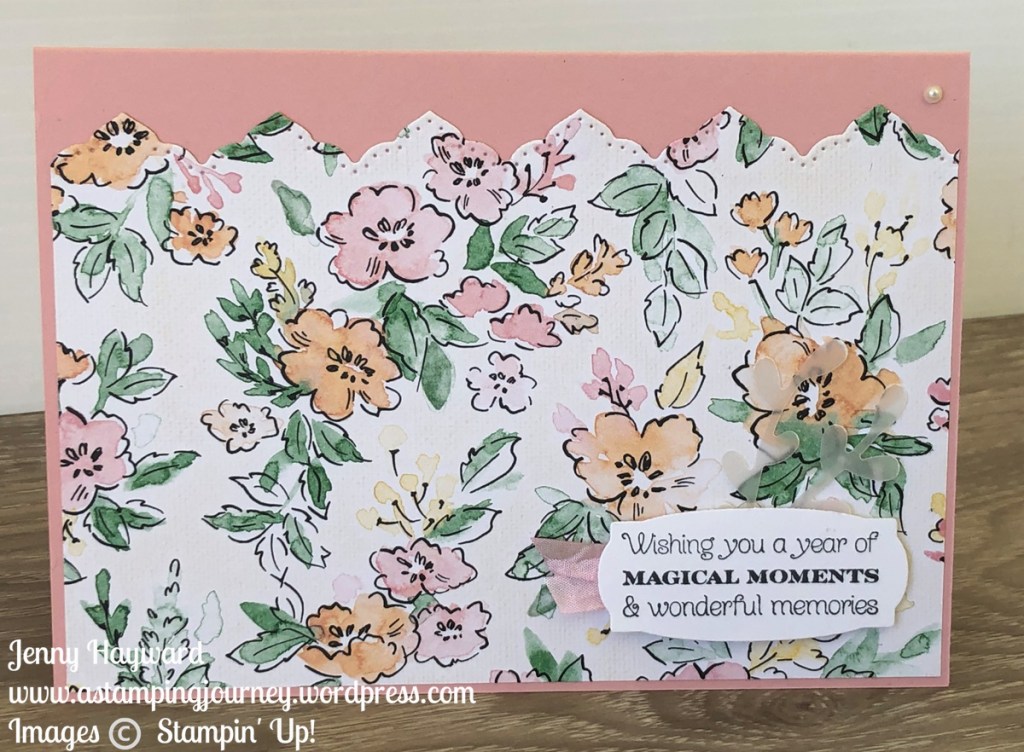
This one is the same version using a different print of the Pansy Petals paper. I used the Basic Borders Dies to create the curves in both of them.
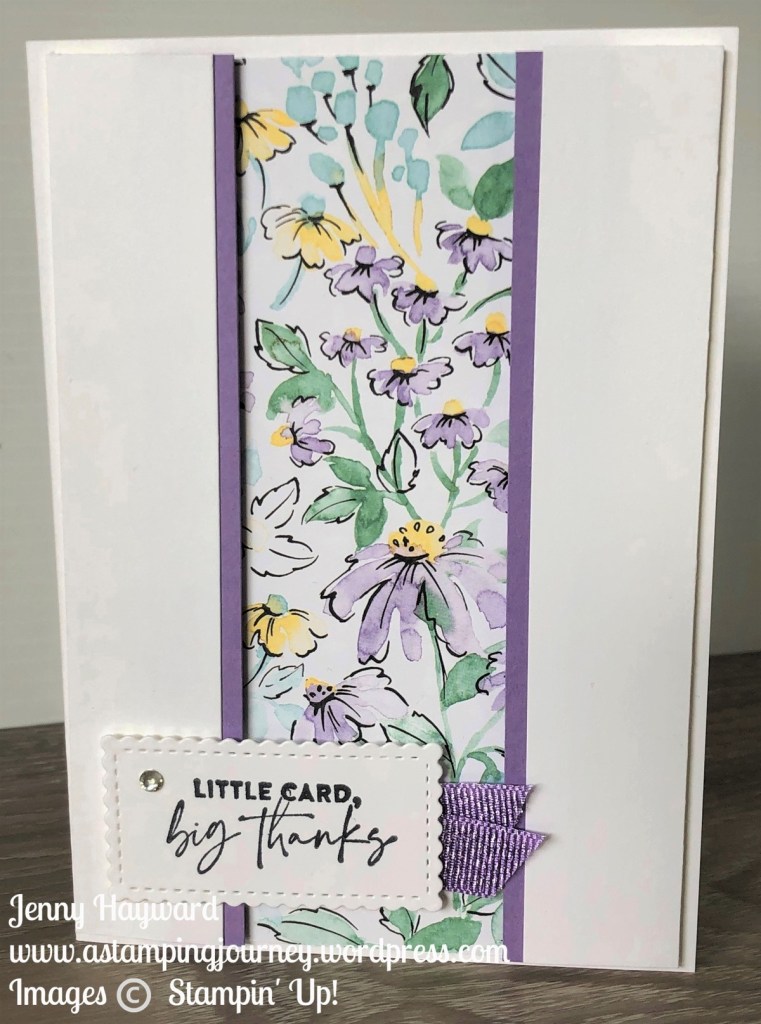
Instead of curves you could make straight cuts in the card. For a difference though cut the card vertically. This one uses the Hand-Penned paper.
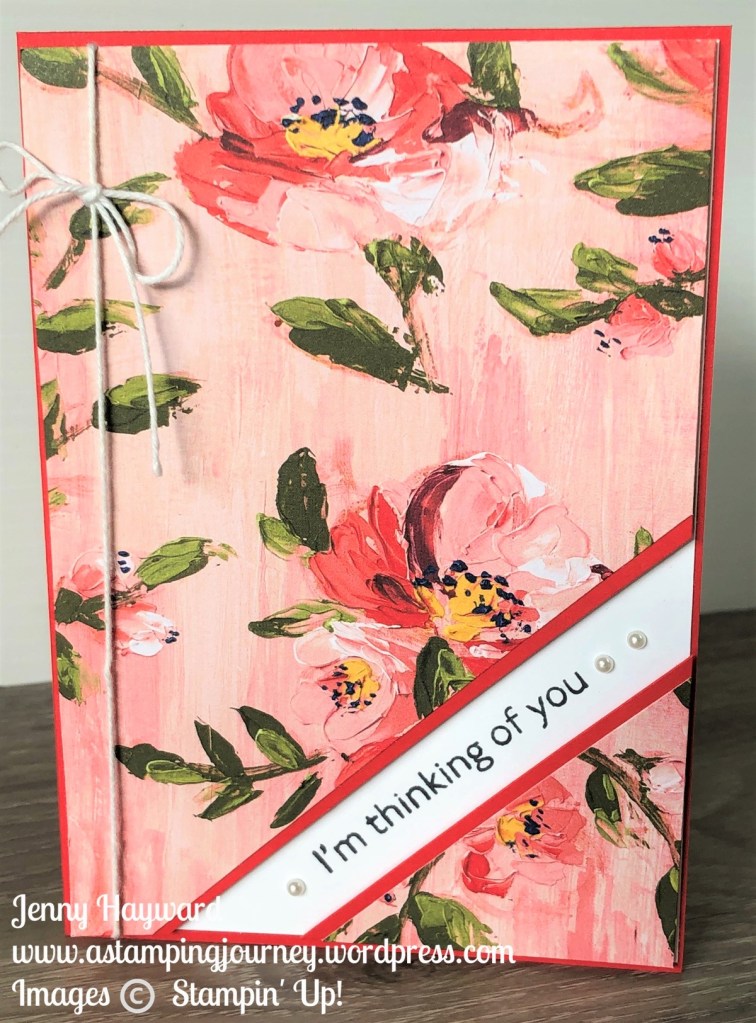
What about adding the pretty papers on top of the recess. This is a great way of showing that beautiful paper. This one uses the Art Gallery Designer Series Paper. For this I cut 2 angle cuts in the bottom right corner of the paper and added strips of the Poppy Parade card behind to highlight it.
I hope you get to create these soon. Choose whatever way you like to.
If you are in Australia and need supplies to create your projects then you can stop by my store anytime -> HERE. Please use the Host Code: 7VNBHHYT
Wednesday’s WOW! #121. Sharing a tip for you on masking your sentiment area. This creates an “edge” for your surrounding stamping and creates a white space for your sentiment that helps it stand out without even raising it on a separate punch or diecut. It creates such a cool effect.
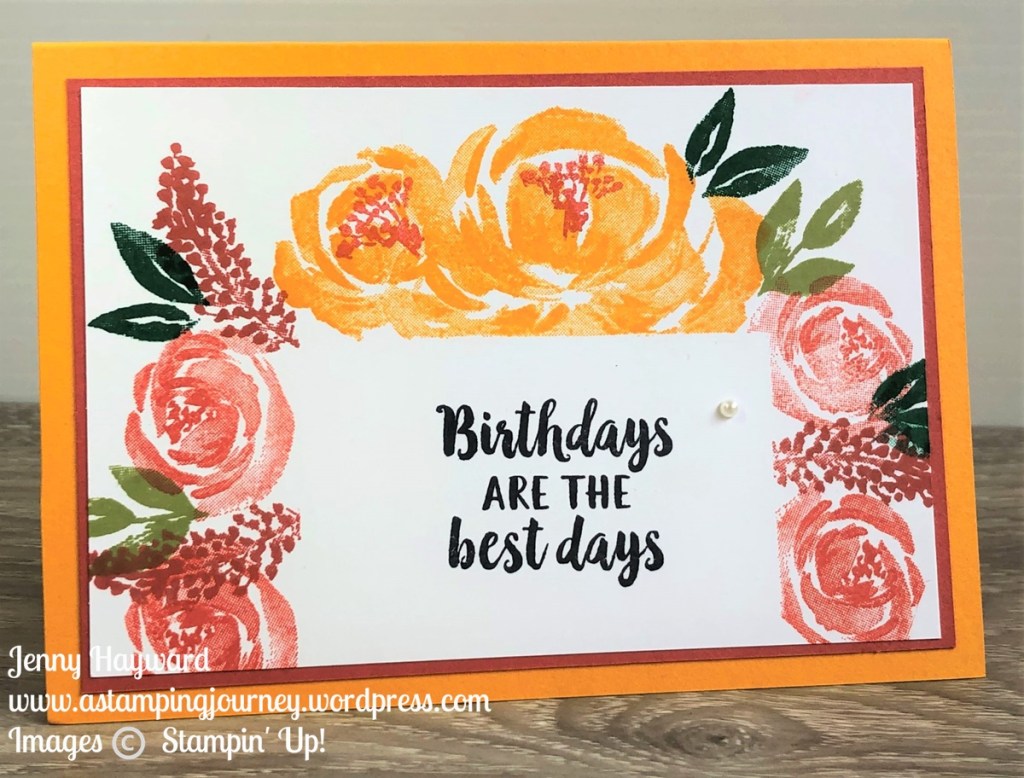
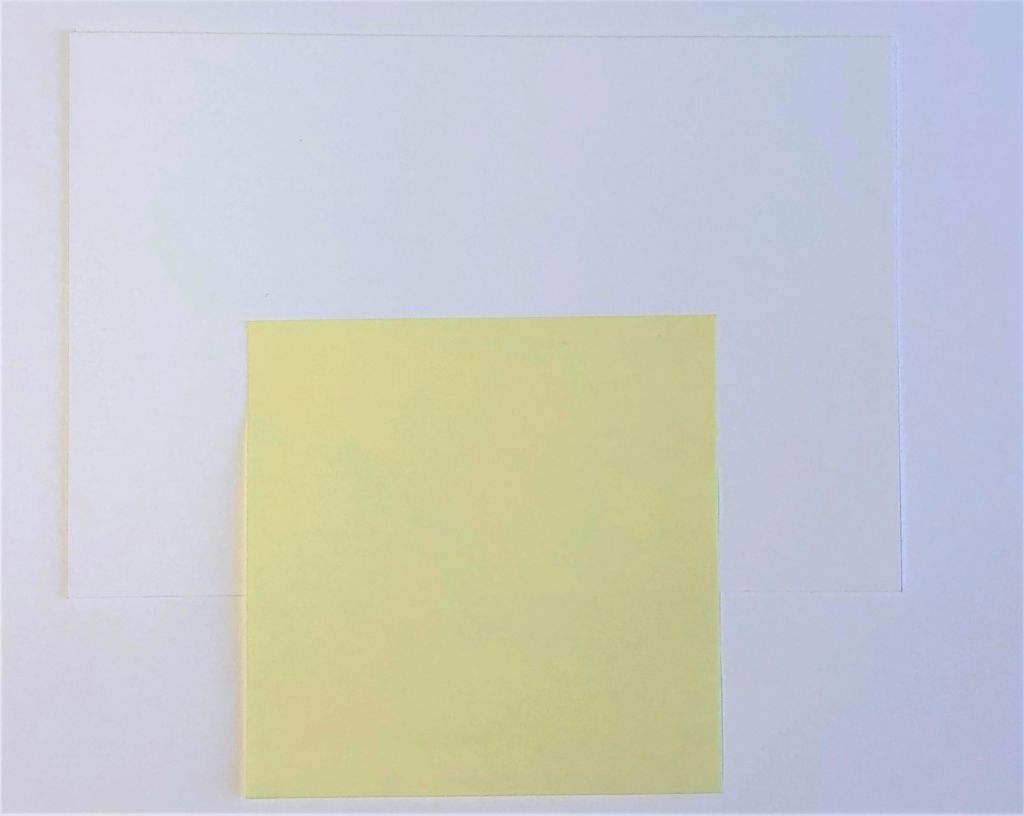
We created this card in my Retiring Class last week. I love the Beautiful Friendship stamp set and I’m so sad it is leaving. This card is not my original idea. I saw it on Pinterest by Nancy Ferb.
I have used the Mango Melody for the card base and Terracotta Tile for the card mat.
You create the mask for your sentiment area by adding a Sticky Note on the white card. I have shown it below. You can place it anywhere you like. Then stamp around the Sticky Note. When you are done remove it and then you have a “block” area to add the sentiment.
Sadly this stamp set is no longer available. 😦 They go quick when they are retiring.
Don’t miss out on any other of the Retiring Items. Only 2 weeks left. Check it out -> HERE.
Check out the Clearance Rack too for some huge discounted items. See it -> HERE.
With your orders I’m sending out some of my Hand-made cards. I have lots to give away. That’s in addition to the other little gifts I send out.
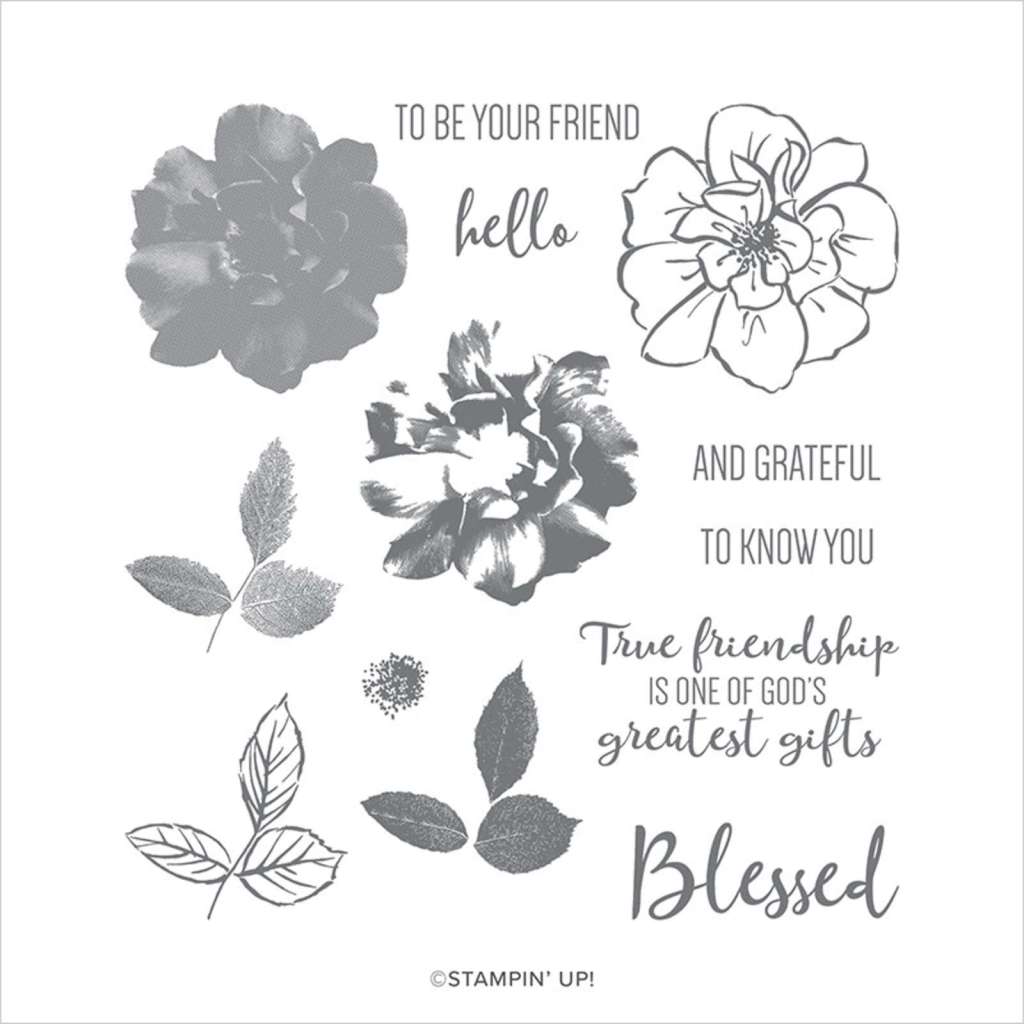
It’s Friday which means it’s video time with Friday Flicks. I couldn’t help but use the gorgeous To A Wild Rose bundle. I am so sad this is retiring. I love the layering you can achieve with the stamps and having the dies to match to get your different flowery effects.
This is today’s card.
You can catch me creating the card on video. (If you receive this blog post by email the video may not show so be sure to head to my blog by clicking on the title at the top or head to Youtube now).
Have you got the To A Wild Rose Bundle yet?
Be sure to grab it ASAP. It is going …
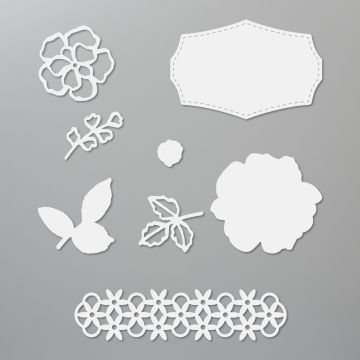
EDITED: I have just seen that the To A Wild Rose stamp set is now not available. 😦 The dies are still.
You can find the Wild Rose dies in my store now -> HERE.
In Australia? Shop at my store (link just above) Please use the Host Code – 3VUEXM63
OR Contact me directly.
Don’t forget – I’m giving away some Hand-made cards with your orders this month. Along with all the other little special things I send out.
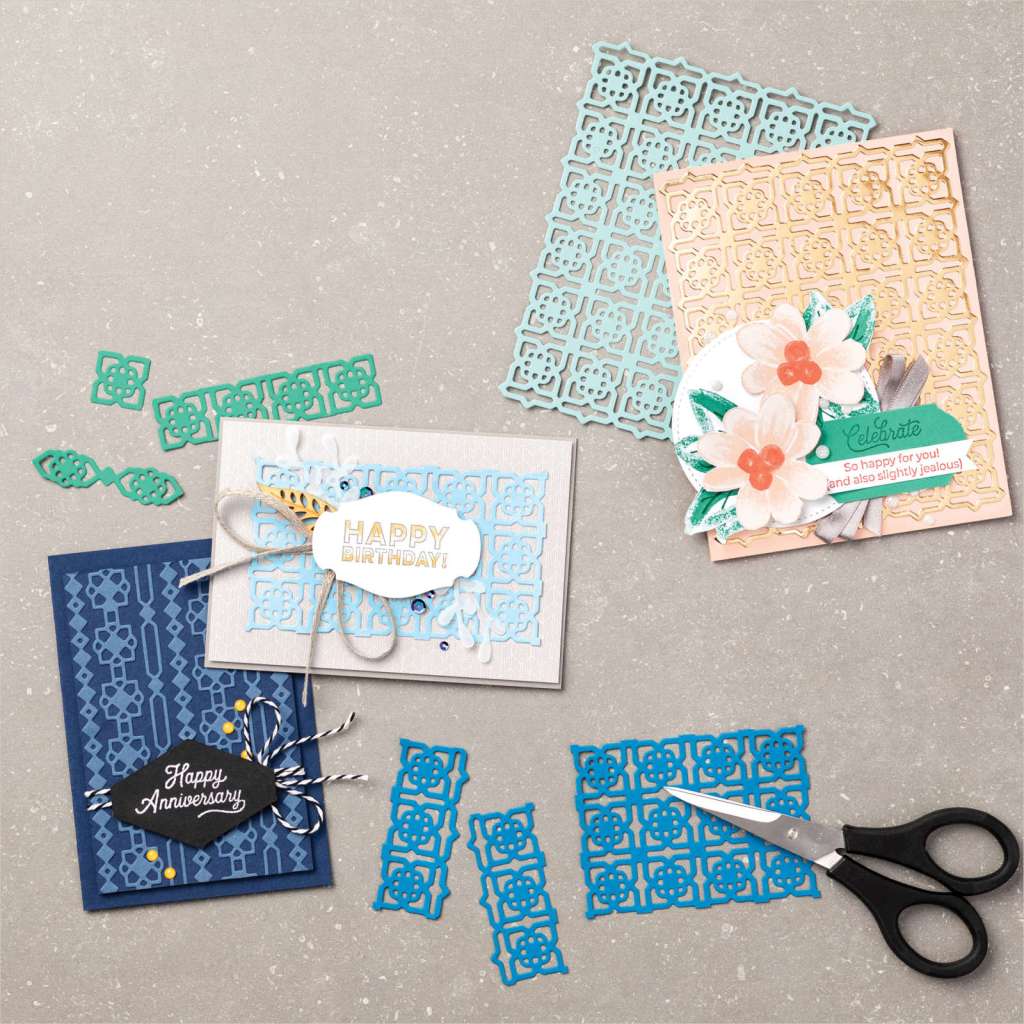
Wednesday’s WOW! #120 – Let’s check out the Many Medallions Diesand the fun ways you can use them on your projects?
Have you seen the Many Medallions Dies in the Catalogue? While they make a great background on the front of your cards using the full diecut. Why not trim it down and use different elements of the die for fun effects.
Check it out below.
So many different ways. Isn’t it cool!
The Many Medallions Dies are retiring very soon. If you want to create these fun effects on your cards be sure to grab this dies.
Here they are for you.
You can grab these in my store or you can contact me directly on 0439 844574.
Head to my store -> HERE. Please use the Host Code – 3VUEXM63
DON’T FORGET:
I’m giving away some hand-made cards with your orders.
Today for our Video I have put together some ideas for you to drag out some of that stashed paper that you are storing up for a special occasion and actually use it. Friday Flicks is showing 5 Ways to use your Pretty Paper!
I will share the cards and general measurements below the video. If you are receiving this update by email and the video is not showing then head to the Blog Post or it is now on Youtube as well.
Have you subscribed to my Youtube Channel yet? Be sure too so you don’t miss out on any videos. Head -> Here.
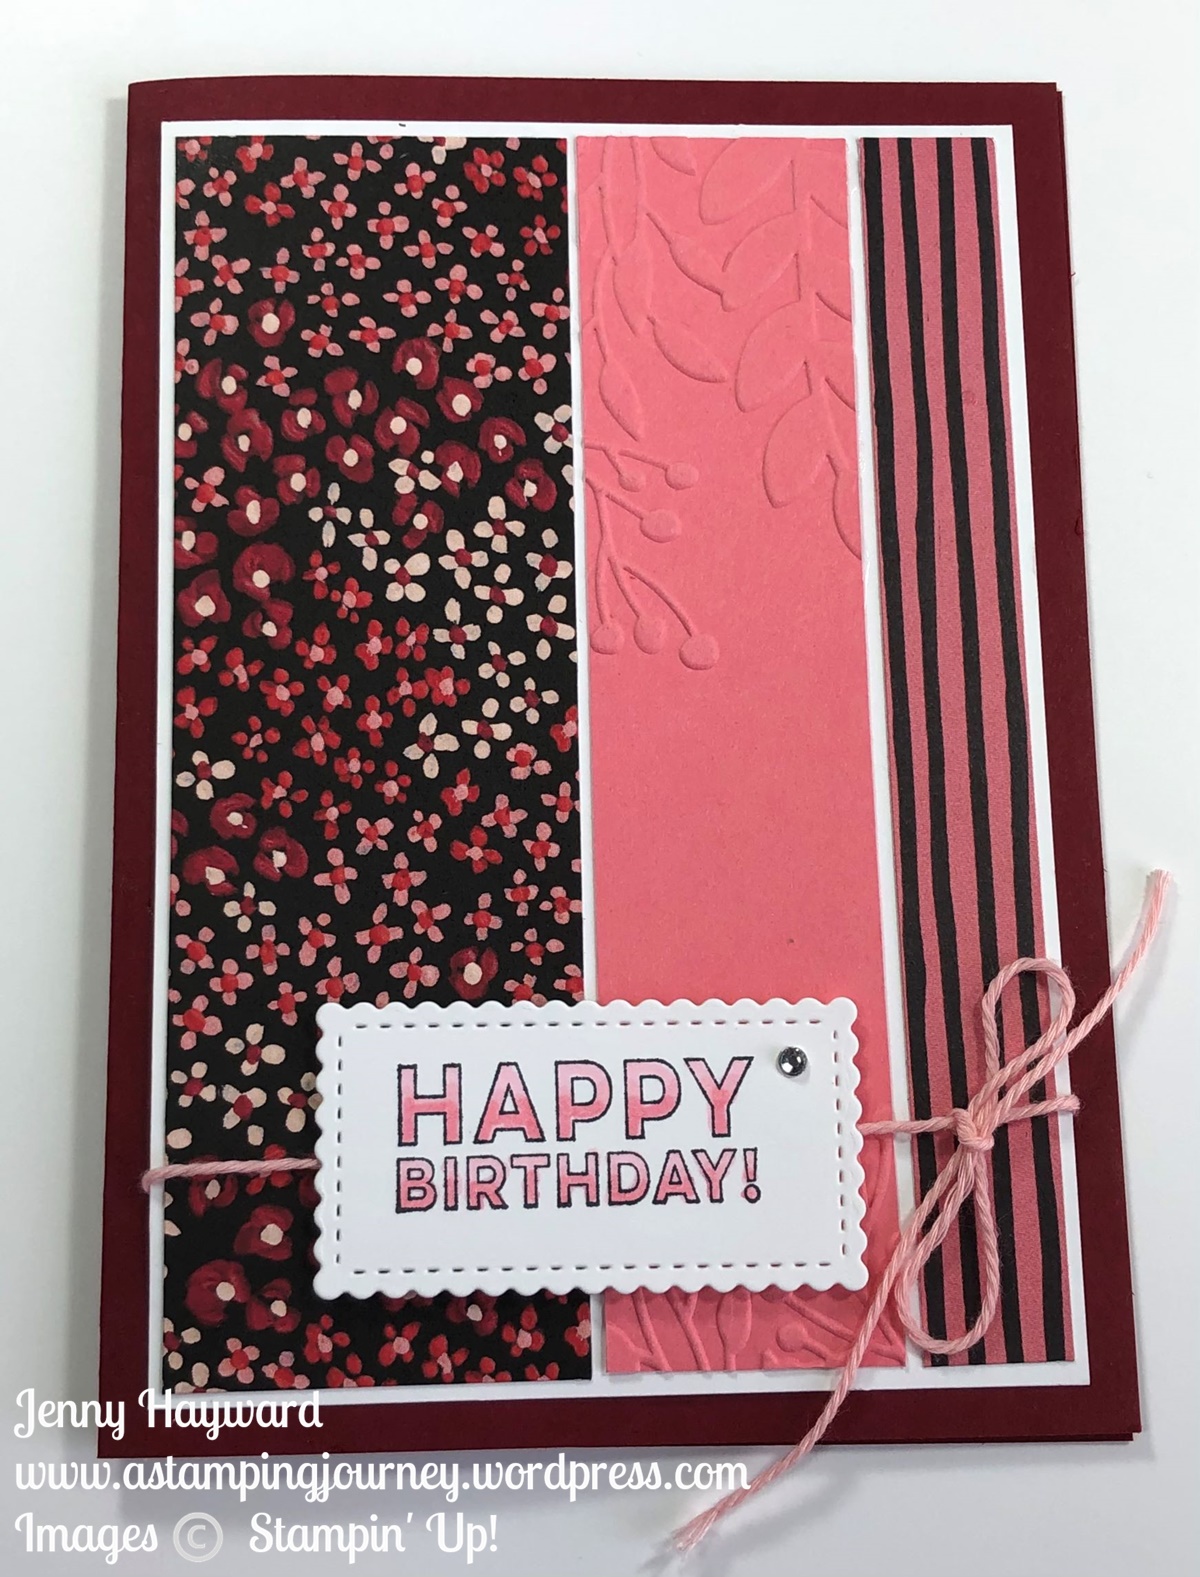
Below is the Flower and Field Strips card that was featured in the video.
The measurements are below.
White Mat – 13.8cm x 9.5cm 5 x 3 3/4″
Strip 1 – 13.4cm x 4.3cm 4 7/8″ x 1 3/4″
Strip 2 – 13.4cm x 3cm 4 7/8″ x 1 1/8″
Strip 3 – 13.4cm x 1.5cm 4 7/8″ x 5/8″
Card 2. Turn and Flip (Inspired by a card by Klompen stampers)
The sizes for cutting can be any measurements. These are my suggestions.
Cut paper to 14.4cm x 10.1cm 5 3/8″ x 4 1/8″
Cut the paper at 7cm 3″
Turn anti-clockwise and cut each paper at 8.4cm approximately 4″. Flip over 2 of the pieces and adhere straight to the card front.
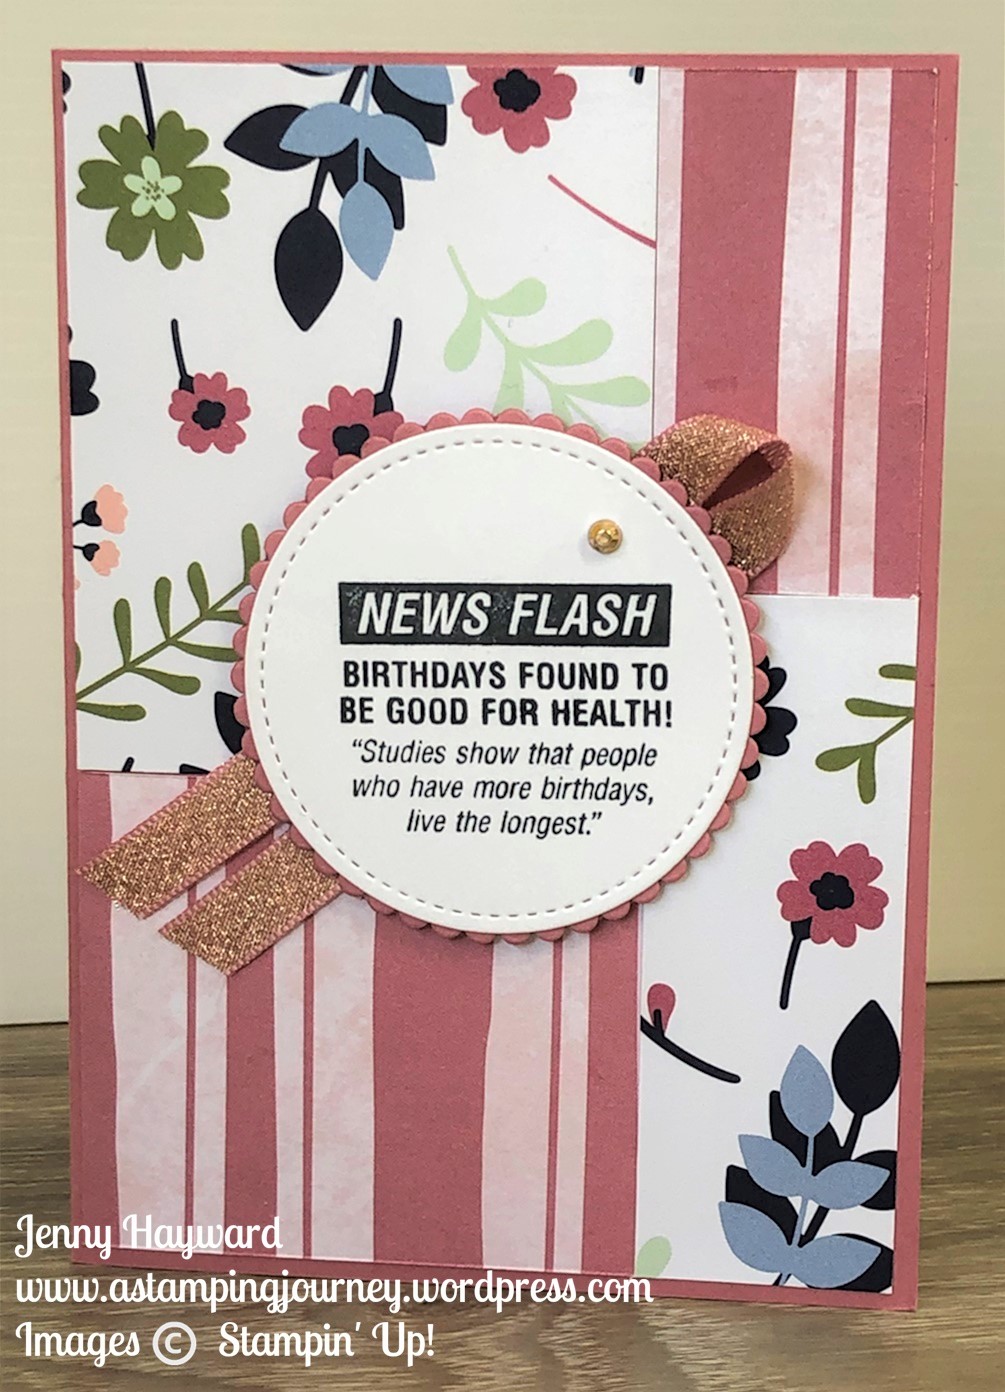
Card 3: Paper Blocks (Inspired by a card by Lisa Pretto)
Cut 2 pieces of paper. They can be the same piece but reverse one side – 1) 8cm x 9.5 3 1/8″ x 3 3/4″ 2) 8cm x 7cm 3 1/8″ x 2 3/4″
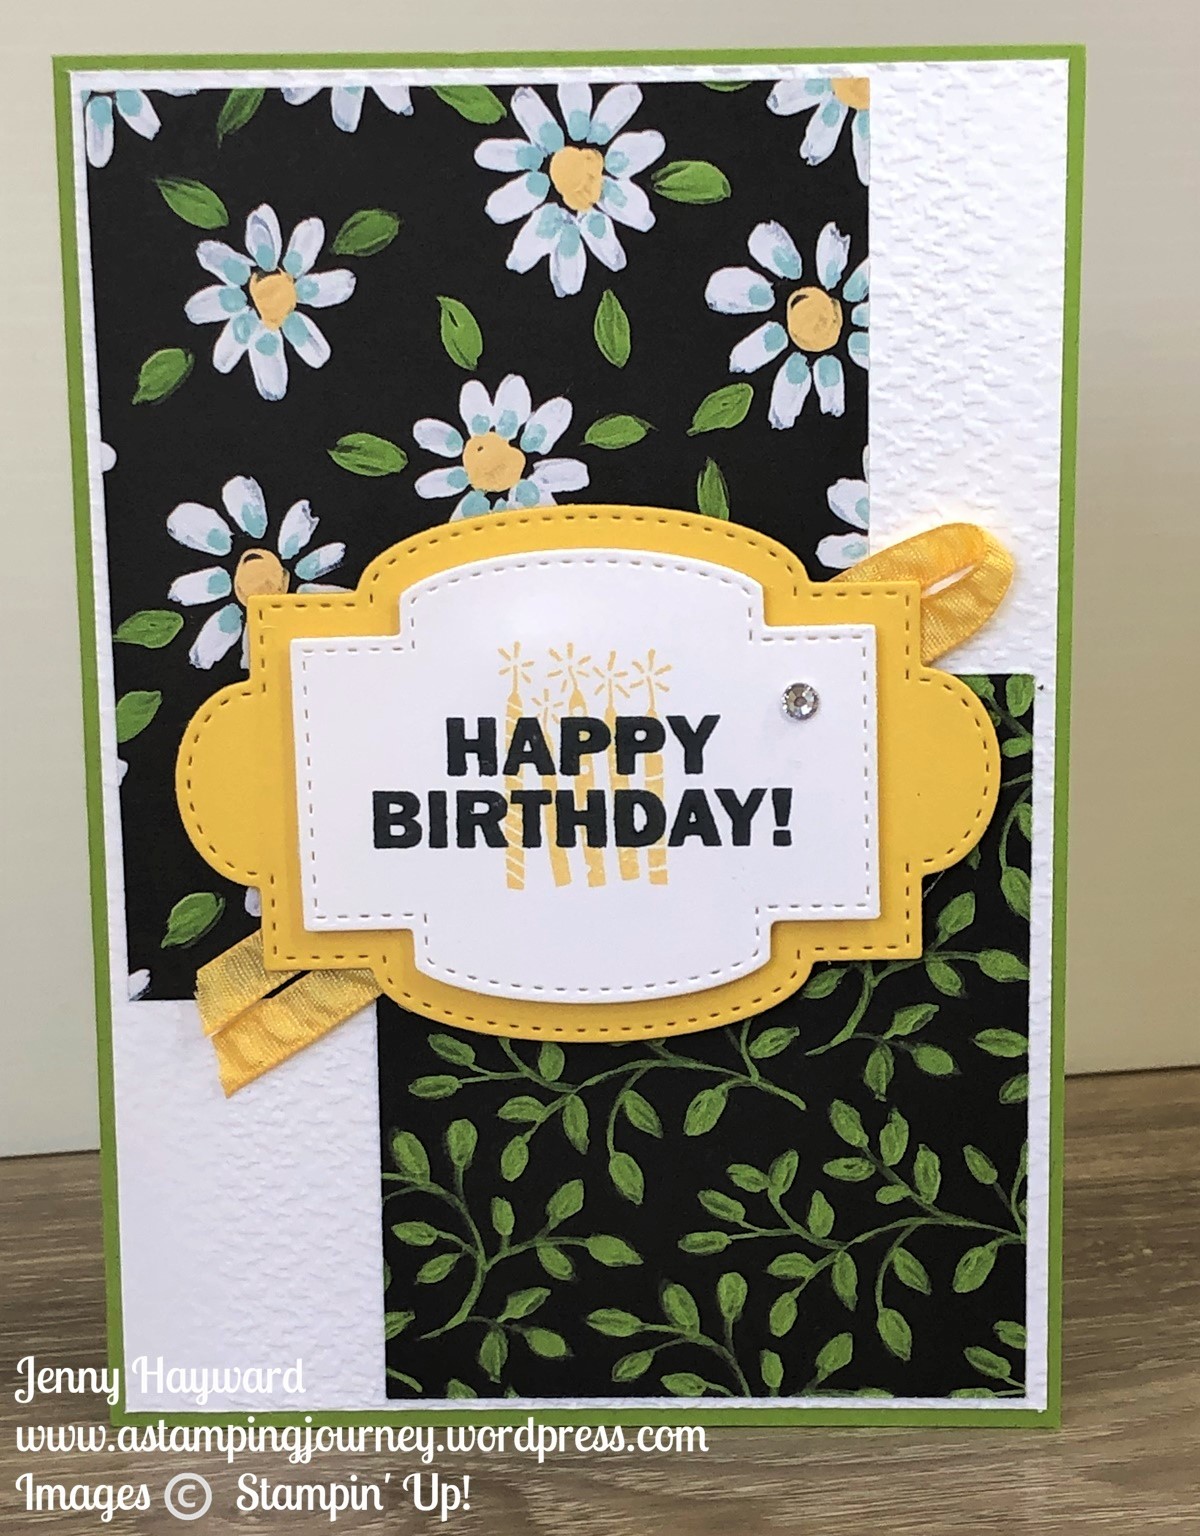
Card 4: Half piece
14.4cm x 10.1cm 5 3/8″ x 4 1/8″ Cut the piece in half and flip one.
Card 5: This works well with a large flower print.
Fussy cut the flowers leaving an edge around the flowers. Raise up off the card with Dimensionals. Use a different pattern print for the card front. TIP: Use vellum between the pieces to break the elements up.
5 Cards and there are so many other ways too which I will share soon.
Hope you like this video and ideas.
Have a great day,
Jenny
In Australia? I would love if you were to shop with me. Head to my store -> HERE.
Have you seen the new Stampin’ Up! Blending Brushes?? I have had mine for a couple of weeks but have just pulled them out this week. I have been having so much fun with them. How soft and delicate are the bristles!! They are lovely.
On yesterday’s Facebook Live I used the brushes on the card and shared some tips in using them.
The edited video is now on Youtube. I will add it below too. If you are receiving this blog post via email it might not show up so head to my blog or you can go to Youtubedirectly.
I will be sharing some more cards with the Blending Brushes very soon so watch out for them.
A couple of tips with using them though. You will want to treat them differently than the sponges or the Daubers.
When picking up the ink from the inkpad you will want to “rub gently” not dab like you might with the sponges.
Dab off a little on scrap paper first. I do this with the sponges anyway.
When applying ink to your card move in a circular motion with light pressure.
Hold the brush down towards the brush head.
If you are sponging the whole card start off the edge of the card and work lightly in.
I hope these tips help. I will put together a video soon sharing some cool ways of using the brushes.
Here is the card from the video. I have used the Dragonfly Garden on the card.
On the Dragonfly I stamped the “solid” wing stamp on the wing outline in Blushing Bride and then coloured just the tip of the wings with the Soft Seafoam Stampin’ Write Marker or you can use the Stampin’ Blends.
The Blending Brushes are available in my store now -> HERE. for $21 AUD
I had seen some gorgeous cards around with a watercoloured effect with the Hummingbird from A Touch of Ink stamp set. I wanted to have a go. I have to say mine didn’t turn out quite like the ones I had seen.
It’s created by heat embossing the images with White Embossing Powder. I used the Shimmery White card for the sparkle in the card. Once it has cooled then watercolour the images using the Water Painters and inkpads. To do this you can create a “well” of ink in the ink pad lid or I dabbed some ink on to a clear block and picked up the ink off that You can build up the colour as you go.
I like the effect. Maybe not the execution of my card. 🙂
I do love the effect of the edge of the card with the Stitched with Whimsy die.
Check that paper out though. That is the Highland Heather print in the Subtles pack you receive when you join Stampin’ Up! during Sale-A-Bration. There are some very cool patterns in the packs. And you receive every colour collection plus 2020-2022 Incolors. That’s 200 6″x6″ papers!
The A Touch of Ink is a free choice during Sale-A-Bration available with orders over $180. It’s such a gorgeous set.
But if you have considered joining the Stampin’ Up! Family then you might want take advantage of that now with Sale-A-Bration so you get your 200 6″x6″ squares of paper.
In Australia? You can shop in my store -> HERE. Don’t forget to add your Sale-A-Bration choice. Host Code: CJ7PPUEC Or you can contact me directly on 0439 844574.