Stampin' Up! A Touch of Ink stamp set
cards, Catalogues, Sale-A-Bration, Stampin' Up!, Videos

A TOUCH OF INK + OMBRÉ WITH A VIDEO!

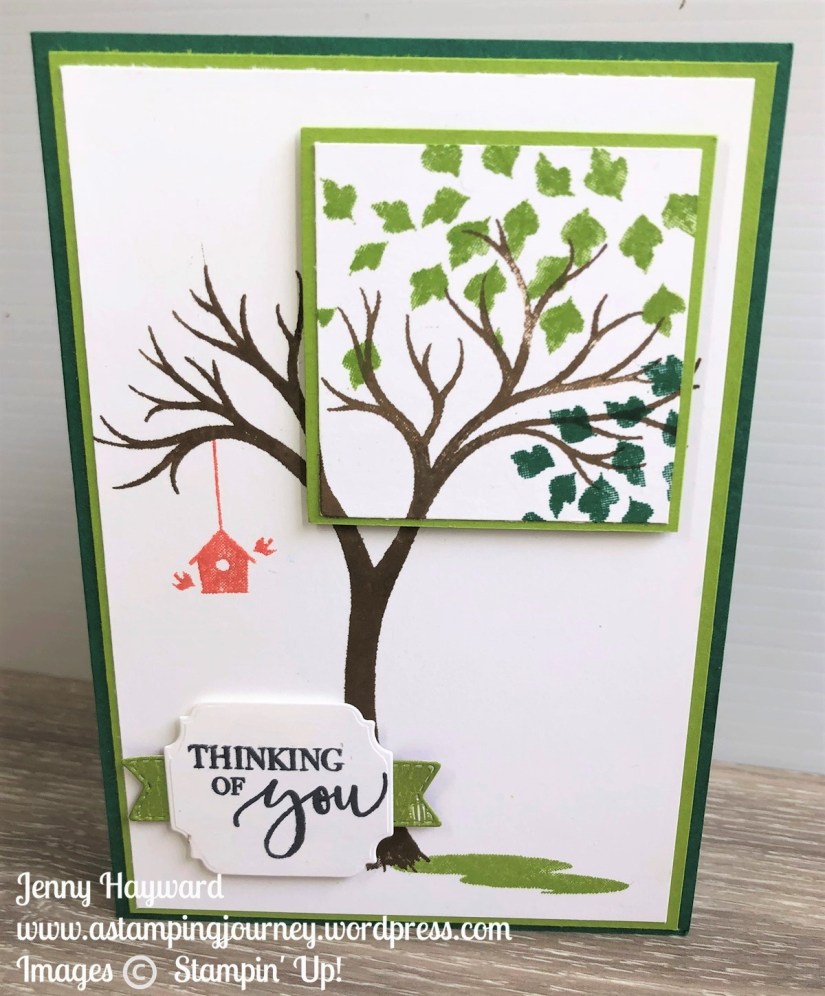
Back with our Friday Flick. Today’s card is using the A Touch Of Ink stamp set. I so love this set.

The card was inspired by one I saw on Pinterest. I just saw the idea as I was scrolling through and realised I didn’t save it.

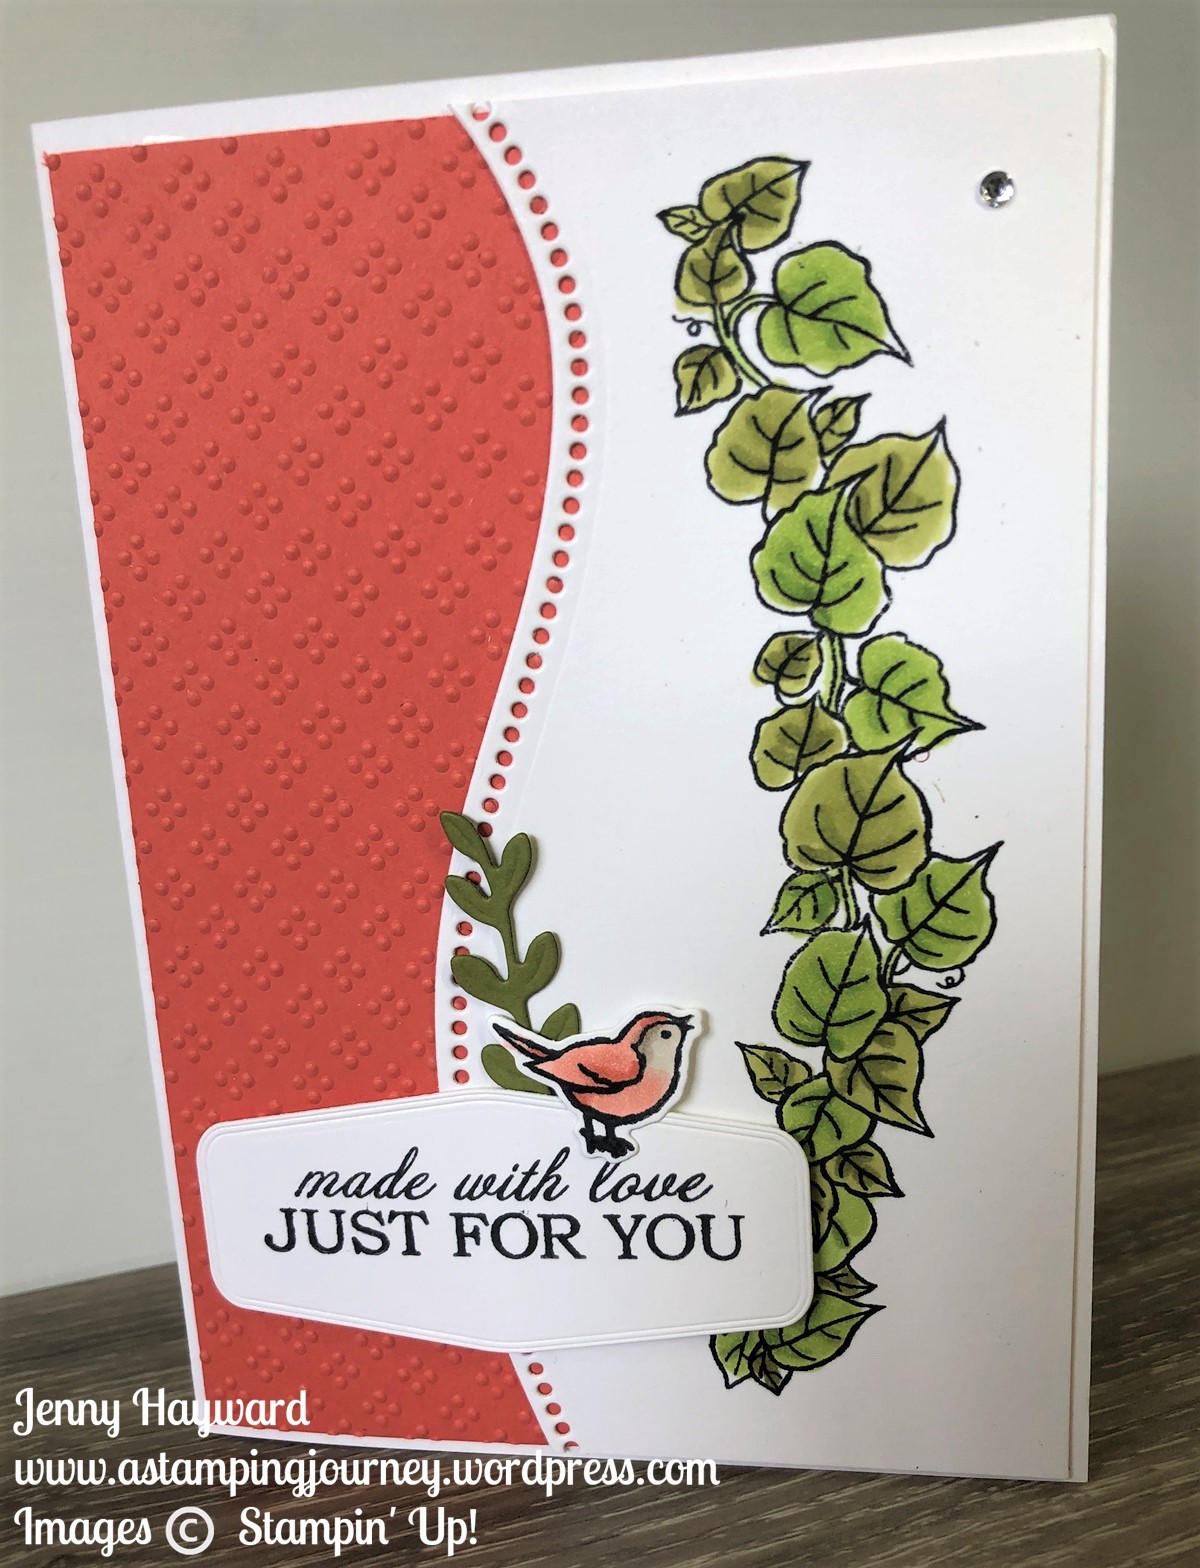
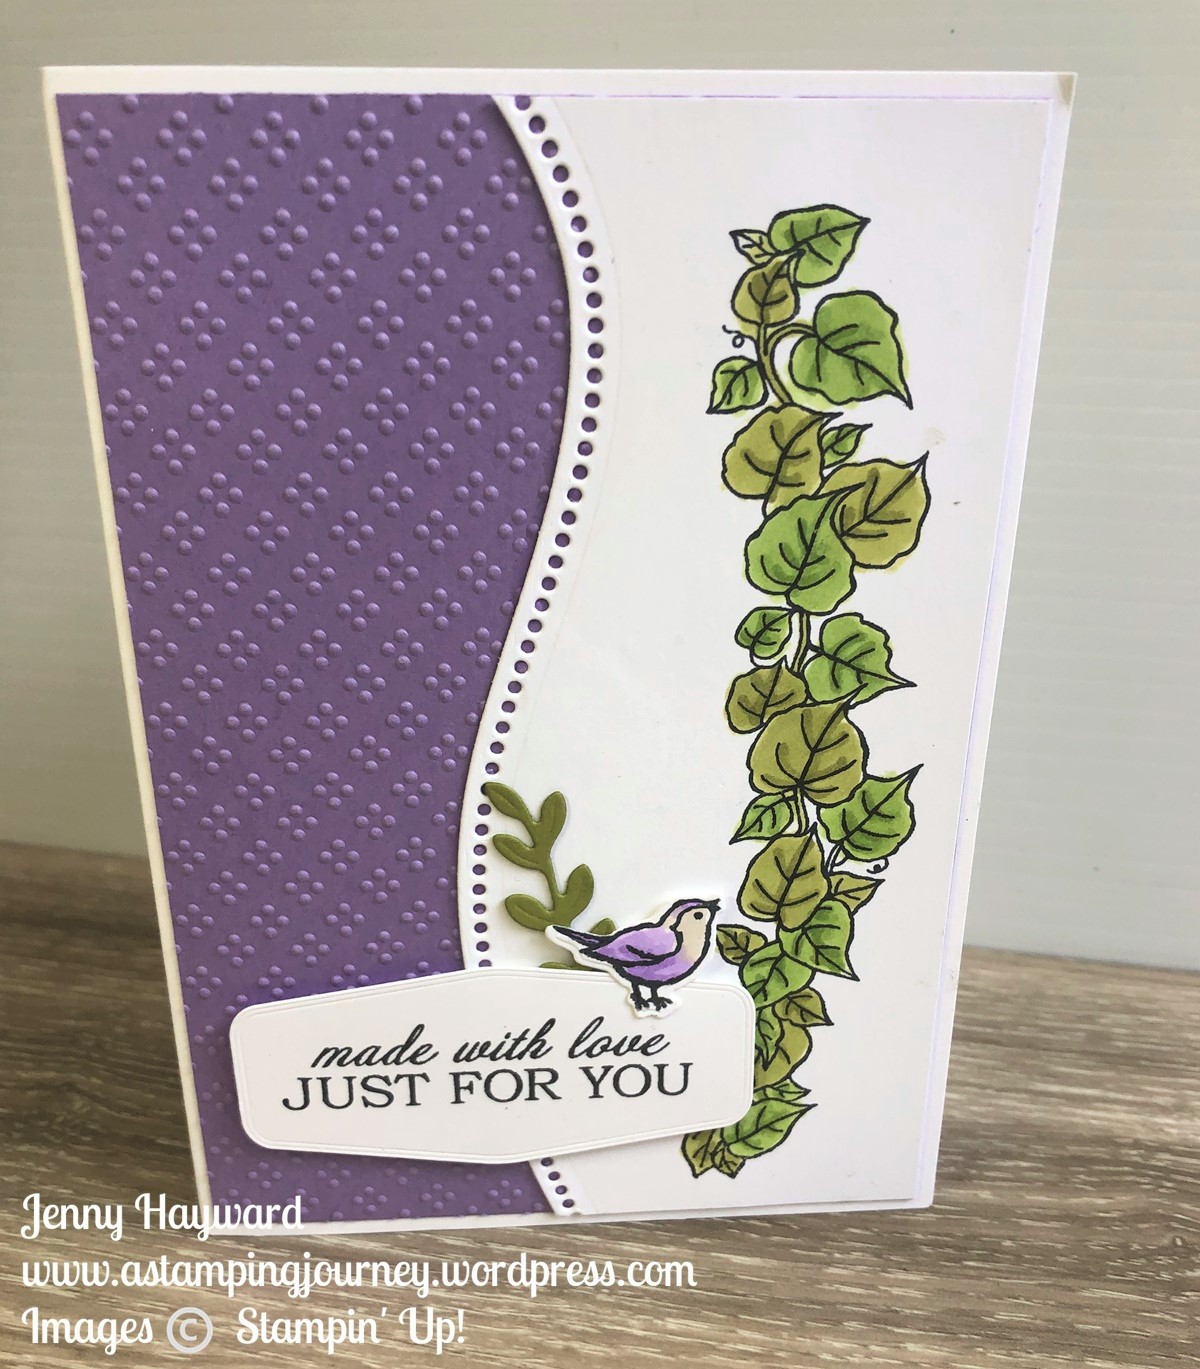
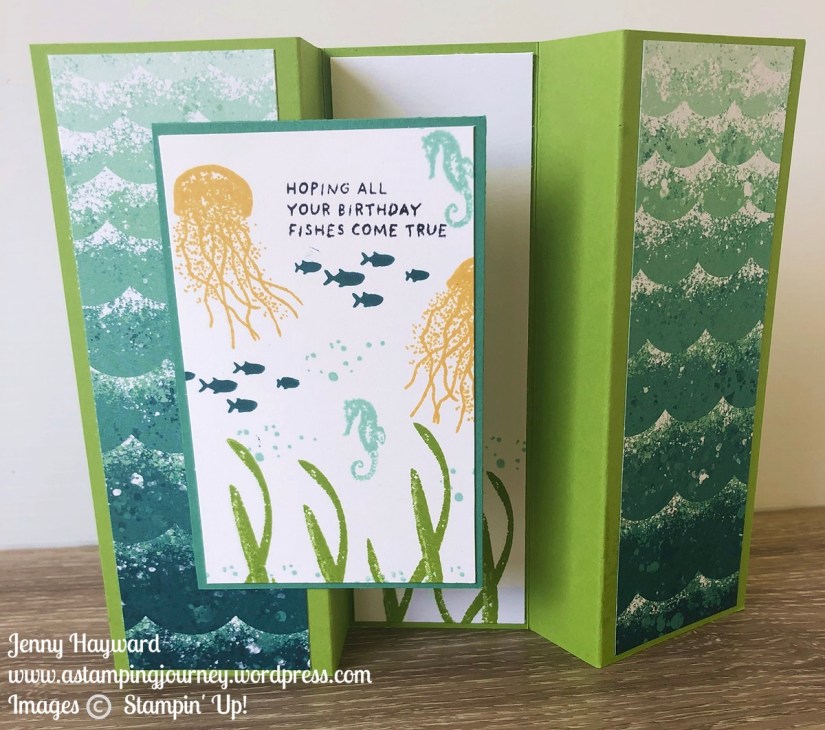
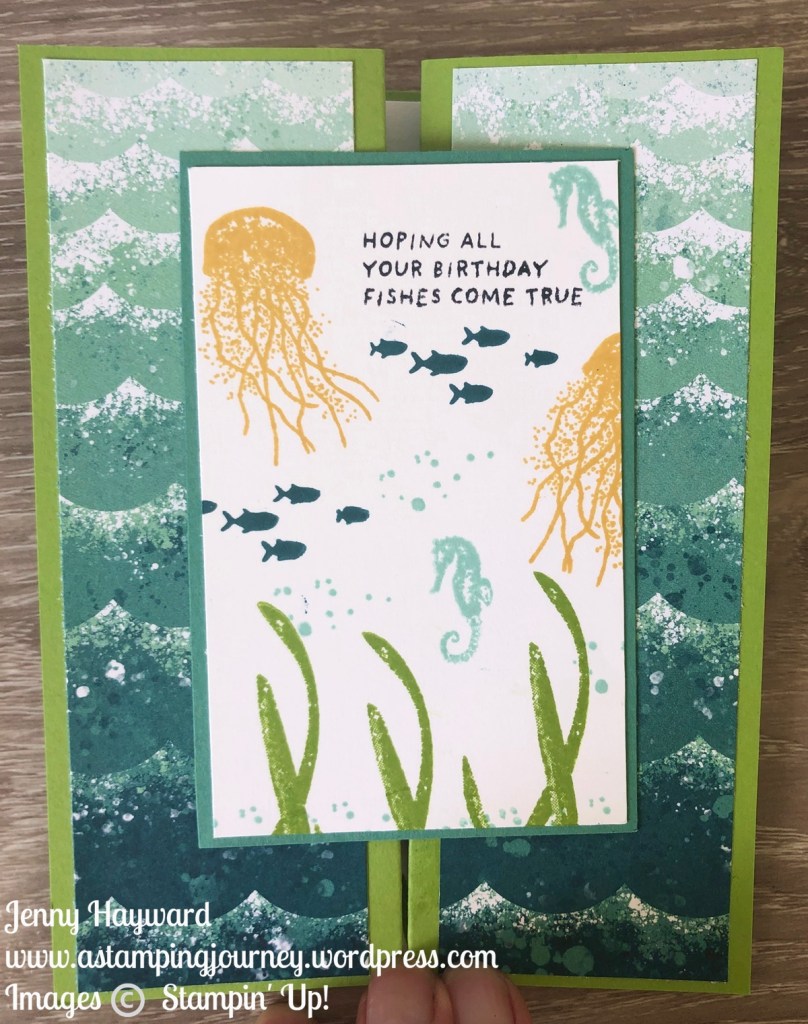
I’m using the Oh So Ombré paper with it. I love that you can get an ombré effect without all the sponging and inking. And I love the colours too.

Check the video out below. (It is also now on Youtube). If you are receiving this blog post via email update the video may not show so head to my blog by clicking on the title above to take you to the post.

Here is the card.

Stampin' Up! A Touch of Ink stamp set

The A Touch Of Ink stamp set is a free choice for Sale-A-Bration with orders over $180. The Ombré Paper is also a free Sale-A-Bration choice with orders over $90. They are both such great choices.

If you are in Australia and need supplies why not stop by my store -> HERE or you can Phone me on 0439844574 and I can help you. Don’t forget to pick your Sale-A-Bration choice.

This weekend I have an Ordering Special just for you. With your orders over $180 you can choose the A Touch Of Ink stamp set (if you like to) and Receive a sampling of the Oh! So Ombré paper from me and a card kit to make 2 cards with the A Touch Of Ink stamp set. Very cool!

Of course even better value though is if you have a lot on your Wish List is to join the Stampin’ Family. You save money all round. You only pay $169 and get $235 of products. Then get a discount each time you order so you save.

But it’s not just the discount. It’s being part of a community of fellow crafters. Of fun and inspiration. Find out more on my page -> HERE.

Free papers with SAB

Hope you enjoy today’s video,

Jenny

cards, Catalogues, Videos

DARLING DONKEYS PART FLAP FOLD CARD + VIDEO!

I can’t resist those little Darling Donkeys. They are just the cutest don’t you think?? 🙂

Today’s card and video is this fun fold card. I called it a Part Flap Fold card. I’m not sure really the exact name of it. I have seen a few different names. But anyway it is so easy and such a fun card to make.

Here is the inside of the card.

Watch the video below. (If you are receiving this Blog Post via email the video may not show us so click on the Blog title above to go straight to post so you can check it out.

I will share the measurements further below to make your own.

MAKE YOUR OWN PART FLAP FOLD CARD

Card Base: 14.8cm x 21cm Scored at 10.5cm 5 1/2″ x 8 1/2″ Scored at 4 1/4″

Flower and Field Designer Series Paper: 14.4cm x 9.7 cm 5 3/8″ x 4″ Cut off 3.1cm 1 1/4″ off from the right hand edge.

White card: 1 piece @ 6.5cm x 9.4cm 2 1/2″ x 3 3/4″ (Front panel)

1 piece @ 14.4cm x 10.1cm 5 3/8″ x 4 1/8″ (inside)

Also Bumblebee card piece diecut with the larger rectangle from the Stitched So Sweetly Die. (if you don’t have these dies cut a card mat slightly larger than the White front panel card piece).

HOW TO:

After scoring the card base in the centre as indicated above also score in from the right hand edge at 3.5cm or 1 3/8″.

TIP: When adhering the front panel piece (Bumblebee rectangle and white stamped piece), be sure to just place adhesive down the centre on the back of the piece.

Did you know this Darling Donkeys stamp set is a free choice for Sale-A-Bration. You have got to love that right?? 🙂

In Australia, you can choose this with your qualifying orders over $90.

You can place your order in my store -> HERE and just remember to select your Sale-A-Bration choice before checkout.

Or, you can contact me directly and I can place your order for you.

Thanks for your visit today,

Jenny

cards, Videos

STAMPIN’ UP! ART GALLERY BUNDLE WITH ADDED TEXTURE!

This card I am sharing today was one I created in my Facebook Live on Saturday. It was fun to create and chat with others. (Join me next time. Head to my Facebook page – see the right hand column for the link – and be sure to follow along so you know when I will be on. I am hoping to get more regular with Lives so still working out the right time).

You can now catch the video on Youtube too -> HERE.

I used the Art Gallery Bundle and adding so much texture with the Painted Texture 3D Embossing Folder. I added some Fine Art Ribbon to the card too which adds more texture.

The Art Gallery Bundle is part of the Fine Art Floral Suite in the 2021 Mini Catalogue. It is gorgeous let me say…

Do you NEED this bundle in your stash. If you are in Australia I would love you to shop in my store. Find it -> HERE.

Thanks for visiting me today. I hope you have a wonderful week.

Jenny

cards, Catalogues, Stampin' Up!, Videos

QUITE CURVY CARD IN CALYPSO CORAL!

Today’s card was created in my Facebook Live on Wednesday. Yes! I have ventured in to doing Lives. This is something I have put off for so long. But I am hoping that each Wednesday afternoon I can share a card with you on Facebook.

The video is now on my Youtube channel and I will post it here for you. For the card I used the Quite Curvy Bundle. I am loving these stamps and dies.

Here is the card.

The leaves were coloured with the Stampin’ Blends. I used the Wrapped In Texture Embossing Folder and the sentiment piece is diecut with the Tasteful Labels Dies.

I had made one of these cards before the Live for a swap card in my JEN’s INK Team Facebook Group. It was great to get some of my team creating for that. I will share the other swap cards soon. The card I made for the swap was in Highland Heather.

If you are in Australia and want to be part of these fun team card swaps and other activities we do then why not come and be a part of my JEN’s INK Team. You can find 9 reasons why you would want to -> HERE.

Now check the video out below. It is on Youtube as well -> HERE. You can head there to subscribe to my channel so you will catch all my videos.

So what version do you like?? Highland Heather or Calypso Coral???

Thanks for visiting me today. Have a great weekend,

Jenny

cards, Catalogues, Videos

MERRY AND BRIGHT CURVY CHRISTMAS + A VIDEO!

I am loving the gorgeous new Quite Curvy Bundle of products we have available this week. I have been creating lots. Today I wanted to share not one but 2 projects with them.

The layouts are the same but one is a Christmas card and then I created another as a Birthday card just changing it a little. Today’s video will show you how to create them with a few tips on how to use these new products.

Check the video below.

On these cards I have used the new Classic Christmas paper in the Crumb Cake prints. There are some great prints in this pack in Crumb Cake, Shaded Spruce and Cherry Cobbler. I have neglected the Scalloped Lace Trim but it is so soft and adds that elegant touch to your cards.

The Crumb Cake card was embossed with the Subtles Embossing Folder to add a little extra texture. The bow and the bird were coloured with Stampin’ Blends.

Are you loving the Curvy Celebrations Bundle of Products? They are available to order now in my store -> HERE.

If ordering online please use the Host Code – RCDPWPWK Or contact me directly to order at jghayward@yahoo.com

Be sure to check out my class details too. View that -> HERE. (Australian residents only at this stage).

Be sure to check the video out and subscribe over on my Youtube channel so you can keep updated when I post a video.

Happy Curvy Creating.

Jenny

cards, Catalogues, Stampin' Up!, Techniques, Videos

BUTTERFLY WATERCOLOUR WASH + VIDEO!

Today’s card uses a fun watercolouring technique.  I call it a watercolour wash.  It’s a great way of colouring your images freely without worrying about staying in the lines.  That’s so cool if you are not one for neat, “in the lines” colouring.

I have used the stamp set Positive Thoughts for this card.

You can check out the video below to see some tips in creating it.

Positive Thoughts is such a beautiful stamp set.  I particularly love the sentiments in it.

I hope you give this idea a go. Try it with different stamp sets.

Thanks for visiting me,

Jenny

cards, Catalogues, Stampin' Up!, Techniques, Videos

TASTEFUL TOUCHES EMBOSSED FEATHERS + VIDEO!

Today’s project is using the Tasteful Touches stamp set.  I love heat embossing and thought those feathers would look lovely in shiny silver.

Stampin' Up! Tasteful Touches Embossed Feathers

I have a video for you showing you how to create it all ready for Friday Flicks.  Check it out.

If you are receiving this blog post via email and the video is not showing then head to the post on my blog and you can view it there directly.  It is now on Youtube too so you can see it there.  (Be sure to subscribe if you haven’t already subscribed so you don’t miss out on any videos).

If you are in Australia and would like this gorgeous Tasteful Touches Bundle or any of the other wonderful products you can grab it now in store -> HERE.  Or contact me and I will take care of it for you.

Have a great day,

Jenny

cards, Catalogues, Techniques, Videos

LIFE IS BEAUTIFUL – DOUBLE LAYER CARD + VIDEO!

This card is one we made in class recently.  I wanted to share this video with you today to show you how to create it.

It is with the sweet Life Is Beautiful Stamp set and is using the Double Layer Technique.  That is using 2 layers of card mat that you stamp on and layer together.  The card was inspired by one I saw on Pinterest using the Sheltering Tree set.  It didn’t have a watermark and I couldn’t tell you who created it.  I changed it up a bit for this card though.

I found that it helped using the Stamparatus to stamp this to be sure to get a crisp stamping. It made it easy to re-stamp if I needed to.

I have the video below to see how you can create this card.


The Life is Beautiful stamp set has such lovely sentiments.

In Australia? Grab it in my store now -> HERE.

Please use the Host Code: TAWWBMRC

Or contact me directly and I can take care of your order.  Thank you so much for ordering. 🙂

Happy Stamping,

Jenny

Catalogues, Stampin' Up!, Videos

GET & GO AND NEW MACHINES!

So many exciting things happening at the moment.  Phew! My head is in a spin.  I have to stop by though and tell you the first 2 very exciting news points!

  1. GET & GO for September … and
  2. The New Diecut and Emboss Machine is here!

GET & GO STARTER KIT!

When you join Stampin’ Up! in September you will get even more!

Receive 2 stamp sets (The Queen Anne’s Lace and the So Much Love stamp set valued at $65 for the two), a pack of Rhinestones AND card kits to create 16 cards.  They are ready for you to make cards to send to friends or get some friends together and create them with you.  (Instructions will be included).

What do you do?? Pay $169, Get $235 of products of your choice. You are well on your way then to stamp and share – and get your discount with every order later.

What are you waiting for?? Ask me for more information or go and check “9 reasons why you would want to join” on my page -> HERE

You are not signing up for life but after you join you can enjoy a minimum 20% discount on all your future purchases for as long as you stay.

Ready to join right now? Head straight to my website -> HERE

I love each and every one of my team members and I look forward to welcoming you to my JEN’s INK team.

THE STAMPIN’ CUT AND EMBOSS MACHINE IS HERE!

We have been waiting a while for this new machine to arrive.  The standard one is now available to order.  I have been giving it a run the last few weeks … and it is SO smooth to turn.  Check the Youtube video -> HERE.

How do you buy this machine??

There are 2 ways.

1) Full Price is $209.  Shipping on this would be $10.45.  You can order this through my store now -> HERE

2) Save $40!  As part of joining the Stampin’ Up! family you can order this in your Starter Kit.  Pay only $169 and no shipping (another saving).  Plus you choose up to $235 of products so you can add some dies or other products.

Email me at jghayward@yahoo.com if you have any questions or I can call you and we can chat.

Have a great day. 🙂

Jenny

cards, Tutorials, Videos

WHALE DONE FUN FOLD + VIDEO!

I have had lots of fun with the Whale Done stamp set lately.  It’s just so cute!

One of the cards I have made is a fun fold. I’m not really sure what the fold is called.  I have a few names – Perhaps a reverse Gatefold? A ‘W’ fold.  What would you call it?  Let me know in the comments.

Whale Done Fun Fold

Whale Done Fun Fold card _ closed

I have a video for you with the Measurements further below so don’t miss them.  I will post it here but it is also on my Youtube channel.

Hey, have you subscribed to my Youtube channel yet?? – Head over -> HERE and subscribe so you don’t miss out on any videos – and be sure to click on the bell to get the notifications. 🙂

WHALE DONE FUN FOLD

MEASUREMENTS

Granny Apple Green Base card –

21cm x 14.8cm  Score the card at 5.5cm, 8cm, 13cm and 15.5cm. 

8 1/2″ x 5 1/2″  Score the card at 1 5/8″, 3 1/4″, 5 1/4″, 6 7/8″.

Pretty Peacock card 10.8cm x 7cm   2 3/4″ x 4 1/4″

Whisper White card (outside piece) 10.4cm x 6.6cm    4″ x 2 1/2″

                                (inside piece)  14.4cm x 4.6cm   5 1/4″ x 1 3/4″ 

 Designer Series Paper 14.4cm x 5.1cm @2    5 1/4″ x 1 1/2″ 

Have fun creating the card.

If you are in Australia and need this Whale Done bundle to your collection.  Head -> HERE.  Or you can contact me directly.

Grab the cute Whale of A Time paper while you are at it.  

Whale Done stamp set and punch

Don’t forget.  Last days for Bonus Days.  

Happy Stamping,

Jenny