cards, Catalogues, Christmas, Stampin' Up!

WEEK 9 – 12 WEEKS OF CHRISTMAS – A WINDOW CARD WITH HUMBLE HOME!

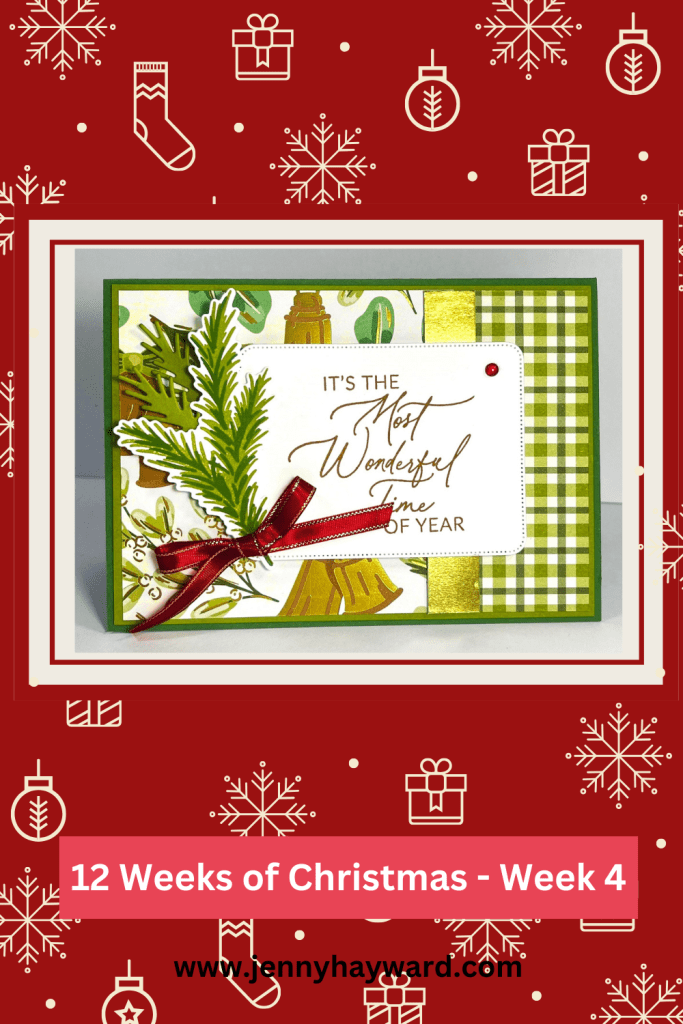
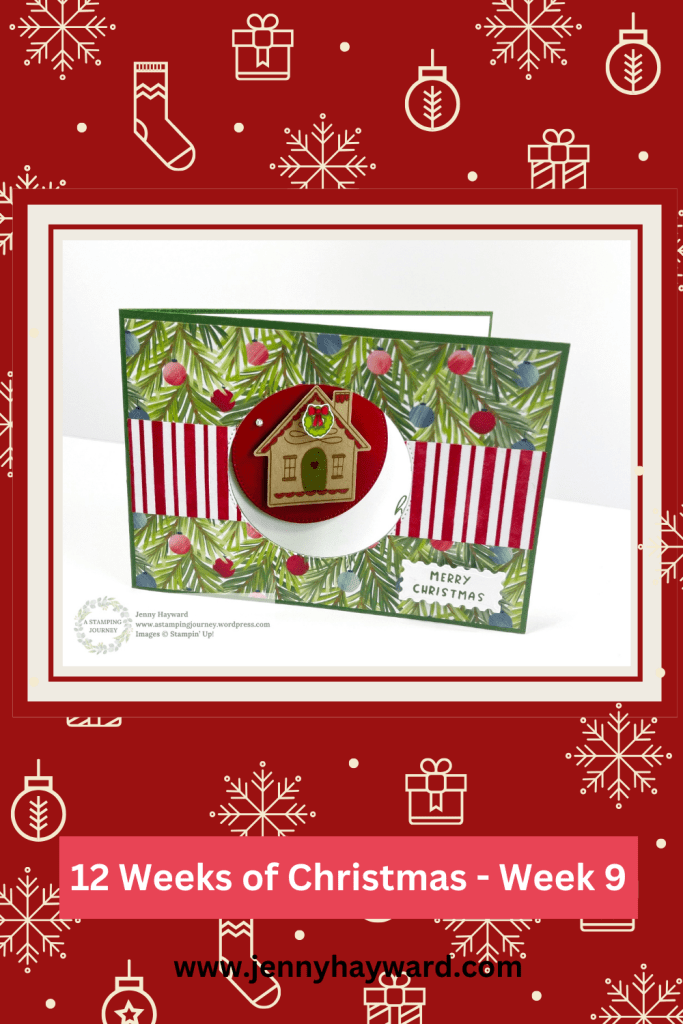
Week 9 of our 12 Weeks of Christmas series.

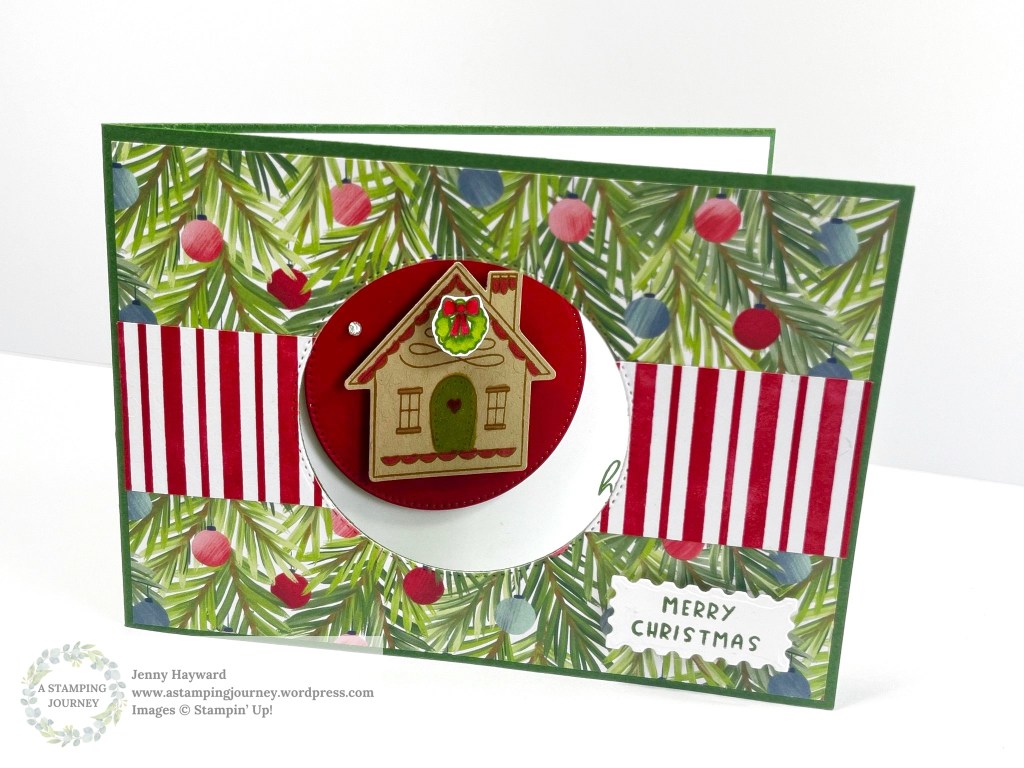
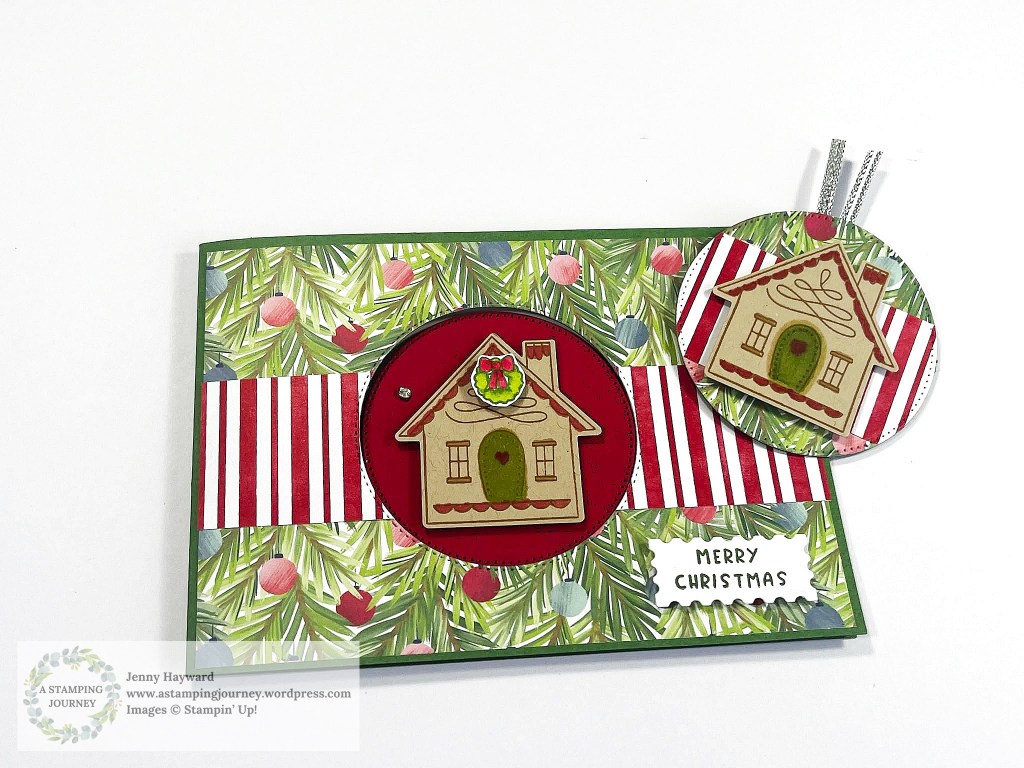
Today’s project is a Window card and it’s using the cute Humble Home Stamps and Punch. I have just recently bought this bundle so it was fun to play with.

This is the card I created. I have used the ‘A Little Bit Festive’ Specialty Designer Series Paper.

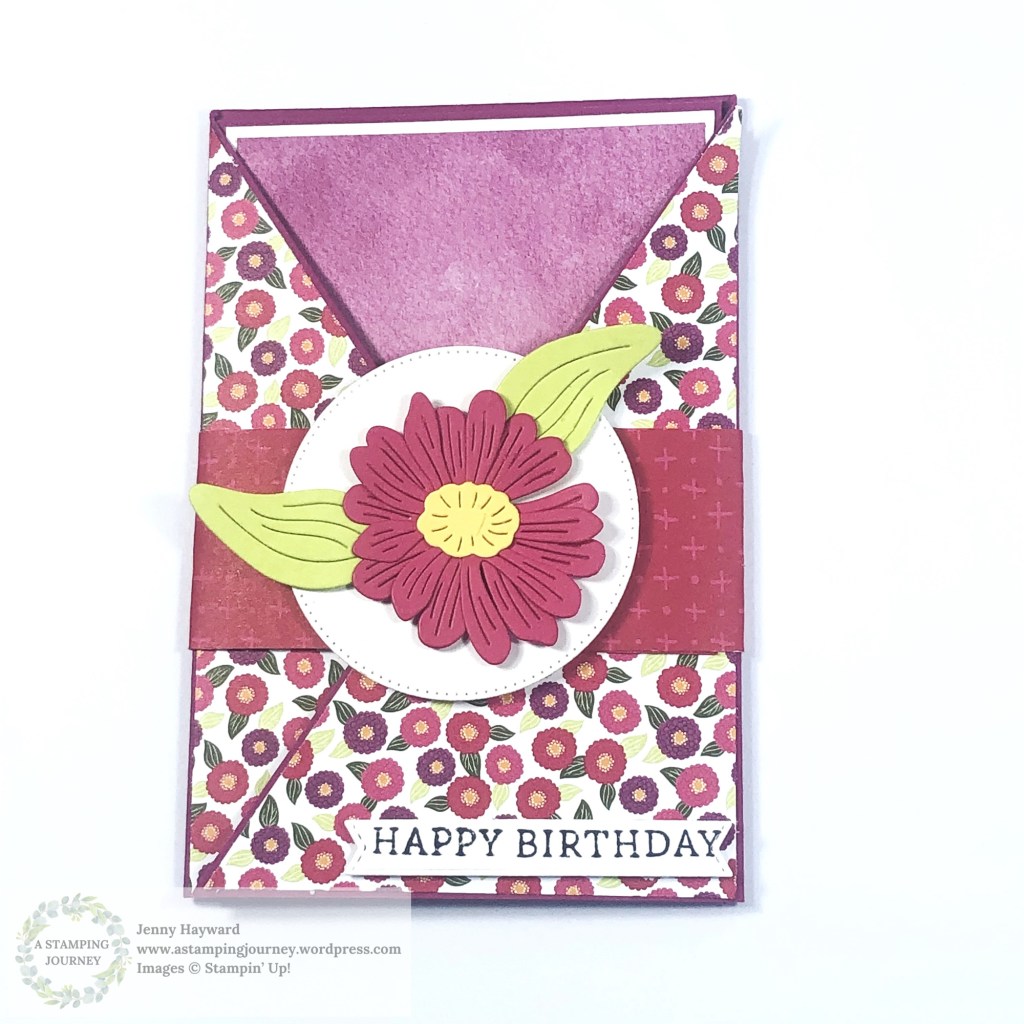
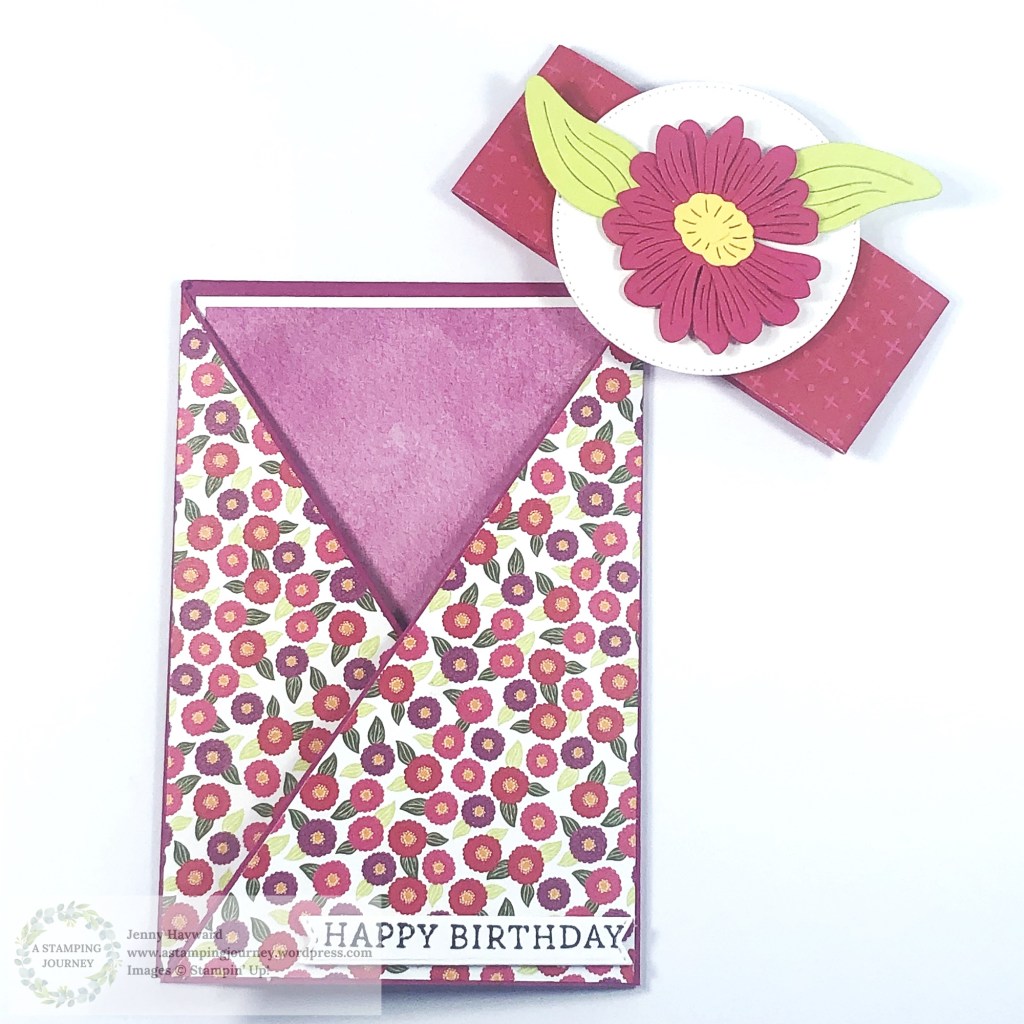
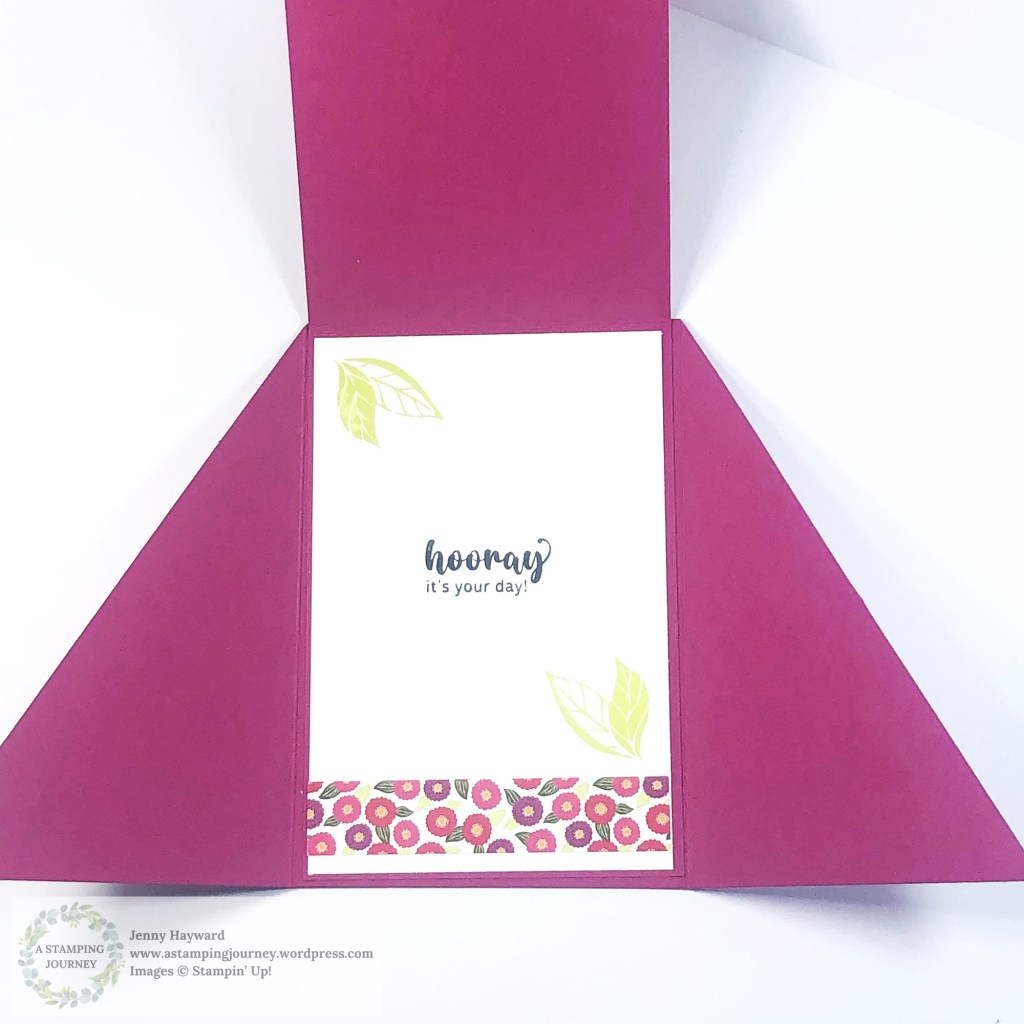
This is the inside of the card.

Don’t forget the Mini Tag you can create with the Circle cut out.

Follow along with the video below (or you can find it on my Youtube). The Full Tutorial with the measurements and directions will be sent out in next week’s Newsletter. Have you subscribed Yet? Find the link in the right hand column on my blog.

This is the Humble Home Bundle.

You can see it more in my store -> HERE.

If you have missed any of the past 12 Weeks of Christmas Projects be sure to check back on my blog. Click on the Tags for the name and it will come up with the posts. OR head to my Youtube and find them there.

Happy Christmas Creating,

Jenny

PIN It Now to come back to later.

Need any products for your crafting and you are in Australia? You can head to my store -> HERE. OR contact me directly.

3D projects, Christmas, Stampin' Up!, Techniques, Tutorials

AN EASY GIFT BAG FOR WEEK 8 – 12 WEEKS OF CHRISTMAS

It’s Week 8 for 12 Weeks of Christmas with an easy Christmas Gift Bag to make. This cute bag could be used for any occasion.

I have used the Season of Green and Gold Specialty Paper on this bag. I created some other version and I will share them later.

You can follow along with the video here. If it isn’t shown then head straight to my Youtube Channel and you can find it.

It’s hard to see but I have some extra texture to the Blackberry Bliss card on the tag. I have used the Distressed Tile Embossing Folder. This is a close up of the tag.

I send out a written tutorial to all my newsletter subscribers with the full measurements and details. Are you a subscriber yet? I send out a free tutorial each week. You can find the link to join my subscriber list in the tab on the right hand column on my blog.

Thanks for following along.

Happy Creating,

Jenny

You can PIN it Now to Pinterest to come back to later.

Need to order and you are in Australia? I would love to help you.

You can shop in my store Online -> HERE. Please use the Host Code: EXSTTBB6

OR contact me directly.

And don’t miss out on your Color Wheel as a gift this month. All orders over $90 with me will receive one.

cards, Catalogues, Christmas, Stampin' Up!

FROSTED FOREST FOR WEEK 7 – 12 WEEKS OF CHRISTMAS

It’s Week 7 for our 12 Weeks of Christmas series.

This week’s card is using the Frosted Forest stamps and masks. You could use this idea with any tree stamp.

This is a Portrait Fold card. That’s what I’m calling it anyway. I’m not sure if it has a particular name. The fold is at the top of the card.

You can follow along with the video below. The full tutorial will be sent out in next week’s newsletter if you are a subscriber. If not check the side bar on my blog.

I have used the Reindeer Days Designer Series Paper and some sparkly Glimmer Paper.

I used just one mask in the Frosted Forest mask set. You can add other layers of ink if you would like to.

This is the card.

Embossing the card mat adds some extra texture. I have used the Timber 3D Embossing Folder on this one.

Hope you enjoy it.

Happy Crafting,

Jenny

You can PIN it Now to Pinterest to come back to later.

Need to order and you are in Australia? I would love to help you.

You can shop in my store Online -> HERE. OR contact me directly.

3D projects, cards, Christmas

GIFT CARD HOLDER WITH AN ENVELOPE FOR WEEK 6 – 12 WEEKS OF CHRISTMAS!

It’s Week 6 of our 12 Weeks of Christmas Series. Can you believe we are half-way through already!

This week’s project is a Gift Card Holder. It is so easy to create. It’s made with a standard White Envelope, some festive paper and matching ribbon.

You can see how to make one in the video below. Gift Cards are a popular gift for Christmas so I hope you get to make one for yourself.

This is the Gift Card I created in the video. I will share some other versions in a later post.

I decorated this one with the Reindeer Days Designer Series Paper. The words on the front are from the Trucking Along Stamp Set. The inside is one from the Greetings of the Season Stamp Set.

You can PIN this now on Pinterest to come back to.

If you have missed out on past projects from the 12 Weeks of Christmas then be sure to head back some posts on my blog here Or head to Youtube. They are all on my Channel.

If you would like the written tutorial for these projects then be sure to subscribe to my newsletters. I send out a free tutorial each week. You can find the link to subscribe in the right hand column on my blog.

Have fun creating,

Jenny

Do you need supplies and you are in Australia? I would love to serve you.

You can head to my store -> HERE. Please use the Host Code: EXSTTBB6 Or contact me directly.

cards, Christmas, Stampin' Up!, Techniques, Videos

OFF-SET GATEFOLD CARD FOR WEEK 5 – 12 WEEKS OF CHRISTMAS!

Week 5 of our 12 Weeks of Christmas series. This week it is an Off-Set Gatefold card. It’s just a little different to the regular Gatefold Cards.

For this card I have used the Nests of Winter Designer Series Paper. It’s so easy to cut one of the sweet birds from the paper to add to the front of your card. One of the Dies from the Winterly Tree Tops Dies is meant to diecut one of the birds but you can fussy-cut them out too.

Create this how you like to and it can be great for any occasion. Once you have the scoring worked out it’s very easy to create. You can follow along in the video.

The pretty diecut circle was cut with the Spotlight on Nature Dies. I do love this die set with the pretty edges. There are 3 different die edges in the set. See them more -> HERE.

The written tutorial will be sent out in next week’s newsletter. If you would like to receive them the link details are in the right hand side column.

This is the card created and you can see the inside.

Have fun creating one. And share it with me if you like to. I love to see other versions.

Happy Crafting,

Jenny

PIN it Now to come back to.

If you are in Australia and would love some supplies to create your projects I would love to serve you.

You can shop in my store -> HERE Please use the Host Code: EXSTTBB6

OR Contact me Directly.

Online Exclusives

CUT AND FLIP FOR WEEK 4 – 12 WEEKS OF CHRISTMAS!

Back with Week 4 for our 12 Weeks of Christmas series.

This week we are looking at the Cut and Flip Method for our Christmas cards. This method can be a great one for making multiple cards at one time too. It’s very quick and easy.

You can just use this idea to make as a single card too.

You just need some gorgeous paper with co-ordinating patterns on each side of the paper. Watch the video below to find out how.

I have used the Season of Green and Gold Specialty Designer Series Paper on this one. And also used the Golden Greenery Stamps and Dies and the Greetings of the Season Stamps and Dies.

At the end of the video I share another version with different papers.

I will send out the measurements in next week’s Newsletter. If you would like the written version you can sign up for my free newsletters. You will see the link in the right hand column on my blog.

This is the card that was made.

Happy Christmas creating,

Jenny

You can PIN this now.

If you need some supplies and you are in Australia I would love to serve you.

You can stop by my Online store -> HERE to order. Please use the Host Code: JDH3D9KQ

Or Contact me Directly and I can assist you.

Have a large Wish List? It would be better value to join the Stampin’ Up! Community. Get a large number of products ticked off your list quickly and then get a discount each time you order after that for as long as you stay around. Find out more -> HERE.

cards, Christmas, Videos

12 WEEKS OF CHRISTMAS – WEEK 1

We are on the countdown. It’s 12 Weeks of Christmas projects coming up.

I’m going to share some quick, fun projects with a video to help inspire you with your Christmas creating. Let’s kick off.

Week 1 with the Nests of Winter paper.

It is such gorgeous paper. You don’t need a lot more. Add some texture with the Dots from the Basics 3D Embossing Folders and some of the gorgeous Cherry Cobbler and Gold Ribbon. It’s very lush.

The Seasons Greetings is from the Greetings of the Seasons Stamps and Dies.

Follow along with the video below. (if it doesn’t show head directly to my blog to view it).

The full tutorial with measurements will be sent out in next weeks Newsletter. Are you a subscriber yet? Check the right hand tab on my blog.

This is the Nests of Winter Paper. You can see it more online -> HERE.

Now you can PIN it to come back to.

Be sure to check back next week for our Week 2.

Happy Crafting,

Jenny

Do you need some crafting supplies and you are in Australia? I would love to help you. You can contact me directly OR Head to my store Online -> HERE. Please use the Host Code: JDH3D9KQ

cards, Catalogues, Stampin' Up!, Techniques, Tutorials, Videos

DIAGONAL GATEFOLD CARD WITH A WRAPPER – PLUS VIDEO!

Have you made a Diagonal Gatefold Card before?

Here is the card.

You can make a wrapper to keep it closed up – or you can leave it off.

But then you open it…

Here’s the video to follow along with.

The written Tutorial will be sent out in my newsletter next week. Have you subscribed to my newsletter yet? I send out a Free Project Tutorial each week to keep you inspired. You can find the link for that in the right hand column. And there is a bonus Tutorial when you first subscribe.

Happy Crafting,

Jenny

Need some crafty supplies and you are in Australia? Head to my Online Store -> HERE.

Or contact me directly and I can help you out.

Don’t forget it’s Bonus Days this month.

Thanks for shopping with me.

cards, Techniques, Tutorials, Videos

FRONT PANEL GATEFOLD CARD + VIDEO!

I love Fun Folds. I have a cool Fun Fold card for you today AND a video to help you create it.

It’s a Front Panel Gatefold Card.

You have the Front of the card. Just like any regular looking card really. I have used the Stippled Roses Stamp Set for this one.

But lift the front and you have a Gatefold. It gives a little extra WOW! to the card. For this one I have used the Unbounded Beauty Designer Series Paper on the side panels.

Then open the 2 flaps and you have the inside. With a little stamping and a strip of the paper it adds to the specialness.

What do you think?

You can follow along with the Video to make your own.

The measurements are included in the video. Stop or pause or rewind. If you prefer the written version I’m sending that out in my newsletter next week.

If you are not a subscriber to my newsletter please consider it.

I send out a Free Tutorial each week with a bonus one when you first subscribe. You can find the tab to subscribe in the right hand column on my blog.

Hope you get to make one.

Happy Crafting,

Jenny

Need some supplies and you are in Australia?

Contact me directly

OR

Head to my store -> HERE. Please use the Host Code: R4QU9DB3

cards, Catalogues, Stampin' Up!, Techniques, Tutorials, Videos

SPOTLIGHT ON NATURE FOR THE BEGINNER STAMPER!

The new catalogue began this week. Woo Hoo! Have you checked it out yet?

This week I was part of the Crafty Collaborations Beginners Stamping series. It’s a large number of videos with tips for the Beginner crafter. They may even help the “well-seasoned” stamper too.

You can follow along with these videos -> HERE. Take your time and work through them. You can come back to them anytime too. AND it’s free!

It will take you through the basics of the types of stamps, inks, adhesives. Also, Cutting and scoring your cards (which I created a video for). That’s always tricky! Then goes through some simple techniques to try.

Head over and check in on it.

As part of this series there is also a number of videos with some more Simple designs. Simple stamping can be a challenge even for the more advanced stamper.

Continue on with that video series and you will find them.

I have added my video here for you to check out. This one is Cutting and Scoring your card in Metric.

I have added the Imperial Cutting and Scoring too as I know many of my followers here are from the US.

This is the project I created for my Simple stamping card.

I will add my video below here on the Simple Stamping project you can create. This simple card is above. For the Stepped Up version check below.

I created a Stepped Up version. Adding a little more texture and elements. Of course you could go way more avid but a few additions can really add to your project already.

I have used the Spotlight on Nature Stamp set.

You can see the added texture and elements here. I think a little glitter should be added to the butterfly.

So with a few steps you can take your card to the next level.

This Spotlight on Nature stamp set is really gorgeous for any level of crafter.

It does come as a Bundle too with some gorgeous shape dies great layering.

You can see it more -> HERE.

Head over and check the videos out.

Happy Crafting,

Jenny

Need to order some great new products and you are in Australia?

You can order in my store -> HERE. Please use the Host Code: R4QU9DB3

OR

Contact me Directly. I would love to assist you.