Catalogues, Stampin' Up!

FREE INK AND FREE PAPER!!

Really! This is so awesome I have to tell you.  Free Ink and Free Paper this month.  I will give you the deets.

FREE INK WHEN YOU JOIN!

WHAT????  $117 in Value!

So you pay $169 but get $235 of products for that.  (=$66 free products) + $0 Shipping + $117 Free Inkpad Collection =$183 of Free products.  (Did you see that?  You get more free stuff than you actually pay).  I am sure you have more than $169 on your Wish List. Right?

Be a part of the family she says! 

What does that really mean though? Be a part of the Stampin’ Up! family and be a Demonstrator and that doesn’t mean you have to do parties and demonstrate making cards.  You can just enjoy getting your discount on your orders.  If you are not sure, then head to my page -> HERE and see 10 Reasons why you would want to be part of the Stampin’ Up! family.

Ask me for a No-Obligation Information Pack.  But if you know a bargain when you see it you can head to my website and Join with my JEN’s INK Team -> HERE.  (Just have your Wish List ready to go). 🙂

———

FREE PAPER ANYONE??

Buy 3 of these select packs of paper and choose one for Free.  How awesome!  If you want a closer look at the papers ,check out p188-191 of the catalogue.

** Order directly in my store -> HERE.  Please use the Host Code: 4SZ43U7M

If you have any questions about these please comment or email me at jghayward@yahoo.com

Jenny

cards, Catalogues, Personal Ramblings, Stampin' Up!

ANOTHER FUNKY PEACEFUL REFLECTION CARD!

I shared a funky card yesterday with you using the Peaceful Reflection set.  Today I have another similar one.  This one is actually the first one I made of the 2.

I used similar colours of Rich Razzleberry, Flirty Flamingo and Lemon Lime Twist.  This one is matted on Rich Razzleberry and with a Thick Whisper White card base. It tones it down a little. 🙂 The sentiment is from Colorful Seasons.  It is kind of fitting for this type of card don’t you think??

Have a great weekend.  I hope I can get some creating happening this weekend.  I haven’t done any all week and I am suffering withdrawals.  Other things have been going on. 🙂  Hope you can get creative too.

By the way, speaking of creating.  Have you joined my Facebook group yet?  I share some projects and tips AND Sunday is ‘Share A Card Sunday’ where everyone gets to share their projects. Head over -> HERE to join the creative fun.

Jenny


cards, Catalogues

FUNKY PEACEFUL REFLECTION!

I shared a card with the Peaceful Reflection set the other day.  It was a nice, soft look with heat embossing. (Head back a couple of posts if you missed it).  For this card today we are going for a different feel.  We are going funky. 🙂

Are they butterflies or flowers?? You be the judge.  Pretty funky though do you think?? Can you see that with this set?

Colours are Rich Razzleberry and Flirty Flamingo with some Lemon Lime Twist.  The Lemon Lime Twist card was embossed with the Petal Pair Embossing Folder.  The sentiment is from Color Me Happy stamp set which is now retired.  I had made this card before the retirement list was out.

I made another card similar which I will show you tomorrow.

Jenny

Catalogues, Stampin' Up!

WEDNESDAY’S WOW! #30 – DID YOU SEE THE THINLITS CUTTING GUIDE??

You know you go through the catalogue so many times and still discover things in there.  It is a wealth of inspiration and ideas.  I discovered this recently and thought I would share it for our Wednesday’s WOW! today.  Perhaps I am a little late to the party here and you already know about it but if you are like me then let me tell you…

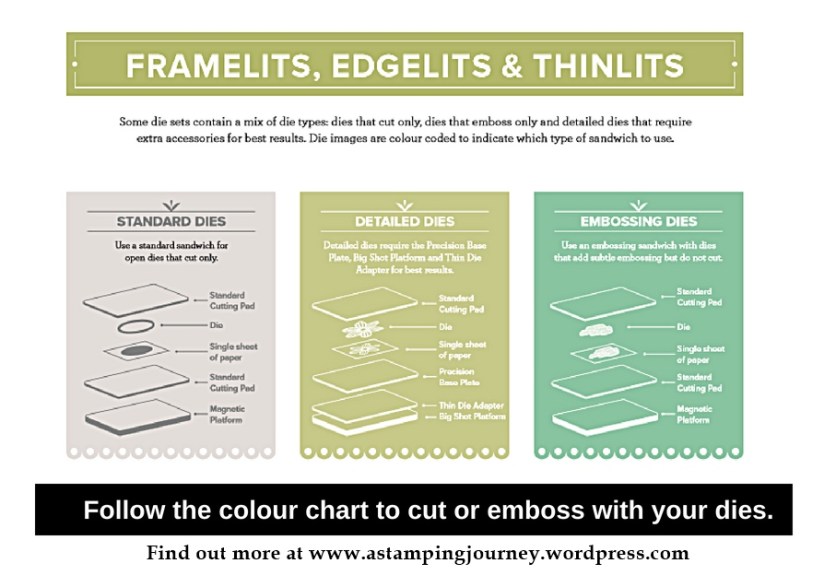
On page 215 of the 2018 Catalogue is a Die cutting and embossing guide.  Here it is here for reference.  I hadn’t read it that closely previously.

The Framelits, Edgelits and Thinlits are coloured coded in the catalogue (page 215-221) to show which sandwich to assemble on your Big Shot platform when cutting or embossing.  Sometimes it can be confusing how to get the best result when you use your dies.

  • The grey shaded box is for the Standard dies to simply cut.
  • The Pear Pizzazz coloured box are for more detailed dies and it recommends to use the Precision Plate. (That is a personal preference I find).  You may like to use an extra shim from paper or card in your own platform.  Each Big Shot is calibrated differently so just trial that in your own.  Note too: the Thin Die Adapter mentioned is the separate piece you get with the new Big Shot Platforms.  Earlier styles use a “book” type platform with “pages” to open.  In this case, you will use the “book” closed.
  • The Coastal Cabana coloured box is how to use the dies for embossing but not cutting.  It is suggested to the use the Magnetic Platform to keep your dies in place when embossing.  (How fun is it that you can emboss with some of your dies!!). 🙂

So in the catalogue showing all the dies the boxes are colour-coded to help you.  (Ok, I thought at first it was all just pretty colours happening!!)

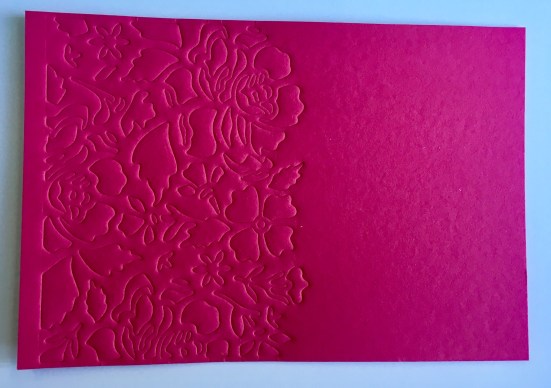
Here is an example shown on p217.

Now when you are using the dies you can refer back to the guide to see how to set up your platform. You could always print off the chart and have it near your Big Shot to remind you. When you use them often you will remember without referring back to it.

Is that helpful??  I hope I wasn’t alone here.

Ok, back to creating now. 🙂

Jenny

cards, Catalogues

SOFT PEACEFUL REFLECTION!

A few weeks ago I was playing around with the set Peaceful Reflection.  I share a z-fold card some time ago (if you missed it see it ->HERE)

Today’s card I had in my head and was pleased it turned out as I thought.

Some quick details on it: 

The ripples are stamped in Versamark on Whisper White card and heat embossed in White.  Then sponged over with Pool Party ink to create an emboss resist effect.

The large waterlily is stamped on Vellum in Versamark and heat embossed in White and coloured with the Dark Pool Party Stampin’ Blends.  It was then hand-cut around and adhered on to the white card.

The Dragonfly is stamped on Vellum and heat embossed in Copper powder.  Then coloured with the Dark Pool Party Stampin’ Blends and hand-cut and adhered on to the card.

The sentiment is from the Petal Palette set and heat embossed in Copper.  It is cut with a label die from the Petals and More Thinlits.  I sponged around the edge with Pool Party ink.

The decorative strip is cut from Copper Foil with the die from the Petals and More Thinlits.  

It was all adhered to a Pool Party card base.

I like the softness of how this card turned out.

Thanks for visiting.  I have more with this set that I will share later in the week.

Jenny

cards, Catalogues, Challenges, Stampin' Up!

COLOUR INKSPIRATIONS CHALLENGE #35 WITH NEUTRALS!

Initially this Colour Inkspirations Challenge #CI35 this week stumped me.  All neutrals!  Now with the colour revamp though we had a mix of other colours. (which I am still trying to get my around as neutrals!).

I had a little time today to play – and it’s nice to play with new toys. I used the gorgeous new Botanical Bliss Bundle (Botanical Bliss stamp set and the Botanical Tags Thinlits).

We were required to use 3 of the Neutrals colour collections.  I chose Merry Merlot, Mossy Meadow and Crumb Cake.

The sentiment is stamped and heat embossed in Copper.  It is cut with one of the dies in the new Stitched Labels Framelits. I finished it with some Copper Thread loops.

You can play along too if you are quick.  It finishes Monday night (AET).  Head -> HERE to the Facebook group.

Jenny


cards, Classes, Techniques, Tutorials

STAMPING IN THE ROUND!

Today I have had my Stamparatus class showing lots of fun ways to use this great new tool. I posted the projects we were making a couple of posts back but I thought I would show you more detail of one of the projects.  I don’t often share the details of class projects but today I want to share it would you my lovely blog readers.

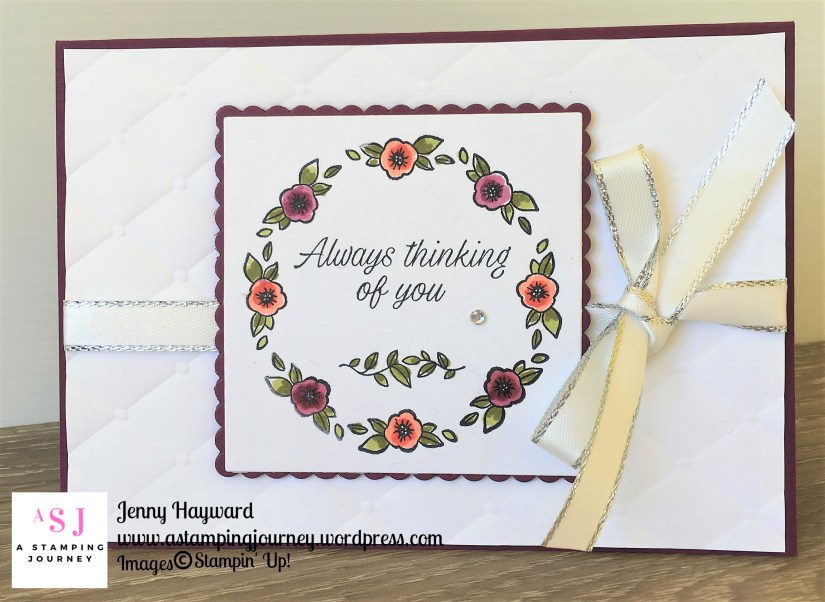
The Stamparatus is a great positioning tool for your stamping but it can do so many other fun techniques.  I think my favourite is stamping in a circle.  I created these 2 projects with them.  The first one is the one we made in class and everyone loved it.  I think this might have just sold them on it. 🙂

This one is using the Accented Blooms set.  The tiny flower creates a lovely flower wreath.  These were coloured with the Stampin’ Blends.  The White mat was embossed with the new Tufted Embossing Folder. 

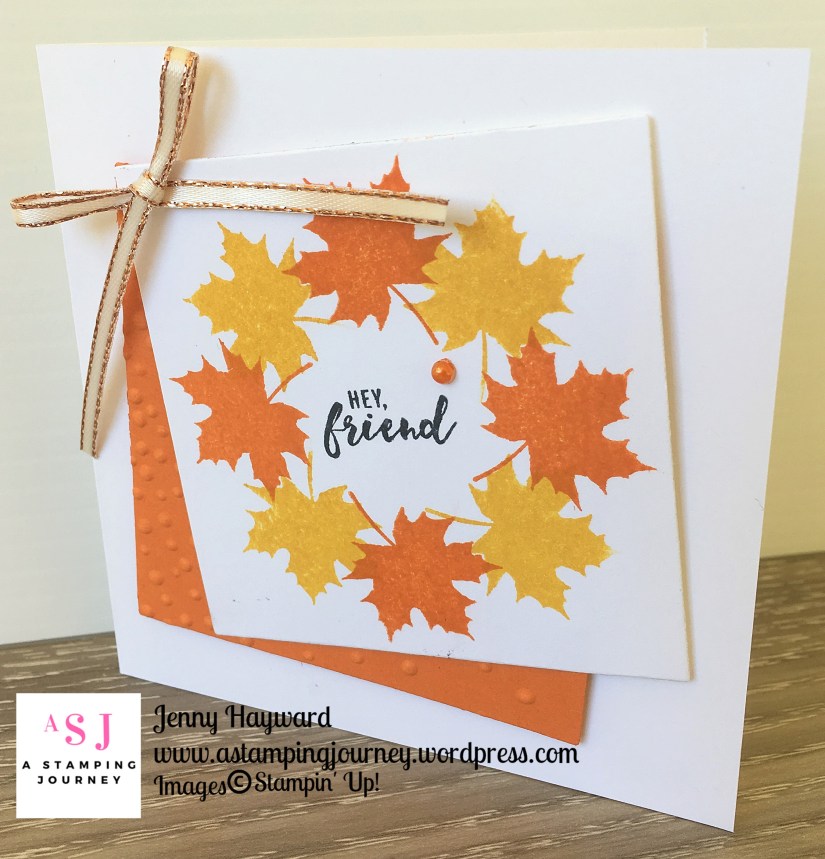
I was playing around with a few other ideas.  This leaf is from the Colorful Seasons set.  Wouldn’t this be a lovely idea for a Christmas card?? (filing away that idea so watch this space). 🙂

This is a mini card measuring 10cm x 10cm (4″x4″).  The sentiment is from Itty Bitty Sentiments.

So how you do this?? There are lots of great tutorials online.  Rather than me repeat it why not head to Allison’s Blog -> HERE and see the video.

Have fun with it. If you haven’t got one yet, you might just have to get one. 😉

Jenny

cards, Catalogues, Techniques, Videos

WEDNESDAY’S WOW! #29 – EMBOSSING MATS!

Today for Wednesday’s WOW! I have an exciting new product to show you.  I don’t know if you have noticed these in the catalogue.  I know I missed them the first time (or even the fifth time!) I went through the Catalogue.  This is the Big Shot Embossing Mats.  You can see them on p221.  Have you noticed them?

They consist of 2 different Silicone mats and an impressions mat.  These mats will enable you to emboss with your cutting dies to create a totally different effect on your cards.  I will let the video below show you how to work them. If you receive this post via email and don’t see the video, head to my blog directly by clicking on the post title above and see the video there.

What a great effect it can give. What do you think?  Think of all your current dies that would work well with this???

I had a go with some of my dies.  I still have the older style Embossing Mat from a few years ago.  I used some acetate instead of the silicone mat. See how they turned out.

I used the Detailed Dragonfly Thinlits and the Detailed Floral Thinlits.  


Here are the layers for the Big Shot again to emboss with your dies –

Big Shot Platform

Cutting Plate

Die (facing up)

Cardstock

Silicone Mat

Impressions Mat

——

You can find the Embossing Mats in store now -> HERE.  $26 AUS.  They are certainly a worthwhile investment and will really extend the use of your current dies.  Grab them now.  Please use the HOST CODE: PUB9TYMG

Thanks for visiting,

Jenny


cards, Classes, Personal Ramblings, Stampin' Up!

SOME CARD LOVE!

I don’t often share personal things here on my blog as I don’t like to toot my horn but this is Stampin’ Up! related – and it is very exciting for me.

For those who follow me on Facebook and Instagram will know that recently I achieved a HUGE milestone.  It was a big goal and for the most part out of my control.  As a Demonstrator we can achieve different titles.  This one has alluded me for 3 years.  Although I had the team and the sales for some time I needed some other factors to come in to play. Anyway, last month I did it! I made Silver Elite. 

It might not be big for you and you may not really care what the fuss is but for me this is big! Thank you to my customers and my team for helping me along the way – and for your support.  I received my certificate yesterday in the mail which was exciting.  Always good to receive Happy Mail. I also received some other Happy Mail this past week and that is what I wanted to share with you today.  I received 2 special cards.

The first one was from my Upline Vanessa.  This is using the Delightfully Detailed Laser-Cut paper that I have been sharing lately but this is one of the other patterns from the pack.

This card was a lovely surprise.  This is from one of my blog readers who has become a dear friend, Ruth.  It was even in my favourite colour too.  This is using the Love What You Do set with lots of lovely shiny silver embossed features.  Thanks so much Ruth x

Thanks for indulging me.  Thanks everyone for your love and support and visiting me often. ❤

See you again tomorrow.

Jenny


Catalogues, Classes, Stampin' Up!

FIND OUT ABOUT THE STAMPARATUS!

You have heard about the Stamparatus but not sure really what it is about?  If you are a Wollongong local then come and see and play with it at this week’s class.  You will be amazed!

These are the cards you will make along with seeing some other fun ways to use it.

CARD FRIDAY CLASS – Ways with the Stamparatus

WHEN: Friday 22nd at 10am or 7pm.
COST: $15  $5 extra to use my adhesives.
BYO: Scissors and adhesives. If you have a Stamparatus already bring it along.
PLEASE RSVP: Wednesday 20th.

Look forward to seeing you for this class.  You can join us for any class each fortnight though.

Jenny