cards, Christmas

CHRISTMAS CARD LOVE!

We received lots of lovely cards this Christmas.  It was always nice opening the envelopes.  There were store bought cards and handmade cards.  All so nice that we were thought of.  Since it’s all about hand-made here I thought I would show you the beautiful hand-made cards we received.  Maybe they will inspire you.

These are with some non Stampin’ Up! products.  Aren’t they gorgeous?

These ones below are predominantly with Stampin’ Up! products. Such a beautiful selection.

All sent with love.  I am so blessed. 🙂

Thank You to those of you who sent me cards.  All appreciated.

I think that’s a wrap for Christmas 2019.  January brings us the new 2020 Mini Catalogue and Sale-A-Bration which we all love.  Stay tuned for projects with these.

Still time to request your free catalogues too.  Head -> HERE to fill out the short request form.  Australian residents only. 

Thanks for following me along this year.  I have loved sharing my projects with you and can’t wait to share more in 2020.

Happy creating,

Jenny x

cards, Christmas, swaps

CHRISTMASTIME IS HERE SWAPS!

Christmas is fast approaching.  I have just time to show you these 2 cards I received for swaps recently.  These are using the Christmastime is Here suite. 

This first card was created by Peta one of my team members.  I received this as a swap for Onstage in early November but hadn’t shared it with you yet.  The copper makes it very classy.  She used the Stitched Rectangles Dies to create the card mats for the gorgeous array of flowers.

This next one is just a mini card.  It is about 7.5cm x 5cm (3″ x 2″) – roughly anyway.   The flowers are cut from the gorgeous Christmastime is Here specialty Designer Series Paper.  This one was a swap from my upline Vanessa. She added a little stamping too.

This Christmastime is Here Suite of products are still available in my store -> HERE.  Just because Christmas is over don’t think you can’t use them.  They are beautiful, elegant products for a birthday or wedding.

If ordering online please use the Host Code: REKK2FW4

Wishing you all a wonderful Christmas time however you spend it.  I hope it is filled with love and special people around you.  For some I know Christmas can be a difficult time.  Know that you are loved and I pray that God’s grace and strength will fill you at this time.

Much love to you.

Jenny x

cards, Stampin' Up!

SOME RAK CARDS FROM SPECIAL FRIENDS!

I received some lovely RAK cards in October for World Cardmaking Day and only now able to share them with you all with the busyness of Onstage and Christmas.  A RAK card is a Random Act of Kindness.  Being papercrafters we like to send out cards sometimes for no reason.  It’s always so nice receiving one rather than the bills that come in the mail.

These RAK cards are from lovely crafters in a small Facebook group I am in where we can cheer each other on and help each other out.  It’s a great little group.  It was nice to receive a card from them.

I am not going to give you the details on the cards but perhaps go and visit their blogs and give them some blog love. 🙂

This first one is from Alison. Visit Alison’s Facebook Business page -> HERE.


From Jo.  Check all that Copper heat embossing.  So shiny.  Visit Jo -> HERE.

A card from Melinda. Go and check out Melinda’s Blog -> HERE.

From Sue.  Visit Sue’s Blog -> HERE.

Aren’t they lovely?? They certainly brought a smile to my face when I received them.

I hope you are having a lovely day in your corner of the world.  I know it’s crazy with Christmas happening but I hope you can send a RAK card to someone among your Christmas mail-outs to bring a smile to that person’s face.  Sometimes Christmas is a hard time and it’s nice to have a little cheering up.

Thanks for visiting,

Jenny

cards, Catalogues, Christmas

SUNDAY BUNDLES – SHINE BRIGHT!

Our Sunday Suites have finished for the short term.  We have gone through nearly all of the suites in this current Holiday Catalogue.  I thought now we would look at some Bundles that have been a little neglected this Christmas

Today we are looking at the Shine Bright Bundle.  I really haven’t seen a lot around with these stamps and dies but they are so pretty.

The Bundle includes the Shine Bright stamp set.  This is a photopolymer set and is great for colouring but I think they would look really great heat embossed.  The sentiments are lovely don’t you think??

Check this pretty sample from Stampin’ Up!.  I really like how it is layered with the Wrapped in Plaid paper.

It also includes the Stitched Brightly Dies.  They are 3 dies but some of them cut several of the images on one die like the star and the tree making it very quick to cut out several and when you are layering them on a card they are even.  Another feature – is they are stitched!! They create a really cool effect that you can see below.

So I think this little bundle is overlooked.  I certainly love those dies.

See the Shine Bright Bundle in store -> HERE. 

I hope your Christmas creating is going well?

Happy Stamping,

Jenny

3D projects, cards, Catalogues, Christmas

SNOW GLOBE SEAHORSE!

You have probably seen the Still Scenes stamps and the Snowglobe Scenes dies in the Holiday Catalogue along with the Snowglobe Shaker Domes.  These make fun Christmas cards and we had a great time using them in a class recently.  You can use these products not just at Christmas time.  I was looking around on Pinterest and found some fun ideas using other occasions stamps.

For this one I used the Seaside Notions stamp set to make a fun snowglobe.

To make this I diecut the circular shape with the die in the set on the white card then embossed it with the Swirls and Curls Embossing Folder.  I used a small piece of white card and traced the circular shape on to the white card in pencil so I could see the area to stamp on to.  Then adhere one of the Shaker domes in to the embossed white card from behind.

The images were stamped on the scrap white card in Memento and coloured with the Stampin’ Blends.

To assemble the card the stamped white piece was adhered on to the Seaside Spray Card mat.  Then carefully add a little glitter. I used the Ice Stampin’ Glitter and also some Snowflake Sequins. Remove the backing off the Snowglobe Shaker Dome and carefully position it on to the Seaside Spray card mat.  Then you can adhere the whole piece on to the White card mat.

To finish stamp the base in Smoky Slate and cut that with the die and raise that up off the card with Dimensionals.  Stamp the sentiment from the set on to scrap white card and cut this with the Ornate Frames Dies and also cut one in the Silver Glimmer Paper.  Cut the silver one in half and adhere that behind the white one to off-set it . Adhere that on to the card and add a bow from the Seaside Spray Metallic Ribbon. 

The Still Scenes Bundle will be carried over But as individual stamps and dies.  If you buy them now as a bundle you will save 10%.  See them -> HERE in my store. 

Thanks for visiting me today,

Happy Stamping,

Jenny


Blog Hops, cards, Christmas, Stampin' Up!

STAMPING AROUND THE WORLD DECEMBER BLOG HOP!

We have another Blog Hop for you today with the Stamping Around The World Tutorial group.  As I used the Itty Bitty Christmas in my project for the Tutorial this month I am sharing another project for the Blog Hop.

You might have come from Alicia’s Blog HERE or starting from my corner of the world.  Enjoy this little hop around the world.  Here is my project for this month.

I wanted to create a different card using the Christmas Layers dies and not just diecutting them and adding them to the card.  So I diecut one of the dies from scrap paper and used that as a mask on the white card and then sponged through with the Seaside Spray ink and the sponge dauber.  It creates a fun effect.

I had to use those Playful Penguins of course.  I am sad they will be retiring.  If you haven’t got these cute guys you better get on it.  They are only available while supplies last.  And really they aren’t just for Christmas. 🙂

The penguin is stamped in Basic Gray and the scarf in Seaside Spray ink.  They were both hand cut with scissors.  I like to leave a little white edge around the shape as it is a little softer visually.

The sentiment is from the Itty Bitty Christmas set.  How sparkly is the Seaside Spray ribbon?? It is a little hard to tell in the photo.   A smaller snowflake star was cut from the Sparkle Glimmer Paper.

Just a note too:

The Itty Bitty Christmas stamps and the Christmas Layers dies will be carrying over but not as a Bundle so buying them now will save you 10%.  Check them out in my store along with the cute Playful Penguins stamp set -> HERE.

Now continue on the Blog Hop.  Just click on the little blue frog below.

Happy Hopping,

Jenny

All orders will receive the Tutorial Bundle of 12 projects from me as a little Thank You. 

cards, Catalogues, Christmas

SUNDAY SUITES – NIGHT BEFORE CHRISTMAS!

It’s taken me a little time to get to this suite for Sunday Suites – the Night Before Christmas Suite.  This is a fun suite and is a great one for very quick cards.  If you are at this point in time and still haven’t got a start on your Christmas cards then these products might just be for you.

Let’s take a look.

Below are the products in the Night Before Christmas Suite. 

NOTE: The Holly Jolly Christmas stamp set is no longer available.  The Jolly Season Dies are on low inventory so will be unavailable very soon.

The Jolly Season Dies are fun even without the stamp set with the cool Santa and his reindeers and the words are great too.  They say “Tis They Season” and “To Be Jolly” $57 AUD

Let’s look at these papers closer.  There are so many fun prints in the pack.

There are 2 photos per sheet of paper so you can see each side.

If you are time pressed to make cards these Night Before Christmas Memories and More Cards will help you out.  Grab them. You can just add them to a card front (maybe even grab the red Memories and More cards and Envelopes to make them even quicker).  There are some stickers included to use as well.

What about some inspiration.  Although the stamps aren’t available I am sure you would have other stamps to substitute. Don’t miss the Cherry Cobbler Diagonal Striped Ribbon.  I have used this ribbon a lot this Christmas.  You will love it.

The Night Before Christmas products are available in store now.  Don’t waste time though as some of the items are sold out.

TO ORDER:

Head -> HERE.  Please use the  Host Code: REKK2FW4

OR contact me directly.  All orders will receive a gift from me PLUS a 12 project Tutorial Bundle of some exclusive projects (not from the Night Before Christmas suite).

Thanks for visiting.

Jenny


cards, Catalogues, Christmas, Stampin' Up!, Techniques

WEDNESDAY’S WOW! #90 – SHINY DIECUTS!

Wednesday’s WOW! #90 – creating shiny diecuts.  This is something really cool I just realised. Maybe you already know.  This is how you can make your diecuts shiny – and not using the shiny Foil or sparkling Glimmer Paper.  It’s very easy.

Firstly, diecut your shape.  Here I used the leaf shape from the Christmas Layers Dies.  Rub over the diecut with Versamark, Sprinkle over the Clear Embossing Powder and heat the powder with your Heat Tool.  See the shine develop.  It’s always magical isn’t it when you see that powder melt away.  If you want to take it a step further you could add some glitter in with it to really make it sparkle.  How cool!

I have given you an image below that you can PIN to Pinterest so you can then come back to anytime to remember this fun little technique.

Below is the finished card.

I had a small piece of the Brightly Gleaming Specialty Designer Series Paper.  Before I adhered this to the white card mat I stamped over some “spots” from the Christmas Gleaming stamp set and then embossed the white card with the Subtles Embossing Powder.  It is a little hard to see. 

Add a small strip of the Copper Foil behind your Brightly Gleaming paper strip too before adding it to the card. Adhere the leaf spray on to the white card and then add this to the Pretty Peacock card base.  The sentiment is from the Christmas Gleaming stamp set stamped on to white card and that was cut out.  All finished with a Copper Star Embellishment and some of the Classic Weave Ribbon added with a glue dot.

Here is a close-up of the shine on the leaf spray.  I have to say this card was so hard to take a photograph of with the shine from the Copper in the paper and the shine on the leaf spray.  I hope you get enough of an idea anyway.

Try this idea out for yourself.

Happy Stamping,

Jenny

cards, Catalogues, Christmas

#ELFIE PAIR!

I have to say the little #Elfie set is kinda cute don’t you think.

Recently I stamped up a few images when I visited a friend and just managed to colour them and make up the cards on the weekend.  I thought I would show you.

I had some “bits” of the Wrapped in Plaid Designer Series Paper hanging around and thought I should try and use those rather than cut in to another full piece.  The Wrapped in Plaid Paper does have Cherry Cobbler and Shaded Spruce colours in it but I think the Real Red colour still works well with it.   The images were coloured with the Stampin’ Blends. 

For the first one I cut down some of the strips of the paper to add them to the white card mat.  I added some sparkly Red Glimmer Paper and the Real Red Satin Ribbon.  The sentiment is from the Itty Bitty Christmas stamp set.

This next one I added a small strip of the Gold Foil behind the paper and layered it on to a Real Red Card mat.  The stamped image was cut with the Rectangles Stitched dies.  I think the sentiment is appropriate for this cute elf.  This is from the Itty Bitty Christmas set too and it was layered with the Gold Foil Diecut frame from the Ornate Frames Dies.

Hope you like these cute elfies.

See the other cute images in the stamp set -> HERE.

Have a great day,

Jenny

cards, Catalogues, Onstage, Stampin' Up!

NOVEMBER ONSTAGE REVIEW!

Well I can’t believe that it is 2 weeks since Onstage.  Seriously is someone taking time off our days??? 🙂

Since I have come back it’s been a whirlwind so while I catch my breathe very briefly I thought I would share a few highlights from Onstage.

Onstage was an incredible time in more ways than one.  It is a fun-filled, jam-packed event of inspiration and sharing and friendships.  I attended the Sydney event.  I have to tell you though a couple of months ago I received a call from Clare from Stampin’ Up! asking me to do a presentation.  Eek! After the initial “I can’t do this” and freaking out right there and then, Clare was so wonderful and coached me and encouraged me and cheered for me all the way.  It was an incredible experience.

Firstly though, How about this gorgeous backpack.  Poppies are in and they are beautiful.  This backpack has so many pockets.  I think it will be well used.  I have my lanyard too.  I am so thankful to have achieved so well this year.  Thank you to my team and my customers.  The number ‘3’ is the prize patrol badge.

Centrestage event is on the Friday night for those Silver Elite level and above.  It’s a pretty chilled night with some fancy food.  Nice to be spoilt.

The new Mini Catalogue…  How gorgeous!

(If you want a copy be sure to head -> HERE to request one to be sent to you.  Australian residents only).

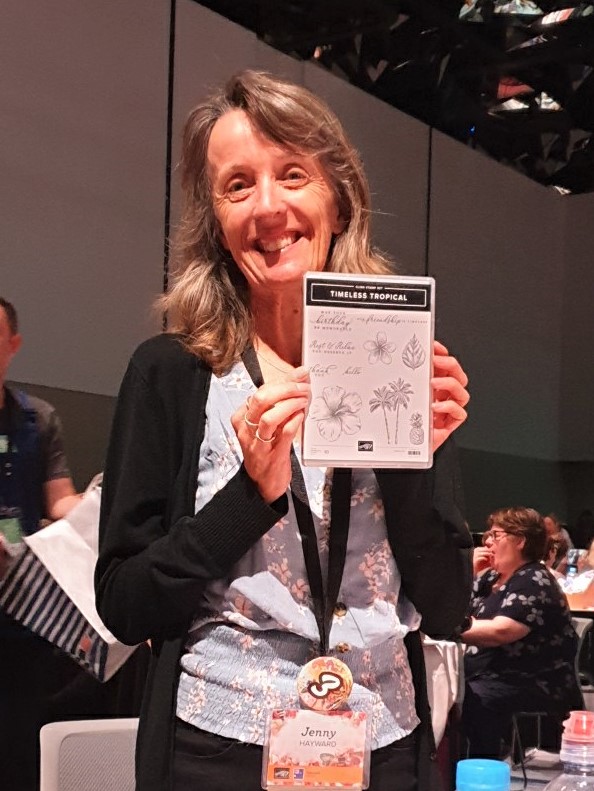
Prize Patrol winner.  I was really happy to receive this set.  And yes I have already ordered the matching dies.

Below is the header for the screen before I did my presentation.  I hadn’t even noticed it.  I have to say things were a bit of a blur then.  I was honoured to present the new Dressed to Impress Suite that is coming in the new 2020 Mini Catalogue.

During my presentation.

This is the board with my samples.  It’s a bit hard to see them. I will share the projects in more detail over the next few weeks and months so be sure to check back here often.

I am thankful to Stampin’ Up! for the opportunity to present at Onstage.  It was an unforgettable experience.

Part of my presentation was talking about my ‘WHY”  Why I do what I do. I love creating and sharing my projects with others (like you).  I love seeing the joy on people’s faces when they make a card and when they receive a card,  I hope to inspire others and hopefully bring a little joy in people’s lives.

Thanks for your support for visiting me, for sharing with me and for your encouragement.  It all means so much.  I hope you can bring Joy to the lives of others too.

Jenny