cards, Catalogues, Stampin' Up!

COLOR ME HAPPY WITH THE BLENDS!

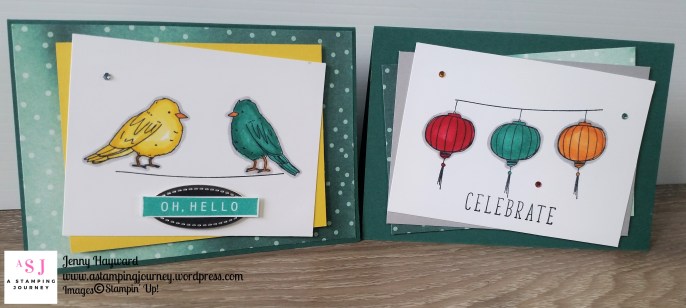
A bonus of being a demonstrator is that we get to order the products way before customers can.  It gives us much more time to play with them.  When I first got my Stampin’ Blends a couple of weeks ago I also ordered this new set Color Me Happy.  It’s such a sweet set.  I shared these cards on Instagram and Facebook but hadn’t got to share them with you as yet.  So it seems a good time now to show you what I have been doing.

What do you think of this Color Me Happy Set.  Very cute??  This set is $47 W or $33 C.

There is also the Color Me Happy Card Kit. This kit includes card stock and all embellishments to make 16 cards. Cost is $41 which is not bad for $2.60 per card.  You would need to buy the stamp set separately to use with this set. 


TO ORDER:

Whether you are wanting to order the Blends, the stamps or any other products you can shop now.

Order directly by contacting me

OR

Order Online HERE.  Please use the Host Code: MX3UA64N

Thank you. 🙂

Jenny


Catalogues, Stampin' Up!, Techniques, Videos

THE STAMPIN’ BLENDS ARE HERE!! WATCH THEM NOW! WHY NOT JOIN THE BLENDS CLUB TOO!

The day has finally arrived.  The Stampin’ Blends are here now for you to order.  I think you will love them.  They are so easy to use and to blend.  You will feel like an artist!!

Just a few features of them:

  • There are 12 colours of Markers available.
  • In each colour there are 2 colour shades – a Dark and a Light colour.  They are available as single pens or as a Combo pack with the 2 colour shades.
  • Colours available are Bermuda Bay, Calypso Coral, Cherry Cobbler, Crumb Cake, Daffodil Delight, Night of Navy, Old Olive, Pink Pirouette, Pool Party, Pumpkin Pie, Rich Razzleberry, Smoky Slate.
  • In addition there is a Bronze marker, Ivory marker and also the Color Lifter.
  • Each marker has a Brush tip end and a Bullet tip end.  These are marked on the outside of the barrel.
  • These markers are not refillable.
  • Stamp the images you intend to colour with Memento Black Ink.

For an individual marker they are $7.75 AUS.  For the Combo pack they are $15.50 AUS.

The Collection of 26 colours – Dark and Light of the 12 colours, plus the Bronze and Ivory plus the Color Lifter is $209.75 AUS.  **This month receive 2 Clear Cases with inserts to hold them FREE to store your markers in when you buy the full Collection. (see the cases down below).

Do you want to see how they work??  This is very timely for a Wednesday and so it is this week’s WATCH IT WEDNESDAY #9. Let’s have a close up look at the Stampin’ Blends.

NB: If you get this post via email updates and the video is not showing, please head to my blog and view it there.

So what do you think?  Can you wait to get these?? They are available in my store now -> HERE  Please use the Host Code this week: EJJVSDME

OR you can order them by contacting me directly.

OR Why not join my BLENDS CLUB!

Here are the details.

Each month for 3 months receive 4 Combo Colour Markers and 1 Single Marker (either the Ivory, Bronze, or Color Lifter).

**Receive 2 Clear Cases with inserts in to hold them Free the first month to store your Markers.             

Total Includes Shipping and Handling      $73.25 (Local)  or  $75.70 (Non-Local)

The Clear Cases include and insert and front cover to store your Markers securely.


Jenny


cards, Catalogues, Classes, Stampin' Up!

LAST DAY TOMORROW FOR PAPER AND FOR MERRY PATTERNS!

End of October tomorrow.  Yikes! That is scary how quickly the year is speeding by.  I wanted to let you know though that tomorrow is the last day for these Stampin’ Up! specials.

Yes! If you want to grab the free pack of Designer Series Paper with the purchase of 3 then you better be quick.

Here are the ones that are available just to remind you.

Here are the papers again to see them.

You can order them in store HERE.  Choose your 3 then you can add your 4th one for free!  Ordering Online?? Please use the Host Code: BRE396PY

OR to order you can contact me directly.

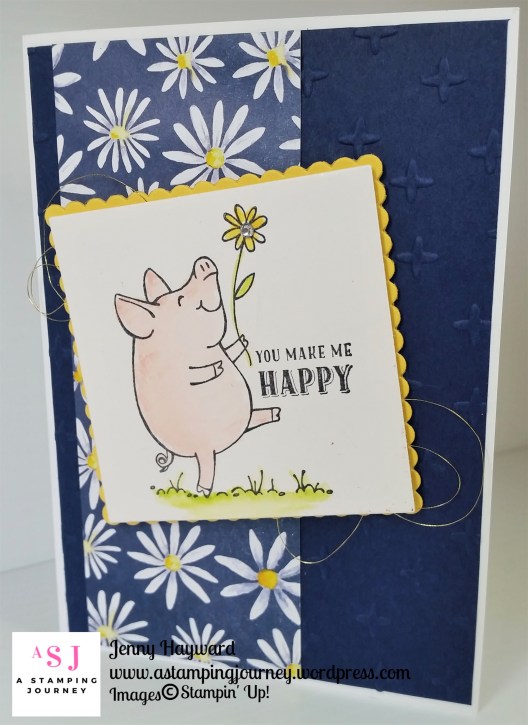
While we are talking paper.  I hadn’t shown you this cute card with the Delightful Daisy DSP that is one of the listed papers.

This card was inspired by Marcy Denning on Pinterest.

Just a little strip of the Delightful Daisy Paper, one happy piggy coloured with the Aquapainters and ink and a few loopy threads.  One Happy Card I think. 🙂

———————

Another quick reminder too, the stamp set Merry Patterns is only available for one more day.  Receive it free with a minimum $450 party order (or maybe you need to stock up big!) 🙂  I have had fun playing with this set these past 2 months.  It’s sad to see it go.

This is one of the cards we made at my Stamp A Stack class on Friday.  This was inspired by a couple of different cards on Pinterest.  Gotta love that Pinterest!! 🙂

—————————-

While these 2 specials end tomorrow I can’t wait until Wednesday when the Stampin’ Blends alcohol markers are available for you to order.  I have had fun playing with these the past couple of weeks so stay tuned for them later.

“See” you soon,

Jenny

Catalogues, Personal Ramblings, Stampin' Up!

RETIRED LIST CORRECTION! :)

Sorry folks there was an error in the links for the previous blog post for my retired products.  Sorry about that.  I checked it but obviously not good enough hey! (Thanks Lynda x).

I have corrected them on the previous blog post BUT if you want to grab some retired Stampin’ Up! products then you can also head to these links.

For Retired Stamps – CLICK -> HERE.

For Retired Products – CLICK -> HERE.

Thanks again.  Happy Shopping.

Jenny

Catalogues, Personal Ramblings, Stampin' Up!

SELLING OFF STAMPIN’ UP! RETIRED PRODUCTS!

OK, help me out here.  I NEED SOME STUFF GONE!! I still have so many stamps, Punches, Big Shot Dies and Folders and different “bits” to go.  Go and check out to see if you want to grab something.

NB:  Available for Australian residents only sorry.  Prices don’t include shipping.

Special to the end of the month,  Spend minimum $90 and receive an extra 10% off.

Check the lists.  I haven’t included photos at this stage.  If you are unsure, Google search the name or you can ask me to send an individual photo to you.

For Retired Stamps – CLICK -> HERE.

For Retired Products – CLICK -> HERE.

Email me at jghayward@yahoo.com

Happy Shopping, 🙂

Jenny

3D projects, cards, Catalogues, Stampin' Up!

CARD IN A BOX WITH BIRTHDAY MEMORIES!

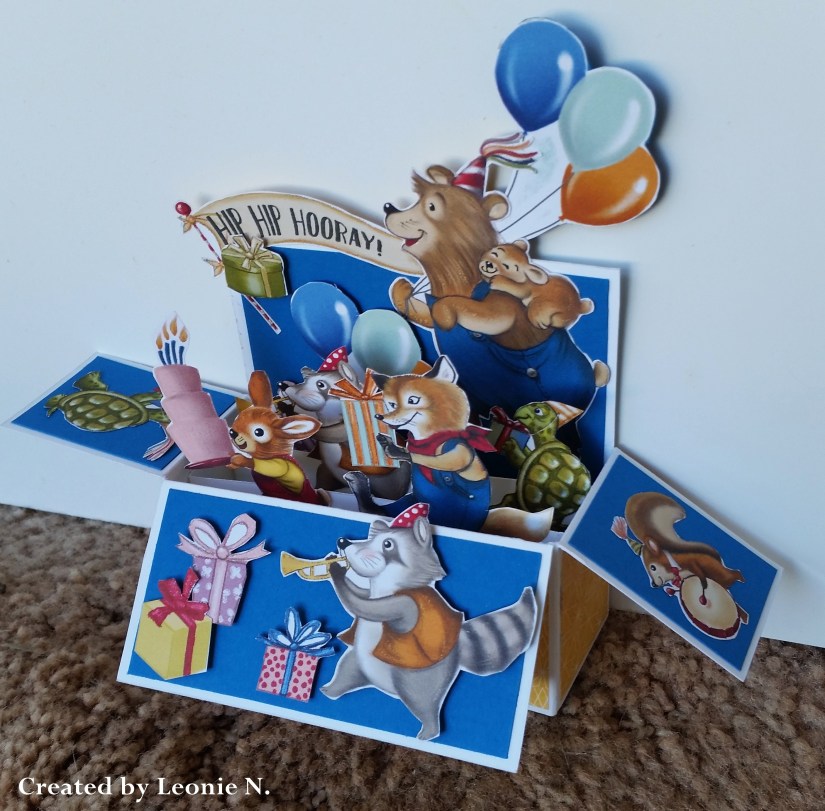
Back to some projects with the beautiful Designer Series Paper that Stampin’ Up carry.  I wanted to share this fun Card In A Box style card using the cute Birthday Memories paper.   This was created by my lovely friend Leonie N and she allowed me to share it with you.

Isn’t this just so cute??? 🙂  There is no stamping involved.  All these cute images are cut from the paper.  (No colouring too!). I love this paper as you get one side with really cute images and then the other side is some fun patterns.  It really is a great pack.

The Birthday Memories Designer Series Paper is one of the packs available for the special promotion this month.  Buy 3 packs and get one Free!!

Just to remind you of the papers that are available during this promotion.

You can order the Birthday Memories Paper or any other products in my store -> HERE now.  Please use the Host Code this week  BRE396PY

Thanks for visiting.

Jenny

Blog Hops, cards, Catalogues, Tutorials

LATCH FOLD WITH TRANQUIL TULIPS!

Yesterday I shared a Christmas Latch Fold card.  Today I have another version using the Tranquil Tulips set.  OK, I did this card first and then realised for the Blog Hop that it was for the Holiday Catalogue.  I thought I would share it with you today and give you the tutorial for it. 🙂

I have used the Birthday Blossoms set for the front and inside.  I think it works well.  The small flower to hold the flap was punched with the 3/4″ circle and then layered on a circle punched from Cherry Cobbler with the 1″ circle punch.

Here is the inside.  I added a strip of the Old Olive paper from the Color Theory Paper Stack. 

CREATE YOUR OWN LATCH FOLD CARD

** Apologies in advance for Imperial measurements.  I am not too familiar with your standard card size so just check the measurements first for the front and inside card mats 🙂

1. From a standard size card base cut off 2.5cm (1″) off the front of the card.

2. Stamp your front image on Whisper White card. This piece was 7cm x 14.4cm.  (for Imperial, measure a piece slightly smaller than the size of your front panel).  If you like add a strip of Dazzling Diamonds Glimmer Paper. 

3. Cut a strip for your latch which measures 10.5cm x 2.5cm and score it at 8cm.  (4 1/8″ x 1″).  The white sentiment strip is 7.6cm x 2.1cm (3″x 3/4″)

4. For the inside panel cut a piece of Whisper White for the card mat slightly smaller than the inside of your card. (10.1cm x 14.4cm).  (Imperial measure approximately 1/8″ smaller than the inside of your card).  Add a strip of Designer Series Paper (14.4cm x 3cm) (Imperial 1 1/8″ x length of your card).  BEFORE you stick this down to the inside of your card adhere your latch strip by adhering the smaller section of your strip behind your white card mat.

5. Fold this over the front of the card and position your punched circle piece in place that will hold your card closed.  You can add a Dimensional to the back of the circle to raise it up but remember to ONLY ADD IT BEHIND HALF of the circle to allow you to fit the latch under it. 

Hope this makes sense.  Have fun making your Latch Fold card.

Jenny

Blog Hops, cards, Catalogues, Christmas

ESAD 2017 HOLIDAY CATALOGUE BLOG HOP WITH FANCY FOLDS OR 3D!

Today’s Blog Hop with ESAD (that is Extra Special Australasian Demonstrators  – We are all pretty special though!), is focusing on creating a Fancy Fold or a 3D project using products from the 2017 Holiday Catalogue.  You would have just come from the very talented Sue’s blog HERE. 

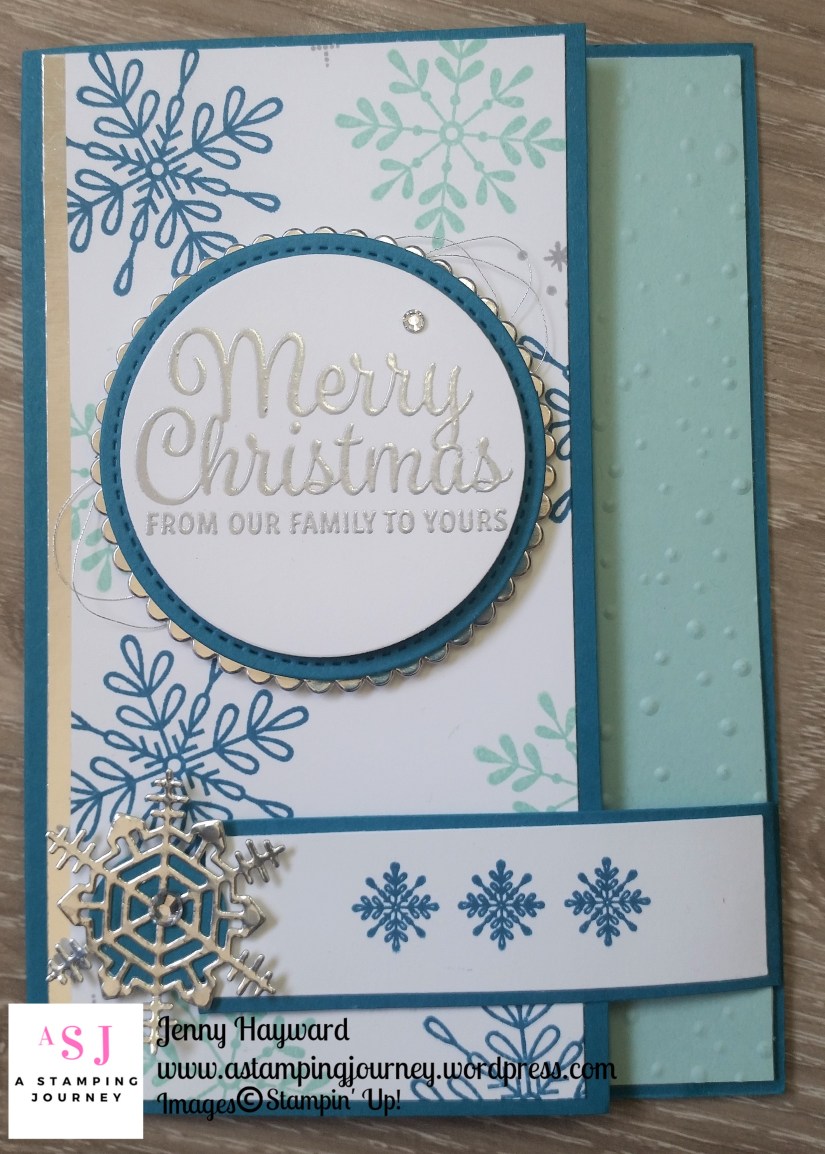
I love a Fun Fold card so I was keen to take part in this Blog Hop.  Today I have made what I call a ‘LATCH FOLD’.  It could be called a Buckle Fold as I have been investigating but there is no slit that the flap tucks in to so I will still call it a Latch Fold. 🙂

I have used the Snowflake Sentiments stamp set found on page 35 of the Holiday Catalogue and my favourite Christmas colour combinations of Island Indigo and Pool Party.

The “Merry Christmas” sentiment is heat embossed in silver to add some sparkle.  It was cut with the Layering Circle Framelits and then raised up with Dimensionals on an Island Indigo circle cut with the Stitched Shapes Framelits and then this was raised up on a Silver Foil circle cut with a scallop in the Layering Circle Framelits.  Before adhering it to the card I looped around some Silver Thread.  The snowflake is from the Seasonal Layers Thinlits cut from Silver Foil too. To make that stand out I punched a circle from Island Indigo with the 3/4″ circle punch.

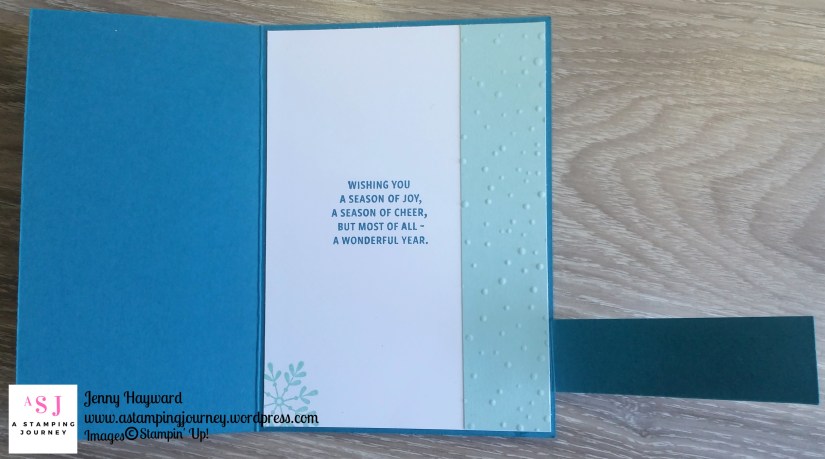
Here is the inside.  I added a strip of Pool Party card which I had embossed with the Softly Falling Embossing Folder.

Do you want to make one yourself??

Stop by tomorrow I have made another Latch Fold card and I will share the instructions then.

For now you need to get hopping again. This time you are off to the lovely talented Nicole’s blog -> HERE.

If you get lost on your Hop then here is a list of all the participants for you to join in anywhere.

See you tomorrow.

  1. Lou Kitzelman
  2. Leonie Schroder
  3. Courtenay Heuston
  4. Rebecca Scurr
  5. Peta Stephen
  6. Kristel Rimmer
  7. Delys Cram
  8. Libby Dyson
  9. Jessie Holton
  10. Megan Lenske
  11. Cheryl Algie
  12. Kim Oliver
  13. Sharon Dalton
  14. Sue Vine
  15. Jenny Hayward
  16. Nicole Wilson
  17. Narelle Fasulo
  18. Cathy Pinchbeck
  19. Maree McIntosh
  20. Josie Dean
  21. Ellen Woodbridge
  22. Monique Fielder

cards, Catalogues, Classes, Stampin' Up!

CUT THAT PAPER ON AN ANGLE!

Do you hoard that precious paper away?  Occasionally pulling it out and admiring it and stroking it.  Maybe just maybe you might cut it.  Oh boy that’s tough isn’t it!

This week it’s all about paper.  We are going to cut that paper that you have piling up.  You know if you use it then you can go and buy more of the pretty stuff. 🙂

Today’s card is getting that angle on your paper.  I normally don’t do angles.  They don’t sit well with me.  Everything has to sit straight and even.  I am trying to let go a bit  more and throw caution to the wind – and angle things up.

So let’s check out this gorgeous paper Whole Lot of Lovely Designer Series Paper and cut it on an angle.  I did give a sneak of these cards last week but I will tell you about them now.
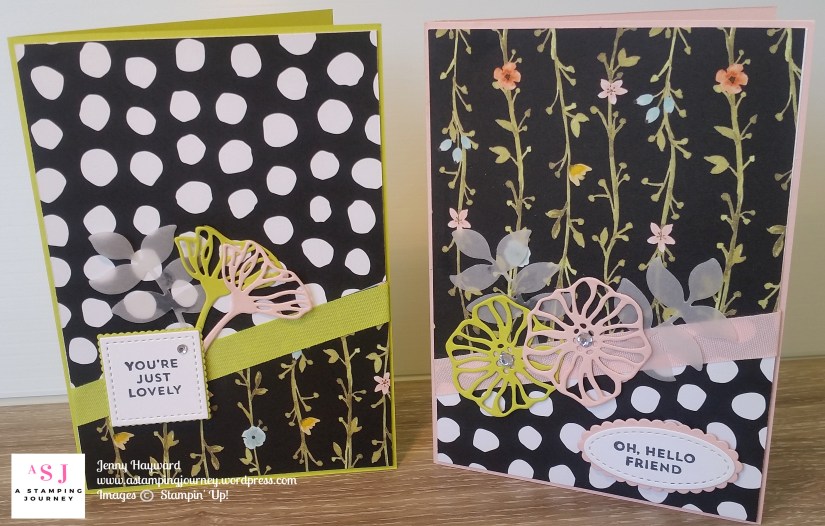
Whether you use this gorgeous paper or another of the gorgeous papers Stampin’ Up! has, the idea is the same.  You don’t need a lot of stamping with these cards as you can let the paper be the star.

Another great benefit to creating this type of card is that you get to make 2 cards at the one time.

TO CREATE YOUR ANGLE 

1. From your 12″x 12″ piece of Designer Series Paper you will cut a strip of paper.  Which way you cut will depend on which way the pattern lies on the paper but for the most part you will cut it vertically but just check first.  The width you cut will be just slightly smaller than your card base.  For metric you will cut your paper 10.1cm wide.  For the US I think your card base is slightly wider at 4 1/4″ x 5 1/2″. You just want a small margin around each side so cut your paper to this size, (4″ but just double check).

2. Then from this long strip of paper, cut 2 pieces at 14.4cm (approx. 5 1/4″).

3.  With these 2 pieces you have cut, flip one over and put them together.  You can cut them both at the same time which will mean you get the same angle making it so much easier.

4. To cut the pieces put them together and place them on your paper trimmer with the long side along the top and the left hand end at approximately the 3 cm mark (1 1/4″).  Tilt your paper to angle it slightly. The angle is really up to you.  When you are happy with the angle then cut the papers.

5.  You can now separate the papers.  You will have 2 large sections which will be for the top.  Take the 2 narrow bottom angled pieces and swap them over to mix them with the tops.

6. Assemble your cards as you like.  I have added a strip of ribbon with the gorgeous Lemon Lime Twist and the Powder Pink Finely Woven Ribbon.  I have then finished the cards with the sentiments from Oh! So Eclectic cut with the Stitched Shapes Framelits and the Ovals and Squares Framelits.  I also added some diecuts with the Eclectic Layers Thinlits.

—————————–

This gorgeous Whole Lot of Lovely DSP is one of the packs available this month for the Buy 3, Get One Free!  There are some beautiful prints in this pack.  Well really all of them. 🙂

It’s only a couple of weeks left for this promotion to get your free paper.


Stop by again and we will see some more fun ways of using that paper.

Jenny

 

Catalogues, Stampin' Up!, Videos

WATCH IT WEDNESDAY #7 – I’M EXCITED TO SHOW YOU THESE!

I have something exciting to share with you today for WATCH IT WEDNESDAY #7.  I was going to hold off for a couple of weeks before I shared it …but I can’t wait!!!

There is something new coming to Stampin’ Up! and Demonstrators can now buy them.  I received them yesterday and unpacked them.  So I had to take a video as I unveiled them.  So today we meet the Stampin’ Blends. 

In the video I said I used paper but it was actually Whisper White cardstock.  Just remember to use Memento Black ink when using these markers as they are alcohol based markers. Also, to have some scrap paper underneath your work as the ink does bleed through to the back but that’s ok.

I was very impressed with them when I played with them – and kind of excited if you could gather that. At the moment there is no official date for them to be available for customers.  So you will need to sit tight and wait.  I will let you know when I know.   As demonstrators we can order them until October 15th.  Just a tip:  If you are impatient to wait, then you can get them as part of your kit when you join the family until October 15.  Something to think about… Ask me for more info.

I hope you enjoyed this WATCH IT WEDNESDAY episode.  I have been playing around with them this afternoon so hopefully I will actually show you some finished  projects soon.

Have a great day.

Jenny