cards, Catalogues, Challenges, Tutorials

ACCENTED BLOOMS FOR #CI38!

I had a little time yesterday to play along with the Colour Inkspirations Challenge for this week.

#CI38 colours were Powder Pink, Berry Burst, Gray Granite, Whisper White and Basic Black.

I had been using the Accented Blooms stamp set the last few days, which I will show you those cards later on. Since that set was out I thought I would use that.  I think the soft muted colours would work well with a little watercolouring on flowers.

Here is my card.
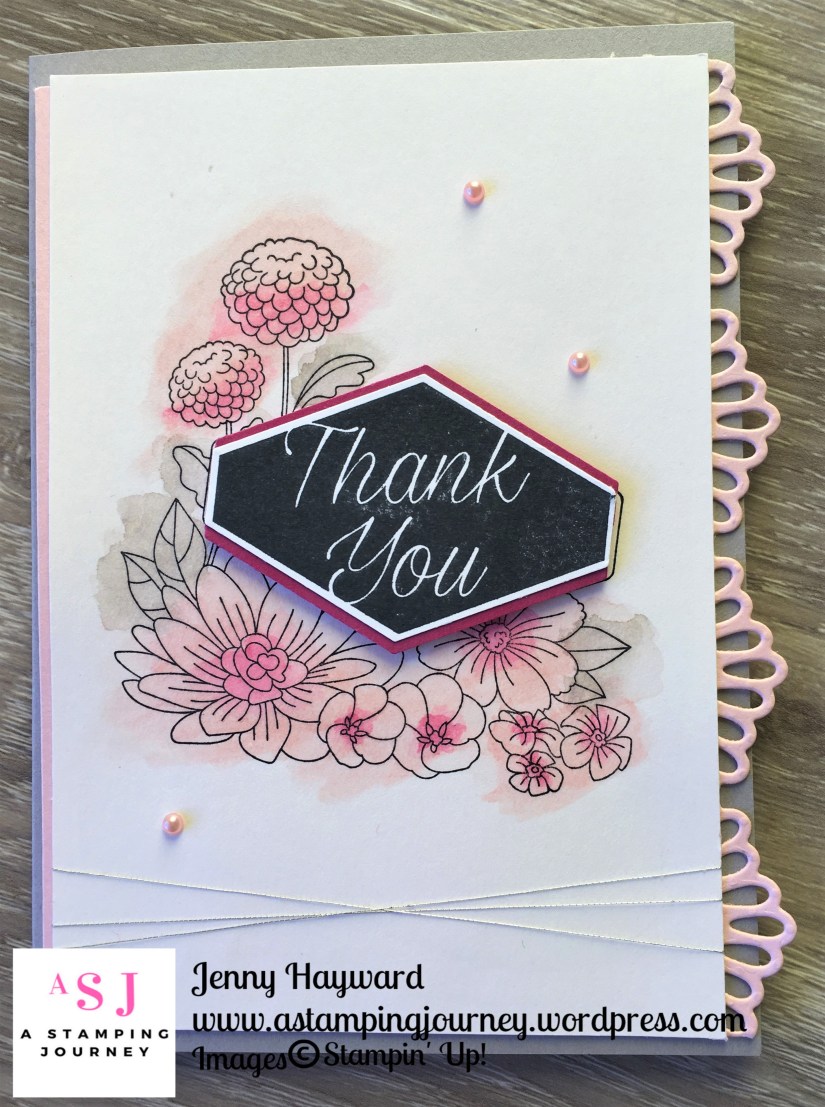
I came to the conclusion this week that I am not a fan of colouring.  So to colour this for the challenge was a little surprise.  But I think a little freestyle watercolouring can work well.  It doesn’t matter if you go out of the lines. 🙂

I used the Aquapainter and Inkpads to watercolour this. TIP: To watercolour any image I suggest several washes of colour if you want to build up the colour. Then allowing it to dry in between.  For this card I lightly washed sections with the Powder Pink and then allowed it to dry.  It only takes a few minutes.  Wash over the areas with the Gray Granite.  Then wash over again in the areas with the Powder Pink.  I did that 3 times with the Powder Pink as it is such a pale colour.  When it was all dry I washed over the centres of the flowers with the Berry Burst ink.  I allowed it to dry before washing again with the Berry Burst.  It is a time consuming process but I think worth it.

The lovely delicate edge is cut from the Delicate Lace Edgelits.

The sentiment is stamped in Black and punched with the Tailor Tag Punch.  I punched another piece from Berry Burst card.  Cut that piece in half horizontally then could layer it underneath the stamped piece so you see the little pink edge peeking out.  I finished with some Artisan Pearls and some Silver Thread wrapped around a few times.

Now to get this in to the Facebook group before the time is up tonight.  You can head over to the group -> HERE and join in on the challenges.  It’s a great way to extend your creativity.

Thanks for stopping by,

Jenny

Catalogues, Stampin' Up!

BLENDED SEASONS AND BONUS DAYS!

August is an exciting month with some awesome happenings.  Let me tell you about them.

COLOUR YOUR SEASON

The Blended Season Bundle is a limited release bundle.  It has some gorgeous stamp images and sentiments for many occasions.  The matching  Stitched Season Framelits you will love.  They leave a stitched edge on the inside and outside of your diecut.  Use them in many ways.  If you love the Stitched Shapes and the Stitched Labels Framelits, these are a must have.

Bundle Available in Wood mount $134.00 AUS  Clear Mount $113 AUS

Dies on their own $57 AUS

So you can colour these beauties, Stampin’ Up! have added another colour set of Watercolor Pencils. $21.75 AUS

If you want to order any of these you need to be quick.  They are only WHILE SUPPLIES LAST.  I don’t want you to be disappointed so get in early.  (To order see below).

BONUS DAYS

What a “bonus” that Bonus Days are on this month when the gorgeous Blended Season is available.

HOW IT WORKS

For every $90 in orders during August you get to earn a $9 voucher to redeem in September.  How cool is that.

NB: After your order is placed you will receive an email with a code.  You must keep that email with the code so you can use that for your redemption in September.  You can earn as many Bonus Days vouchers as you like. 

TO ORDER

Email me directly at jghayward@yahoo.com

OR

Order online in my store -> HERE.   Please use the Host Code: WRQSC9N3

Have a wonderful day,

Jenny

Blog Hops, cards, Catalogues, Stampin' Up!

JOY OF SETS 2018 CATALOGUE BLOG HOP!

I am taking part in a Blog Hop today with the Facebook group – The Joy Of Sets.

You might have just come from Kirsten’s blog. (click on the arrow below to go back if you missed it or you will get there after going around the hop).

Today’s theme is a project using any product from the current 2018 Stampin’ Up! Catalogue.

Focusing on ANY product from this current catalogue is pretty overwhelming really.  There are so many wonderful products.  What do you choose!! After trying a few options I chose the Sitting Pretty Bundle.  I made a card set in some fun bright colours.

I used the Brights Paper stack and the co-ordinating Glitter Enamel Dots in Gorgeous Grape, Granny Apple Green, Coastal Cabana and Melon Mambo.

The lovely ornate seat is heat embossed in Copper and then cut with the Pretty Park Framelits. I added a vellum scallop circle under the seats and cut a small heart that is in the Framelits set in the matching colour.  The sentiments and the fun swirl is from the Happy Birthday Gorgeous set.

Here is a close-up of the Gorgeous Grape one so you can see it more clearer.  They are all the same layout.

Now you can continue the Blog Hop and see all the other creations.  Head to Susan’s Blog by clicking on the arrow below.

Happy Hopping,

Jenny

cards, Catalogues, Stampin' Up!, Techniques

TEAM SHOEBOX SWAP – DAY 2!

I have another group of photos to share with you today from out Team Stamp day a couple of months ago.  We all created a card in the Shoebox Swap for each person to create.  I showed you some lovely ones yesterday. (Head back to the last post if you missed it).

This is a mix of different cards.

I haven’t used Sheltering Tree set in a while.  After stamping the tree on the white Diecut oval, then stamp the small “dots” in the set in different colours over the branches.  We used Tranquil Tide, Pineapple Punch (I think), Grapefruit Grove, and Lovely Lipstick.  There was a purple colour created but that was from mixing the Lovely Lipstick and the Tranquil Tide I think.  The white card piece was backed on to a diecut black oval that was cut in half.

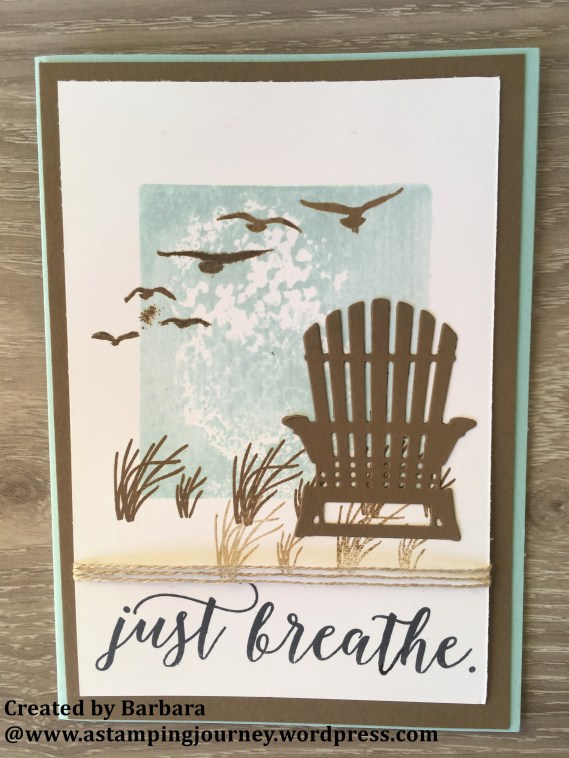
The next one below uses the High Tide set and the cool seat from Seasonal Layers Thinlits.  The sentiment is from Colorful Seasons. To create the background on the card, ink the clear block in the Pool Party inkpad.  Lightly spritz it with water and stamp on to the Shimmery White cardstock.  The reeds are stamped in Soft Suede and then stamped off again on the card to make it lighter.  This was repeated a couple of times.

This next one is using the Coffee Cafe stamp set and the Coffee Cups Framelits.  The card was distressed a little with some sponging with Soft Suede ink.  This was a fun card to create.

Hope you like them.

Be back again soon with more,

Jenny

Catalogues, Stampin' Up!, Tutorials

THINLITS V’S FRAMELITS V’S EDGELITS!

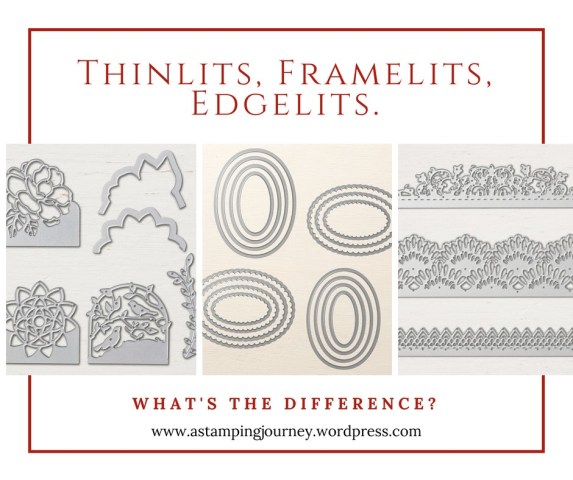
There are a number of different types of dies in the Stampin’ Up! Catalogue.  Do you know the difference between them?  That’s what Wednesday’s WOW!  #34 is looking at today.  Let’s check them out.

THINLITS VERSUS FRAMELITS VERSUS EDGELITS

Just a note too: You will find that many of the Stampin’ Up! Die sets contain Thinlits, Framelits and Edgelits.

What are they though?

Thinlits are usually the more detailed dies consisting of intricate designs and words. There are also Thinlits dies to create some 3D boxes or bags.  The detailed dies include ejection holes so you can remove the paper easily.  I would recommend using the Big Shot Die Brush or the Paper Piercer.

For example, Botanical Tags Thinlits shown below.

Or the Window Box Thinlits

Framelits have an open centre and are like a frame.  They can be placed over stamped images to cut the shape or used on their own.

Layering Ovals.

Wood Crate Framelits

Many of the Stampin’ Up! Die sets contain both Thinlits and Framelits as seen in the Eclectic Layers Thinlits set below.

Most Framelits can cut materials such as card, paper, vellum, fabric and other light materials.


Edgelits can cut the image to create a detailed border as in the Delicate Lace Edgelits below.

They can also cut the outline of the detailed Thinlits such as the Detailed Floral Thinlits below.


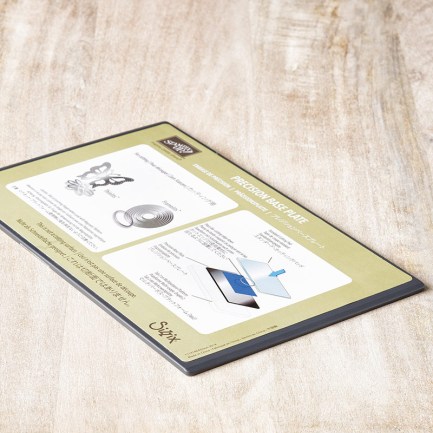
While discussing the Thinlits and Framelits?  Should you use the Precision Plate?

The Precision Plate is designed to get the best cut with the more detailed Thinlits so they are crisp and sharp.  They should not be used with Framelits or less detailed Thinlits as they may warp the dies.

To use the Precision Plate you will replace this with the bottom Cutting Plate in your Big Shot.

See it in action in the video below. (If you receive this blog update by email and the video is not showing then head directly to the blog post by clicking on the title at the top).


Information from Stampin’ Success Quarter 2 2016. Stampin’ Up! Publication and the Stampin’ Up! online store.


I hope you have found this helpful.  I know I did when I was looking in to it.

Thanks for stopping by,

Jenny


Catalogues, Stampin' Up!, Videos

WEDNESDAY’S WOW! #33 – CHECK THAT PAPER OUT!

I have talked a bit about paper lately and sharing some great ways to use it. I am in the middle of sharing 5 Ways to With Paper during this week.  We are just taking a little commercial break today.

This month we have the special promotion of Buy 3, Get one Free.  For today’s Wednesday’s WOW! #33 I thought we would take a closer look at all these beautiful papers.  It’s hard to see with the tiny images in the catalogue.  So let’s meet them i this video below. (If you receive these blog posts by email and you don’t see the video, please click on the blog title above to go straight to the blog post).


What’s your favourite?  I still love the Nature’s Poem paper and I mentioned about the beautiful Petal Promenade paper recently.  It’s so hard to choose.

So just quickly, here is the deal again.  This month Buy 3 packs of paper and get a fourth one free. 

It’s a great deal and you can grab these this month.  Head to my store -> HERE to grab them.  Please use the Host Code this week: 3B6A2PJ6

Thanks for visiting.  Back with more great ways to #usethatpaper tomorrow.

Jenny


Catalogues, Stampin' Up!

RETIRED STAMPIN’ UP! BUNDLES TO CLEAR OUT!

I still have LOTS of retired Stampin’ Up! items left after my sale last weekend.  I have bundled some of them up to clear them out.  You might be interested.  It’s first in, first served.  Only for Australian residents. These are not entitled to the BOGO offer.  Prices do not include postage.  There might be some additional bonuses to surprise you.

Leave a Comment if you are interested in any of the bundles.

Medallions: Floral Frames Framelits, Daydream Medallions (W), Label Something (C), plus paper.  $75

Butterflies: Butterfly Thinlits, Bold Butterfly Framelits, Watercolor Wings and ribbon. $100

Birthday: Party Wishes (C), Party Punch pack, Confetti Embossing Folder, Party Dots and paper. $50

Christmas: Cheerful Tags (PH), Merry Patterns (PH), Star Border Punch $50

Small Wheel Pack: Small handle, Skulls wheel, Betsy’s Blossoms.

Circles:  3 1/2″ Circle Bigz die, 3″ Circle Bigz die, Scallop Circle Bigz die.   $25

Tasteful Trim: Die and extended Clear Plates for the Big Shot  $30

I have more.  Lots more!  You can view them online.

For Tools and Big Shot items Head -> HERE.      For Stamps Head -> HERE.

Thanks for looking,

Jenny

cards, Catalogues, Stampin' Up!, Techniques

SHADOW STAMPING WITH ONE FOR ALL SET!

I have one more card to share with you today using the One For All set.  I had wanted to try the Shadow Stamping Technique for a while but just never got around to it as yet.  I thought this set might be fun to try this with.

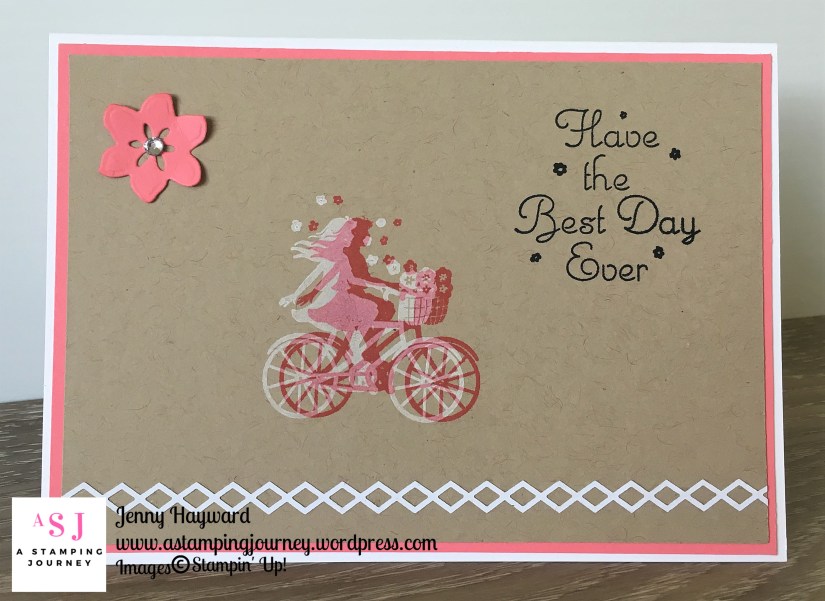
For this card I stamped the girl on the bike on Crumb Cake card stock in White Craft Ink. I used the Stamparatus to do this although you can do it without it.  I wanted to use it in case my White stamped image didn’t stamp out too clearly I could restamp it.  I lined the card up on to some grid paper on the base of the Stamparatus and stamped the image.  See it below. Sorry lighting isn’t great.

After I left it to dry for a bit I then slid the card about 2-3mm to the left.  (or it would be about 1/8″).  I kept it lined up with the Grid Paper too so I knew it would be straight.

I cleaned the stamp with a shammy and then inked it with Flirty Flamingo ink and stamped it again.  It created a cool effect. I think maybe I don’t need to move it quite so far.  Perhaps I will try this again and just move it slightly.

To finish the card, I stamped the sentiment in black in the right hand corner.  I adhered the Crumb Cake card mat to a Flirty Flamingo card mat and then to a Thick White Card base.  I was toying with the idea of adding some ribbon or twine then spotted the borders on the Delightfully Detailed Laser-Cut paper.  So I added one of the triangular border strips.  To finish the card I added a flower in Flirty Flamingo cut from the Seasonal Layers Thinlits and added a Rhinestone in the centre.

It is a simple card but I think I will have to try this technique out again very soon.

That’s the last of the cards for the One For All set.  I will be back with more though later.  I have so many more ideas in mind.

Have an awesome weekend wherever you may be.  May it be a crafting weekend for you.  I am hoping to anyway. 🙂

Jenny

Catalogues, Personal Ramblings, Stampin' Up!

BOGO SALE DAY IN WOLLONGONG!

Everyone loves this BOGO Sale Day and it is on again for all my retired stamps, paper, Punches and Big Shot items. And I have lots!!

WHAT IS BOGO? Buy One Get One Free! 

For the total you spend on my retired products you choose the equivalent value for FREE of brand new products from the 2018 Catalogue. (NB: shipping and handling not included). Recent retired catalogue items are listed at close to catalogue price.  Past years items have been reduced.

This is just some of the stamps I have.

SO WHEN IS IT ON?

Drop in any time to my studio in East Corrimal, Wollongong (address given on request).

Saturday 7th July 2pm-4pm
or
Sunday 8th July 2pm-3pm.

Cash only. Bring a shopping bag for your new loved items.

WHY NOT SELL YOUR UNLOVED ITEMS TOO?

If you have stamps or other craft items you want to clear out (and you are local) then add them to my sale. (*These are not included in the BOGO). Drop them to me before the event, add your prices to them. Any unsold items are returned to you after with the cash for sold items.

I look forward to seeing you then. Help me clean these out because they need to go.

Jenny

cards, Catalogues, Stampin' Up!

ONE FOR ALL WITH NATURE’S POEM!

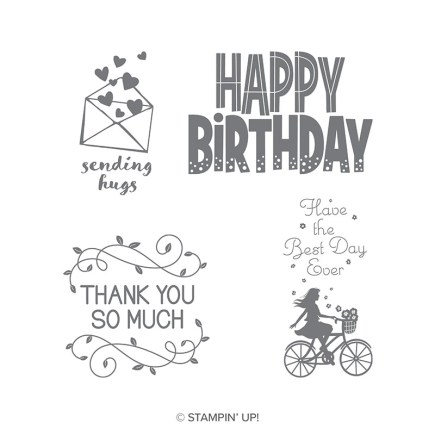
I have recently got the One For All set.  I really loved this one when I saw it in the catalogue.  I don’t know why it appealed to me particularly.  Perhaps the whimsical nature of it or just the fact that I go bike riding a bit.  It was a must-have though.

Over this last weekend I played a lot with it and I have a number of cards to show you.  This was the first one I made.

I kept it simple to start with.  On the Tranquil Tide base card I added a strip of the Nature’s Poem Designer Series Paper.  On the White card I stamped the girl in Tranquil Tide ink.  Just a note on this: I cut the sentiment off the girl image on the stamp so it could be more versatile.

The sentiment was stamped on Crumb Cake card and cut with the larger circle in the Stitched Shapes Framelits. I sponged around the edge with Crumb Cake ink.

Before adhering the white stamped piece on the card I sponged around the edge and then looped around some of the Crumb Cake Nature’s Twine.

A simple card! Come back and see a few more with this set.  I have loved using this set.

Jenny