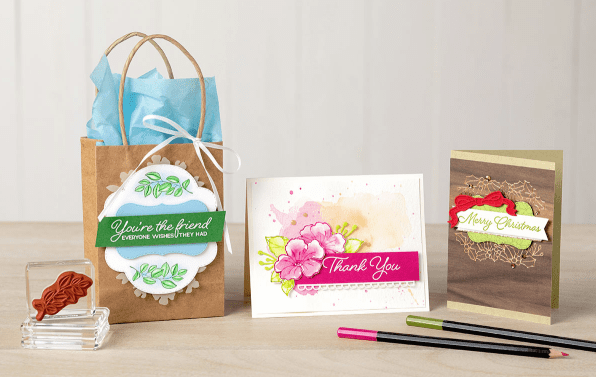
Do you know someone who would like to learn to stamp and make cards OR perhaps it’s been a while and you have lost your MOJO. We are getting Back To Basics this week.
In this class we will talk about stamps, inks and paper. We will go through some tips to help you get the best results when you stamp. We will also create 2 cards.
WHEN: Friday 31st August 7pm or Saturday 1st Sept. 2pm.
Cost: $15 RSVP: Thurs. 30th August.
This is one of the cards we will make.
Do you know someone who might like to try this? Please pass on the details to them.
Are you feeling a little lost in stamping yourself? Why not join us.
Please RSVP by Thursday 30th by emailing me at jghayward@yahoo.com or commenting here and I will get back to you.
I have been sharing cards with you with the Accented Blooms set. I had a Craft Show over the weekend and I focused on this set for the Make and Take there. When I was thinking of using this set for the show it needed to be a simple card that didn’t require colouring with it as there was no time for that in the small minute that you have with people. I came across a card by Amanda Bates with some simple stamping in Basic Gray and a POP of the Lemon Lime Twist. So I CASED her card for it. (Thanks Amanda 🙂 ) You can see her card ->HERE.
This is the card that everyone made. I have to say that Kids and adults loved making this card.
It’s just a mini card 10cm x 10cm. (4″x4″). Stamping in Basic Gray gives a little more softness to it than using a heavy black. I liked the Lemon Lime Twist POP. Everyone added a Rhinestone to their card for a little bling rather than the Glitter Gemsthat I have added on this one.
I have another card with this set that I will share with you shortly that doesn’t require colouring. Check in soon for that.
I am giving a Stamparatus away this week to celebrate my 10th Stampin’ Up Birthday. Entries close tomorrow (Sunday) so you better get on to it.
Here are the details to remind you.
————-
The Stamparatus is a great positioning tool that will help you in your stamping.
I am really excited to be able to give one lucky person the chance to have their very own one.
HOW DO YOU ENTER?
Every order over $50 will receive one entry. Orders can be emailed/phoned directly to me or can be submitted through my store. (see below). Australian residents only. Orders must be received by 8pm Sunday 26th August.
EVERY ORDER WILL RECEIVE A SMALL GIFT TO SAY THANK YOU.
Don’t forget with Bonus Days on too, for every $90 order you will receive a $9 redemption voucherto use in September.
TO ORDER
Email me directly at jghayward@yahoo.com
OR
**Shop Online ->HERE.Please use theHOST CODE: EFQMYZZJ
I have been creating with the Accented Bloomsset recently. I have a few to share with you over the next few posts.
Let me show you the first one.
The image was stamped in Memento Black Ink onto Thick Whisper White card. Both a must when you are colouring with the Stampin’ Blends. I used a number of the Stampin’ Blendsto colour the image. I still have much to learn with colouring but I was happy with this attempt. The sentiment was stamped on Pumpkin Pie card and punched out with the Tailored Tag Punch. I sponged a little Pumpkin Pie ink around the edge.
To assemble the card I embossed a piece of Rich Razzleberry card with the Layered Leaves Embossing Folder. The strip of paper is from the Share What You Love Specialty Designer Series Paper pack and I added some of the Rich Razzleberry Velvet Ribbon around the pieces before adhering them to the Thick Whisper White Card. The stamped piece was raised up off the card with Dimensionals. Just to finish add an Artisan Pearl embellishment.
Tomorrow I have another card for you similar to this so be sure to stop by.
Tomorrow (Tuesday), I celebrate 10 years with Stampin’ Up!. It’s pretty crazy really! It’s been a wild ride I have to say with lots of creating, travelling to fun events and “meeting” many amazing people here and from all over the world. I have many customers who have been with me nearly the whole time and some blog readers here too. I have to say a HUGE THANK YOU for sticking with me. ❤
It still amazes me what you can do with ink and paper and I am continually learning new techniques and ideas. 10 years ago I threw myself into this journey having no idea what I was doing – and still don’t half the time, but I keep going and I hope that I inspire you along the way. Stampin’ Up! has given me a greater confidence in myself to try new things and to believe in myself that I can create. 🙂
I appreciate each and every one of you whether you have been with me for 10 years or 10 days. Thank you for sharing this ride with me. I love sharing my creations and ideas with you. Creating is such an important part of our lives. So keep creating and I hope you continue on this ride with me. To many more years of creating! 🙂
So to celebrate my 10th Stampin’ Up! Birthday, I am giving you the gifts.
————-
You might have seen the Stamparatus? The great positioning tool that helps you in your stamping.
Well I am giving one away this week. I am really excited to be able to do this. 🙂
HOW DO YOU ENTER?
Every order over $50 will receive one entry.Orders can be emailed/phoned directly to me or can be submitted through my store. (see below). Australian residents only. Orders must be received by 8pm Sunday 26th August.
EVERY ORDER WILL RECEIVE A SMALL GIFT TO SAY THANK YOU.
Don’t forget with Bonus Days on too, for every $90 order you will receive a $9 redemption voucher to use in September.
TO ORDER
Email me directly at jghayward@yahoo.com
OR
**Shop Online ->HERE.Please use theHOST CODE: EFQMYZZJ
I made this card a few months ago and I forgot to show you. This was the first card I made with this Animal Outingset way back then. I have to say I wasn’t overly wrapped in the card. Maybe that’s why I filed it away in the “forget about it” box. 🙂 Anyway, maybe you like it – and not all our cards can be super-wonderful. Not that I think many of my cards are super-wonderful. 😉
So here we are. I call it my Giraffe parade.
I stamped 3 of the giraffes from Animal Outing across a piece of white card and coloured them with the Stampin’ Blends. I outlined the giraffes with the grey Blend. It helps them stand out. After that I wasn’t sure what to do with it. I embossed a piece of Silver Foil Sheet with the Hexagons Embossing Folder. To assemble it I adhered a strip of the Pumpkin Pie card under the foil and matted the Giraffes on some Pumpkin Pie card. The sentiment was stamped on a Thick Whisper card base and then Rhinestones were added to finish.
I just received the Kraft Pillow Boxesrecently. These are lovely little boxes for little treats. I will do that with them soon but I had different ideas for this little project.
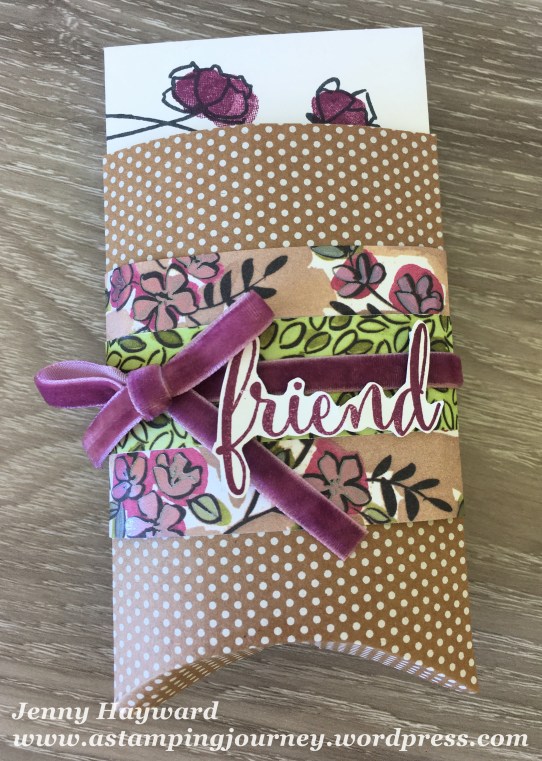
I made a little pocket with a matching note card and envelope using the Narrow Note Cards and Envelopes.
This is a great size to give a little note to someone as a pick-me-up or a Thanks. Add a chocolate treat or even a Gift Card.
To make these little pockets, simply cut the top off the Pillow Box just under the curved score line. Then assemble the Pillow Box. Decorate it as you like after it is assembled.
To decorate mine, I added a wide strip of the Share What You Love Specialty Designer Series Paper and then a narrower strip over the top. I wrapped around some Rich Razzleberry Velvet Ribbon and adhered a bow with a Glue Dot. The sentiment from the Love What You Do stamp set was stamped in Rich Razzleberry and then I cut around the ‘friend’ word with scissors. That was raised up with Dimensionals.
The Narrow Note Card was stamped with the flowers in Memento Black and then “filled” with one of the small “dot” type stamps in Rich Razzleberry. I added some Old Olive leaves. Of course, finished off with a Linen Thread bow and a Pearl from the Adhesive Artisan Pearls. The envelope was stamped with a matching flower.
These are so quick to make. I think I need to make some more so I can have some on hand to give out. How will you decorate yours?
If you have followed me for a while you would notice that I don’t do a lot of scrapbooking. I have done a page here and there. (If you want to see some of them then be sure to click on the tag ‘scrapbooking’ at the top and it will take you to some of the posts).
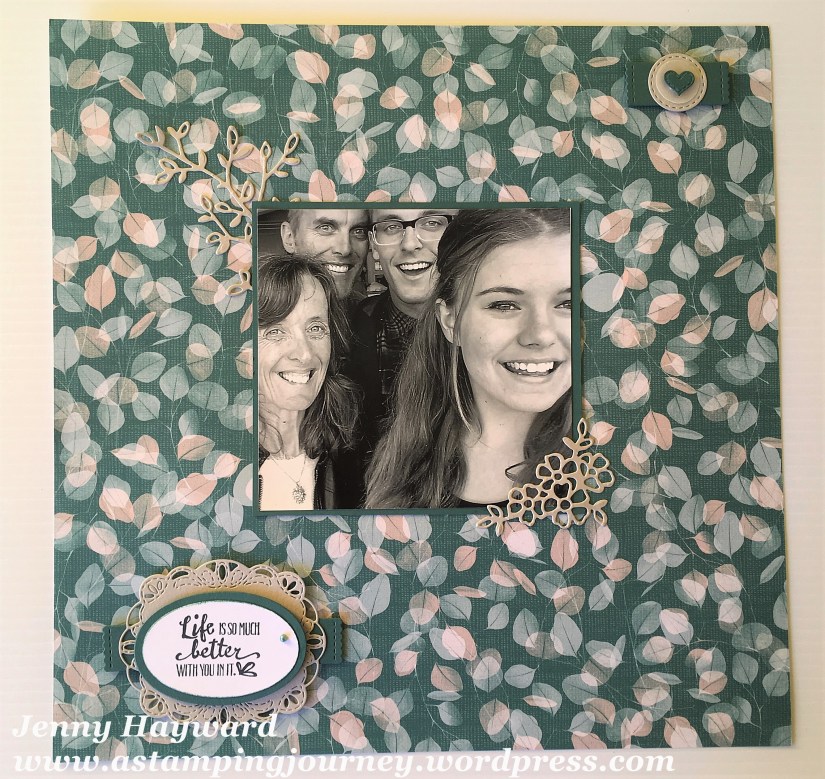
I have had this photo for a couple of years now with the idea of scrapping it. I needed to make a page this week and thought of this photo again – and it was time to do something with it. So … I made a scrap page. 🙂
Here it is for you.
WHAT I HAVE USED
Card and Paper: Nature’s Poem Designer Series Paper, Tranquil Tide cardstock, Sahara Sand cardstock, Whisper White, Vellum.
Stamps:Petal Palette. Dies: Petals and More Thinlits, Layering Oval Thinlits, Stitched Labels Thinlits.
THE PROCESS
Choosing the photo was the easy part but working out how to put it together took a little time. I first went through some scrapbooking page ideas I had pinned on Pinterest. I also looked at some ideas I saved to my computer and in some magazines. I wanted to use some of the gorgeous Stampin’ Up! paper in some way. I had thought in strips. I tried a few sheets of paper that I had to see what worked. I found that this piece looked the best against the black and white photo. I thought I might cut it in strips with some other prints from the Nature’s Poem pack but I liked this piece left as it was.
I narrowed down the stamps and the dies to the Petal Palette setand cut a few pieces from the Petals and More Thinlits and the Stitched Labels Framelits. I played around with the positioning and then added the sentiment. I have to say it was a fun process putting the page together and I was happy with the way it turned out.
Now don’t hold your breathe for me to scrap another page in a hurry. 😉
A couple of weeks ago when I was creating a card for a Blog Hop I was in I created this card. I wasn’t happy with it for the Blog Hop but I thought I would share it with you now. It is not my usual style so I didn’t feel comfortable with it. 🙂
At the time the theme of the Blog Hop was to be using a product from the current Catalogue. If you go back a few posts (or head -> HERE) you can see what I ended up with.
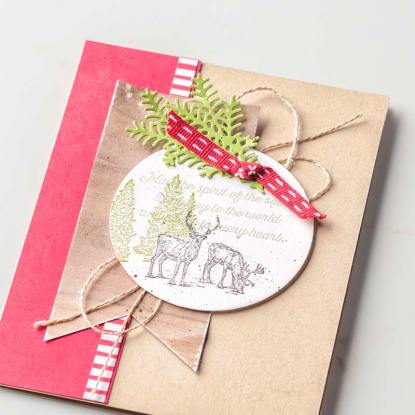
I was having trouble working out what to make for it initially so I thought I would CASE a card from the catalogue. The card on page 99 of the catalogue caught my eye so I thought I would use that as inspiration.
This was the inspiration card.
Details for my card I created up above.
The Designer Series Paper strip is from Share What You Love Specialty Designer Series Paper. The Razzleberry Strip is embossed with the Softly Falling Embossing Folder.
The tag and the background was stamped with the Timeless Textures stamp set. I sponged around the edge with White Craft Ink and distressed the edges. The little sprigs were diecut from the Botanical Tags Thinlits cut from Mossy Meadow card. The circle is stamped with images from the Botanical Bliss stamp set. I swirled around a couple of loops of Linen Thread behind the circle.
So certainly different. Whether you like it or not just remember that the catalogue can be a great source of inspiration to create your next card.
By now you would have seen quite a bit of the Blended Seasons Bundle around different blogs and Pinterest. It is a beautiful bundle. I am just sad that it is only around for this month. It is so versatile. So today for Wednesday’s WOW! #35 I thought we would take a closer look at it.
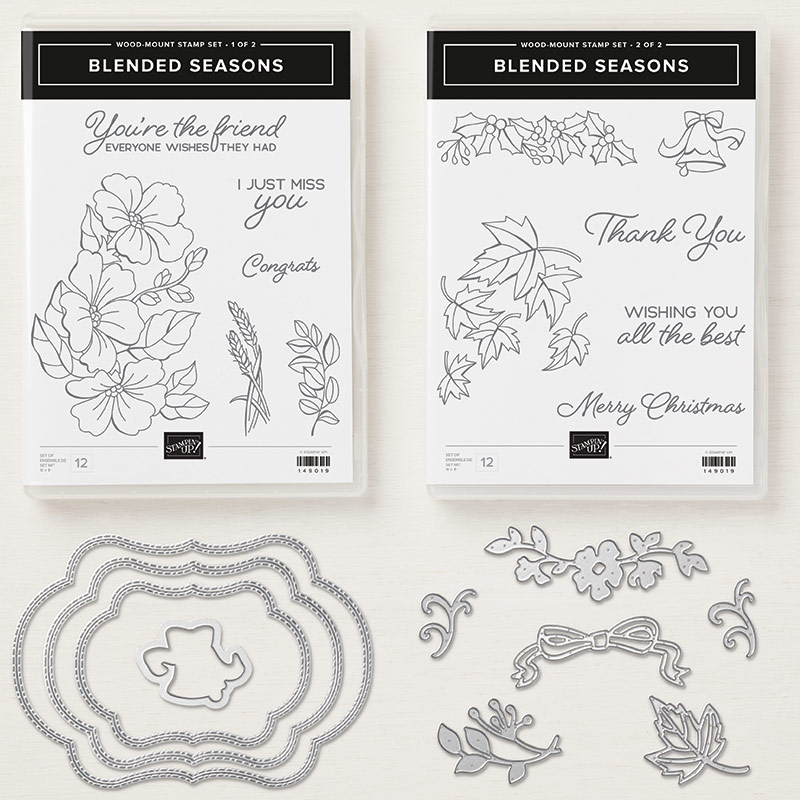
Here is the Blended Seasons stamp set and the matching Stitched Seasons Framelits.
How many different occasions can you see using this set for?
Birthday – The sentiments are fitting for a birthday. The flowers come up beautifully coloured with whatever your choice of medium whether it is Watercolor Pencils, Stampin’ Blends or Inkpads and Aquapainter. You could also use the ‘husk’ type image or the leaves for a great male card.
Congratulations/All the Best– Try colouring the flowers for this occasion too. The leaves are great as well.
Wedding – Those sweet bells are not just good for Christmas but they make a lovely wedding card.
Thinking of You – Add flowers, leaves or the husks and with those sentiments you have a lovely card to let someone know you are thinking of them.
Christmas– There are lots of stamps to use for this occasion, the bells or that gorgeous holly. I love the font in this set.
Teamed with the Framelits they make cards for every occasion. It is such a versatile set.
Speaking of those Framelits though. Did you realise they are double stitched? They have a stitched line effect on the outside edge and the inside edge of the diecut. It looks really cool. With 3 different sizes you can layer them together.
Below is a videofrom Shannon West at Stampin’ Up! to show how these stamps and dies can work together but it especially has some great tips on watercolouring, so be sure to check it out. If you are viewing this from an email update and the video is not showing be sure to click on the blog link above to go directly to my blog to view it. 🙂
Here are some ideas courtesy of Stampin’ Up! Some of the cards are the ones featured in the video.
I think this one below is one of my favourites I have seen with this bundle. It shows how the Framelits work with the stitching and I love the colours used.
Lots of great ideas for you.
If you are after some more inspiration you can head to my Pinterest board ->HEREand check them out.
Grab your Blended Seasons Bundle in my store now ->HERE. Don’t delay as it is only available for this month but only while supplies last. If you are ordering online please use the Host Code: WRQSC9N3