cards, Catalogues, Techniques, Tutorials

CHANGING THE DRESS LINE OF THE BEAUTIFUL YOU LADY!

I have been sharing lots of projects with the ‘Beautiful You’ set this past week.  When I first started seeing ideas with this set on Pinterest I noticed that some of the dresses were different.  I was curious and went investigating further. I thought I would share with you today how it can be done so you can create more with this set.

masking-dress-for-beautiful-you

I have put together a tutorial for you.

CHANGING THE DRESS LINE.

1. You can do either of two things. a) draw over the top part of the lady with the Black Stampin’ Write Marker or what I have done b) Place the stamp on the table top facing up. Mask the skirt area with a Post It note or piece of scrap paper. Leaving the stamp on the table ink up the stamp with the Black StazOn inkpad.  I have used StazOn as you will be watercolouring the image.

2. Stamp the image onto Thick Whisper White, Shimmery White card or Watercolor Paper as you will be watercolouring it.

3. With the Black Marker draw a skirt line that you would like.  If you prefer use a pencil and then go back over it with the Marker. You could create any style, short or long.

4. To Watercolour this I used the Real Red Watercolor Pencil, colour along the lines of the dress and the hat.  Using the Aquapainter blend over the colour.  You can build up the colour as you desire by going over the area but allow it to dry a little before adding more colour.

Assemble your card as you like.

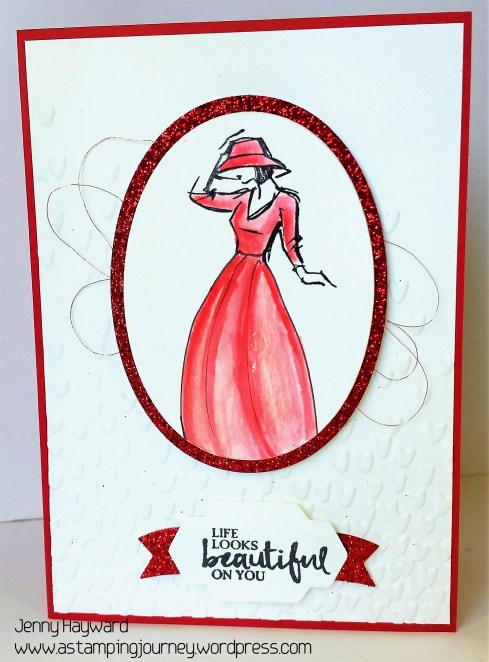
beautiful-you_red-lady

To create this card I cut the image with the Layering Oval Framelits cutting a larger one with the Red Glimmer Paper. The sentiment was stamped in black and cut with a Framelit from the Stylish Stems.  Using the Duet Banner Punch I cut a banner from the Red Glimmer Paper and cut it down in the centre to adhere behind the sentiment.

To finish I looped around some Copper Thread and raised that off some Whisper White mat which had been embossed with the Falling Petals Embossing Folder.  Base card is Real Red.

Hope that was helpful for you.  You can use this idea to change different stamps. Go and experiment.

Jenny

3D projects, cards, Stampin' Up!, Tutorials

BEAUTIFUL YOU MATCHBOX AND MINI CARDS!

Continuing on my ‘Beautiful You’ projects this week. I have a cute little Matchbox and mini cards to show you. The sentiments in this set can make great “pick me up” type cards to give to a friend. I have the tutorial for you below so you can make your own.

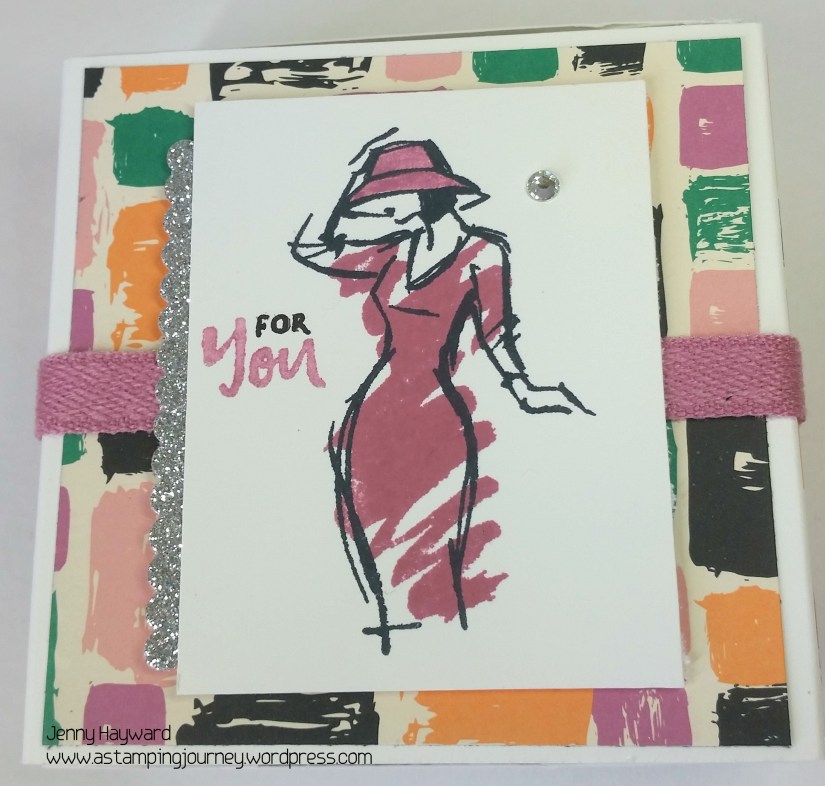
matchbox-box

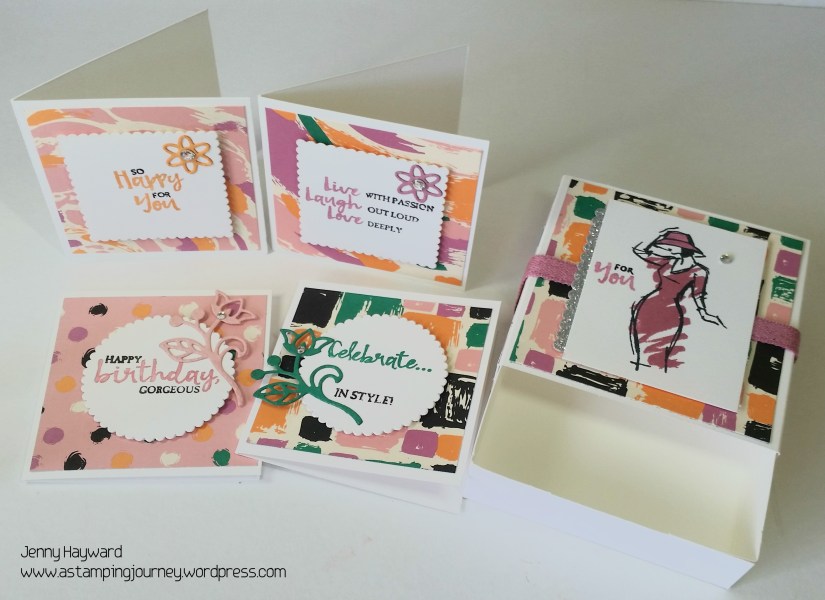
A little drawer slides out to hold the Mini cards. I am sure you could fill it with some chocolates or maybe teabags even.

matchbox-_-open

There are 4 mini cards.

box-and-mini-cards

mini-cards

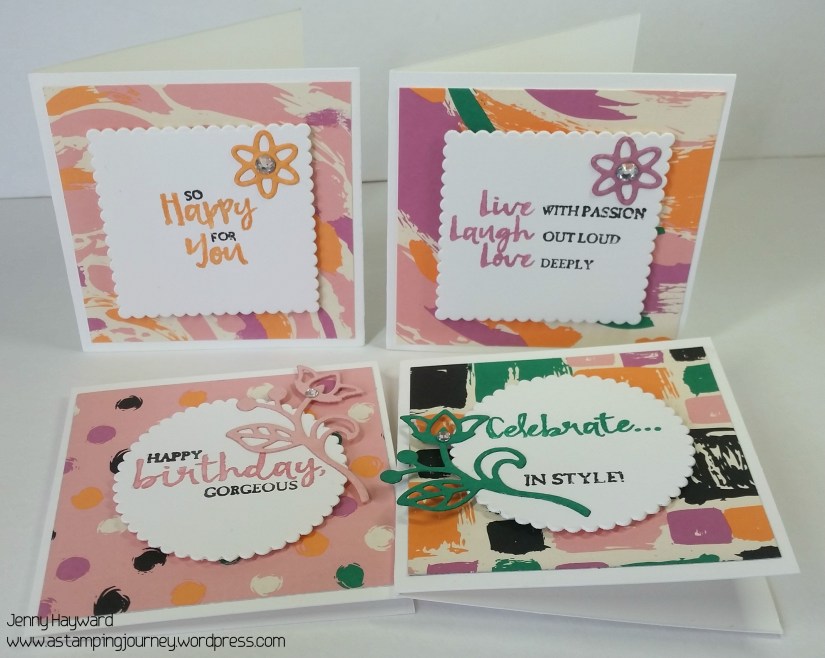
I have used the ‘Playful Pallette’ DSP pack. This is a great way to use up those little scraps of patterned paper you have around. I inked the sentiments with the Markers. They were then cut out with the Layering Squares and Layering Circles Framelits. To decorate my mini cards I used the ‘Flourish Thinlits’

Do you want to make your own?  Here is the tutorial in Metric and Imperial. Give it a try.

MATCHBOX MINI CARD BOX

METRIC

BOX

Cut cardstock 13.5 cm x 13.5cm.  Score at 2.5cm and 11cm.  Turn 90’ and score at 2.5cm and 11cm.

Cut up on tabs on opposite sides and assemble to form a box.

BOX SLEEVE

Cut card 24.5cm x 8.6cm.  Score on the long side at 5.6cm, 8.2cm 17cm and 19.6cm. Fold on score lines.  Place adhesive on the inside of one end.  Wrap around box and seal the ends to fit.

Decorate as you like.

IMPERIAL (you might like to check these measurements in scrap card first!).

BOX

Cut cardstock 5 3/8” x 5 3/8”.  Score at 1” and 4 ¾”. Turn 90’ and score at 1” and 4 ¾”.

Cut up on tabs on opposite sides and assemble to form a box.

BOX SLEEVE

Cut card 3 ½” x 9 ¾”.  Score on the long side at 2 ¼”, 3 3/8”, 6 7/8” and 7 7/8”. Fold on score lines. Place adhesive on the inside of one end.  Wrap around box and seal the ends to fit.

Decorate as you like.

Thanks for looking

Jenny

cards, Cards by Mail, Classes, Stampin' Up!, Tutorials

ONE SHEET WOW! CLASS + BY MAIL!

This Saturday I have a fun class on.  If you can’t make it locally it will be available by mail so check all the details.

ONE SHEET WOW!!

Make 8 cards quickly by stamping one sheet of A4 cardstock.

osw-class-cards

Saturday 14th January 2pm 

COST: $20. $5 extra to use my adhesives.

BYO: scissors, adhesives and paper trimmer.

RSVP: Thursday 12th.

CLASS BY MAIL 

Can’t make it? Get the class by mail. Includes cutting template and instructions, cardstock and embellishments.

 Cost: $20

Let me know ASAP.

Jenny

cards, Stampin' Up!, Techniques, Tutorials, Videos

SPECIAL REASON BIRTHDAY!

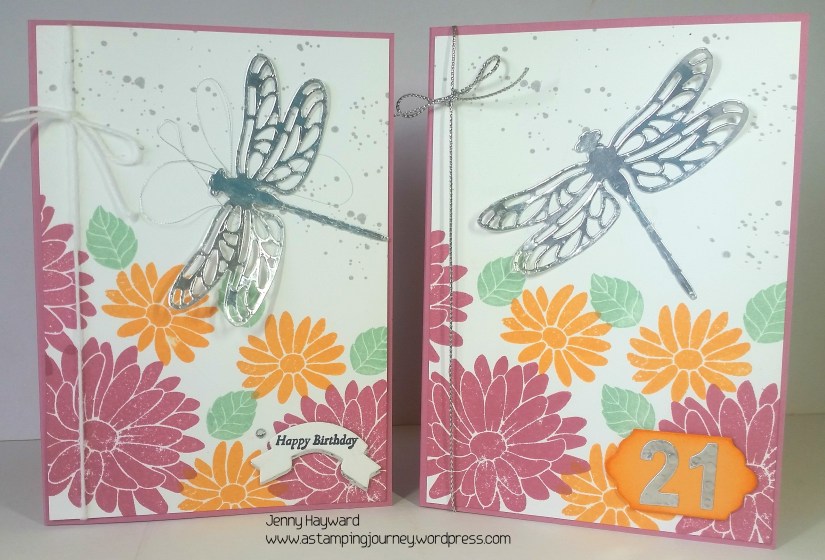
A Birthday is always a special reason for a card. 🙂 I needed to make a card for a friend of Josh’s who is turning 21.  There seems to be a run of these now.  I made 2 just in case!!!

I inked up the ‘Special Reason’ set for the first time.  I received this set for Prize Patrol from Onstage event last November.  I thought at the time “it’s another flower set!”. Being honest here. 🙂 But now I have seen some really sweet cards made with this set – and with the matching dies.  (I might have even ordered the dies the other day!).  Sometimes you just have to right. 😉

Anyway, to the cards.  This lovely young lady loves flowers so I thought this might be a good set for a card for her.  I teamed it with the Detailed Dragonfly Thinlits, just because. 🙂

sweet-sugarplum-21

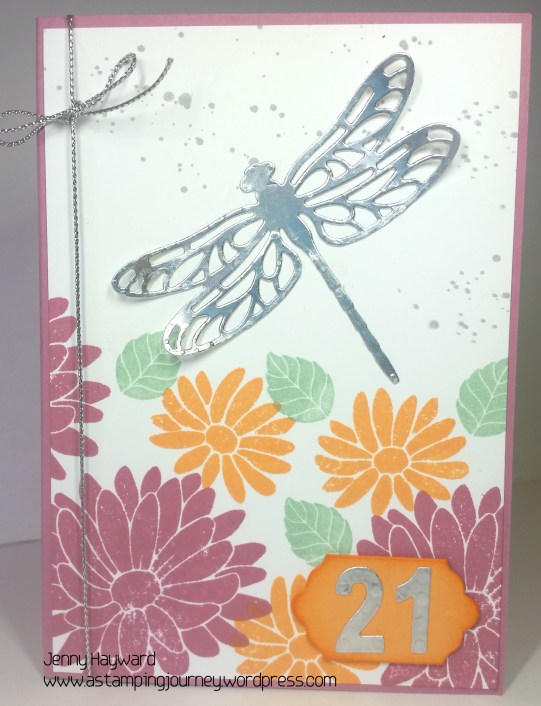
The card base is Sweet Sugarplum.  The flowers and leaves from the ‘Special Reason’ set are stamped on Whisper White card in Sweet Sugarplum, Peekaboo Peach and Mint Macaron and the dots are stamped in Smoky Slate. I cut a “21” in Silver Foil using the retired ‘Little Numbers’. I felt it got lost on the card so added a tag in Peekaboo Peach which was was cut from the 2nd smallest label from the ‘Lots of Labels’ Framelits.  I sponged around the edge on that to make it stand out more.  To assemble the card I then adhered that to the card base and tied around some Silver cord (retired), and added a gorgeous detailed dragonfly on it which was cut from the Silver Foil.

I forgot to take a photo of the inside.  I just stamped a Happy Birthday greeting from the Tin of Cards set and added a small stamped flower in Peekaboo Peach.

The second card I made was very similar.

sweet-sugarplum-birthday

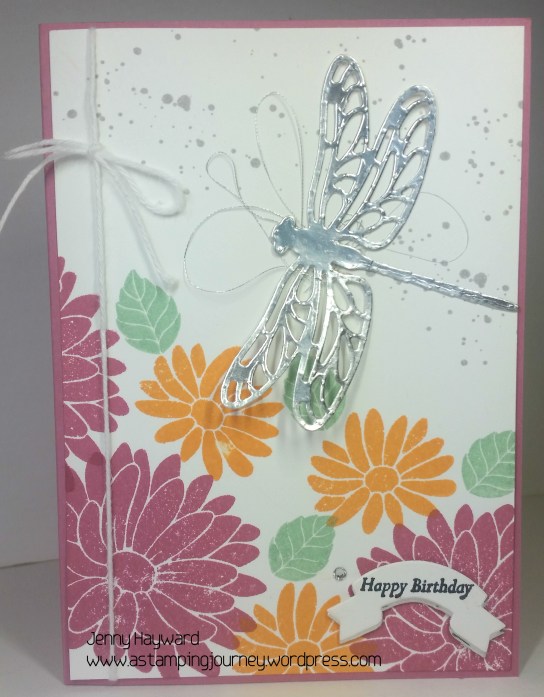
For this one, I tied around Whisper White Baker’s Twine.  The sentiment from the set is stamped in black and I have cut that from the small banner in the Home Sweet Home Thinlits.  It’s great for those tiny sentiments.  I cut one out also in Silver Foil and layered them together.  I added a Rhinestone as it needed something else.  Underneath the dragonfly on this one I swirled around some Silver Thread.  

sweet-sugarplum-_2

Before I could use this set I had to assemble it as it was a clear mount set.  As I was assembling it I thought I should take a video of what I do.  I know when I use clear mount stamps it can be frustrating when those pesky little stamps fall off your blocks.  Do you find that?? Some time ago I came across a way to keep those stamps on your blocks.  I have been doing it this way for the most part now and have had very little problems.

I have just uploaded it to Youtube but thought I would share it here.

How you can help keep those clear stamps on your blocks!!

I hope that might help you and stop some frustration.  Just saying!! 😉

Thanks for visiting.  I will try and get back sooner to share more with you.  I have been creating a lot but just haven’t made it to the computer yesterday.  It is summer holidays here and Mum’s taxi is working overtime!

Hope to see you again soon.

Jenny

cards, Stampin' Up!, Tutorials, Videos

MAKING LOOPY THREADS ON CARDS!

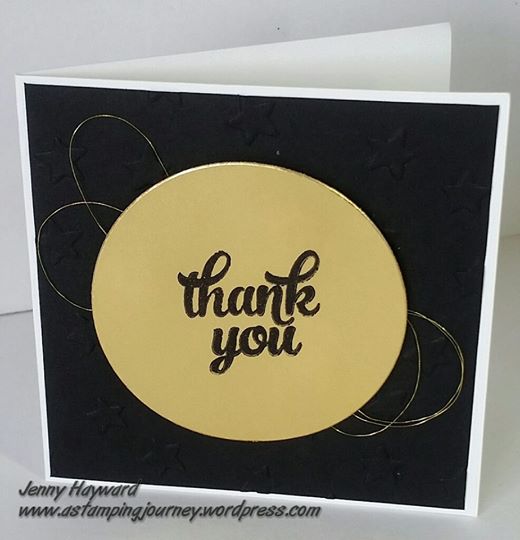
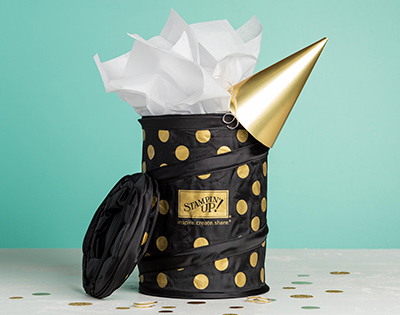
Last month I gave away these cute Pop Up Scrap Bins for everyone who ordered from me. I made up some cute cards as Thank You’s.  The card was inspired by the Pop Up Bin itself.

gold-thank-you

Here is the bin again just for you to see.

sp_10yr_shareable_thumb

The cards were small notecards measuring 10cm x 10cm (4″ x 4″).  The black card mat was embossed with the Lucky Stars Embossing Folder.  A Gold Foil circle was cut with the Layering Circles Framelits and then stamped in Black Stazon with the sentiment from ‘Tin of Cards’.  I looped around Gold Thread behind the circle before adhering it to the card with Dimensionals.

People have asked me several times how to make those loopy threads on the cards so when I was making this I made a video to show you.  See that below.

(*If you receive this blog update via email then you might need to head to the blog post by clicking on the heading at the top to be able to view it.  Just a note too, the last blog post on ‘behind the scenes in my classroom’ didn’t show the video if you received it by email so head to the last blog post for that one too).

I have just created a Youtube channel to share videos with you more easily so stop by to subscribe to keep updated.   Find it HERE (Jenny Hayward _A Stamping Journey).

Thanks for visiting and sharing in my creative journey playing with ink and paper.

Jenny

cards, Techniques, Tutorials

COOL COFFEE CUP CARD!

I found this idea the other day to make these cute coffee cups.  I don’t drink coffee but I love meeting up with friends for “coffee”.  I loved the idea that you could make these cute cups with … The Home Sweet Home Thinlits Dies.  How clever! They make great sized coffee cups for a card.

This idea is from Susan Campfield on suestampfield.com HERE.

coffee-cups

 I put together a video on how to make it for you.  View that -> HERE.

You can dress them up as you like.  I have used the ‘Paisleys and Posies’ stamps and the Paisleys Framelits.  The background is stamped with the ‘Timeless Textures’ set. The sentiment is from ‘Bella and Friends’ which I think is very apt for a friend to let them know you are thinking of them.

What a fun idea!

It just happens that the Home Sweet Home Thinlits are 30% off this week for Extravaganza. They are priced this week at $44.10.  You can check out all the List for Extravaganza at my store HERE.

I hope you can make your own “coffee cup” cards.

jenny-_-signature

3D projects, Christmas, Stampin' Up!, Tutorials

CHRISTMAS TREAT BOX!

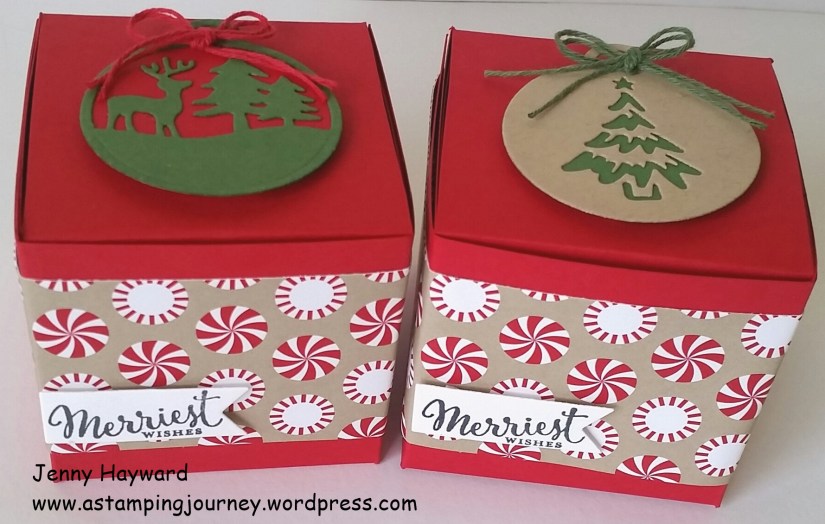
In a post or 2 back I showed you a cute little Christmas Treat Box and I said then that I would show you how I made it.  I thought I would tell you about it today. It is so quick to make and seriously you can make up a number of these in no time.

Here is the box if you forgot – and to save you going back a couple of posts.  You can go back if you like to though. 🙂 You can see all the other fun projects I shared from my Holiday Catalogue Review too while you are there.

christmas-box

These are so Christmas-y.  These are called “SEVENS” boxes.  WHY? Well it is all in the measurements.  I have made a number of these over the years.  I like how quick they are to make and you can fit a fair amount of treats inside.

I  will tell you the measurements and then give you a link to the original creator for the assembly of the box.  On that blog post it doesn’t have Imperial measurements so I have put created one for you my lovely friends if you use Imperial Measurements. 🙂

SEVENS BOX (Metric)

Using a full sheet of A4 card, score your card.  On the short side score at 7cm and 14cm. On the long side score at 7cm, 14cm, 21cm and 28cm.

Rather than relay the cutting and assembling of the box you can refer to the original blog post which you can find HERE at Marelle’s blog.

2 AND A HALFER BOX (Imperial)

It doesn’t really have the same ring to it as a “SEVENS” box does it but it would be a bit odd to call it that!).

NB: Please try this on scrap paper first before creating it on card to see that the measurements are correct.  This will be a slightly smaller box that the “SEVENS” box but still a good size.

Cut your card to 10 3/4″ x 7 1/2″.  On the short side score at 2 1/2″ and 5″.  On the long side score at 2 1/2″, 5″, 7 1/2″ and 10″. Cut and Assemble the box as in the link in the Metric measurements above.

Once you have made one I don’t think you will stop.

Enjoy. 🙂

Jenny

3D projects, cards, Catalogues, Christmas, Tutorials

COOKIE CUTTER Z-FOLD CARD!

I have a little sneak peek for you today.  Very soon the Stampin’ Up! Holiday Catalogue will be Live. September 1st to be exact.  You are going to L.O.V.E. it!  I tell you there are so many exciting new products it is going to be hard to choose.  I am having a hard time to choose myself!

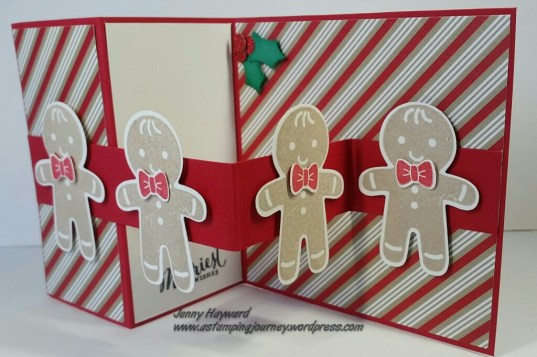
Have to say though when I first saw our sneak peek I just loved the cute little gingerbread in the Cookie Cutter Christmas set.  It was the first on my list – and the first thing to play with the other day when my preorder arrived.  It has the stamp set AND the matching punch.  It makes it so easy to cut those gingerbread and the other characters out.

So here is the card I made, because I couldn’t wait until later in the month. 🙂

This is a Z-Fold card which you might have seen a bit around recently.  I have been waiting to try one of these folds and I thought the Gingerbread were just the thing to use.

Z-fold

Z-fold with Cookie Cutter

I thought the corner looked a little plain so I created a little Holly leaves and berries using the NEW Holly Berry Builder Punch.

This is the card when it is folded flat.

Z-fold card folded flat

Have you tried a Z-Fold card before?? There are a number of tutorials around the internet and some vary in size.  I based mine on Amanda’s version (craftyspa) HERE. You will find that Amanda’s tutorial makes 2 card bases from one sheet of cardstock. That’s OK if you want to do multiple cards or you are using the same colour card base for different cards. 

I adjusted the measurements a little and have them in Metric and Imperial for you if you wish to create just one card.

Square Z-Fold Card Tutorial (Based on Amanda Bates – Craftyspa)

* This makes one card.

1. Cut card t0 21cm x 13cm for your card base. (8 1/4″ x 5 1/8″)

2. On the long side score your card at 5.2cm and 10cm (2 1/16″ and 4 1/8″).

3. On the short side, cut your card at 10.5cm.  The thin strip you cut off will be your band.

*Doing it this way by cutting your card after you have scored saves you scoring the little strip. 🙂

4. Cut your Designer Series Paper  – I have used the new ‘Candy Cane Lane DSP.  You will need 2 pieces: 4.8cm x 10.1cm (1 7/8″ x 4″) and 10.1cm x 10.1cm ( 4″ x 4″)

Plus a piece of Whisper White piece: 5.1cm x 10.1cm (2″ x 4″).

5. Adhere your Designer Series Paper pieces to each end sections.  Stamp your Whisper White piece with a sentiment as you like and then adhere that to the centre section.

6. To attach your band please take note of where to place adhesive.  You don’t want to run adhesive along the whole length. Place your card base down open and flat on the tabletop. Lay down the strip on to the card halfway down the card.  Work out where you want to place your adhesive. I find it helps to mark in pencil where to place it. You will want to place adhesive on the back of your strip just where it rests on the front section not where it lays on the white section. Then on the back of the strip on the last section.  I hope that makes sense??

Hope these instructions are helpful to make your own Z-Fold card.

Why not share your version with me.

Jenny

3D projects, cards, Stampin' Up!, Tutorials

TRIANGLE EASEL CARD WITH THOUGHTFUL BRANCHES!

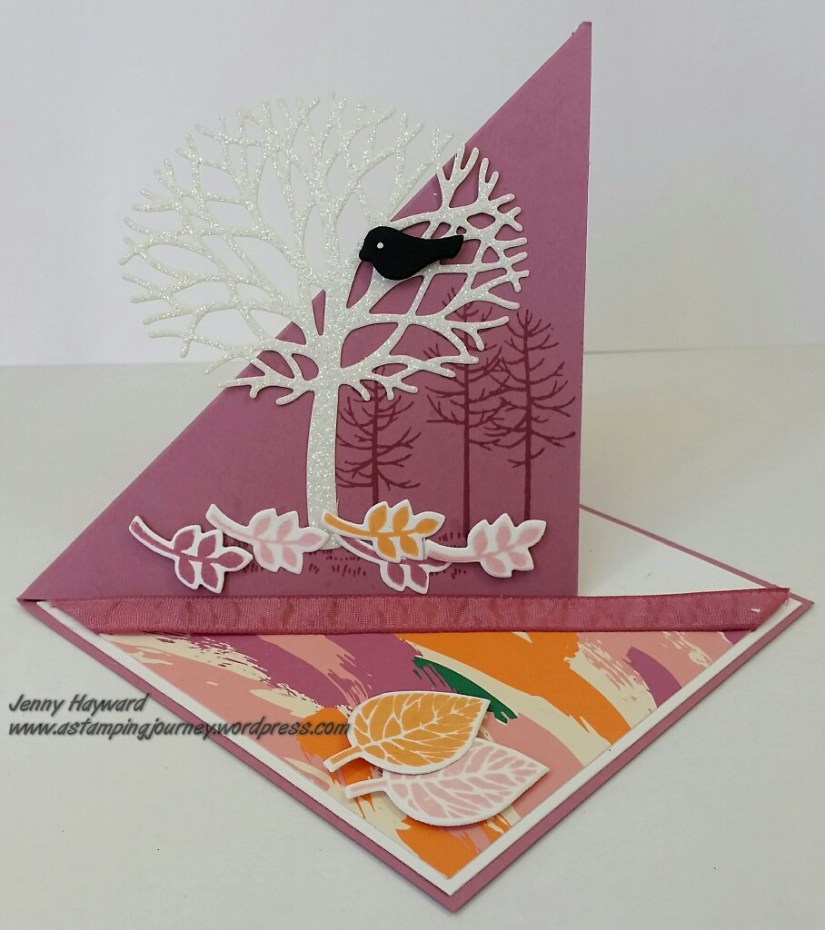
I was looking at my Butterfly Easel card the other day that I made some time ago and thought this would be a great card idea for the Thoughtful Branches.  So of course, I had to make it.  🙂  Here it is for you.

Front view.

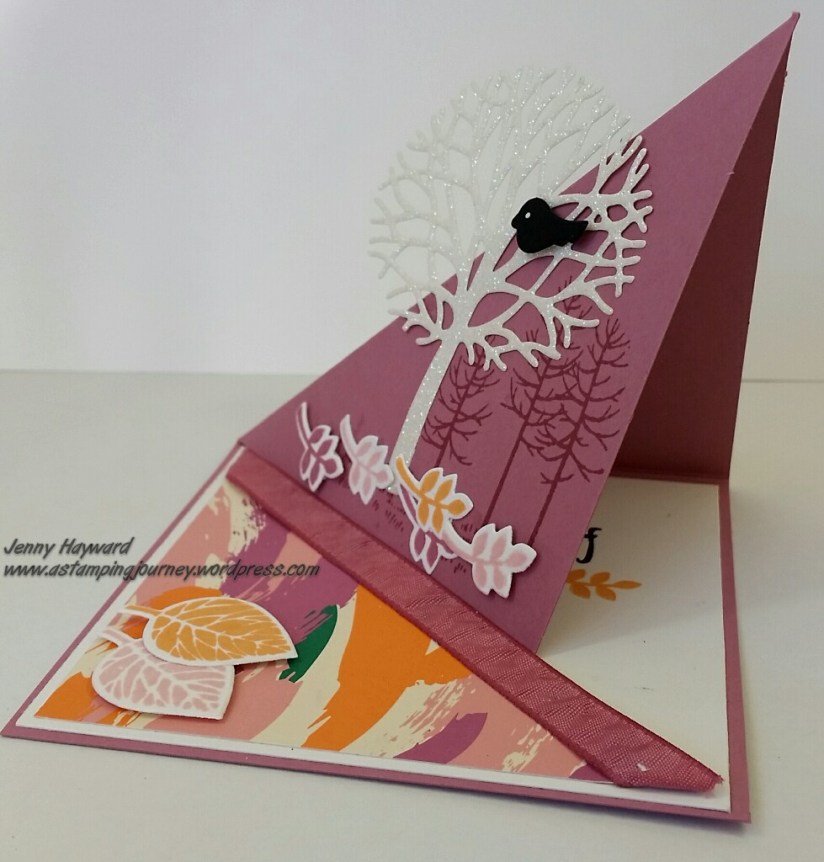
I have used the Sweet Sugarplum as the card base.  The tree is cut with Dazzling Diamonds Glimmer Paper. The Designer Series Paper is the Playful Palette Paper stack.

Easel card front

Side View.

Easel card side view

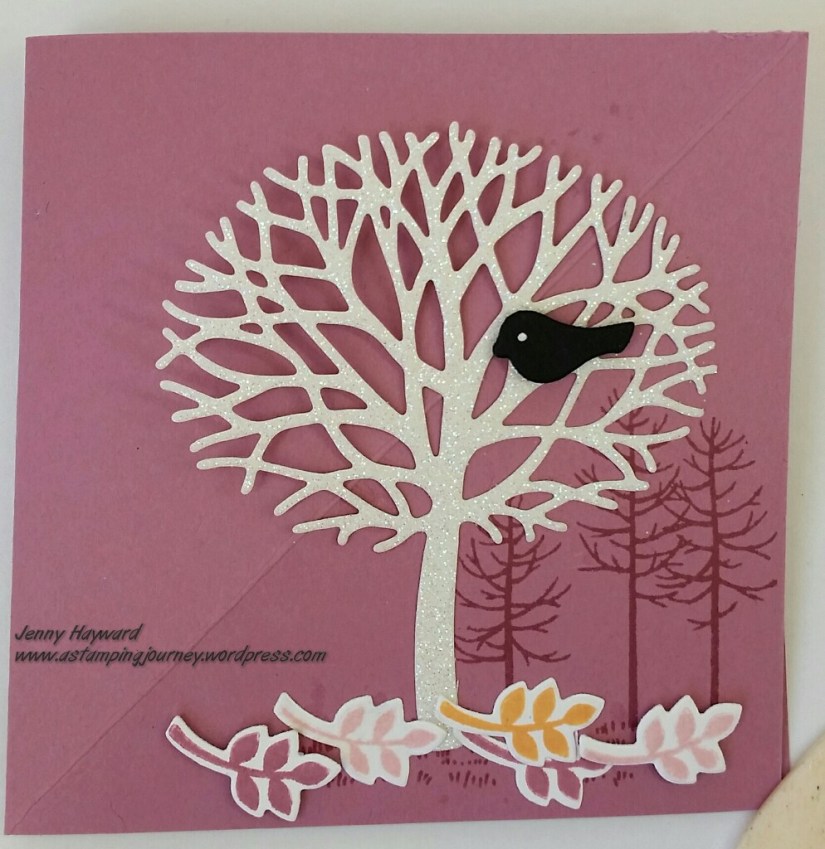
The card folds flat for postage.  It measures 10.5cm x 10.5cm (4″ x 4″). So you could make an envelope with the Envelop Punch Board.

closed

Inside of the card.

inside easel

I made up a tutorial for this Fold way back when I made the Butterfly Card.  You can find that tutorial HERE in this post. So go and check it out for you to make your version.

Thanks for looking.  I hope you can make a Triangle Easel card yourself.

Jenny

3D projects, cards, Tutorials

POP UP EASEL CARD!

A customer called in last weekend and showed me a card she had made. She had gone to a class to do it.  (It wasn’t a Stampin’ Up! class and I don’t know who the original creator is). I loved the idea of the card so I had to make one. I had a little time to play around with it the other day. I call it a POP UP EASEL CARD. I used Confetti Celebration on mine.  I will show you the photos of the card (sorry, lots!) and then give you the instructions.

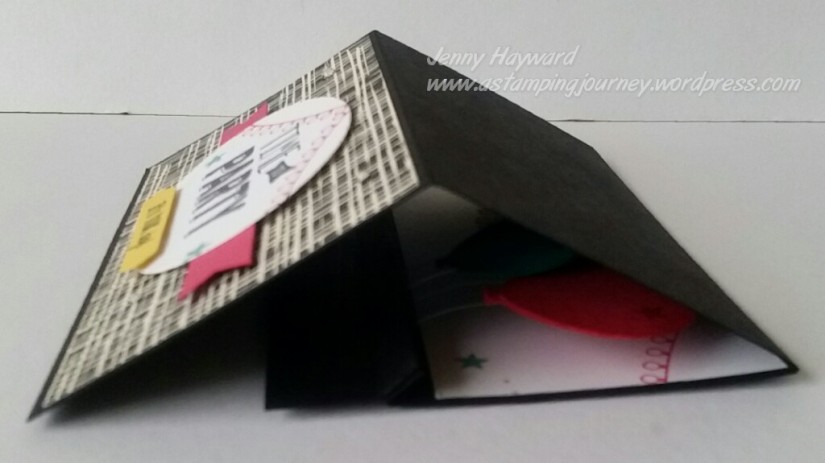
This is the front of the card.  The Rhinestones you see is what holds up the Easel part.  The balloons are suspended on strips of acetate in a folded crease.

Easel front

This is another view front on.  The Designer Series Paper is from the Playful Palette pack. The balloons are punched with the Balloon punch in Bermuda Bay, Daffodil Delight and Melon Mambo.  I sponged around the edges with the sponge and added a small star that from the stamp set.
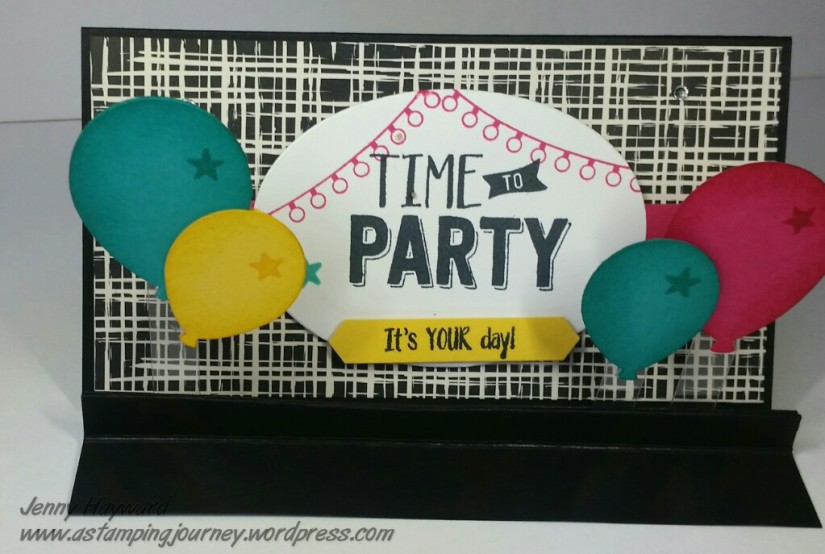
Easel card

Side on view gives you an idea of the suspended balloons.  I punched 2 each of the balloons and adhered one to the front and back of the strip of acetate to keep it tidy.

You can see the side view and inside of the card with the sentiment that I will show you below.
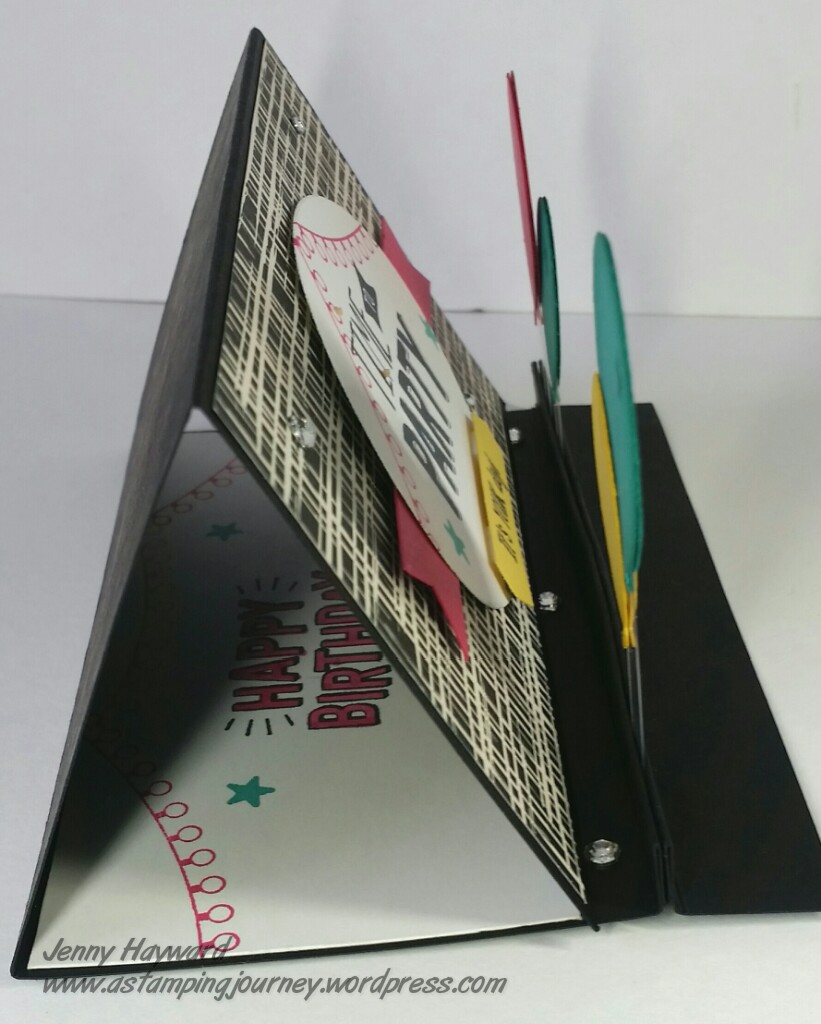
Side view of Easel

The card can fold flat for postage.

folded inside

When it is folded flat it is a square card measuring approximately 15cm x 15cm (6″ x 6″) so you would need to make an envelope to fit but that is no problem with the Envelope Punch Board!

folded

This is inside of the card.  I continued with the sentiments from the Confetti Celebration set.
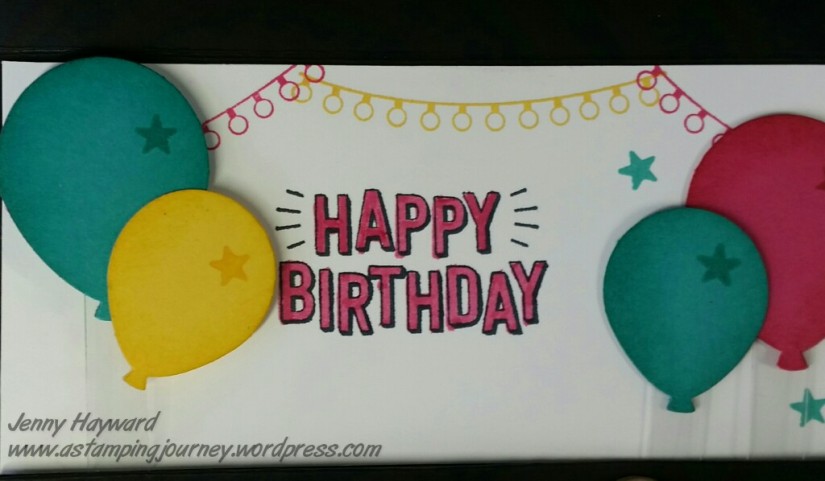
 inside

You can see when it is open that the balloons can fold flat against it.  This is a trick too. Whatever image or shape you have suspended in the front crease, you need to fold it against the inside of the card to test it out first before you put it together to be sure that it will fit below the score line for when it is folded flat.  You can’t have it squashed in. 🙂 Check the photo below to see what I mean. The balloons sit just below the score line.
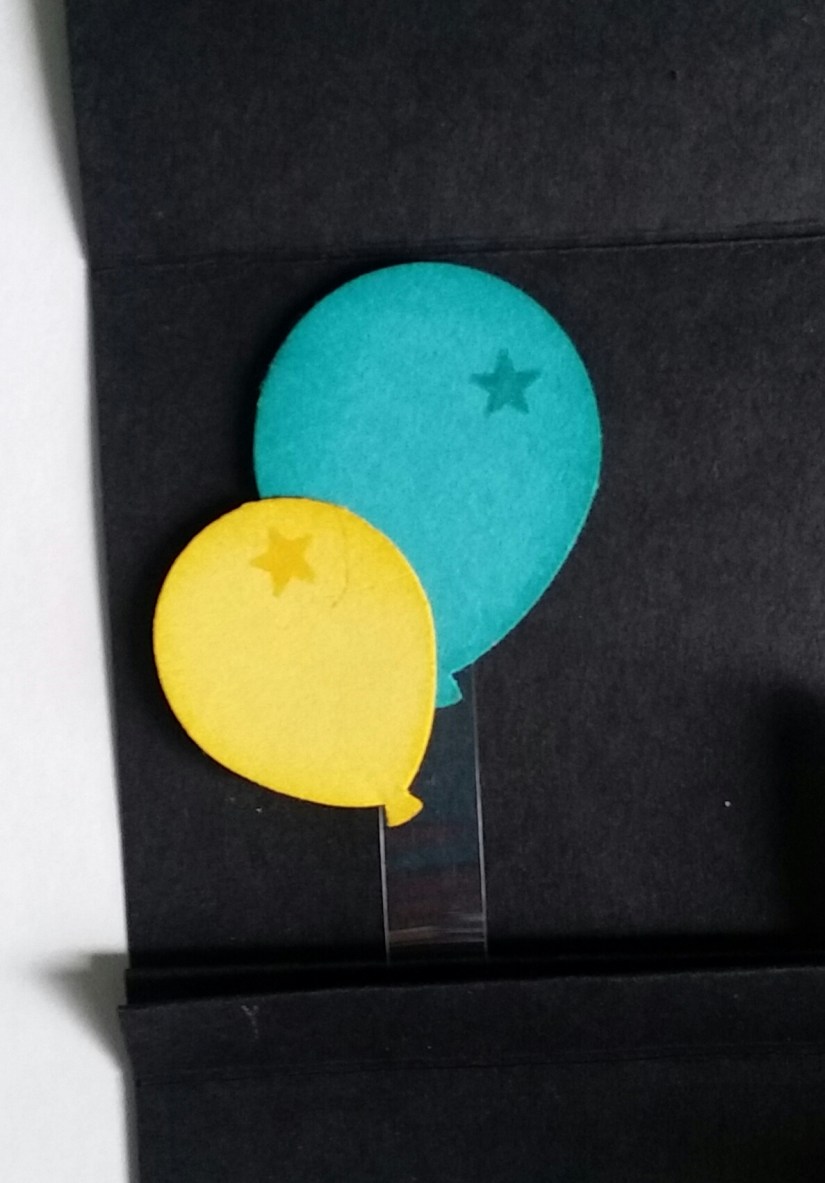
Balloons lying flat

Now I will tell you how to make your own.

POP UP EASEL CARD

NB: I have included metric and imperial measurements.  For those following the Imperial measurements can you please just check these.  Maybe do a test run first. I am just concerned with all the “16th” measurements if they are correct.  🙂

What you will need:

Cardstock for base 14.8cm x 29.8cm (5 7/8″ x 11  3/4″).

Designer Series Paper 14.4cm x 7.6cm (5 7/8″ x 3″)

Whisper White card (inside piece) 14.4cm x 6.6cm (5 7/8″ x 2  3/4″)

Scrap card for your suspended images (Of your choice.  I have chosen balloons for this one).

Acetate strips 1 cm x 4-5cm (1/4″ x 1  1/2″-2″) You will trim these as you make the card depending on where you want your images to sit.

To construct your Easel:

1. On the long side score your card at 2cm, 3cm, 4cm, 5cm, 6cm, 13.8cm and 21.6cm.

(3/4″, 1  3/16″, 1  9/16″, 2″, 2  3/8″, 5  7/16″ and 8 1/2″)  – Please check the measurements.

2. Fold on all the score lines starting as I have shown in the photo in a concertina fashion creating a “M” shape at the beginning and then after folding it as a Valley fold on the next 2 score lines. (ie folding it up towards you). I haven’t shown those folded in this photo.
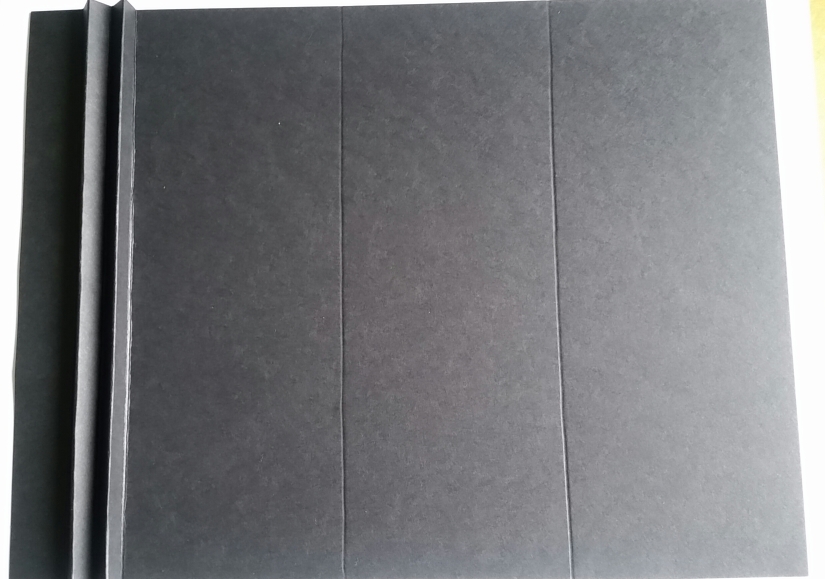
scored card

3. On the back of the card, place adhesive behind each side of “peak” that is formed. in the “M”. Adhere these together.  Check the photo below. (sorry if it is a little unclear).    This is it turned back to the correct side of the card.  It now becomes more a “V” shape which will be your crease for your acetate strips.
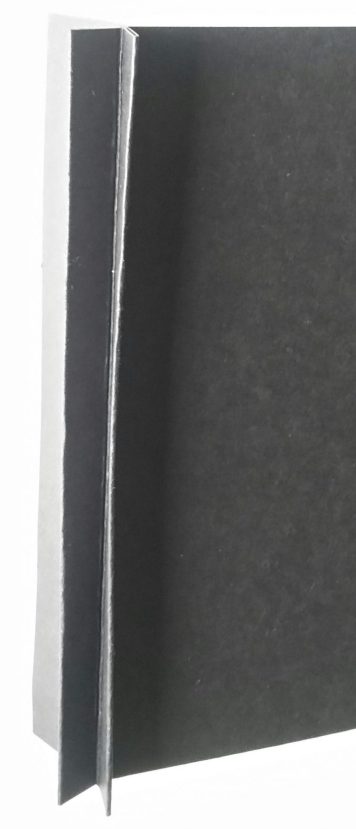
folded piece

4. After you have stamped and punched your images adhere them to the acetate strips. I used Fast Fuse to adhere them but you could use glue dots or other tape. I punched 2 balloons so adhered one to the back and one to the front of the acetate strip. Check the length of the acetate strip with the image to see if it is the right length BEFORE you adhere them in. 🙂 Trim the strip if necessary remembering you want to make sure they fit below the score line as I described above.

Place your adhesive (Fast Fuse or tape) along one edge inside the crease and adhere the acetate strips in place. Once in place then adhere the crease together. See the photo below.
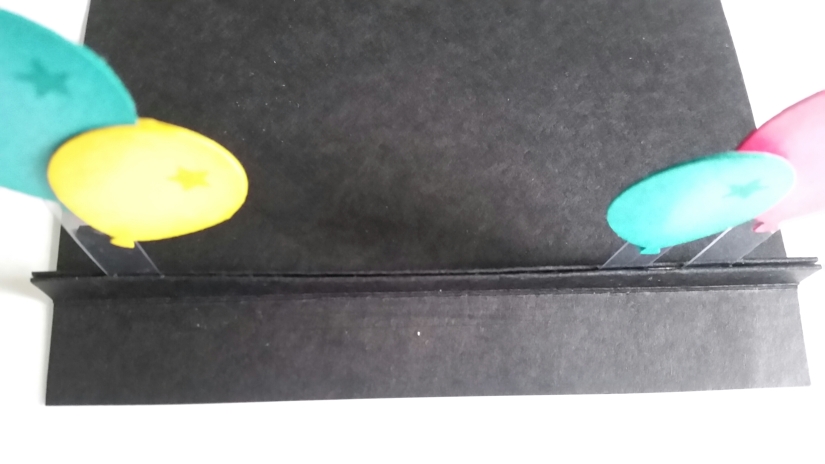
Balloons suspended

5. Now you can create the front and the inside as you like.  I adhered the Designer Series Paper piece on the front.  The Whisper White piece I stamped and adhered inside.

+++

I hope you can follow this.  Perhaps I need to start making videos. 🙂  If you have any questions please don’t hesitate to ask me.

Jenny