
I had a little time yesterday to play along with the Colour Inkspirations Challenge for this week.
#CI38 colours were Powder Pink, Berry Burst, Gray Granite, Whisper White and Basic Black.
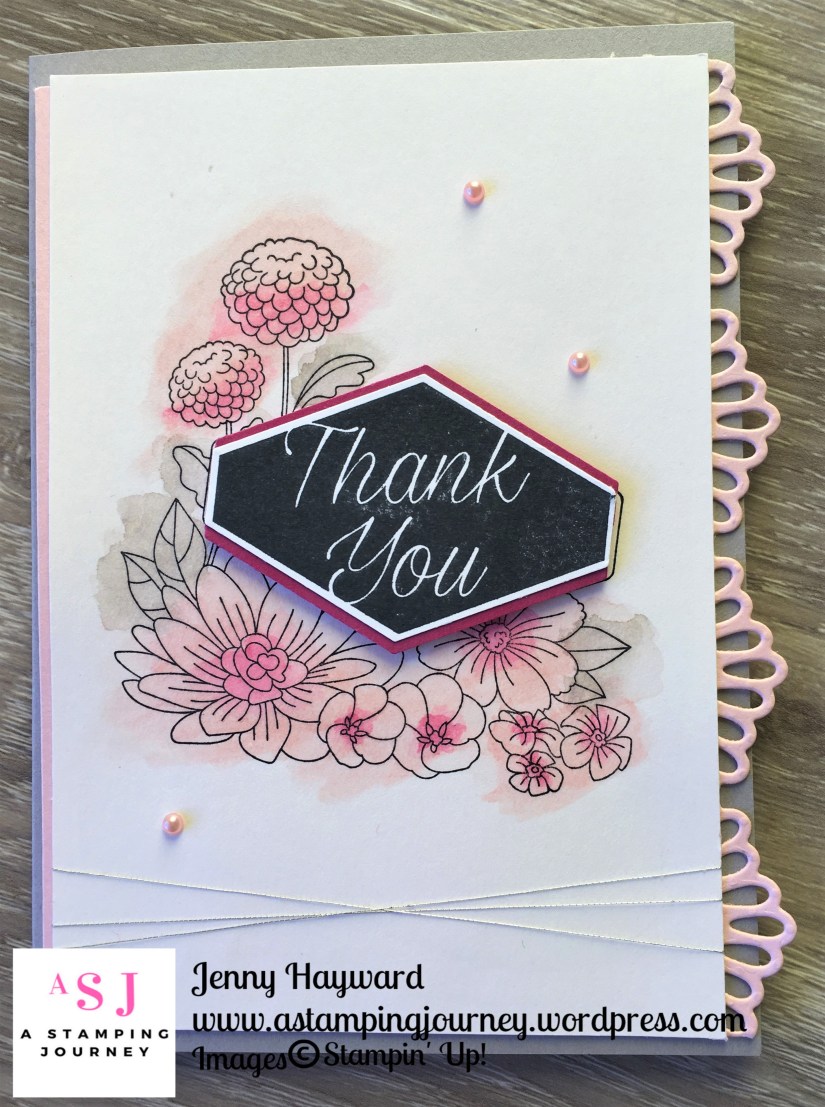
I had been using the Accented Blooms stamp set the last few days, which I will show you those cards later on. Since that set was out I thought I would use that. I think the soft muted colours would work well with a little watercolouring on flowers.
Here is my card.
I came to the conclusion this week that I am not a fan of colouring. So to colour this for the challenge was a little surprise. But I think a little freestyle watercolouring can work well. It doesn’t matter if you go out of the lines. 🙂
I used the Aquapainter and Inkpads to watercolour this. TIP: To watercolour any image I suggest several washes of colour if you want to build up the colour. Then allowing it to dry in between. For this card I lightly washed sections with the Powder Pink and then allowed it to dry. It only takes a few minutes. Wash over the areas with the Gray Granite. Then wash over again in the areas with the Powder Pink. I did that 3 times with the Powder Pink as it is such a pale colour. When it was all dry I washed over the centres of the flowers with the Berry Burst ink. I allowed it to dry before washing again with the Berry Burst. It is a time consuming process but I think worth it.
The lovely delicate edge is cut from the Delicate Lace Edgelits.
The sentiment is stamped in Black and punched with the Tailor Tag Punch. I punched another piece from Berry Burst card. Cut that piece in half horizontally then could layer it underneath the stamped piece so you see the little pink edge peeking out. I finished with some Artisan Pearls and some Silver Thread wrapped around a few times.
Now to get this in to the Facebook group before the time is up tonight. You can head over to the group -> HERE and join in on the challenges. It’s a great way to extend your creativity.
Thanks for stopping by,
Jenny


