cards, Christmas, Online Exclusives, Stampin' Up!, Tutorials, Videos

WEEK 12 – 12 WEEKS OF CHRISTMAS WITH A SPECIAL TREAT BAG!

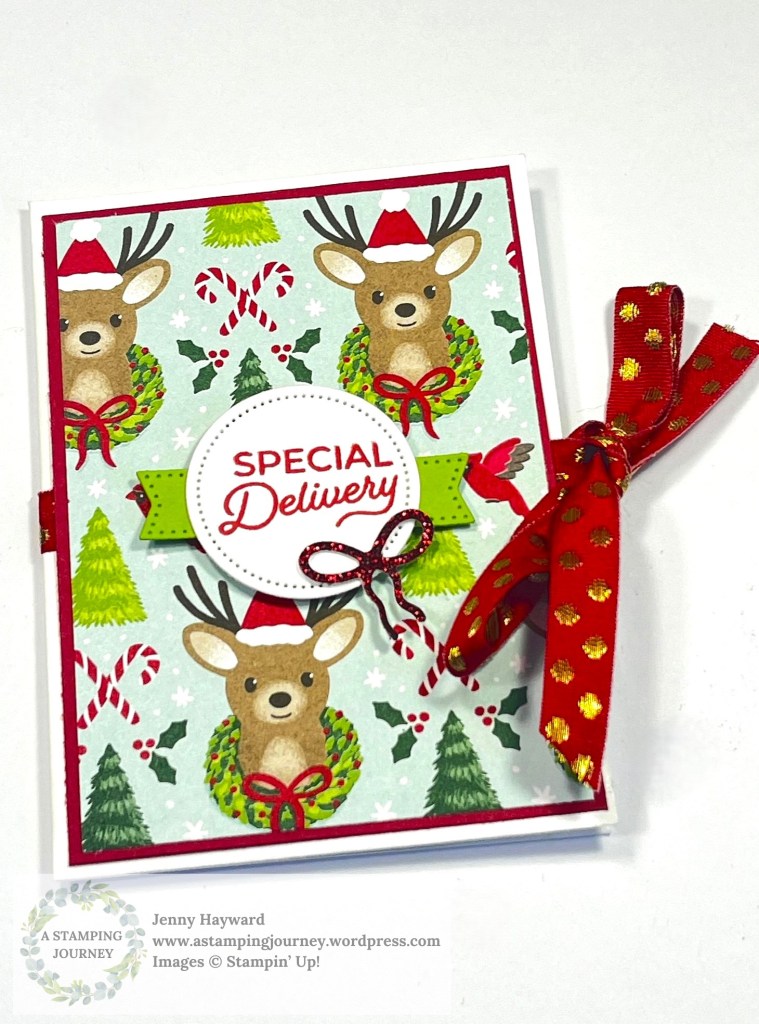
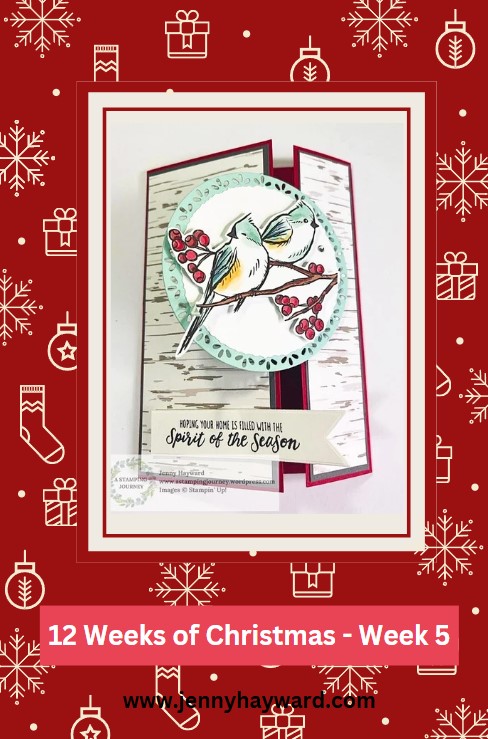
We have arrived to our last week for our 12 Weeks of Christmas Series. Our Week 12 project is a quick and easy Treat Bag.

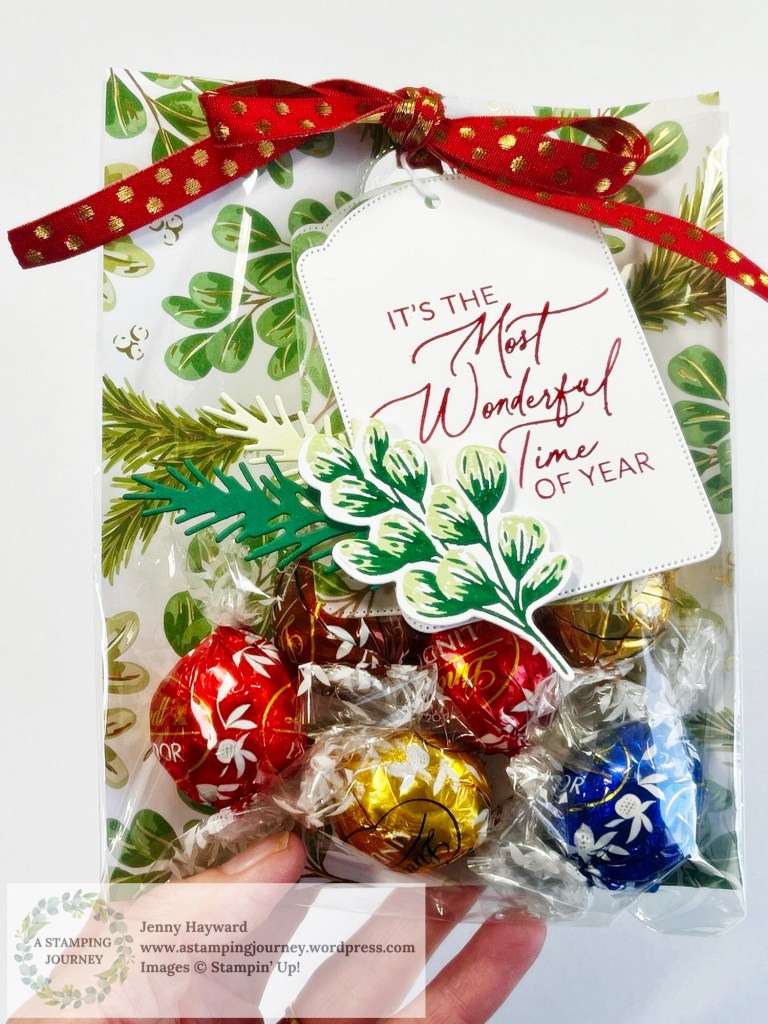
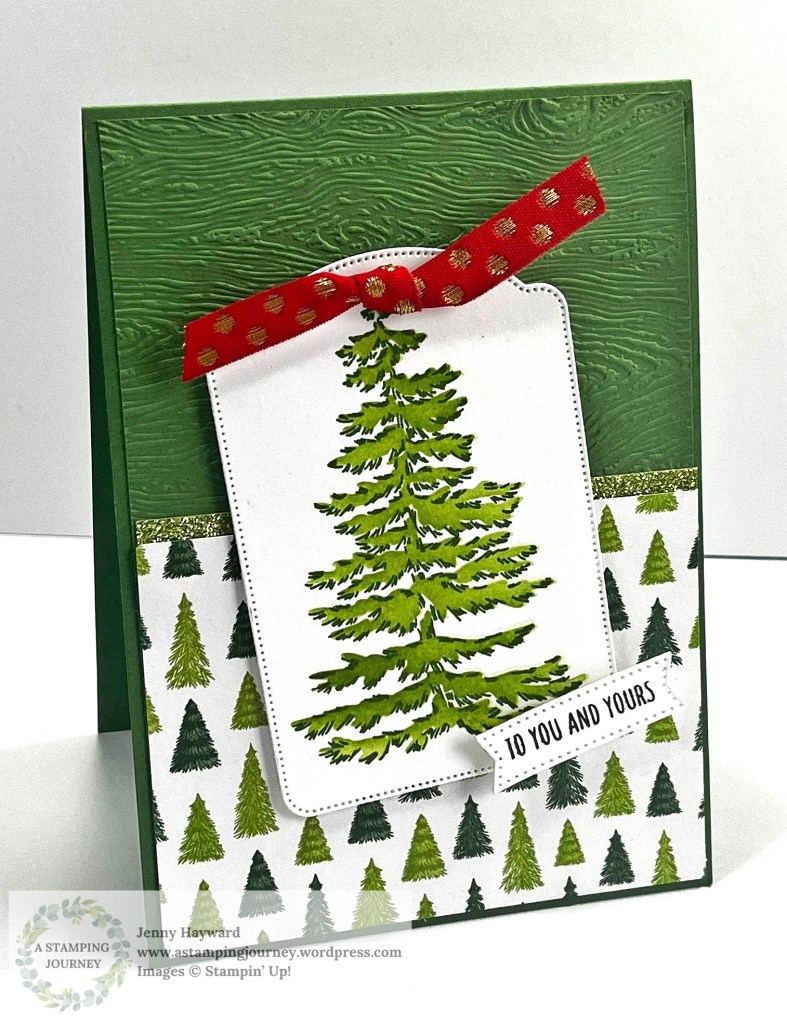
For this one I have used the Green and Gold Specialty Designer Series Paper.

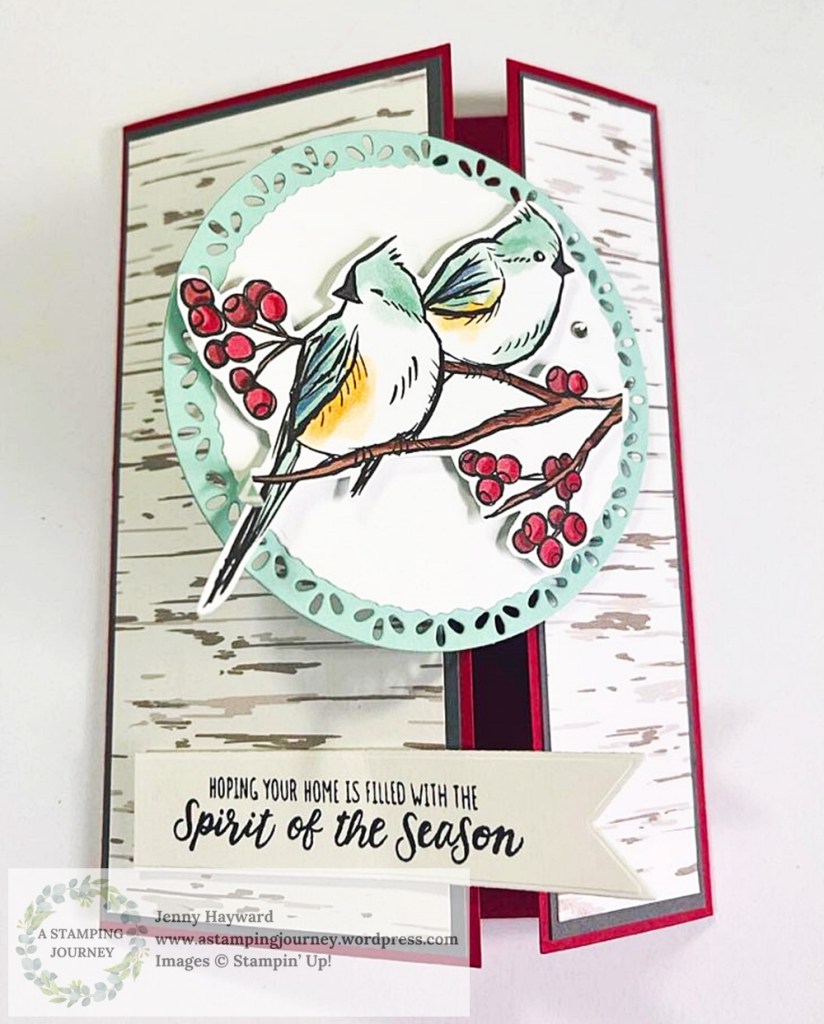
Here’s a close-up of the tag.

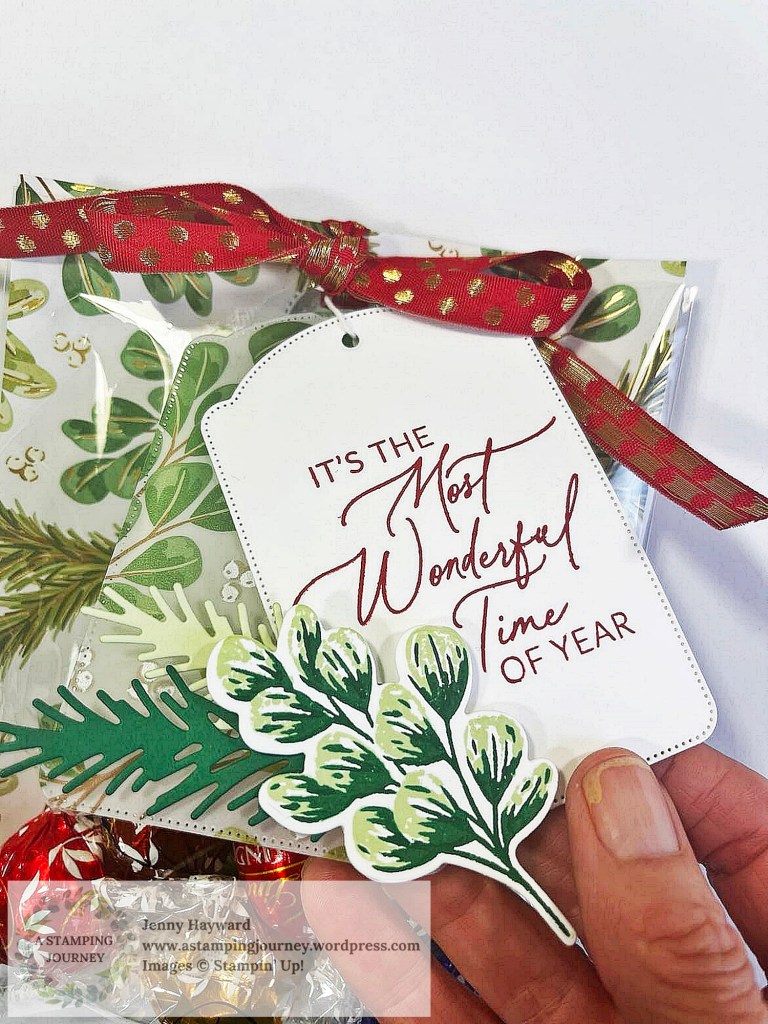
A tag was diecut from White card but also from the Graceful Greenery Vellum. I used the Greetings of the Season stamps and dies. Add a stamped leaf from the Golden Greenery stamps and dies and then also diecut leaves. One from Shaded Spruce and the other from Soft Sea Foam card.

It’s nice to dress up some chocolates in a cute bag. All you need is a clear plastic or Cello bag and some pretty paper. I share some tips in how to create them in the video below.

I hope you have enjoyed the projects through our 12 Weeks of Christmas Series and that they have inspired you. Some would work for any occasion so file them away for upcoming ideas.

Happy Christmas Crafting,

Jenny

cards, Christmas, Techniques, Tutorials, Videos

WEEK 10 – 12 WEEKS OF CHRISTMAS – INKED EMBOSSED TECHNIQUE!

Well this is an Oops!

Recently I posted our Week 11 project for 12 Weeks of Christmas – and I just realized Week 10 project was still sitting in the Drafts Folder! SO you all missed out. So sorry. So we might be out of order but here is our Week 10 project. Be ready for our last project later this week.

Week 10 of our 12 Weeks of Christmas Series. This week’s card uses a fun technique to add extra detail. It’s the Partial Inked, Embossed Technique.

This is the card.

I have used the Distressed Tile Embossing Folder. The technique is inking part of the Embossing Folder and embossing the card. You can follow along in the video below.

The paper strip is from the A little Bit Festive Specialty Designer Series Paper. The Holly is from the Reindeer Fun Dies and the sentiment from the Reindeer Fun Stamp Set.

We are coming to the end of the Christmas series. Hope they have inspired you. Check back on my blog for the past ones if you missed them.

Happy Christmas Crafting,

Jenny

Need any products for your crafting and you are in Australia? You can head to my store -> HERE. Please use the Host Code: 7BBQ9BKK

OR contact me directly.

cards, Catalogues, Christmas, Stampin' Up!

FROSTED FOREST FOR WEEK 7 – 12 WEEKS OF CHRISTMAS

It’s Week 7 for our 12 Weeks of Christmas series.

This week’s card is using the Frosted Forest stamps and masks. You could use this idea with any tree stamp.

This is a Portrait Fold card. That’s what I’m calling it anyway. I’m not sure if it has a particular name. The fold is at the top of the card.

You can follow along with the video below. The full tutorial will be sent out in next week’s newsletter if you are a subscriber. If not check the side bar on my blog.

I have used the Reindeer Days Designer Series Paper and some sparkly Glimmer Paper.

I used just one mask in the Frosted Forest mask set. You can add other layers of ink if you would like to.

This is the card.

Embossing the card mat adds some extra texture. I have used the Timber 3D Embossing Folder on this one.

Hope you enjoy it.

Happy Crafting,

Jenny

You can PIN it Now to Pinterest to come back to later.

Need to order and you are in Australia? I would love to help you.

You can shop in my store Online -> HERE. OR contact me directly.

3D projects, cards, Christmas

GIFT CARD HOLDER WITH AN ENVELOPE FOR WEEK 6 – 12 WEEKS OF CHRISTMAS!

It’s Week 6 of our 12 Weeks of Christmas Series. Can you believe we are half-way through already!

This week’s project is a Gift Card Holder. It is so easy to create. It’s made with a standard White Envelope, some festive paper and matching ribbon.

You can see how to make one in the video below. Gift Cards are a popular gift for Christmas so I hope you get to make one for yourself.

This is the Gift Card I created in the video. I will share some other versions in a later post.

I decorated this one with the Reindeer Days Designer Series Paper. The words on the front are from the Trucking Along Stamp Set. The inside is one from the Greetings of the Season Stamp Set.

You can PIN this now on Pinterest to come back to.

If you have missed out on past projects from the 12 Weeks of Christmas then be sure to head back some posts on my blog here Or head to Youtube. They are all on my Channel.

If you would like the written tutorial for these projects then be sure to subscribe to my newsletters. I send out a free tutorial each week. You can find the link to subscribe in the right hand column on my blog.

Have fun creating,

Jenny

Do you need supplies and you are in Australia? I would love to serve you.

You can head to my store -> HERE. Please use the Host Code: EXSTTBB6 Or contact me directly.

cards, Christmas, Stampin' Up!, Techniques, Videos

OFF-SET GATEFOLD CARD FOR WEEK 5 – 12 WEEKS OF CHRISTMAS!

Week 5 of our 12 Weeks of Christmas series. This week it is an Off-Set Gatefold card. It’s just a little different to the regular Gatefold Cards.

For this card I have used the Nests of Winter Designer Series Paper. It’s so easy to cut one of the sweet birds from the paper to add to the front of your card. One of the Dies from the Winterly Tree Tops Dies is meant to diecut one of the birds but you can fussy-cut them out too.

Create this how you like to and it can be great for any occasion. Once you have the scoring worked out it’s very easy to create. You can follow along in the video.

The pretty diecut circle was cut with the Spotlight on Nature Dies. I do love this die set with the pretty edges. There are 3 different die edges in the set. See them more -> HERE.

The written tutorial will be sent out in next week’s newsletter. If you would like to receive them the link details are in the right hand side column.

This is the card created and you can see the inside.

Have fun creating one. And share it with me if you like to. I love to see other versions.

Happy Crafting,

Jenny

PIN it Now to come back to.

If you are in Australia and would love some supplies to create your projects I would love to serve you.

You can shop in my store -> HERE Please use the Host Code: EXSTTBB6

OR Contact me Directly.

cards, Catalogues, Christmas, Videos

CUTE DEER WITH THE REINDEER FUN FOR WEEK 3 OF 12 WEEKS OF CHRISTMAS

It’s Week 3 for our 12 Weeks of Christmas series.

This card is using the Reindeer Fun Stamps and Dies which are just the cutest. The card shows a great way of using different papers together too. I used the Reindeer Days Designer Series Paper.

This is the card.

You can follow along with the video.

You can PIN this image now to come back to later for your creating.

The tutorial to create the card will be sent out in next week’s newsletter. If you haven’t subscribed yet to my newsletter you can find the link in the right hand column on my blog.

In the video I showed a template for variations in colour with the deer head. I have that below so you can refer back to it later.

They can look so different using different colours. Don’t forget the Red Glimmer for a Rudolph nose.

Enjoy Week 3. Be sure to check back again soon. If you have missed the last 2 then head back some posts on my blog to catch them.

Happy Crafting,

Jenny

Need supplies for any of your projects? I would love to help you.

You can head to my store -> HERE. Please use the Host Code: JDH3D9KQ OR contact me directly.

cards, Catalogues, Christmas, Techniques, Videos

MERRIEST TREES FOR WEEK 2 OF 12 WEEKS OF CHRISTMAS

Week 2 for our 12 Weeks of Christmas series is half front with the Merriest Trees stamps and dies.

Here’s our card.

This is the inside.

If you don’t have the Merriest Trees another trees stamp would work just as easily I am sure.

Catch the video below. (If it doesn’t show in the email mail out please head directly to my blog to view it there).

You can PIN it now on Pinterest to come back to.

If you like the Merriest Trees I shared a video sometime ago with 5 Ways with the Merriest Trees. You can catch the blog post and the Video -> HERE.

Happy Christmas crafting,

Jenny

Need some crafting supplies and you are in Australia?

I would love to help you. Head Online to my store -> HERE. Please use the Host Code: JDH3D9KQ Or Contact me directly.

cards, Christmas, Videos

12 WEEKS OF CHRISTMAS – WEEK 1

We are on the countdown. It’s 12 Weeks of Christmas projects coming up.

I’m going to share some quick, fun projects with a video to help inspire you with your Christmas creating. Let’s kick off.

Week 1 with the Nests of Winter paper.

It is such gorgeous paper. You don’t need a lot more. Add some texture with the Dots from the Basics 3D Embossing Folders and some of the gorgeous Cherry Cobbler and Gold Ribbon. It’s very lush.

The Seasons Greetings is from the Greetings of the Seasons Stamps and Dies.

Follow along with the video below. (if it doesn’t show head directly to my blog to view it).

The full tutorial with measurements will be sent out in next weeks Newsletter. Are you a subscriber yet? Check the right hand tab on my blog.

This is the Nests of Winter Paper. You can see it more online -> HERE.

Now you can PIN it to come back to.

Be sure to check back next week for our Week 2.

Happy Crafting,

Jenny

Do you need some crafting supplies and you are in Australia? I would love to help you. You can contact me directly OR Head to my store Online -> HERE. Please use the Host Code: JDH3D9KQ

cards, Catalogues, Christmas, Stampin' Up!

12 WEEKS OF CHRISTMAS – WEEK 11 – ALL IS BRIGHT!

I know I have featured the All is Bright Designer Series Paper a lot recently for my 12 Weeks of Christmas.  But hey! it’s a fun, festive paper and so easy to make cards with and that is what 12 Weeks of Christmas is all about.

Here we have Week 11 of our 12 Week of Christmas series.

The card base is Garden Green. The red card mat was embossed with the Softly Falling Embossing Folder. The piece of All is Bright Designer Series paper which is about 7.5cm wide (3″) was cut to a banner ends with scissors.  The circle wreath from the Making Christmas Bright was stamped in Garden Green.  The sentiment was stamped in black and the Bright was stamped in Real Red.  I added some Red Rhinestones for dress up the wreath.  This circle wreath was adhered on to a scallop circle in Gold Foil cut with the Layering Circles Framelits.  Before adhering this piece to the card I added some Red Satin Ribbon hanging from behind it.  

I love the brightness of this card and the festive feel to it.  Very traditionally red and green Christmas don’t you think?

So next Friday is our last project for our 12 Weeks of Christmas.  That’s crazy! That means it’s almost Christmas.  I don’t know about you but I am totally not ready.  How about you?

Just a note on this stamp set too the Making Christmas Bright.  This stamp set is carrying over BUT not as a bundle.  If you like this stamp set then grab it now and get it at 10% off for the Bundle.  It is too late for this year’s projects but then you are all ready for next year.

You can grab it in my store now -> HERE at $61 for the bundle which includes the Making Christmas Bright stamp set and the Bulb Builder Punch.  Please use the Host Code: BZ6KB7SU or you can contact me directly.  

Thanks for visiting me,

Jenny

cards, Catalogues, Christmas, Stampin' Up!

12 WEEKS OF CHRISTMAS – WEEK 10 – STYLISH CHRISTMAS BRIDGE FOLD!

Week 10 for our 12 Weeks of Christmas series.  Can you believe it?  Have you been following along over the weeks?  I hope so.  It’s been fun but I can’t believe it’s coming to the end.

Today I have a Bridge Fold card for you.

I have used the set Stylish Christmas for this which can be found in the Annual Catalogue.  Don’t forget about those great Christmas sets that are in the Annual Catalogue.

The original design for the card was from Lyssa’s blog ->HERE.

I redesigned the card to make it larger and also converted it to Metric measurements.  I will add them below.

BRIDGE FOLD CARD

** These are for the metric measurements.  For Imperial measurements, head to Lyssa’s blog post in the link above. NB:  My version is taller at 14.8cm.  You would cut your card at 5 7/8″ instead of 4 1/4″ if you want that to be the same.  Each of your strips would be longer too at about 5 3/4″. Hope that makes sense.

Base card – 14.8cm x 20.3 cm.  Score at 3.2cm, 6.3cm, 14cm and 17.2cm

Front Strips – either card or co-ordinating paper. 2 pieces measuring 2.8cm x 14.4cm.

Centre Mat – 7.3cm x 14.4cm.

Centre piece – 6.9cm x 14cm.  Whisper White.

Front Strip – 3.2cm x 14cm.

Fold the Base card.  Adhere the strips to the front.  Stamp the centre piece as you like.  Adhere on to Centre mat and adhere to the Base card in the centre.

To adhere the Front strip: Fold the left hand edge to create a z-fold.  Adhere the strip in position on the left hand piece by lining it up to the left hand edge.  Leave the Right hand folds open, adhere the right hand edge of the strip on to the right hand edge.

Decorate the card as you would like.  Have fun with it.

Thanks for stopping by,

Jenny