cards, Christmas, Stampin' Up!, Techniques, Videos

OFF-SET GATEFOLD CARD FOR WEEK 5 – 12 WEEKS OF CHRISTMAS!

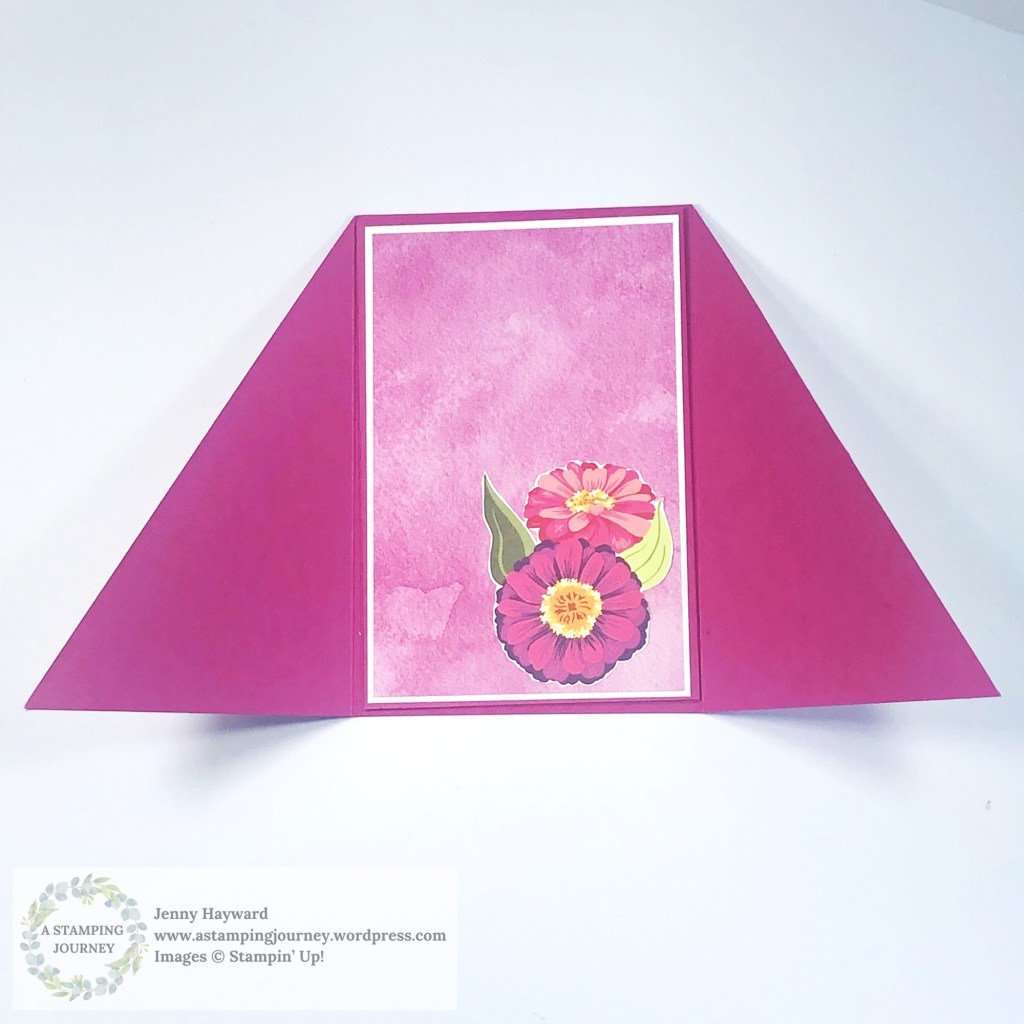
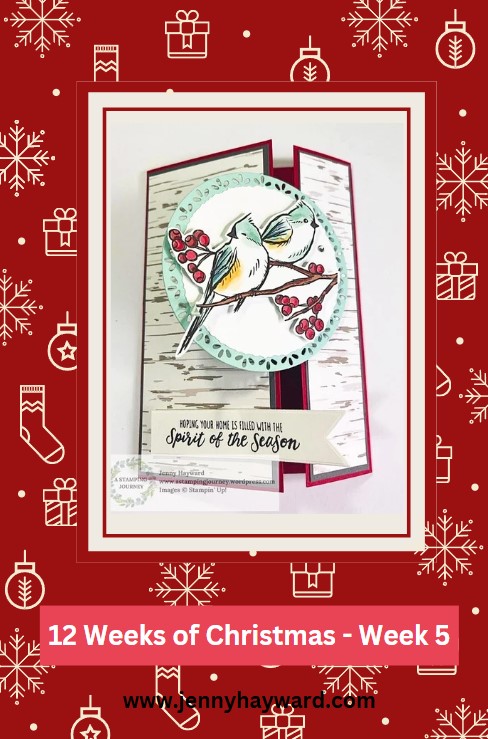
Week 5 of our 12 Weeks of Christmas series. This week it is an Off-Set Gatefold card. It’s just a little different to the regular Gatefold Cards.

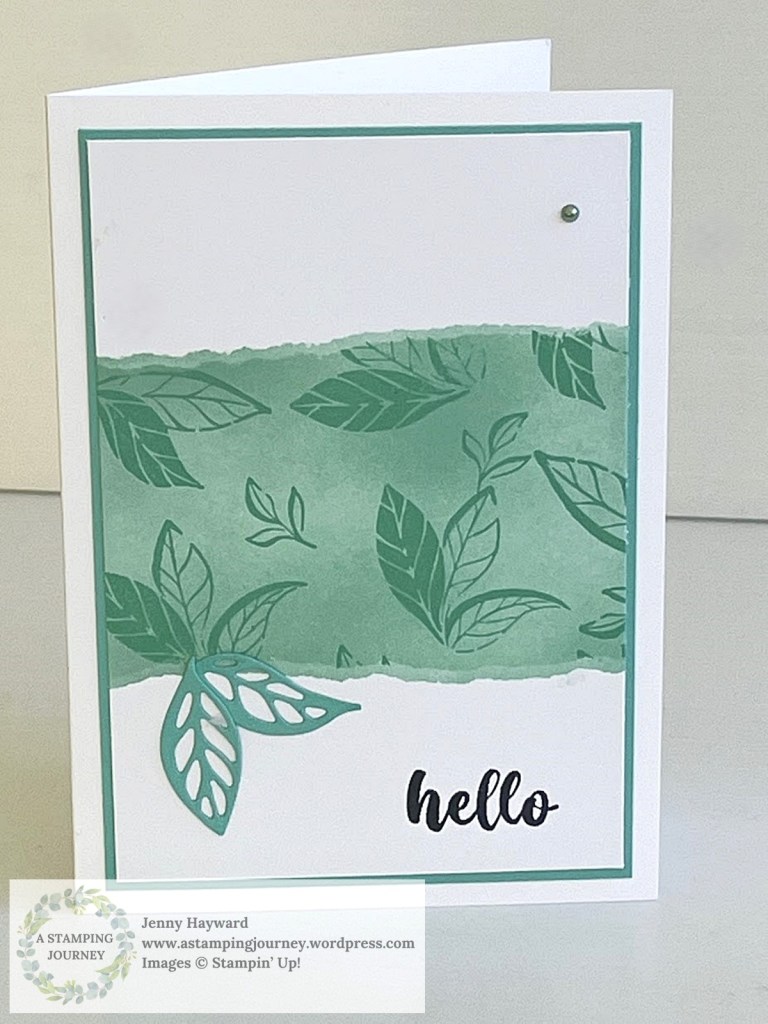
For this card I have used the Nests of Winter Designer Series Paper. It’s so easy to cut one of the sweet birds from the paper to add to the front of your card. One of the Dies from the Winterly Tree Tops Dies is meant to diecut one of the birds but you can fussy-cut them out too.

Create this how you like to and it can be great for any occasion. Once you have the scoring worked out it’s very easy to create. You can follow along in the video.

The pretty diecut circle was cut with the Spotlight on Nature Dies. I do love this die set with the pretty edges. There are 3 different die edges in the set. See them more -> HERE.

The written tutorial will be sent out in next week’s newsletter. If you would like to receive them the link details are in the right hand side column.

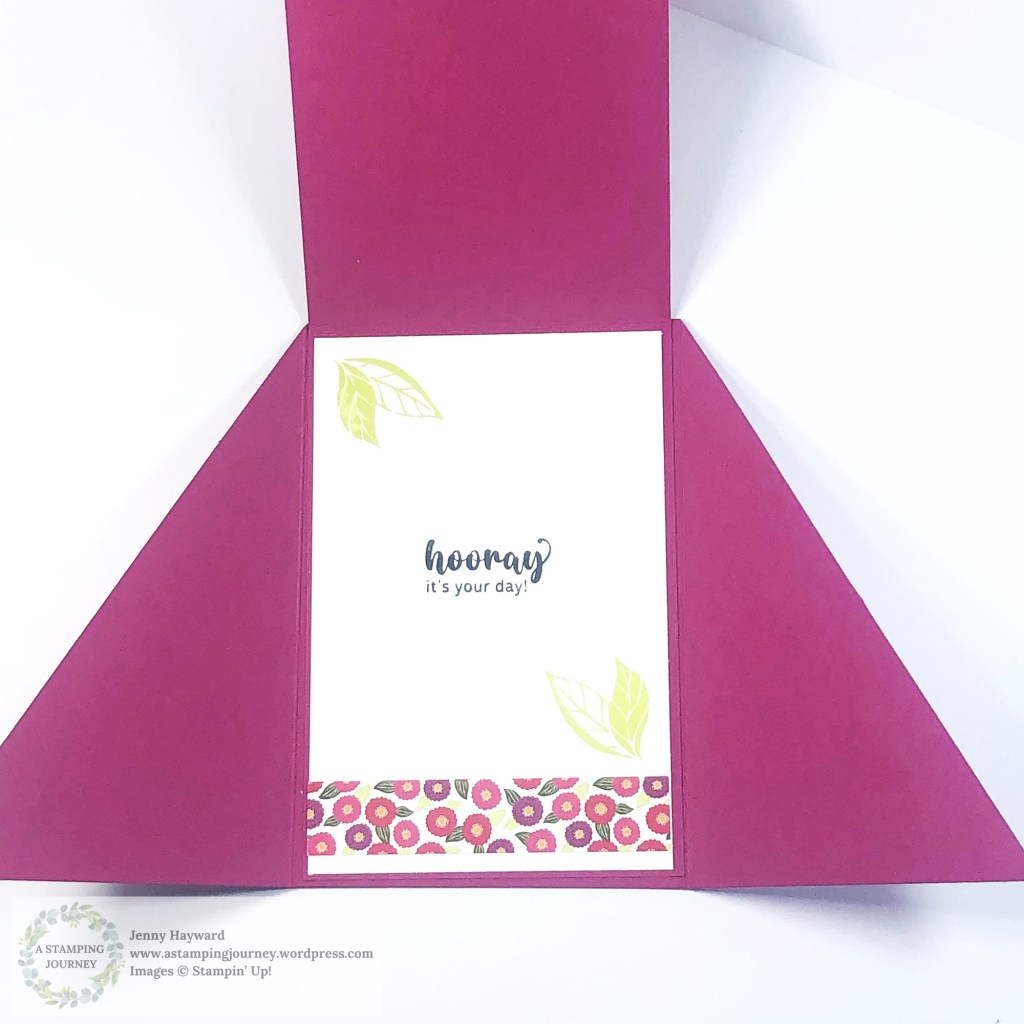
This is the card created and you can see the inside.

Have fun creating one. And share it with me if you like to. I love to see other versions.

Happy Crafting,

Jenny

PIN it Now to come back to.

If you are in Australia and would love some supplies to create your projects I would love to serve you.

You can shop in my store -> HERE Please use the Host Code: EXSTTBB6

OR Contact me Directly.

Stampin' Up!

A CUT AND FLIP CARD WITH REINDEER DAYS!

Did you catch last week’s video for our 12 Weeks of Christmas series?? It was created with the Cut and Flip Method. That’s what I call it anyway.

The card in the video was using the Season of Green and Gold Specialty Designer Series Paper. I created another version. This one is using the Reindeer Days Designer Series Paper.

Simply put the Cut and Flip Method is take a piece of pretty paper. Cutting it and then flipping one side over. So you see both sides of the paper. And it is cool too.

This is the card.

The sentiment is from Reindeer Fun Stamps and Dies. The tree was stamped in Garden Green and Granny Apple Green.

Don’t forget some sparkle with the Granny Apple Green Glimmer Paper.

You can check the video by heading back a post or two.

Have fun creating one.

Happy Crafting,

Jenny

Need some supplies for your crafting and you are in Australia? You can stop by my store -> HERE OR Contact me directly.

For orders over $75 receive a Tutorial Bundle of nearly 40 projects.

Online Exclusives

CUT AND FLIP FOR WEEK 4 – 12 WEEKS OF CHRISTMAS!

Back with Week 4 for our 12 Weeks of Christmas series.

This week we are looking at the Cut and Flip Method for our Christmas cards. This method can be a great one for making multiple cards at one time too. It’s very quick and easy.

You can just use this idea to make as a single card too.

You just need some gorgeous paper with co-ordinating patterns on each side of the paper. Watch the video below to find out how.

I have used the Season of Green and Gold Specialty Designer Series Paper on this one. And also used the Golden Greenery Stamps and Dies and the Greetings of the Season Stamps and Dies.

At the end of the video I share another version with different papers.

I will send out the measurements in next week’s Newsletter. If you would like the written version you can sign up for my free newsletters. You will see the link in the right hand column on my blog.

This is the card that was made.

Happy Christmas creating,

Jenny

You can PIN this now.

If you need some supplies and you are in Australia I would love to serve you.

You can stop by my Online store -> HERE to order. Please use the Host Code: JDH3D9KQ

Or Contact me Directly and I can assist you.

Have a large Wish List? It would be better value to join the Stampin’ Up! Community. Get a large number of products ticked off your list quickly and then get a discount each time you order after that for as long as you stay around. Find out more -> HERE.

cards, Catalogues, Christmas, Techniques, Videos

MERRIEST TREES FOR WEEK 2 OF 12 WEEKS OF CHRISTMAS

Week 2 for our 12 Weeks of Christmas series is half front with the Merriest Trees stamps and dies.

Here’s our card.

This is the inside.

If you don’t have the Merriest Trees another trees stamp would work just as easily I am sure.

Catch the video below. (If it doesn’t show in the email mail out please head directly to my blog to view it there).

You can PIN it now on Pinterest to come back to.

If you like the Merriest Trees I shared a video sometime ago with 5 Ways with the Merriest Trees. You can catch the blog post and the Video -> HERE.

Happy Christmas crafting,

Jenny

Need some crafting supplies and you are in Australia?

I would love to help you. Head Online to my store -> HERE. Please use the Host Code: JDH3D9KQ Or Contact me directly.

cards, Classes, Techniques, Tutorials

FAUX TEARING TECHNIQUE FUN!

Our last class was creating with the Faux Tearing Technique. It was a lot of fun looking back at this older technique. Have you tried it?

This was one of the cards we made. This one using the Irresistible Blooms Stamps and Dies.

It is very easy technique to do. All you need is Blending Brushes and ink and use any stamps you have. You can use scrap paper for the masks or use the Masking Paper or large Sticky Note Paper.

Tear your paper so it is at least as wide as your white card. Position that over your card at the top and bottom leaving a gap on the card in the centre section.

Blend over some ink on the white card building up your colour. Hold your paper firmly so it doesn’t move. I then moved the paper away from the inked edge just slightly and added some more ink for a light edge. Then return your masks to the original position and stamp over the images having some go off the edge of the masked area.

Finish your card as you like.

Are you game to try it?

Happy crafting,

Jenny

Need supplies for your next project and you are in Australia?

Head over to my store -> HERE. Or contact me directly. (at present I am away until the 12th of September so please email not phone as I won’t have the phone available).

cards, Catalogues, Stampin' Up!

SWEET SUNDAY WITH THE MUSICAL JAMBOREE STAMP SET!

It’s a cute sing, song with the Muscial Jamboree Stamp Set for Sweet Sunday.

Isn’t this character having such a great time singing his heart out??

Stampin' Up! Musical Jamboree Stamp Set

(Card created by Stampin’ Up! artists)

On the circle diecut with one from the Spotlight in Nature dies the image was stamped and coloured with the Stampin’ Blends. The clouds were first cut from the Hot Air Balloon Dies and then placed on the circle creating a mask. Then brush over the sky with some ink with the Blending Brushes.

On the Timber 3D Embossing Folder ink was swiped over the inside of the folder. You can swipe over with the Ink Pad or use the Brayer with ink. Then add your Balmy Blue card mat and run it through the machine. This adds an extra dimension to you card and highlights the embossed detail.

So enjoy a little sing along with this cutie for our Sweet Sunday. Have a great week ahead. I hope you escape to your craft space this week.

Happy Crafting,

Jenny

For your crafty supplies in Australia head to my store -> HERE. Or you can contact me directly and I can assist you.

cards, Stampin' Up!, Techniques, Tutorials

WEDNESDAY’S WOW! #164 – MASK A BACKGROUND ~

Wednesday’s WOW! #164 – Creating a masked background.

Here’s a technique for you to try sometime. You can create a masked frame and add colour to the centre area.

To do this use the Masking Paper to add strips around the edge of your card leaving a rectangle or square shape in the middle. Using the Brayer or the Blending Brushes roll (or brush) over your ink. Try different colours to create a coloured background.

Once you are done gently remove the masking paper and stamp over your images. Stamping them in black ink will really highlight them against the background. Then it is a matter of adding a simple greeting.

Hope you get to try this out in your crafting soon.

Happy Crafting,

Jenny

Bonus Days are happening now. Receive a $9 voucher now to redeem in August when your orders are over $90.

Need supplies and you are in Australia? Head to my store -> HERE. Please use the Host Code: JTRANKN3

Or contact me directly and I can help you with your order.

cards, Catalogues, Stampin' Up!, Techniques, Tutorials, Videos

DIAGONAL GATEFOLD CARD WITH A WRAPPER – PLUS VIDEO!

Have you made a Diagonal Gatefold Card before?

Here is the card.

You can make a wrapper to keep it closed up – or you can leave it off.

But then you open it…

Here’s the video to follow along with.

The written Tutorial will be sent out in my newsletter next week. Have you subscribed to my newsletter yet? I send out a Free Project Tutorial each week to keep you inspired. You can find the link for that in the right hand column. And there is a bonus Tutorial when you first subscribe.

Happy Crafting,

Jenny

Need some crafty supplies and you are in Australia? Head to my Online Store -> HERE.

Or contact me directly and I can help you out.

Don’t forget it’s Bonus Days this month.

Thanks for shopping with me.

cards, Catalogues, Challenges, Stampin' Up!, Techniques

BATIK STYLE WITH LEAF COLLECTION FOR CI 169

I had a little play over the weekend just for me. I checked out the Colour Inkspirations Challenge and created along with the colours for this week.

The CI 169 colours for this week were: Basic Beige, Blueberry Bushel, Misty Moonlight and Night of Navy.

I had the Leaf Collection stamp out from other creating so thought I would try these colours with this stamp. This is the result.

I used the Emboss Resist Technique and then sponged over the different colours in different areas over the white card. It gives it a Batik style to the look.

To do this technique – Ink up the stamp in Versamark. Press the stamp on to the card and pour over the Clear Embossing Powder. Heat to melt the powder. Then with the Blending Brushes rub over ink in different parts. You will get some ink on the Embossed areas but that’s ok. Wipe off the excess ink with a tissue.

Heat Embossing is one of my favourite techniques.

You can join in with this colour challenge. Head to the Facebook group there. If you are not already a member then request to join. Then add your projects too. There is a different colour challenge every 2 weeks.

Happy Crafting,

Jenny

Need to order supplies and you are in Australia. I would love to serve you. Head to my store -> HERE. Or contact me directly.

cards, Catalogues, Stampin' Up!, Techniques, Tutorials

WEDNESDAY’S WOW! #163 – TRY A WATERCOLOUR WASH ON YOUR IMAGES

Wednesday’s WOW! #163 – A Watercolour Wash on your images.

You might have tried Watercolour Washing over your card to create a background, but have you tried giving your stamped images a wash? It creates a really soft look.

Stamp your image on to Watercolour Paper. This one uses the Painted Lavender stamp set. Spritz over the image lightly with water. Allow to dry for a short time. Then stamp over the washed area again with the same image. You will get a mottled look with a wash in the background. It looks really lovely.

Hope you get to try it out. I have added this image below so you can save it to try later.

Happy Crafting,

Jenny

In Australia and need supplies? I would love to serve you.

Head to my store -> HERE. Please use the Host Code: JTRANKN3

OR contact me and I can help you out.

Don’t forget it’s Bonus Day. When you order over $90 in one order you will receive a $9 bonus voucher to redeem in August.