cards, Sale-A-Bration, Stampin' Up!, Videos

ZIG-ZAG FOLD WITH THE DELICATE DAHLIAS + VIDEO!

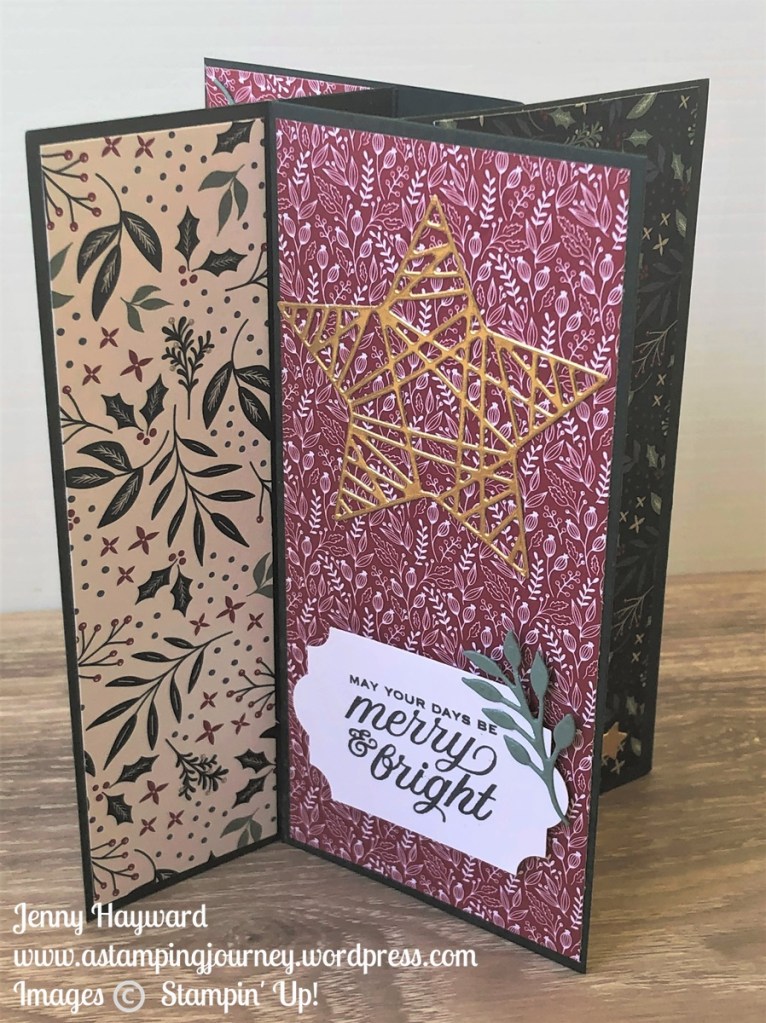
For today’s video I brought out an older card design that I haven’t made for sometime. I was reminded of it recently when I was going through some old cards.

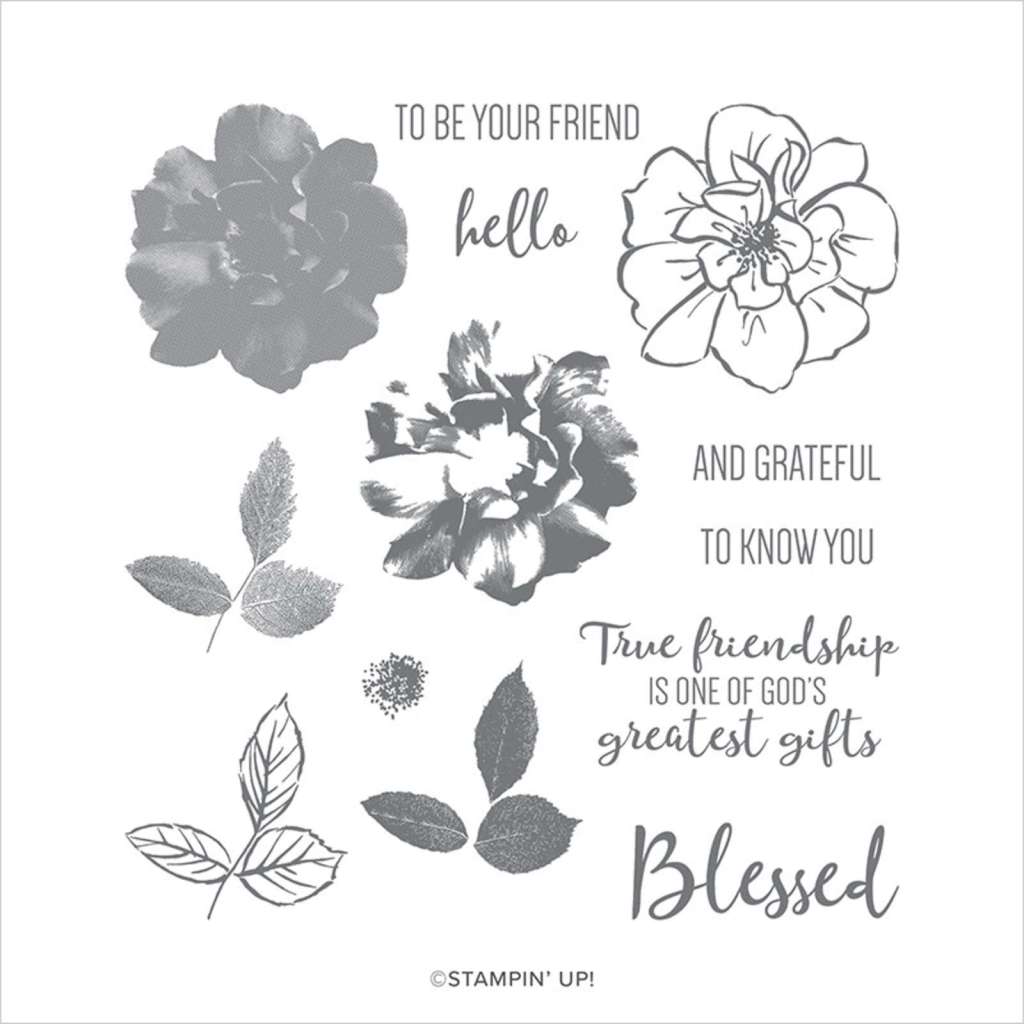
It’s a Zig-Zag style card and I have used the lovely Delicate Dahlias stamp set available as a Free choice for Sale-A-Bration with orders over $180 AUD. I have all the measurements below but check the video to see how to put it together.

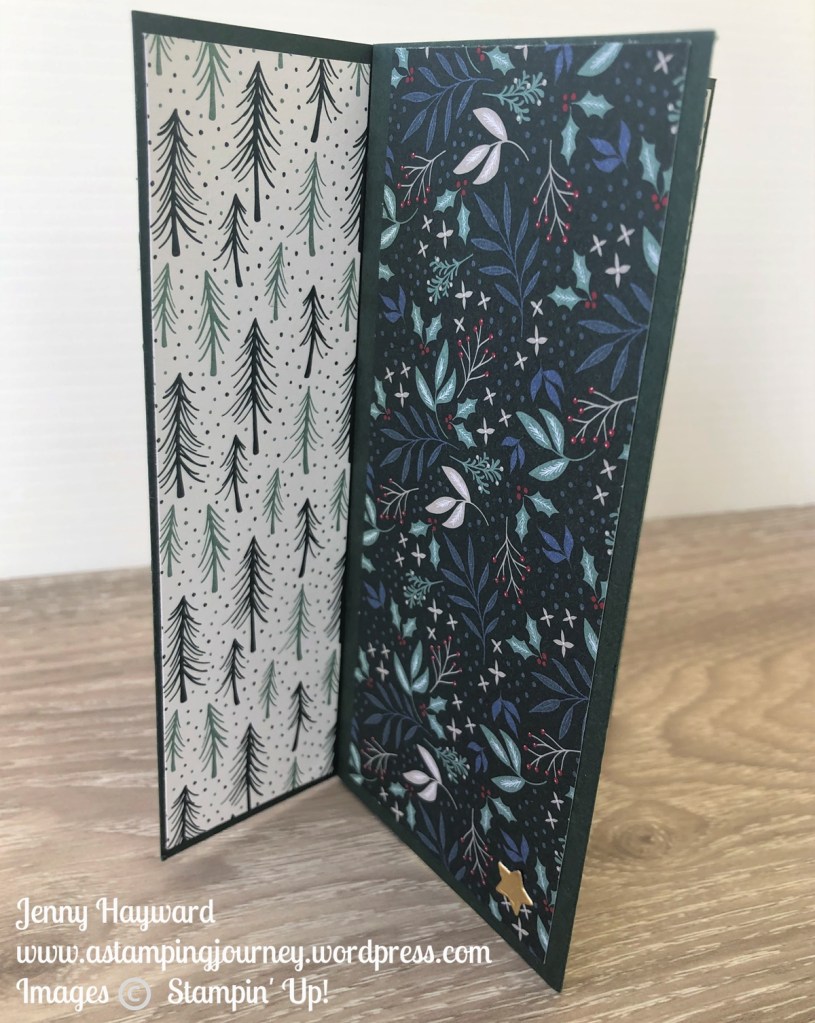
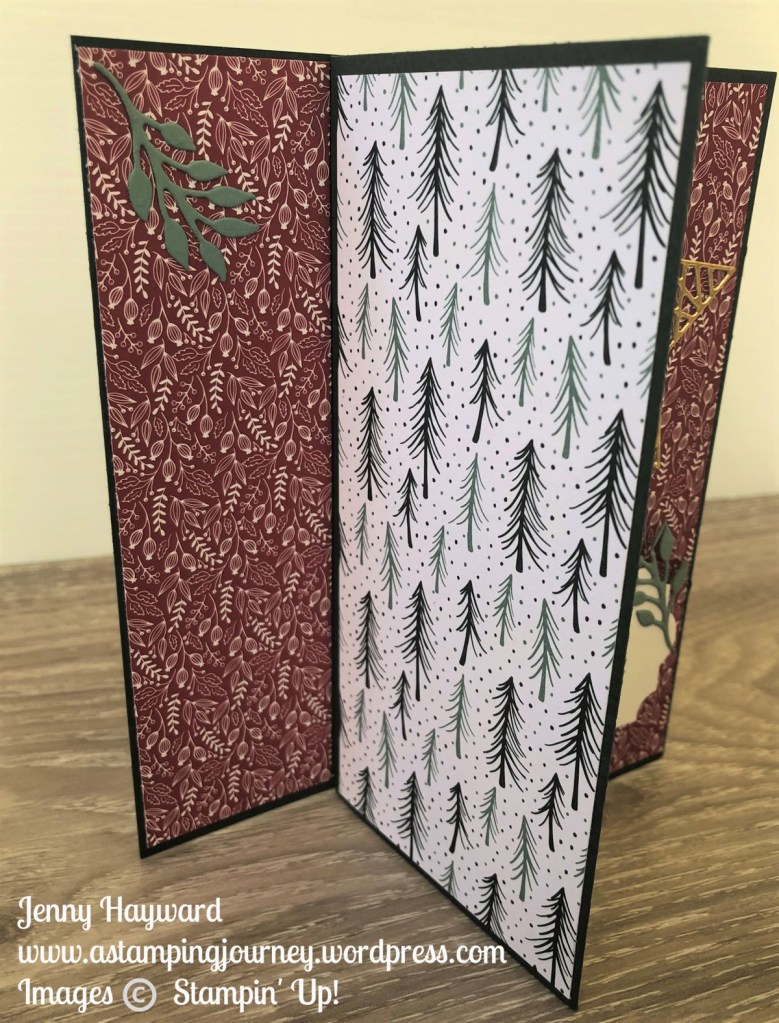
Here is the card from different angles.

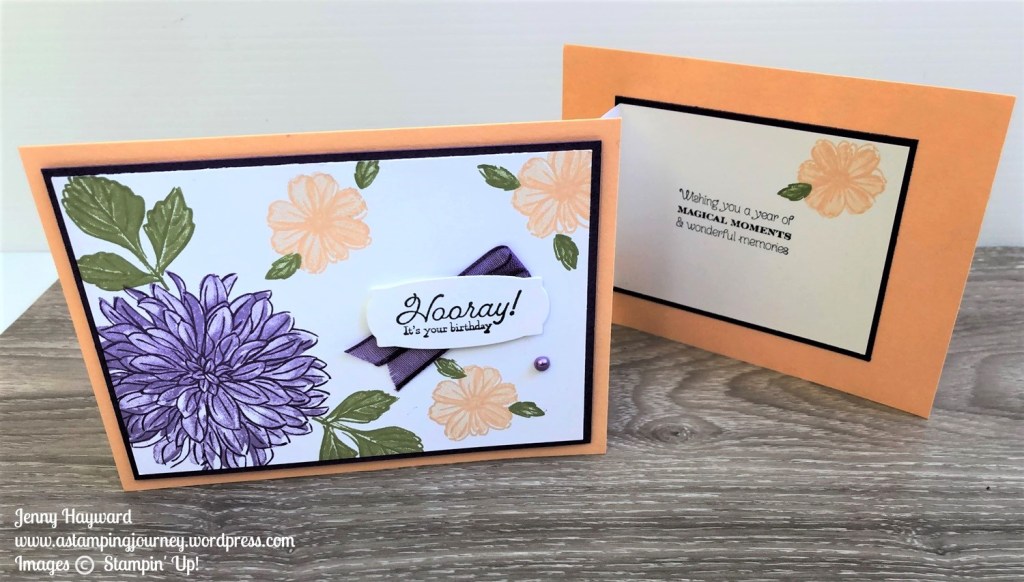
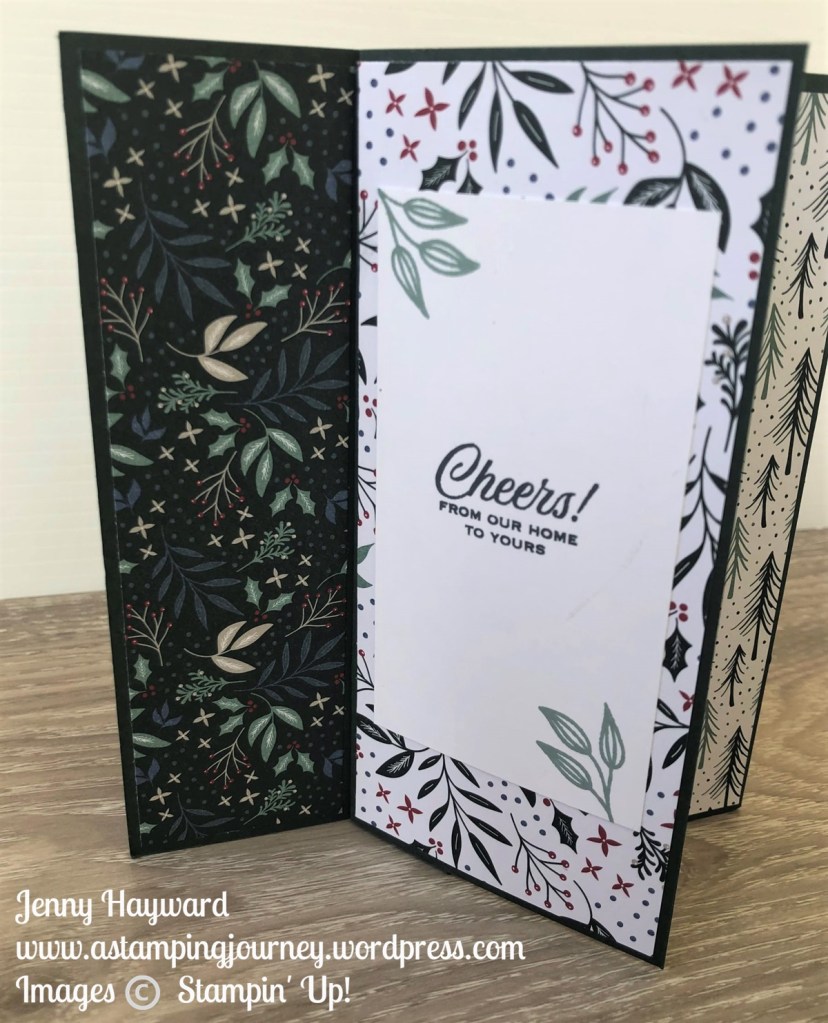
This is the back of the card.

Check the video out.

MEASUREMENTS TO CREATE YOUR OWN ZIG ZAG DAHLIA CARD

(Please check the imperial measurements but I am fairly certain these are correct for your card sizes)

Base: 2@ 10.5cm x 14.8cm 4 1/4″ x 5 1/2″

Mat (outside): 9.5cm x 13.8cm 4″ x 5 1/4″

White Card: 9.1cm x 13.4cm 3 7/8″ x 5 1/8″

Mat (inside): 2@ 7.5cm x 10.3cm 3 1/2″ x 3 5/8″

White card strip: 29.8cm x 7.1cm Score at 9.9cm and 19.8cm

10 1/2″ x 3 3/8″ Score at 3 1/2″ and 7″

***

I hope you get to create one. Let me know how it goes.

See the Delicate Dahlias in my store -> HERE.

In Australia? Shop in my store and your order will be sent directly to you. Please use the Host Code: SN2FPKZB OR contact me directly and I can help you with your order.

Happy Stamping,

Jenny

3D projects, cards, Videos

CREATE A PINWHEEL TOWER CARD + VIDEO!

For our Friday Flicks today I show you how to create a Pinwheel Tower Card.

You might have seen these around. I have been fascinated with them and wanted to have a go. They are so easy – and they look so cool. You will want to try one yourself.

I have used the Tidings of Christmas Designer Series Paper and the Tidings and Trimmings Bundle.

Here are each of the other panels.

It can easily fold flat. This particular size is too large for a standard envelope but you can create your own OR cut the panels 2cm (3/4″) thinner and it should work.

I have the video below for you or it is now on Youtube to view. I give the measurements for them in Metric and Imperial but don’t stress I have the measurements below.

PINWHEEL TOWER CARD MEASUREMENTS

There are a number of versions around. This one was based on Karen’s card -> HERE.

Tower Base – 17cm x 14.8cm 7″ x 6″ Scored at 2.5cm, 5cm, 7.5cm, 10cm (1″, 2″, 3″, 4″)

Panels – 3 @ 7cm x 14.8cm 3″ x 6″

Designer Series Paper Pieces – 4 @ 14.4cm x 6.6cm 5 3/4″ x 2 3/4″

– 4 @ 14.4cm x 4.1cm 5 3/4″ x 1 3/4″

Hope you get to make one yourself.

The Tidings of Christmas paper is one that is reduced at the moment in the Paper Sale. This finishes on Monday. So not long to save 15% on it.

You can find it in my store -> HERE.

Have a great day,

Jenny

cards, Stampin' Up!, Techniques, Videos

CELEBRATE SUNFLOWERS EMBOSS RESIST CARDS!

Last post I shared a video with the Emboss Resist Technique using the lovely Celebrate Sunflowers stamp set. I thought I would share the second card with you that I showed right at the end. Hope you caught that one.

Here they are.

The Daffodil Delight card was created in the video and I showed the unfinished Granny Apple Green/Bermuda Bay.

What one do you like the best? I would love to know. I have to say the Granny Apple Green one is quite striking.

If you missed the video head back to the last post and catch it or it is now on Youtube. (Be sure to subscribe to my Youtube channel so you can catch the videos I share).

I hope you have a go at it. Send me email with your version. I would love to see.

Happy Stamping,

Jenny

cards, Stampin' Up!, Techniques, Videos

EMBOSS RESIST WITH A WATERY SPLASH + VIDEO!

Our Friday Flicks Video today I’m sharing a card with the Emboss Resist Technique. You might have tried it but we are stepping it up.

I am using the Celebrate Sunflowers stamp set. Those large sunflowers is so striking with it.

The video is now on YouTube or you can watch it here. Be sure to stay to the end to see a different colour variation.

Here is the card I made from the video.

Any of the products are available to order in my store -> HERE.

Or you can contact me directly.

If you try this technique why don’t you share it with me. Email me at jghayward@yahoo.com

Have a great day,

Jenny

cards, Stampin' Up!, Techniques, Videos

RECESSED PANEL CARDS + A VIDEO!

For today’s video I wanted to create some Recessed Panel cards to share with you. In the video I show you how to make one version but I have some other variations to share too. Have you tried this technique? It’s a great way to showcase some beautiful papers.

Check the video. I have the other cards to share with you too.

This is the card created in the video. I think when I looked at it after I should have cut the top curve higher to showcase more of the paper. You just don’t think of that in the middle of filming. 🙂

This one is the same version using a different print of the Pansy Petals paper. I used the Basic Borders Dies to create the curves in both of them.

Instead of curves you could make straight cuts in the card. For a difference though cut the card vertically. This one uses the Hand-Penned paper.

What about adding the pretty papers on top of the recess. This is a great way of showing that beautiful paper. This one uses the Art Gallery Designer Series Paper. For this I cut 2 angle cuts in the bottom right corner of the paper and added strips of the Poppy Parade card behind to highlight it.

I hope you get to create these soon. Choose whatever way you like to.

If you are in Australia and need supplies to create your projects then you can stop by my store anytime -> HERE. Please use the Host Code: 7VNBHHYT

OR you can contact me directly on 0439 844574

Happy Stamping,

Jenny

Catalogues, Classes, Stampin' Up!, Videos

WEDNESDAY’S WOW! #122 – UNBOXING MY 2021 STAMPIN’ UP! CATALOGUE + VIDEO!

Wednesday’s WOW! #122. Let’s unbox my Preorder from the 2021 Stampin’ Up! Annual Catalogue.

EEK! I’m so excited for this new catalogue to begin.

Just a Disclaimer: This may be a small Preorder and there may have been 1 or 2 orders since. 😉

One of the great benefits of being a Demonstrator is seeing the Catalogue and getting hold of these products EARLY. It’s so exciting. (Have I said that already) 🙂

You can view the video now. (If you receive these blog posts as an email, the video may not show. Head to my blog directly or it’s now on Youtube).

The new catalogues are going out now.

Are you in Australia and need/want/desire a new Catalogue? Drop me an email at jghayward@yahoo.com or Phone/Text me on 0439844574.

I look forward to sharing lots with you soon,

Jenny

cards, Catalogues, Stampin' Up!

LAYERING WITH THE TO A WILD ROSE SET + VIDEO!

It’s Friday which means it’s video time with Friday Flicks. I couldn’t help but use the gorgeous To A Wild Rose bundle. I am so sad this is retiring. I love the layering you can achieve with the stamps and having the dies to match to get your different flowery effects.

This is today’s card.

You can catch me creating the card on video. (If you receive this blog post by email the video may not show so be sure to head to my blog by clicking on the title at the top or head to Youtube now).

Have you got the To A Wild Rose Bundle yet?

Be sure to grab it ASAP. It is going …

EDITED: I have just seen that the To A Wild Rose stamp set is now not available. 😦 The dies are still.

You can find the Wild Rose dies in my store now -> HERE.

In Australia? Shop at my store (link just above) Please use the Host Code – 3VUEXM63

OR Contact me directly.

Don’t forget – I’m giving away some Hand-made cards with your orders this month. Along with all the other little special things I send out.

Happy stamping,

Jenny

3D projects, Catalogues, Stampin' Up!, Videos

STAMPIN’ UP! BUTTERFLY BIJOU MINI TREAT BAG + VIDEO!

Today’s project and video is a little different. I have a cute Mini Treat Bag for you. It’s using the gorgeous Butterfly Bijou Designer Series Paper. I also have a couple of other versions in this design.

You can check the video below and I have the measurements further down so you can refer back to it.

Here is the Mini Treat Bag.

Notice the bottom edge? I diecut the “hatch” type die on it. Whether you stamp or diecut on this you will need to do this before you assemble the bag.

I added a detailed Diecut butterfly from the Brilliant Wings Dies set cut in Mint Macaron. I diecut a stitched circle with the Stitched Shapes Die between the butterfly and bag to help separate the 2 so the butterfly doesn’t get lost on the bag.

Here is the video. If you receive this post by email the video may not show so be sure to head to my blog to catch the video or heat to Youtube.

I made 2 other versions too. A sweet one with the Dandy Garden Suite. It’s a great way to use the dandelion paper. Also one with the Whale of A Time Designer Series Paper.

MEASUREMENTS TO MAKE YOUR OWN MINI TREAT BAG

Box Base: Card – 21cm x 7cm. Score on the 21cm side at 7cm, 9.5cm, 16.5cm and 19cm.

Score on the 7cm side at 2.5cm

8 1/4″ x 2 3/4″ Score on the 8 1/4″ side at 2 3/4″, 3 3/4″, 6 1/2″ and 7 1/2″‘

Score on the 2 3/4″ side at 1″

Designer Series Paper – 2 pieces at 7.6cm x 12cm Score each piece at 7cm and 9.5cm

2 pieces at 3″ x 6″ Score at 2 3/4″ and 3 3/4″

In Australia? If you need any of these supplies then you can head to my store now -> HERE. Please use the Host Code: 4WESFNXP

Or you can contact me directly on 0439 844574

Thank you for choosing to shop with me.

Have a great day,

Jenny

cards, Catalogues, Stampin' Up!, Techniques, Videos

SINGLE STEP CARD WITH BUTTERFLY BRILLIANCE + VIDEO!

Today’s Friday Flicks is a Fun Fold creating a Single Step card. I couldn’t help but use the new Butterfly Brilliance bundle – Oh! and the gorgeous Butterfly Bijou Designer Series Paper.

I have made this fold before quite some time ago. It is still re-pinned so many times on Pinterest and many people head back to my blog to see it. I thought it would be good to freshen it up. You can see the original card -> HERE.

Check out the card. It is a bit hard to capture it in photos. It folds up easily to mail too.

Single Step Butterfly Bijou Card

I have the measurements for the card and all the different pieces further below. They are available in Metric and Imperial.

Here is the video which is now on Youtube. (Have you subscribed to my channel yet?)

If you are receiving this blog post update via email the video may not show. Click on the title above and it should take you to the blog post.

Here are the measurements.

SIDE STEP FUN FOLD CARD

** Cut card to 28cm x 10.5cm  (11″ x 4 1/4″)

On the long side score at 3.2cm, 6.3cm, 10.8cm 15.2cm and 21cm     (1 1/4″, 2 1/2″, 4 1/4″, 6″ and 8 1/4″)

For back panel piece: Cut card 10.5cm x 10.5cm (4 1/4″ x 4 1/4″)

** The mat pieces are:

Back mat piece – 10.1cm x 10.1cm (4 1/8″ x 4 1/8″) DSP piece 9.7cm x 9.7cm (4″ x 4″)

Middle mat piece – 10.1cm x 4.1cm (4 1/8″ x 1 5/8″) DSP piece 9.7cm x 3.7cm (4″ x 1 1/2″)

Front mat piece – 10.1cm x 2.8cm (4 1/8″ x 1 1/4″) DSP piece 9.7cm x 2.4cm (4″ x 1″)

** To fold the card:

With the narrowest scored section on the left end start folding it concertina style.  On the score lines fold into a mountain fold, then next one a valley fold, then a mountain fold, then a valley fold, then a mountain fold.

This is the folded piece from the previous project just to show you how it is folded.

I hope you get to make one of these fun cards. They really are super easy.

If you are in Australia and need any supplies for your creating, head over to my store -> HERE

Be sure to grab that Butterfly Bijou paper. This paper is only for a limited time.

Thanks for stopping by.

Have a great weekend,

Jenny

cards, Catalogues, Videos

FRIDAY FLICKS – 5 WAYS WITH PRETTY PAPER + VIDEO!

Today for our Video I have put together some ideas for you to drag out some of that stashed paper that you are storing up for a special occasion and actually use it. Friday Flicks is showing 5 Ways to use your Pretty Paper!

I will share the cards and general measurements below the video. If you are receiving this update by email and the video is not showing then head to the Blog Post or it is now on Youtube as well.

Have you subscribed to my Youtube Channel yet? Be sure too so you don’t miss out on any videos. Head -> Here.

Below is the Flower and Field Strips card that was featured in the video.

The measurements are below.

White Mat – 13.8cm x 9.5cm 5 x 3 3/4″

Strip 1 – 13.4cm x 4.3cm 4 7/8″ x 1 3/4″

Strip 2 – 13.4cm x 3cm 4 7/8″ x 1 1/8″

Strip 3 – 13.4cm x 1.5cm 4 7/8″ x 5/8″

Card 2. Turn and Flip (Inspired by a card by Klompen stampers)

The sizes for cutting can be any measurements. These are my suggestions.

Cut paper to 14.4cm x 10.1cm 5 3/8″ x 4 1/8″

Cut the paper at 7cm 3″

Turn anti-clockwise and cut each paper at 8.4cm approximately 4″. Flip over 2 of the pieces and adhere straight to the card front.

Card 3: Paper Blocks (Inspired by a card by Lisa Pretto)

Cut 2 pieces of paper. They can be the same piece but reverse one side – 1) 8cm x 9.5 3 1/8″ x 3 3/4″ 2) 8cm x 7cm 3 1/8″ x 2 3/4″

Card 4: Half piece

14.4cm x 10.1cm 5 3/8″ x 4 1/8″ Cut the piece in half and flip one.

Card 5: This works well with a large flower print.

Fussy cut the flowers leaving an edge around the flowers. Raise up off the card with Dimensionals. Use a different pattern print for the card front. TIP: Use vellum between the pieces to break the elements up.

5 Cards and there are so many other ways too which I will share soon.

Hope you like this video and ideas.

Have a great day,

Jenny

In Australia? I would love if you were to shop with me. Head to my store -> HERE.

Free papers with SAB