3D projects, Catalogues, Christmas, Stampin' Up!

12 WEEKS OF CHRISTMAS – WEEK 8 – PILLOW BOX CHRISTMAS!

Week 8 today for our 12 Weeks of Christmas series.  Are you enjoying these?  I would love to hear what you think.  I hope they are inspiring you. 🙂

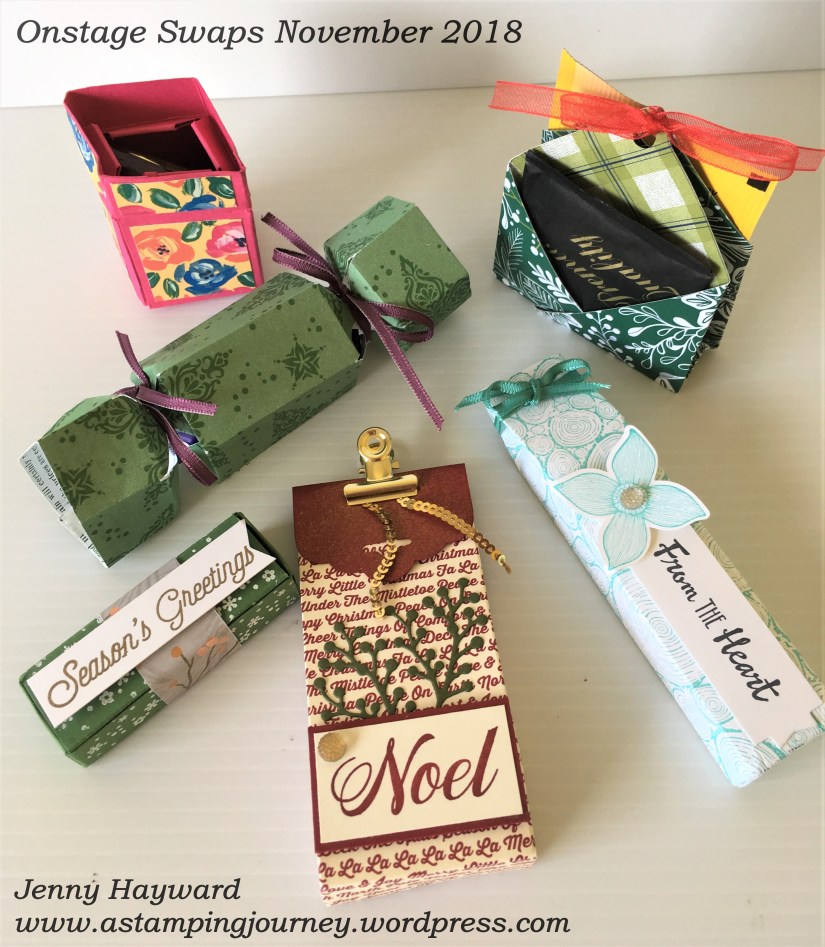
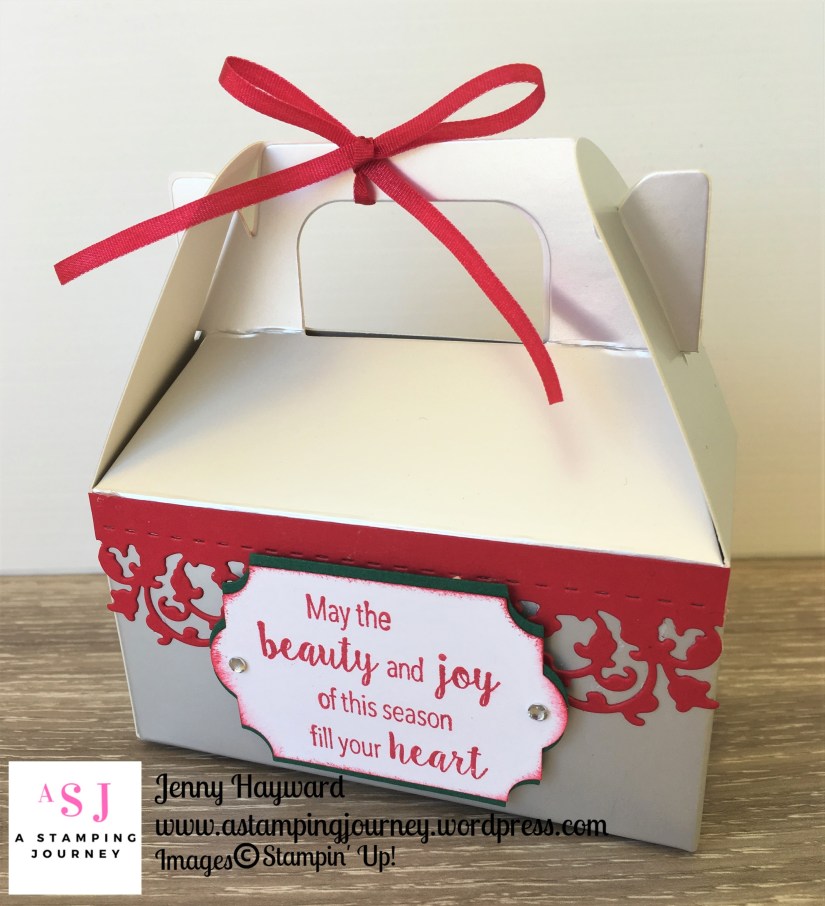
Today’s project is a gift box.  The Kraft Pillow Boxes make really quick gift packaging.  They are large enough to add a gift card and even throw in a few chocolates.

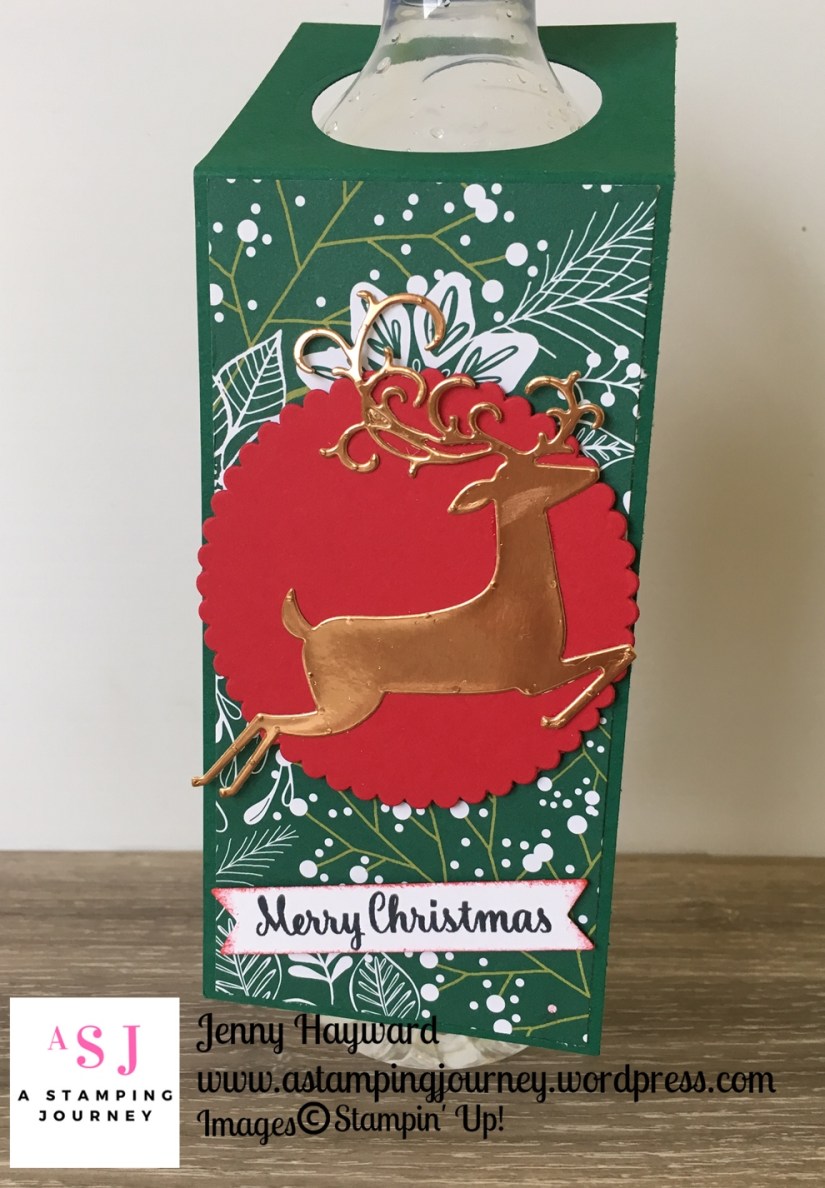
For this one I have use the Snow is Glistening Stamp set and the Snowfall Thinlits.  Not much longer to get these products if you want them.

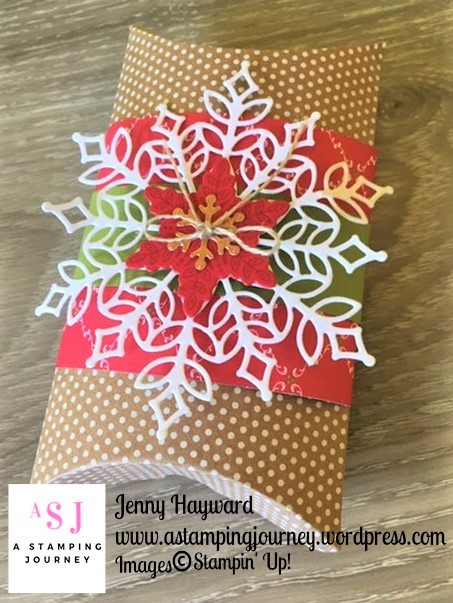
I made a wrap for the Pillow Box using the Under The Mistletoe Designer Series Paper.  Then added a strip of Old Olive cardstock around it.  TIP: Assemble the Pillow Box before you adhere the paper so you have the right dimensions with it being expanded.  The larger snowflake is cut with the White Velvet Paper, then a snowflake is stamped in Real Red on to Red card and cut with one of the snowflake Thinlits.  A tiny snowflake is cut from the Copper Foil.  I added a small bow from the Linen Thread. I just realised I edited this photo upside down as the bow doesn’t sit the right way.  Oops! Oh well! That’s OK right. 😉

Simple but very easy to do.  You can dress up any treat with these.

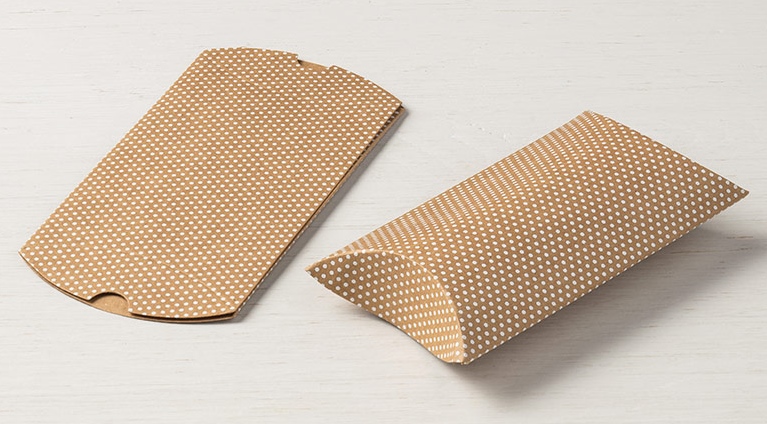
You can grab these Kraft Pillow Boxes in my store now -> HERE.  Unfortunately they are not one of the discounted items for the Extravaganza but they are still great value at $8.75 for 10 boxes.

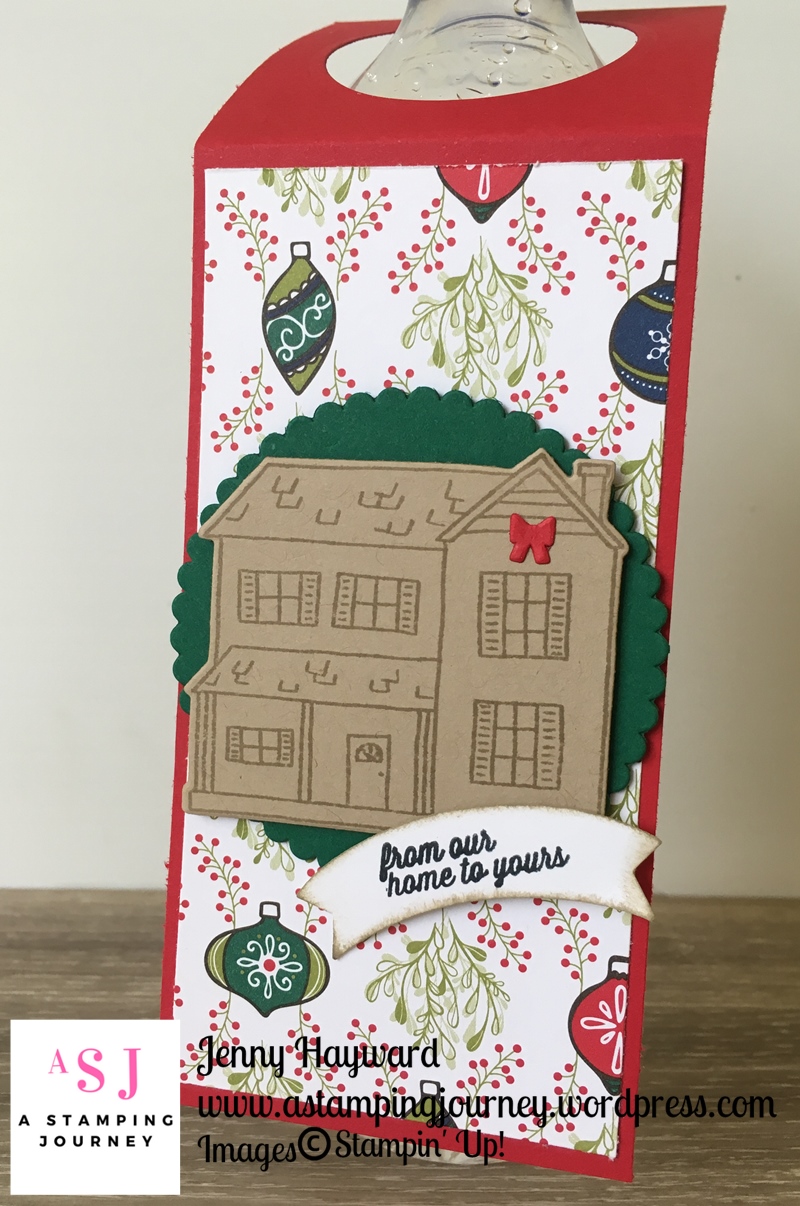
The Under The Mistletoe DSP is one of the papers at 10% off today and tomorrow for Extravaganza.  Grab your pack at $17.32 in my store -> HERE. I have used this paper a lot this Christmas. Make sure you grab some for your Christmas creating.

Thanks for stopping by today,

Jenny

Online Extravaganza is on now.  Check all the reduced papers and embellishments HERE but this ends on the 24th.


3D projects, cards, Catalogues, Christmas, Onstage, Stampin' Up!, swaps, Videos

WEDNESDAY’S WOW! #46 – CHECKING OUT MY ONSTAGE SWAPS!

Something different for you for Wednesday’s WOW! today for #46.  Since I have just returned from Onstage in Melbourne I thought you might like to see the swaps I received.  I could show you photos – and I will but I have a video for you as sometimes you can see them a little better and especially see what the 3D ones are actually like.

So here is the video below.  Further down I have the still photos for you if you want to PIN them.

Such a selection. Aren’t they just lovely?? Thank you everyone who swapped with me.  I hope these give you some inspiration for your projects.

I will show you the swap card that I created shortly.

Thanks for visiting,

Jenny


3D projects, cards, Christmas, Tutorials

12 WEEKS OF CHRISTMAS – WEEK 4 – A TAG FOR YOUR WINE!

Today for Week 4 of 12 Weeks of Christmas I have a cute tag for you.  Quite often we might give a bottle of wine to a workmate, a neighbour or to a friend when we visit for dinner.  Why not dress up the bottle and add a tag to it.  These are very quick to make and good to have on hand.  I have been making them for the Craft Fairs I do and they are very popular.

I actually have 2 tags to share with you today that I have made recently.

The first one is on Shaded Spruce card with some of the gorgeous Under The Mistletoe Designer Series Paper.  The deer from the Detailed Deer Thinlits is cut from Copper Foil.

This tag below is used the Farmhouse Christmas bundle.  I stamped the farmhouse in Crumb Cake on to Crumb Cake card and cut that out.  I kept it simple so I didn’t have to colour them in. 🙂  The paper is also from the Under The Mistletoe Designer Series Paper. 

Do you want to make them? They are very easy.  Let me tell you.

MAKE YOUR OWN WINE BOTTLE TAG

You can create these any size you like.  I will give you the measurements for these ones.

Metric: Cut your card 7cm x 21cm.  Score at 7cm.    Imperial: Cut your card   3″ x 8 1/2″. Score at 3″.

Use one of the smaller circle dies from the Layering Circle Framelits and cut a circle in the small square section at the top.

Decorate as you desire.  I cut the piece of Designer Series Paper slightly smaller than the lower length of the tag.

I made some of these tags a few years back.  If you want to see these versions then head to this post -> HERE.

Thanks for stopping by,

Jenny

3D projects, Catalogues, Christmas

GABLE CHRISTMAS BOX!

Here is a very quick treat box to make up for Christmas.  This one we made at my Christmas in July Class a while ago.  Yes I know that long ago and I am just sharing it now.  Sorry. 🙂

I thought you might like to see it.

These are using the Silver Gable Boxes in the Annual Catalogue.  You get 12 to a pack.  They also come White.

I diecut the red card with the Delicate Lace Edgelits. This was adhered to the front and the back of the box.   The sentiment is from the Stylish Christmas set and punch out with the Everyday Label Punch.  I punched one from Shaded Spruce too to add behind.  I tied around some of the Real Red Solid ribbon on the handle.  Too easy and they will fit a few sweet treats.

Hope you like it?  Thanks for looking.

Jenny

3D projects, cards, Catalogues, Christmas

FOLD FLAT CHRISTMAS CARD WITH DETAILED DEER!

Today’s card is one we made at our Team Stamp Day a few weeks back.  I am just getting to show you now.  This card has a few different names but I call it the Fold Flat card.

This is the front view.

Fold Flat _ Front view

This is it side on.  It can fold flat to be able to send it in an envelope.

Fold Front _ side view

With the paper, the check pattern one on the front is from the Festive Farmhouse Designer Series Paper from the Holiday Catalogue.  The “bauble” one is from the Under The Mistletoe Designer Series Paper from the Annual Catalogue.  The Detailed Deer Thinlits are cut from the Gold Glimmer Paper, Gold Foil and Sparkle Glimmer Paper. The sentiment is from the Flourish Filigree.

I can’t remember now who shared this card for our Shoebox Swap at the Team Stamp Day.  I am not sure where she got the tutorial to make this one but I have made them before and shared the tutorial for it on my blog some time ago.

Fold Flat Card Tutorial in Large and standard size: Head -> HERE.

I hope you like them.  They have been popular on my blog since I orginally posted it so now you have another version.

Thanks for stopping by.  Have a great weekend,

Jenny

3D projects, cards, Catalogues

PILLOW BOX CARD HOLDER!

I just received the Kraft Pillow Boxes recently. These are lovely little boxes for little treats. I will do that with them soon but I had different ideas for this little project.

I made a little pocket with a matching note card and envelope using the Narrow Note Cards and Envelopes.

This is a great size to give a little note to someone as a pick-me-up or a Thanks.  Add a chocolate treat or even a Gift Card.

To make these little pockets, simply cut the top off the Pillow Box just under the curved score line.  Then assemble the Pillow Box.  Decorate it as you like after it is assembled.

To decorate mine, I added a wide strip of the Share What You Love Specialty Designer Series Paper and then a narrower strip over the top.  I wrapped around some Rich Razzleberry Velvet Ribbon and adhered a bow with a Glue Dot.  The sentiment from the Love What You Do stamp set was stamped in Rich Razzleberry and then I cut around the ‘friend’ word with scissors.  That was raised up with Dimensionals.

The Narrow Note Card was stamped with the flowers in Memento Black and then “filled” with one of the small “dot” type stamps in Rich Razzleberry.  I added some Old Olive leaves.  Of course, finished off with a Linen Thread bow and a Pearl from the Adhesive Artisan Pearls. The envelope was stamped with a matching flower.

These are so quick to make.  I think I need to make some more so I can have some on hand to give out.  How will you decorate yours?

Thanks for stopping by.

Catch you again soon,

Jenny


3D projects, Stampin' Up!, Tutorials

DRESS UP YOUR CARDS WITH AN ENVELOPE SATCHEL!

I had a thought the other day to make a fancy little SATCHEL ENVELOPE BAG for a special card.  Why give it in a boring white envelope!  So here it is.

Here it is with the card.  I actually made the card a few weeks ago.

This is so easy to make.  The longest part is the decorating.  I will show you how.

CREATE YOUR OWN ENVELOPE SATCHEL

NB: Check the pattern on the piece of Designer Series Paper you use.  When you fold it half the pattern at the back will be upside down.  You want an all-over pattern.

1. Cut your piece of 12″x12″ Designer Series Paper in half vertically. I used the Share What You Love Specialty DSP.

2. Score it on the short side at 1.2cm (1/2″).  Turn your piece 180″ score it at 1.2cm (1/2″).  You should have 2 score lines running down each long side.

3. Turn your piece 90′  Score it at half way – 15.2cm (6″).  Fold on the scored lines.

4. Cut up on each of the score lines in the lower half of the section and the cut these off.  Check the photo below.

5. Add adhesive to the outside of the long tabs. Fold up the bottom piece and carefully adhere the two sides together lining them up on the edges.

There is your satchel already.

To decorate:

Cut a strip of co-ordinating card about 2 cm wide (3/4″).  This is the length of a full sheet of card.  Score one end at 1.2cm (1/2″).  Add adhesive to the back of this short end.  Fold around the back of the satchel at the top.  Add adhesive to the rest of the strip on the back of it and adhere this along the top edge going right across the front around to the back on the other side. Trim off any over-hang if need be.

For the handles cut a strip the length of a sheet of card and at approximately 1.2cm (1/2″) wide.  Cut the strip in half.  Firstly, to help the strip curve gently run it back and forth along the edge of the desk top or similar.  Add adhesive to the ends of each strip on the back of it.  Place one end in position on the front of the bag. Gently curve the strip and adhere the other end on to the front.  Repeat with the other strip for the back.

To finish, cut 2 ovals from the Stitched Shapes Framelits.  Cut them both in half.  Adhere these over the ends of the strip on the front and the back.  Add pearls to finish if you like.

—–

I made a more masculine version.  Not sure of this one but what do you think?

This one is made from the Nature’s Poem DSP.  I added the strip across the top edge.  Instead of adding handles I added a ‘V’ Shape strip and added some gems to the front.  Is it “manly” enough? Maybe I should make it  more of a tie shape.

EDITED TO ADD: I have been pondering on this last project for the past few days.  I wasn’t particularly happy with it.  So today I changed things up a bit and thought I would show you. I am still not sure about it but I think it is a bit better. It’s not any worse anyway. 🙂

OK, I hope you like these dressed up satchels for your cards.  Do you think you would make them?  You could easily add a Gift Card in it and even maybe a small bar of chocolate.

Have a great day.  See you again soon,

Jenny


3D projects, cards, swaps, Techniques

TEAM SHOEBOX SWAP – DAY 4!

OK, Today is my last sharing from our recent Team stamp day with Shoebox Swap cards.  I have a few various ones for you.

This one below is using that gorgeous Delightfully Detailed Laser Cut paper.  I have shown lots of cards using this paper recently.  For this card you don’t need much more than backing a section of the paper on to a strip of black card and adhering it to your white base card.  It makes it look so elegant don’t you think??  I think from memory the sentiment banner is a strip of white card and using the small circle punch to notch out each corner.

This next one is a fun fold.  Adhere a strip of the lovely paper, this one is the Nature’s Poem DSP, down the left hand side of the front of your card.  Punch a slit using the Classic Label Punch on the side of the card front.  You need to punch it twice to be sure that the dragonfly fits through. Punch it once near the top, then slide it down a little bit and line it up with the previous punch and punch it again.  A dragonfly from the Detailed Dragonfly Thinlits was cut from Vellum and also from Cajun Craze.

This is the inside of the card.  The sentiments are from Better Together set.  It’s a cool card.

This card uses the lovely Love What You Do set, the Share What You Love paper and the Lovely Floral Embossing Folder.

This is a cute little treat bag below.  It is very quick to make up.  This is based on Pootles bag -> HERE.

I hope you have so enjoyed these little projects from our team day.  We are getting ready for another get together in the next few weeks.  Hopefully I don’t take as long to share those with you. 😉

Hope your weekend is going awesomely.

Jenny

3D projects, cards, Christmas, Classes

CHRISTMAS IN JULY IN CLASS THIS WEEK!

If you are a Wollongong local you might like to join us for some Festive fun.

It’s Christmas in July. 

This is what we will be making.  2 great cards and a gift box.

Here are the details.

Friday 27th July at 10am or 7pm.

Please RSVP by Wednesday 25th July.

Cost is $20. BYO: adhesives. Extra $5 to use my adhesives.

I look forward to seeing you. Be quick to reply though as places are limited.

Jenny

3D projects, cards, Techniques, Tutorials

WEDNESDAY’S WOW! #26 – SPINNER CARDS!

I have a fun Spinner card for you today for Wednesday’s WOW! #26  I made this recently as a request from a friend.  The same one who requested the 1st Birthday card in the last post.

I thought you might like to see how to put one together.

I was asked to make a Baby Shower card in yellow/cream colours.  I wanted to make something a little different so created it as a Spinner card.

This is the card using the set A Little Wild.  It was the first time I have used this set – and I have had it sitting there for a while! The great thing too is that it has a back stamped image so this works great for the Spinner Cards PLUS it has matching Framelits so you don’t even have to hand cut it. 

This is the front of the card.  I coloured the cute little lion with the Stampin’ Blends.

And we have the back of the Spinner.


HOW TO CREATE A SPINNER CARD

1. Cut a card base to a standard card size.  I used Whisper White here. Cut a piece of So Saffron card slightly smaller and a piece of Whisper White smaller again.  For metric I reduce the card size measurements by 4mm on each piece.  For US card sizes you might like to reduce the size by 1/4″ on each piece.  Of course it’s totally a personal preference.

Cut a circle using the 2nd largest Circle Framelit in the Layering Circles Framelits set from your smaller piece of Whisper White card.

2. Layer all the pieces together starting with the card base then the So Saffron piece then the Whisper White.  Place the next size down circle Framelit inside the already cut circle on the white.  See the photo below.

3. Carefully place the card pieces in the Big Shot to cut your circle out.  You may carefully remove the top white card piece if you like without disturbing the position. (Just a tip: If you are unsure you can lightly tracing the inside of the circle Framelit with pencil so you can see where to line it up if it moves before cutting it).

4.  Take the White card base with the right side facing upwards.  Place a length of twine or even fishing line across the cut out circle.  Adhere both top and bottom with tape.  I have used the thin White Baker’s Twine which has now retired on this one.  Be sure that the twine is pulled tight when you are taping it down.

5. Adhere the So Saffron card piece over the top of the white card base.  Before adhering the top white card piece run that through your Embossing Folder if you like to.  I used the Sparkle Embossing Folder. 

Stamp and colour your images and then cut them out. On the back of your images run a length of Snail Adhesive on them. Place the front one over the centre of the twine.  Turn your card over and adhere your other image directly on to the first one. You can now spin your images around and let it go and watch it spin.

—–

I made a Christmas Spinner card a while ago which you can see -> HERE.  This was based on a similar idea but I used Designer Series Paper and one layer with the card base.

Have fun spinning.  I would love to see your versions. Share your Spinner cards you create by emailing me them or tagging me.  I would love to see them.

Jenny