3D projects, cards, Christmas, Classes

CHRISTMAS GIFT CARD/TREAT HOLDER CLASS!

Christmas is coming!  Now is the time to start thinking about gifts for family and friends.  Sometimes these gift ideas can be difficult right!!  Gift cards are always a great gift and why not dress them up fancy.  This Saturday’s class is all about that.  If you are not local to the Wollongong area you can get the kits for these projects sent directly to you.  Here are the details.

Christmas Gift Card Holder Class

Saturday 11th November 2pm.  

We have 3 very special gift card holders/gift boxes for you.
(Can’t make it? grab the kit)


COST: $20  Includes all materials.     NB: Chocolates are not included. Patterned paper may vary.  

BYO: Scissors and adhesives.

Please RSVP:  Thursday 9th.  Book early as seats are limited. 
Places are filling already so reserve your seat now. 

Can’t make it or you would like an additional kit to make later?? Kits: $20 each (plus postage).  Australia residents only. Includes all materials to make the 3 projects excluding the stamped images.

Hope to see you there,

Jenny

Blog Hops, cards, Catalogues, Christmas

ESAD 2017 HOLIDAY CATALOGUE BLOG HOP WITH FANCY FOLDS OR 3D!

Today’s Blog Hop with ESAD (that is Extra Special Australasian Demonstrators  – We are all pretty special though!), is focusing on creating a Fancy Fold or a 3D project using products from the 2017 Holiday Catalogue.  You would have just come from the very talented Sue’s blog HERE. 

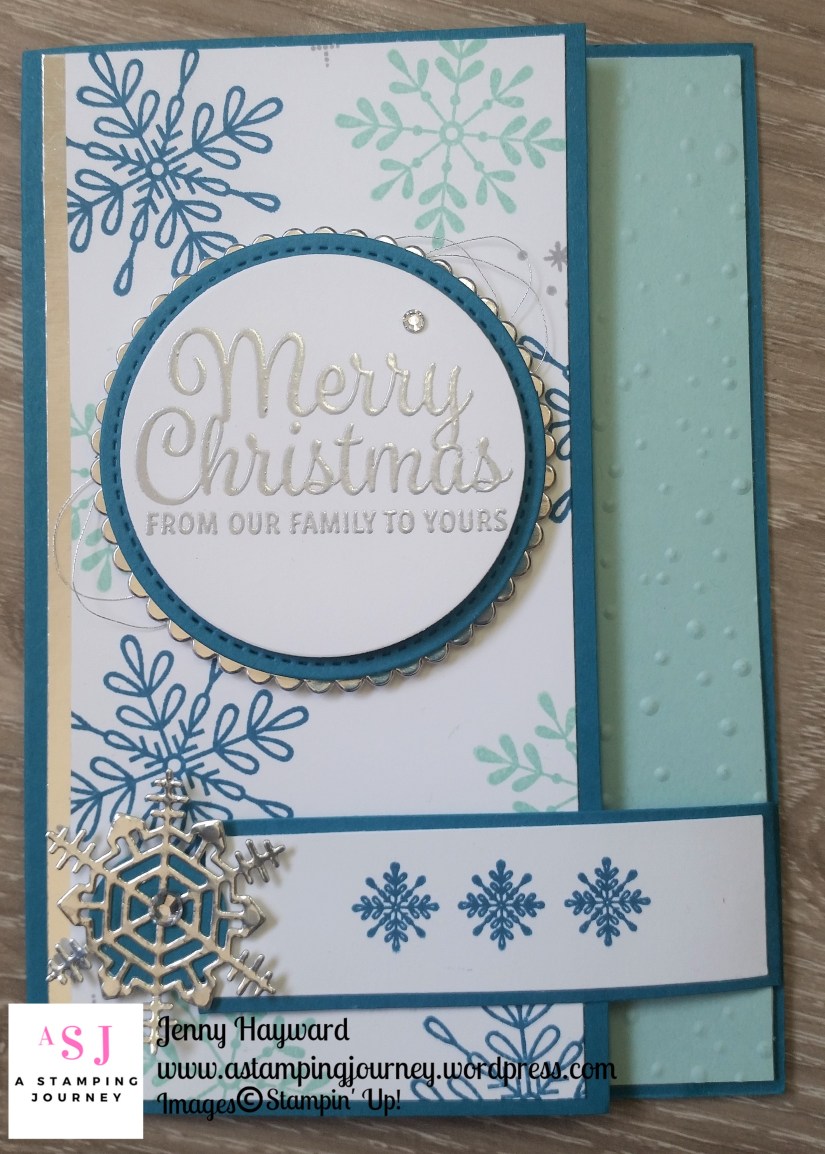
I love a Fun Fold card so I was keen to take part in this Blog Hop.  Today I have made what I call a ‘LATCH FOLD’.  It could be called a Buckle Fold as I have been investigating but there is no slit that the flap tucks in to so I will still call it a Latch Fold. 🙂

I have used the Snowflake Sentiments stamp set found on page 35 of the Holiday Catalogue and my favourite Christmas colour combinations of Island Indigo and Pool Party.

The “Merry Christmas” sentiment is heat embossed in silver to add some sparkle.  It was cut with the Layering Circle Framelits and then raised up with Dimensionals on an Island Indigo circle cut with the Stitched Shapes Framelits and then this was raised up on a Silver Foil circle cut with a scallop in the Layering Circle Framelits.  Before adhering it to the card I looped around some Silver Thread.  The snowflake is from the Seasonal Layers Thinlits cut from Silver Foil too. To make that stand out I punched a circle from Island Indigo with the 3/4″ circle punch.

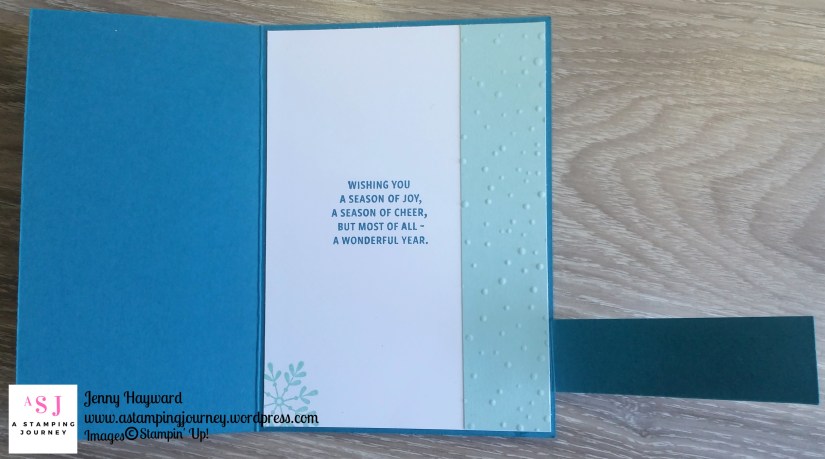
Here is the inside.  I added a strip of Pool Party card which I had embossed with the Softly Falling Embossing Folder.

Do you want to make one yourself??

Stop by tomorrow I have made another Latch Fold card and I will share the instructions then.

For now you need to get hopping again. This time you are off to the lovely talented Nicole’s blog -> HERE.

If you get lost on your Hop then here is a list of all the participants for you to join in anywhere.

See you tomorrow.

  1. Lou Kitzelman
  2. Leonie Schroder
  3. Courtenay Heuston
  4. Rebecca Scurr
  5. Peta Stephen
  6. Kristel Rimmer
  7. Delys Cram
  8. Libby Dyson
  9. Jessie Holton
  10. Megan Lenske
  11. Cheryl Algie
  12. Kim Oliver
  13. Sharon Dalton
  14. Sue Vine
  15. Jenny Hayward
  16. Nicole Wilson
  17. Narelle Fasulo
  18. Cathy Pinchbeck
  19. Maree McIntosh
  20. Josie Dean
  21. Ellen Woodbridge
  22. Monique Fielder

cards, Christmas, Classes, Stampin' Up!

MERRY PATTERNS HALF FOLD CARD!

I have had a couple of great classes yesterday and today.  Lots of fun and chatter and creating.  We have a good time at class.  If you are local you will just have to come sometime.

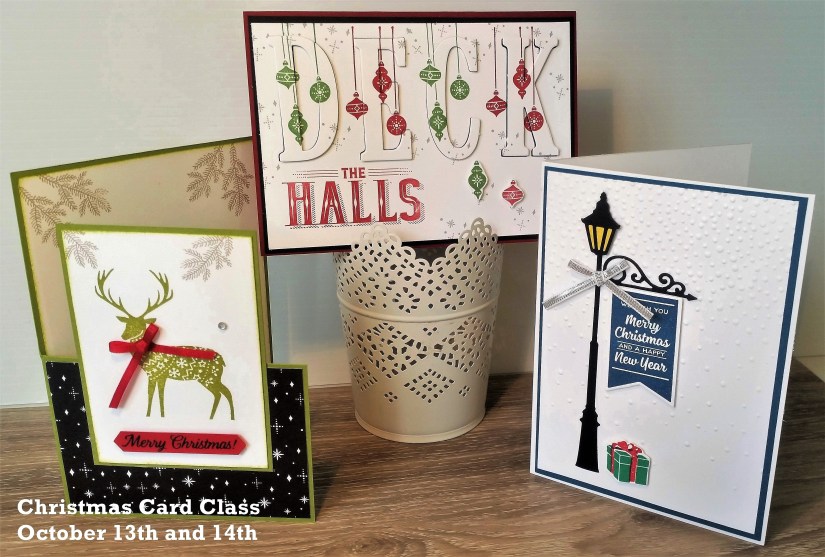
These are the cards we made.  Creating an Eclipse Christmas card with Carols of Christmas, a sweet one with Brightly Lit and a fun Half-Fold card with Merry Patterns. Everyone loved them. 🙂

I don’t often show the “how-to” of my class cards on my blog but I wanted to show you this one.   I have seen a few Half Fold cards on Pinterest lately and wanted to try this card AND as we only have a couple of weeks left for the Merry Patterns I thought it would be good to give this an ink.

So for you to make your own here are the details.  Of course, you could substitute any stamps and paper.

CREATING A HALF FOLD CARD

1. Whether you are using the Metric or imperial measurements it doesn’t matter the idea is the same.  Take your standard base card (for this one I used Old Olive) and score at the half way mark on the long side.  (For metric the base card is 14.8cm x 21cm.  Score on the long side at 10.5).

2. On your score line cut down half way.  Then cut across on the front of the card base from where you finished your cut on the score line to the edge of the card.

3. The piece that you have cut off becomes your card mat for the front image.  Cut a piece of Whisper White just slightly smaller than the card mat. (For metric that measures 10.1cm x 7cm).

4. Cut a piece of Whisper White for the inside of your card just slightly smaller than the inside card base.

5. Stamp and Decorate your card as you like. The Designer Series Paper for this card is from the Merry Little Christmas pack.

I hope this makes sense.  Please ask if you are unsure.

Jenny

PS. Only 2 weeks left to get your Merry Patterns set with qualifying parties/orders of a minimum of $450.  Be sure to book your event soon or place your order so you can grab your set.

cards, Christmas, Techniques, Tutorials

CHRISTMAS PINES ECLIPSE CARD!

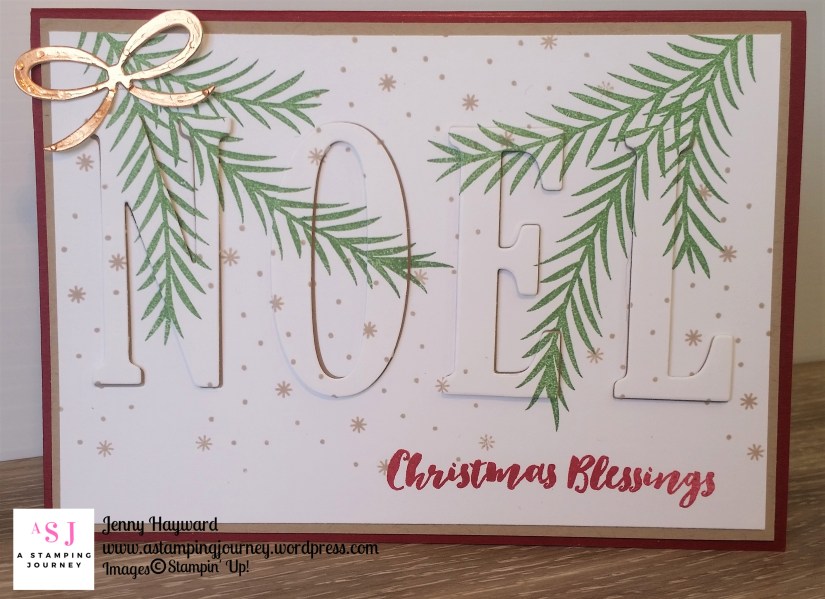
I have been playing with the Eclipse technique recently.  You can see one of them a couple of posts back I made for a colour challenge.  This one is a Christmas one using the Christmas Pines stamp set.

The base card is Cherry Cobbler and the card mat is Crumb Cake.  The pine leaves are stamped in Garden Green. The Gold Foil bow is cut from the Pretty Pines Thinlits.

Have you tried the Eclipse Technique yet.  SO easy but so effective.

Create the Eclipse Technique.

The Eclipse Technique is cutting the words or shapes directly from a stamped card piece and raising them off the card

1. Stamp your card with your chosen images.  You can use a piece of Designer Series paper (patterned paper) too as an alternative.

2. For this card I used the Large Letters Framelits to cut the word out of the white card.  You can use any dies though to cut other shapes from the stamped white card or paper mat.

3. Adhere the stamped white card mat or patterned paper piece directly on to your Crumb Cake card mat and then adhere both to the Cherry Cobbler card base.

4. Raise each letter up off the card in its place with Dimensionals.

NB: I have seen on some tutorials that the letters were cut several times from white card.  Then the cut letter was stacked up and adhered together and then the stamped letter was adhered on top of that stack.  I don’t think that is necessary.  Raising up the letter with Dimensionals is quite adequate.

————————-

Now you can go and create your own Eclipse card.

Thanks for looking today.   I hope your day is going OK??

Jenny 

cards, Catalogues, Christmas, Personal Ramblings, Stampin' Up!

SWEET HOME HOUSEWARMING!

I have a special card to share with you today. My niece and her partner recently bought their first home.  It is a very big deal and I wanted to make a card to share in their excitement.  The pressure was on though as my niece makes cards and comes to my classes.  Here is the card I made for them.

When I was going through my stamps I realised I didn’t have a lot for housewarming cards.  They are not cards you make too often but I came across the Sweet Home set and the Home Sweet Home  Thinlits.  I thought they would work well.  The colours are Old Olive, Soft Sky and Sweet Sugarplum.  The card layout was using the card sketch from CASE THIS SKETCH #193.

The paper I used was from the Merry Little Christmas DSP.  This paper doesn’t have to be used just for Christmas.  It has some great prints either Black and White or the Old Olive.  It really doesn’t do it justice in the catalogue. (p 12 Holiday Catalogue). When I sat the house on to the paper I thought it was a little plain so I added a Vellum circle and some loops of the Silver Thread. This was a fun card to put together. 

My niece really loved it.  It passed the test I think. 🙂

Thanks for visiting,

Jenny

cards, Catalogues, Challenges, Christmas, Stampin' Up!

FRESH COLOURS FOR CI17 COLOUR CHALLENGE!

I had a little play today with the Colour INKspirations Challenge (CI17).  I have missed a few rounds lately so it was good to take time out to play.  I really like to have a go at these challenges as it really extends your creativity.

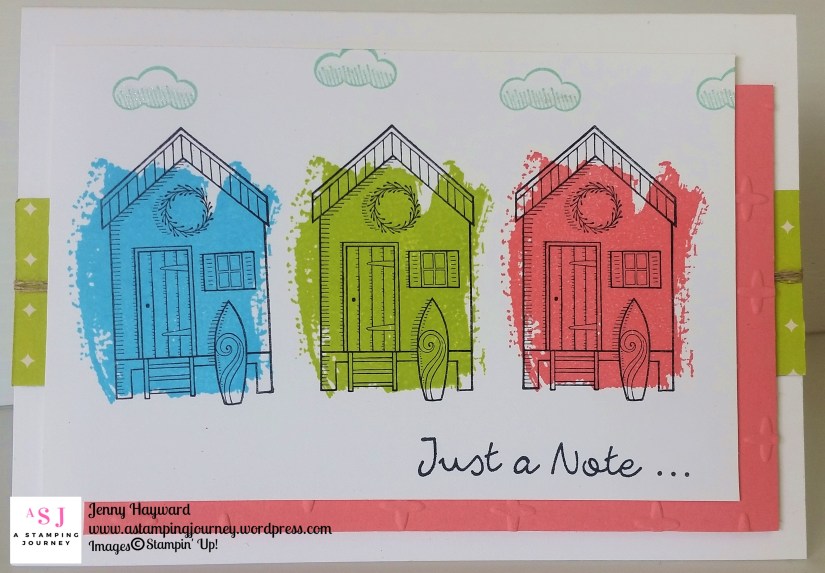
The Colours for this week are: Pool Party, Lemon Lime Twist, Tempting Turquoise and Flirty Flamingo.  What fun, fresh colours!

I had in mind to use the Beachy Christmas set in the Holiday Catalogue.  I hadn’t got around to using this set yet.  And you don’t need to use this just for Christmas …

For this card I used the sketch from Freshly Made Sketches #261

I was going to watercolour the houses with just a wash but then saw the Work of Art set.  One of the larger “block” type stamps covered over it nicely.  I did do a test run on scrap card to mist the colours after I stamped but I liked it better just to leave them.

The Flirty Flamingo card mat was embossed with the Sparkle Embossing Folder.  I added a strip of the Eastern Palace DSP.  I love that Lemon Lime Twist!  The sentiment I used was from Better Together set.

The clouds were from the Lift Me Up Bundle stamped in Pool Party.  I wouldn’t have necessarily stamped them in that colour but had to add it somewhere.  I did add some sparkle with the Wink of Stella pen.  It’s a bit hard to tell though.

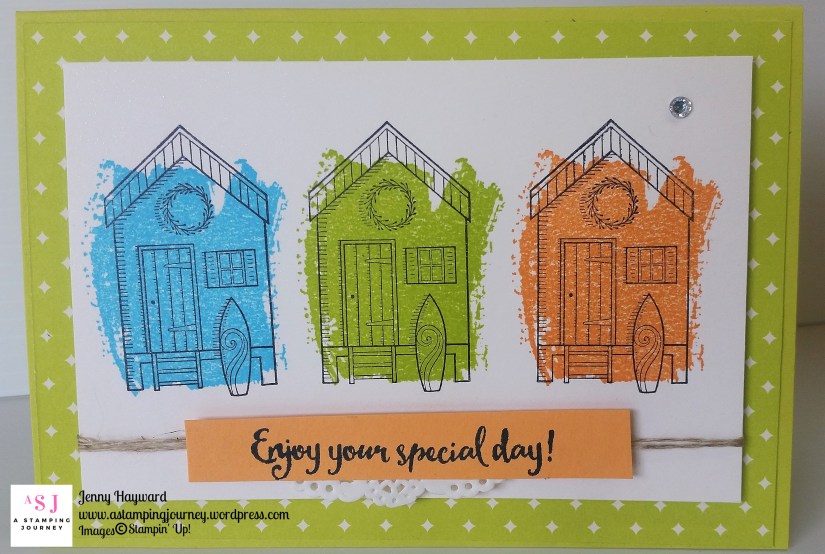
Now when I made this I first used the Peekaboo Peach instead of the Flirty Flamingo.  So I had to put that one aside and redo it with Flirty Flamingo. Once I had finished the card I then went back and finished this one.  I thought I would show you that one too.

I used more of the Eastern Palace DSP.  I played around with the sentiment a bit to cut angles and all kinds of things but ended up just trimming it down and adding some doily underneath.  The sentiment is from Dragonfly Dreams.

I think I like this version better.  What do you think?

Thanks for looking.  I hope your weekend has been great and you have had a chance to be creative,

Jenny

3D projects, Blog Hops, cards, Catalogues, Christmas, Stampin' Up!, Tutorials

STAMPIN’ DREAMS BLOG HOP – SOMETHING DIFFERENT!

I am joining in with the Stampin’ Dreams Blog Hop today.  You would have come from Jenny Hall’s blog (HERE) coming all the way from the US. Or you have just started here. Thanks for stopping by either way.

The theme this month is Something Different.  A fold, a technique, something we have been wanting to try but haven’t as yet.  Really! That’s an open minefield.  I like doing different card folds so thought I would try a different.

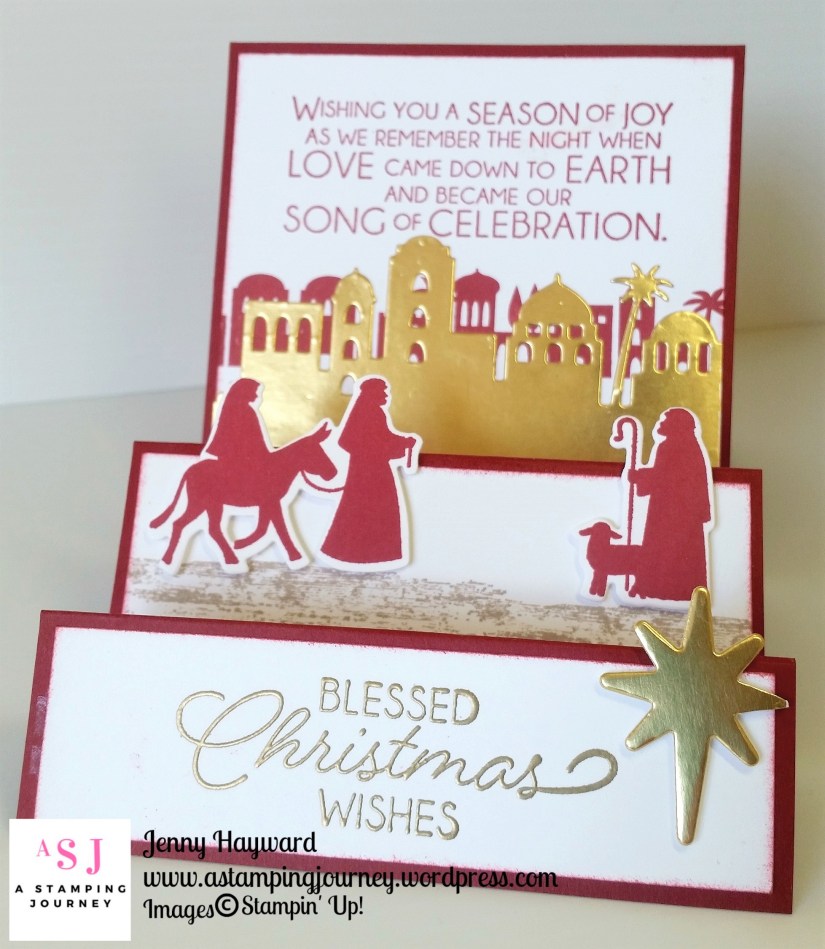
This Fun Fold really is simple but I think it is fun.  This is a Step card and  I haven’t done a Single Step card before.  For this I used the Night In Bethlehem Bundle.

I love how you have the stamps and the matching dies in the bundle making it so easy to create your images.  No scissors required Thank you very much. 🙂  I lightly sponged around the edges of the white card to soften the edges.

The sentiment on the bottom panel has been heat embossed in Gold. For the ground under the figures I used a stamp from the Timeless Textures set.  I like the effect that created.  Edited to add: The base card and the stamping is Cherry Cobbler.  It is a bit hard to tell in the photo. 🙂

As you are all busy hopping today I don’t want to take up much of your time.  Stop by tomorrow and I will have a tutorial for you to create your own step card.

For now you need to continue on with the Hop.  You can head off now to Sue’s blog HERE.  She creates amazing projects so be sure to stop by.

See you tomorrow for the Step Card Tutorial.  

(Edited to Add: The tutorial is now available at the next post.  You can find that HERE.)

Jenny

3D projects, cards, Christmas, Classes, Stampin' Up!

NIGHT IN BETHLEHEM CANDLE CLASS THIS WEEK!

I have a special class for you this week if you are a Wollongong local.  We are making a lovely Tent Card and a stamped candle using the Night in Bethlehem Bundle.  I am sure this would look lovely sitting on your shelf over the festive season.  This would be a special gift to give someone too.

Here are the details.

NIGHT IN BETHLEHEM CLASS

WHEN: This Friday 22nd 10am or Saturday 23rd 2pm.
Can’t make this time?? Let’s make another time to get together (or invite your friends along too).

COST: $20.  Please bring your own scissors and adhesives.

RSVP:  Wednesday 20th.
It’s important to RSVP early to be sure there is enough candles.

I hope you can make it.

Jenny


cards, Catalogues, Christmas

BRIGHLY LIT WITH FRESHLY MADE SKETCHES #278

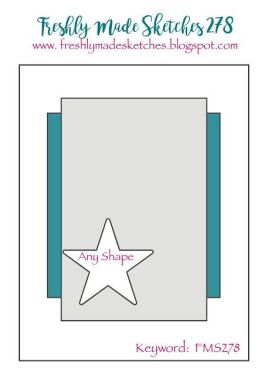
I played around again with the Brightly Lit Bundle.  If I am not sure where to start with a card I take a look at some card sketches to see what grabs my attention and how I can work that stamp set in with the sketch.  I have a number of sketches on my Pinterest Card Sketches board (See the board HERE).

I chose the Freshly Made Sketches #278 one.

Here is the card I created.

The paper is the Merry Little Christmas Designer Series Paper.  It is a bit hard to tell but I heat embossed the sentiment and the bow in Gold.  The lamp post is cut with the Christmas Lampost Thinlits die. I did trim the lamp post down a little to fit closely within the rectangle.  It needed something extra (of course!).  I added a few loops of the Gold Thread under the sentiment.  I do love this bundle.  Must play more …

Thanks for visiting today.  Have a wonderful weekend.  I hope it is a creative one for you.

Jenny

cards, Catalogues, Christmas, Stampin' Up!, Techniques, Tutorials

MASKED BRIGHTLY LIT!

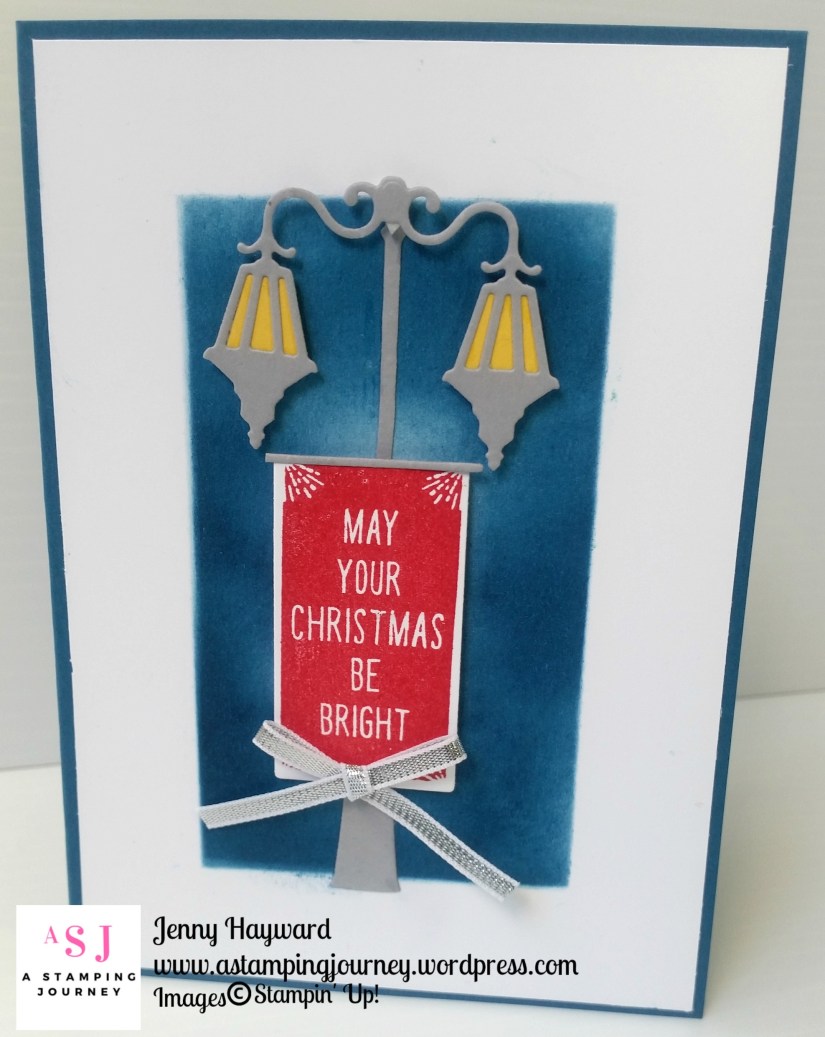
I finally had a chance to quickly play with this new stamp set Brightly Lit. I like it as it is something a little different for Christmas.  Not that we have lamp posts like these ones but that’s OK.
Usually when I first play with a set I head to Pinterest and CASE a card.  For this card I CASED one of Amanda’s cards at the Craftspa.com.  You can see her card HERE.

I liked it as it had a masked sponged background. This was my version.

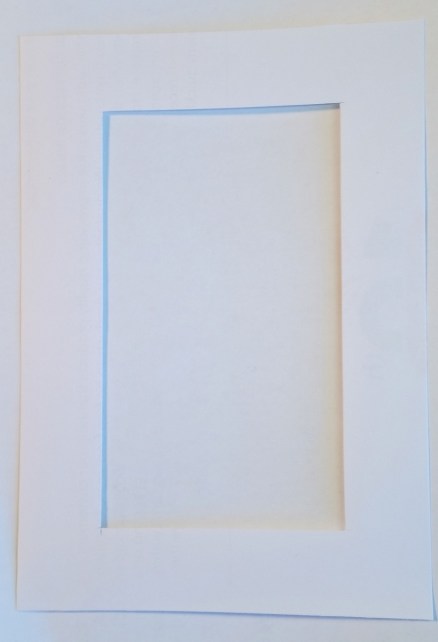
To create your sponged area: first cut a rectangle in your piece of copy paper.  I used the Stampin’ Trimmer to do this.  You could cut any shape you like with the Framelits too.  Below is the rectangle I had.  It is 2cm border each side (or 3/4″). Have the piece of Copy paper the same size as your card mat (whisper white) to be sure you cover the whole piece.  You can adhere the piece on your card with some non-permanent adhesive in a couple of spots or hold the frame in place where you are sponging at the time so it doesn’t move.

I will try to do a video soon but just a note with the sponging: Start with your lighter colour and start off the inside framed area each time you pick up ink.  Move in a circular motion from the outside moving in and along.  I used Marina Mist.  Then pick up a darker colour and just sponge near the edge in a circular motion once again.  This time I used Dapper Denim.  You can lift off an edge carefully and see how it is looking if you like to.  You want to leave a lighter area in the middle.

To finish the card I adhered this to a Dapper Denim card base.  Then add the light post and lamps cut from Smoky Slate.  The centre lights were cut from Daffodil Delight.  The sentiment stamped in Real Red and then cut with the matching Framelits. I added a Silver Taffeta bow to finish.

I have another card with this set to share next time.

Jenny

The Brightly Lit Bundle is available in my store Now -> HERE for $72.   Please use the HOST CODE:  HSVFAXRX