Thank you for joining us on the ESAD Eastern Palace Suite Blog Hop. I have already been sharing some cool projects with this suite this past week and I am excited to share this one with you too.
This project is a cute Tag and matching Envelope. I will share the details on how to make it further below. It’s a bit hard to photograph with the shiny Gold Foil. Sorry for the shine.

CREATING THE MINI TAG AND ENVELOPE.
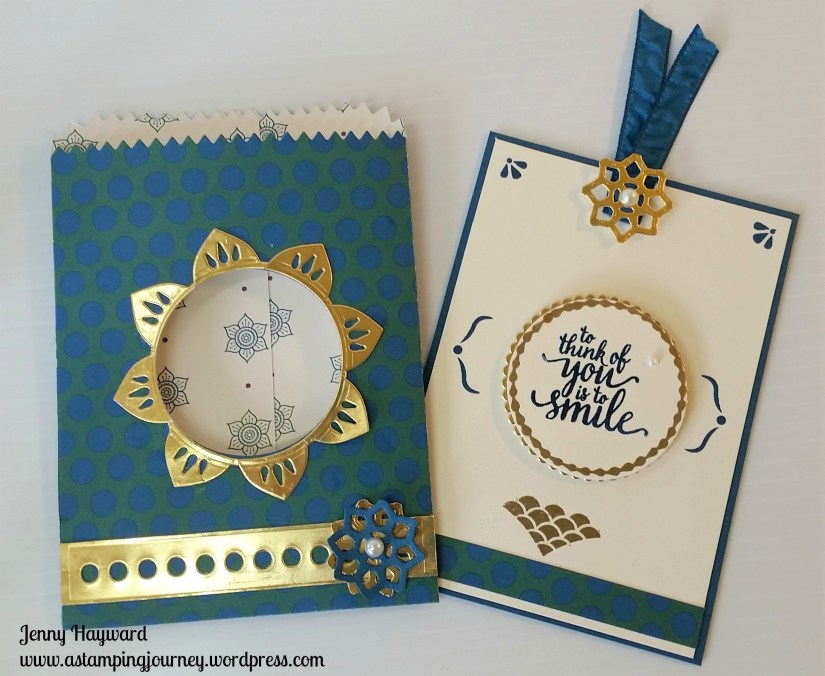
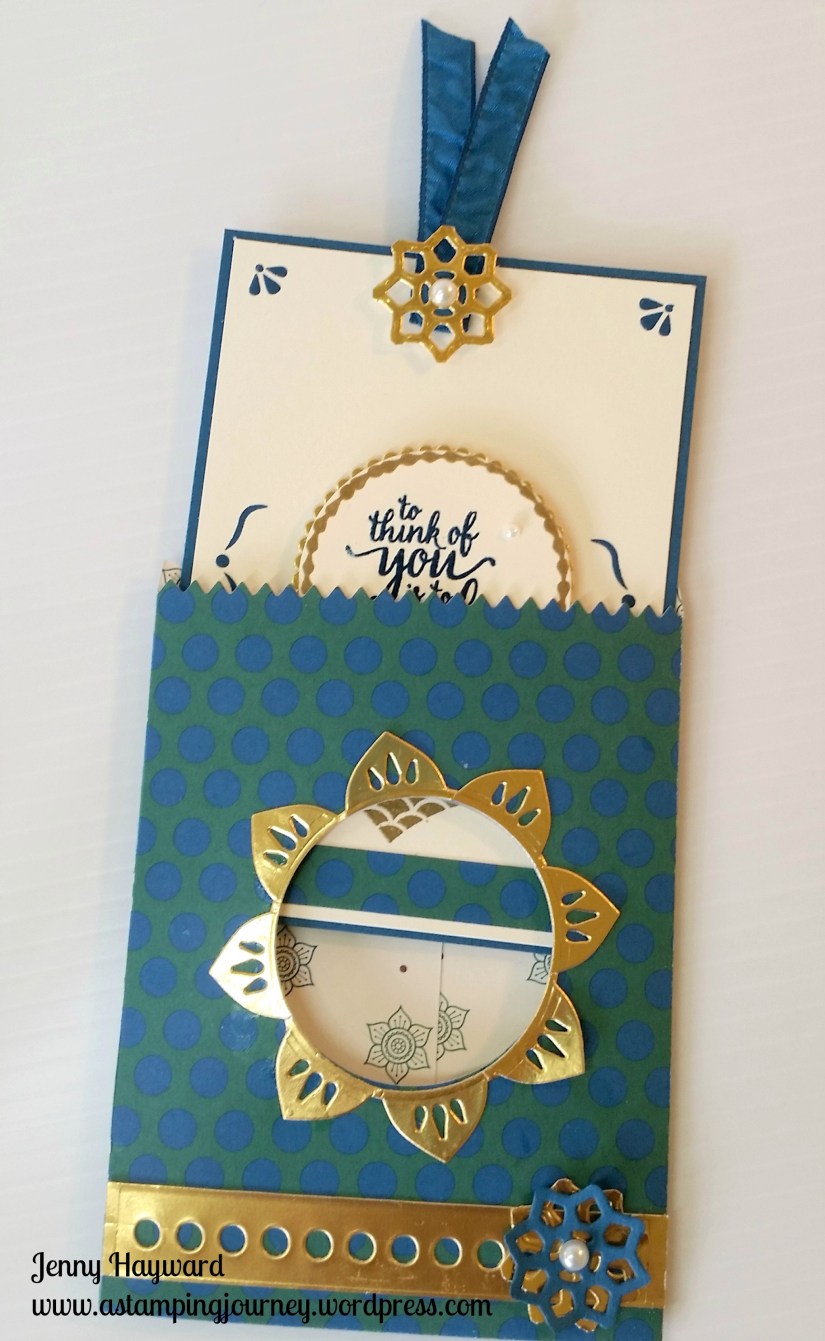
THE ENVELOPE
1. Cut the envelope from the Mini Treat Bag Thinlits with the Eastern Palace Specialty Designer Series Paper. Before you assemble the envelope be sure to cut the circle window in the front panel with the Layering Circles Framelits.
2. Cut the circled strip in Gold Foil using the Thinlits in the Mini Treat Bag Thinlits set. The little flower on the front strip is cut from one of the small Thinlits in the Eastern Medallion Thinlits set in Gold Foil and Dapper Denim.
3. The “flowery” diecut in the centre is from the Eastern Medallions Thinlits set. It comes out attached to your card with the diecut outline. You can snip off the tiny sections where it is attached. I then used one of the Layering Circle Framelits to cut out the centre of this piece and also cut the circle in the Treat Bag BEFORE it is assembled as mentioned further above.
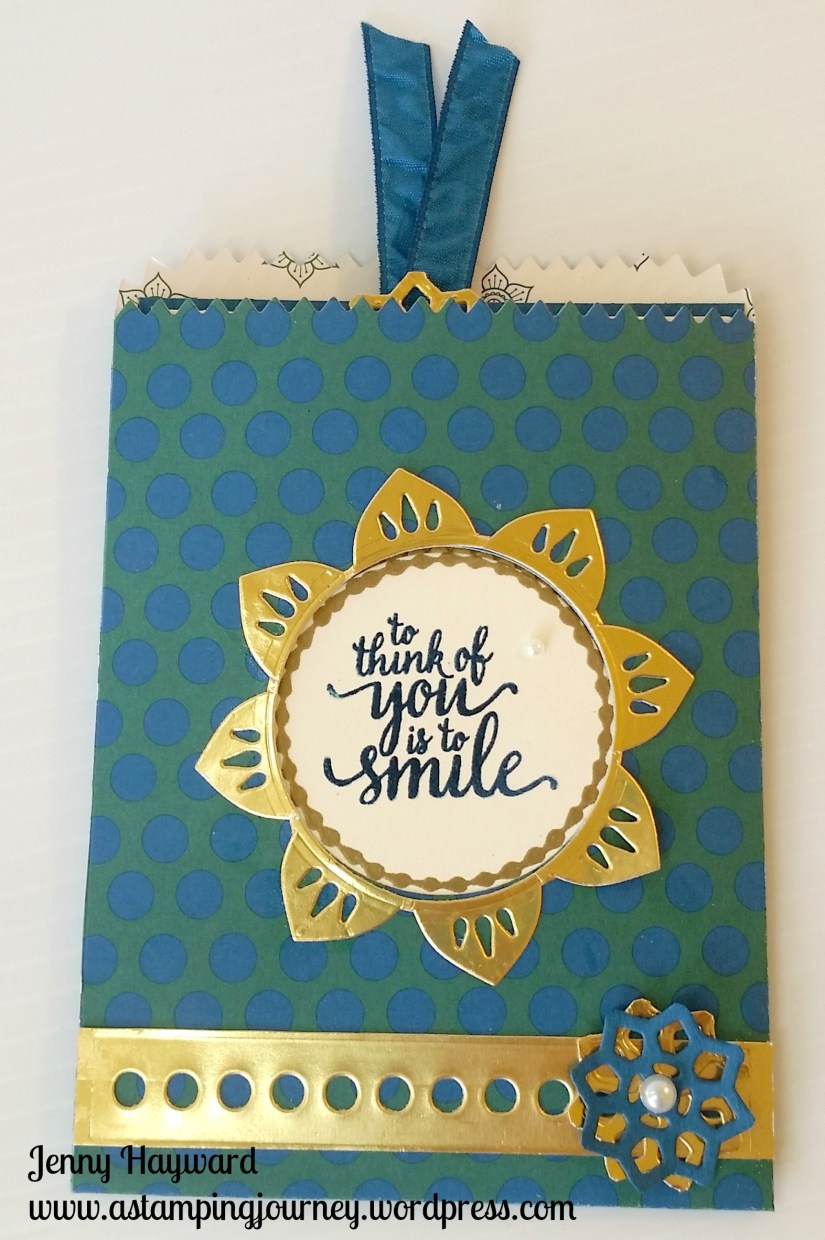
THE TAG
When you pull the tag out it reveals the stamped piece that you could see through the window of the bag.
1. On a piece of Very Vanilla card [measurements are 8.4cm x 12cm – (3 3/8″ x 4 3/4″)] stamp the smaller images from the ‘Eastern Beauty’ stamp set in Dapper Denim. At the bottom heat emboss in gold the “flourishy” image. Add a matching strip of DSP along the bottom.
2.Heat emboss the circle image from the ‘Eastern Beauty’ stamp set in gold onto a small piece of Very Vanilla card. Then heat embossed the sentiment in the centre. To do this first ink the stamp in Versamark and then ink in Dapper Denim ink before stamping on the card. Pour over your Clear Embossing Powder and heat.
3. Cut the stamped circle with the Layering Circle Framelits. Layer this circle on to a Gold Foil Scallop Circle which is a larger size of Scallop than the circle in the Layering Circle Framelits. Raise them up off the card with Dimensionals. Layer this Very Vanilla tag on to a piece of Dapper Denim card [measurements are 8.8cm x 12.4cm – (3 1/2″ x 4 7/8″)] Then add a piece of Dapper Denim Ruched Ribbon at the top and a small Gold “flowery” diecut over it. To finish add an Adhesive pearl to the centre of the flower and one on the circle sentiment.
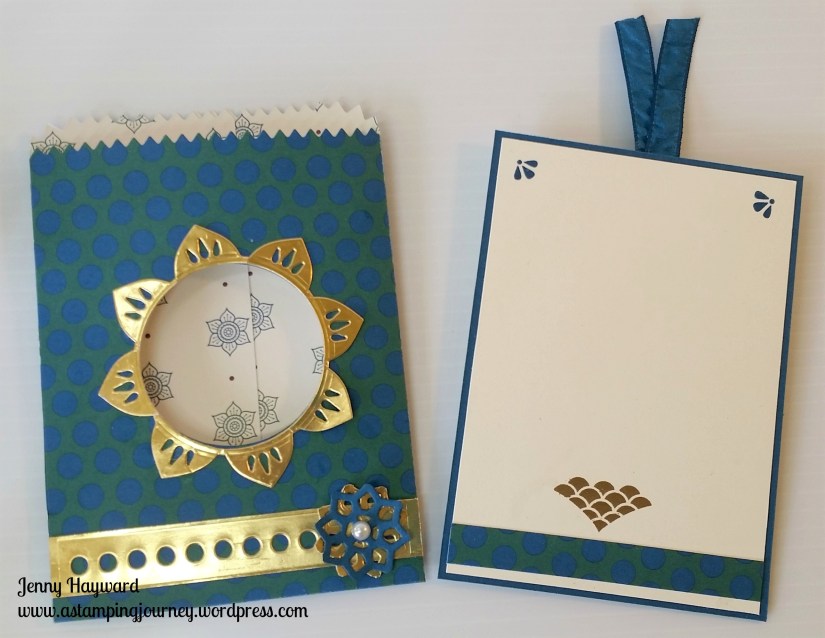
4. For the reverse of the tag cut a piece of Very Vanilla card the same size as the piece on the front of the tag. (measurements above). Stamp the corner images again and repeat the DSP strip at the bottom and the Gold Embossed “flourish”.
If you haven’t seen this great suite yet then below is the stamp set and the thinlits. How many different ways can you use these Thinlits?? I will show you in a post soon.


You can see more about this suite in store HERE.
Now you can continue on your Hop to see some more fun creations with this set.
 You will be off to Narelle’s blog now. Click -> HERE to continue.

Thanks for visiting. See you again with more Eastern Suite Palace projects again soon,
Jenny