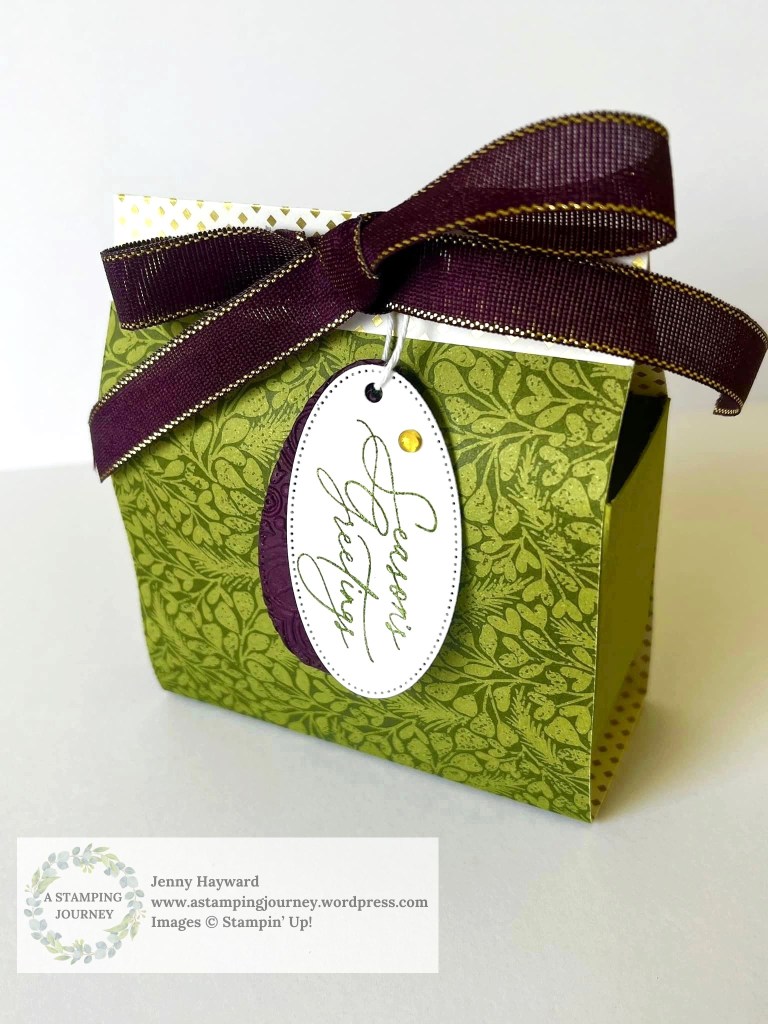
It’s Week 8 for 12 Weeks of Christmas with an easy Christmas Gift Bag to make. This cute bag could be used for any occasion.
I have used the Season of Green and Gold Specialty Paper on this bag. I created some other version and I will share them later.
You can follow along with the video here. If it isn’t shown then head straight to my Youtube Channel and you can find it.
It’s hard to see but I have some extra texture to the Blackberry Bliss card on the tag. I have used the Distressed Tile Embossing Folder. This is a close up of the tag.
I send out a written tutorial to all my newsletter subscribers with the full measurements and details. Are you a subscriber yet? I send out a free tutorial each week. You can find the link to join my subscriber list in the tab on the right hand column on my blog.
Thanks for following along.
Happy Creating,
Jenny
You can PIN it Now to Pinterest to come back to later.
Need to order and you are in Australia? I would love to help you.
You can shop in my store Online -> HERE. Please use the Host Code: EXSTTBB6
OR contact me directly.
And don’t miss out on your Color Wheel as a gift this month. All orders over $90 with me will receive one.
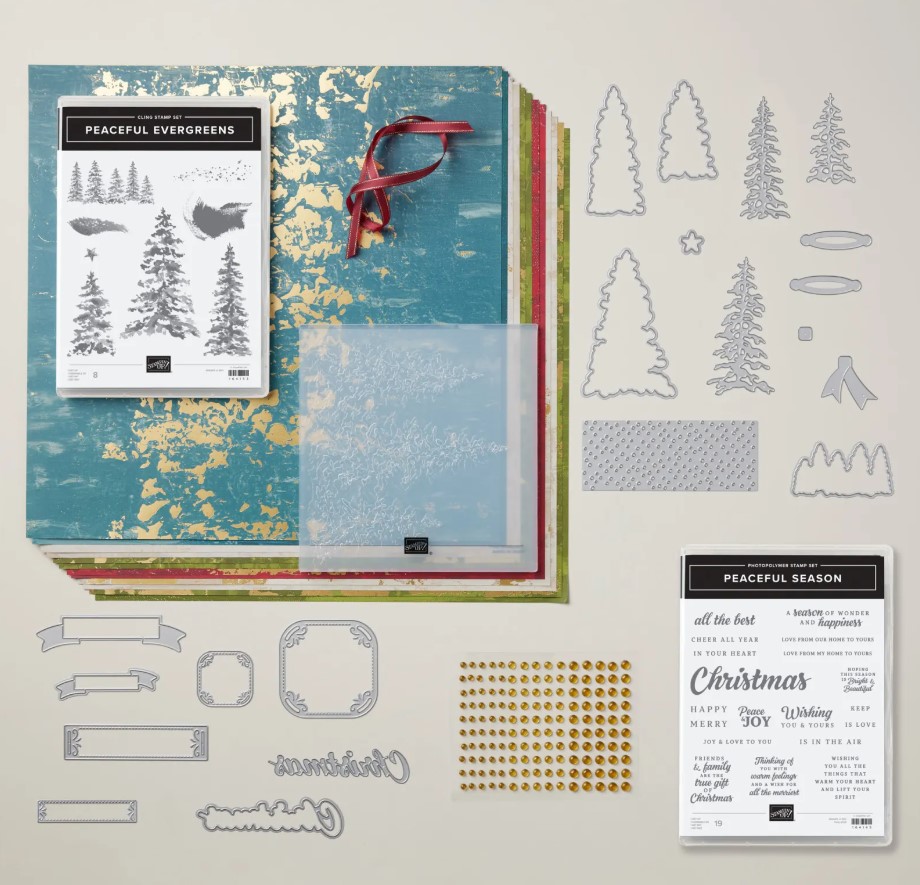
Sunday Suites today with the absolutely gorgeous Season of Elegance Suite Collection.
This suite oozes elegance. From textured paper and gold accents to stamp and die-cut images and sentiments. This is a large Suite Collection with all the elements beautifully coordinating creating artistic outdoor scenes, warm Christmas wishes with elegant greetings and labels, and sophisticated details through foiling and satin textures. Did I say gorgeous???
This is what the full Suite Collection includes.
Peaceful Season Bundle
Peaceful Evergreens Bundle
Season of Elegance 12″x12″ Specialty Designer Series Paper
The Peaceful Evergreens Bundle. In the Die set there are a number of tree shaped dies. Some diecut the stamped trees with other dies giving more detailed diecut trees. There is a also a dotty diecut shape to add a “snowy” effect on your projects. And notice the funny oval and tail shape dies? They create little bows to add which is fun.
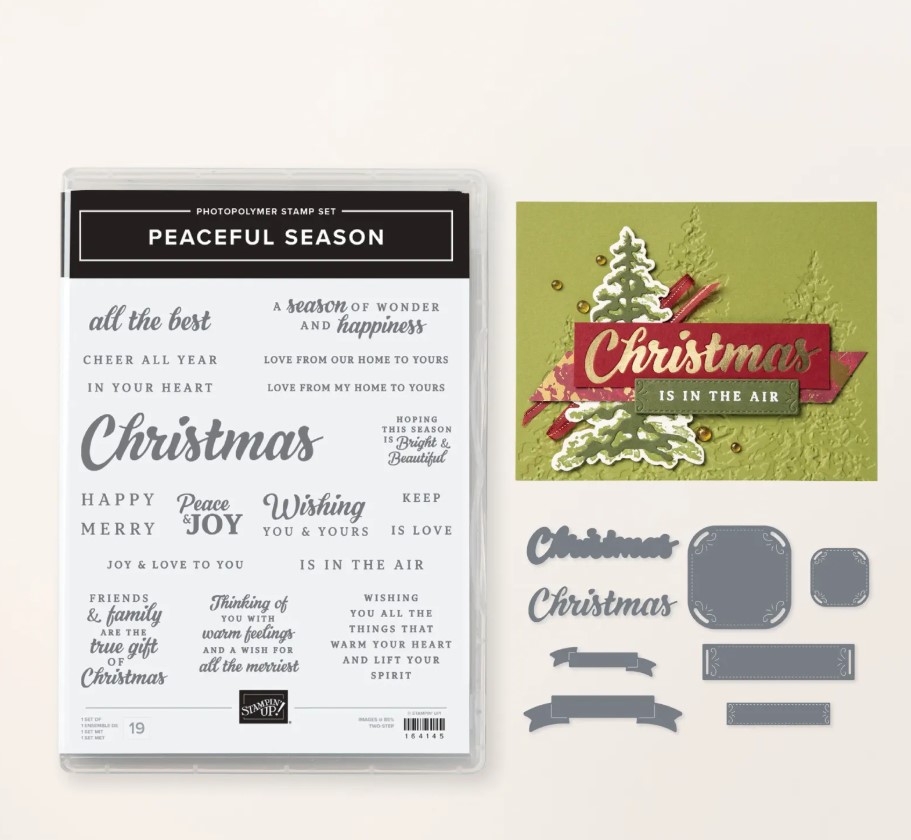
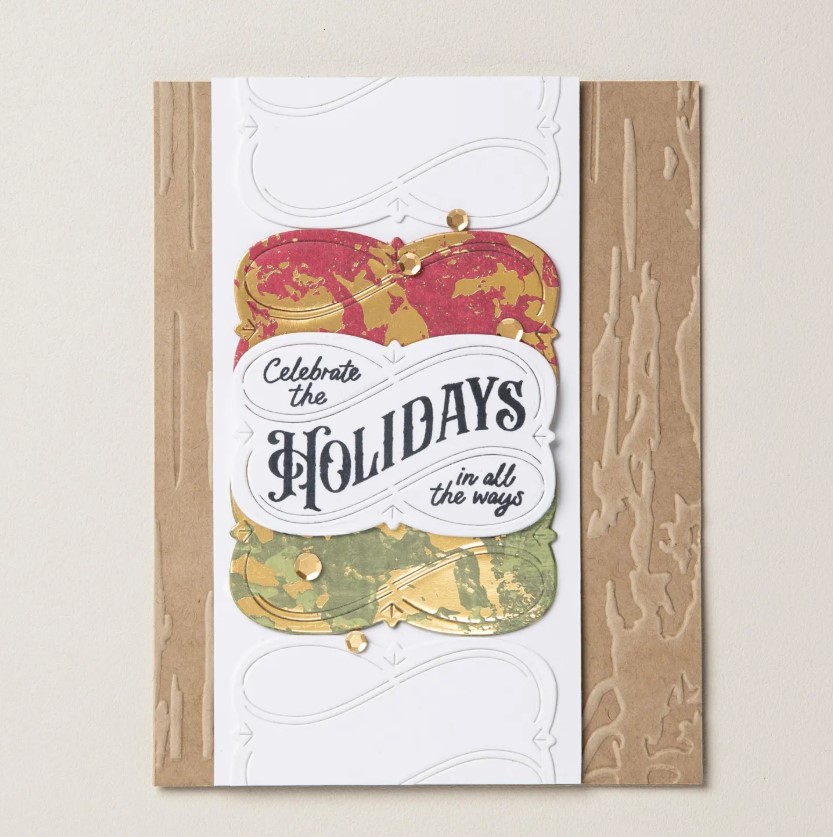
The Peaceful Seasons Bundle. The stamp set contains numerous sentiments. Some you can combine together or use them on their own. There is the option to stamp the “Christmas”and Diecut it and layered. Or you can diecut the “Christmas” word and layer together. There is also some elegant label and banner shape dies.
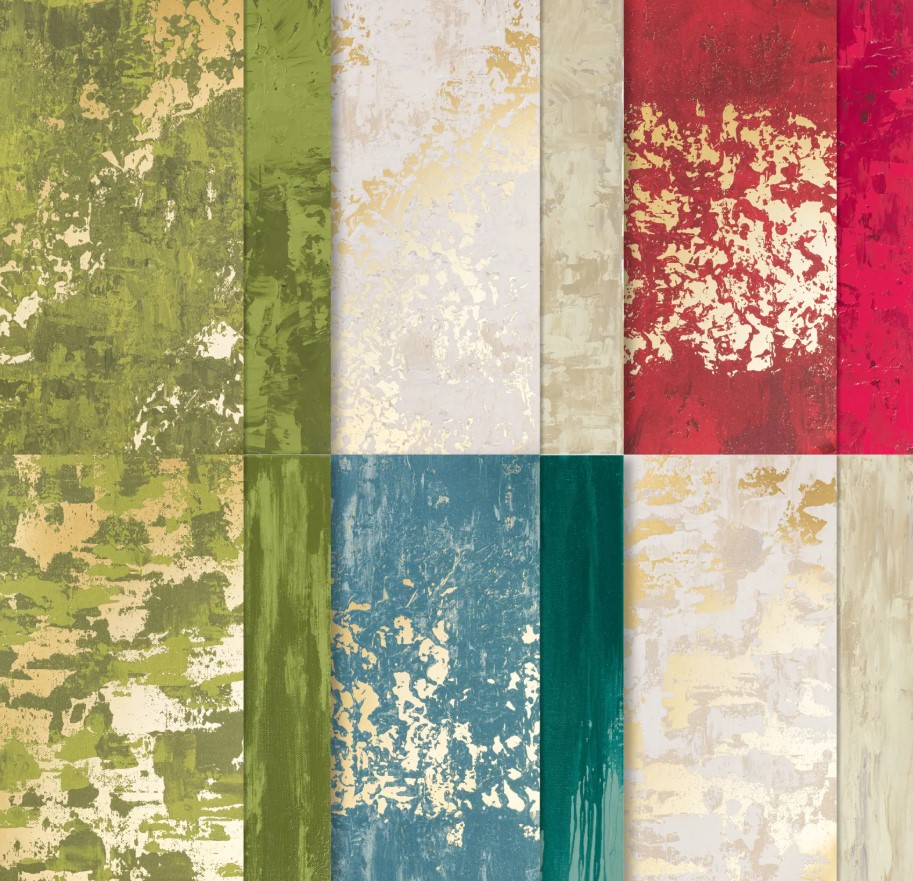
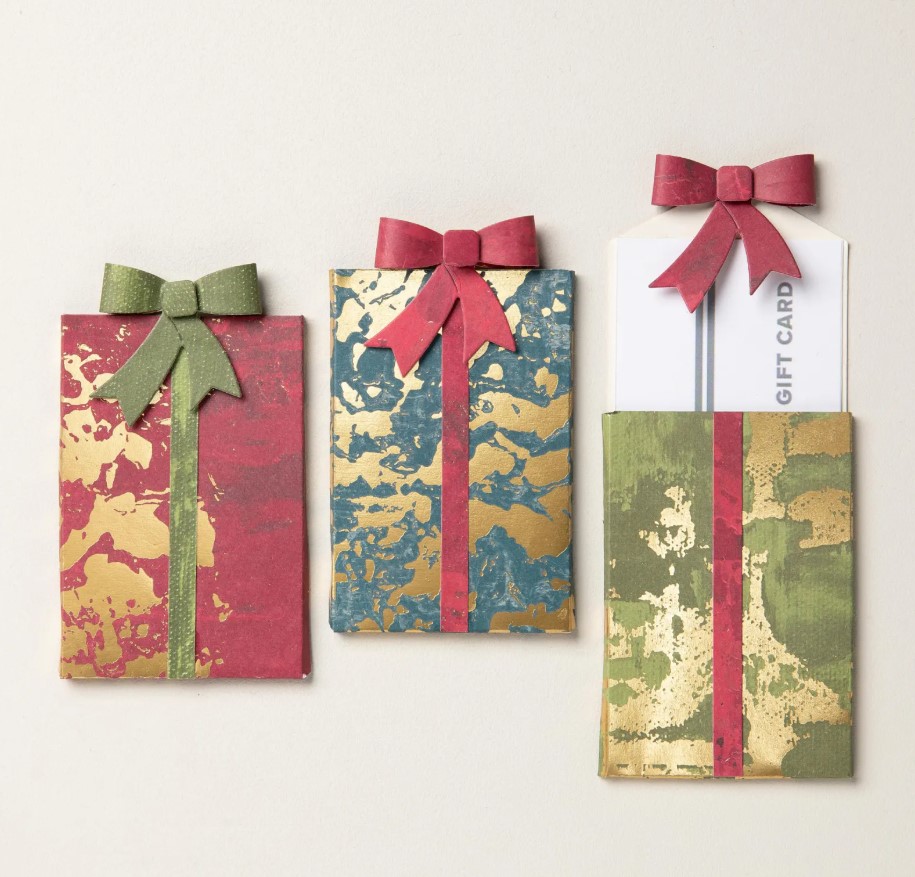
The Season of Elegance Specialty Designer Series Paper. Featuring beautiful gold foil along with textured backgrounds in neutral and Christmas colours, this paper was hand painted to give your projects an artistic look, great for the Christmas season and other special occasions.
The colours in this paper are Basic Beige, Cherry Cobbler, Crumb Cake, gold, Gray Granite, Lost Lagoon, Mossy Meadow, Old Olive, Pretty Peacock, Real Red.
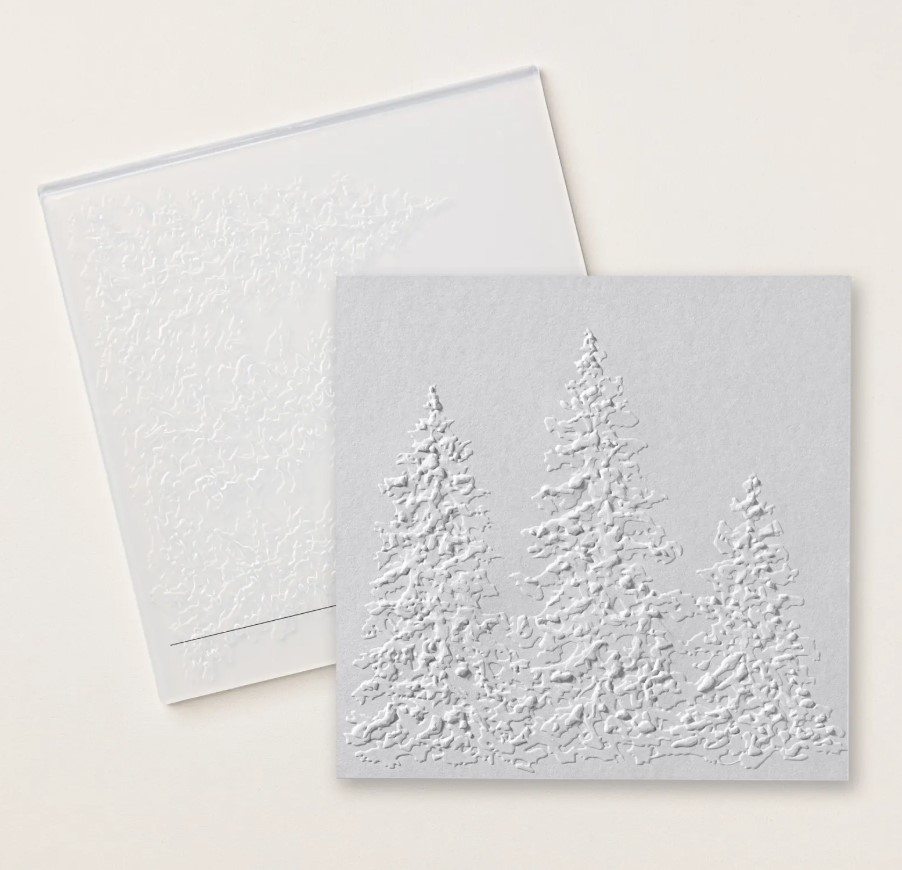
The Painted Trees Embossing Folder adds such detailed texture to your projects. The embossed card created with this folder can be used as a background look or as a statement in itself on a card front. It is beautiful.
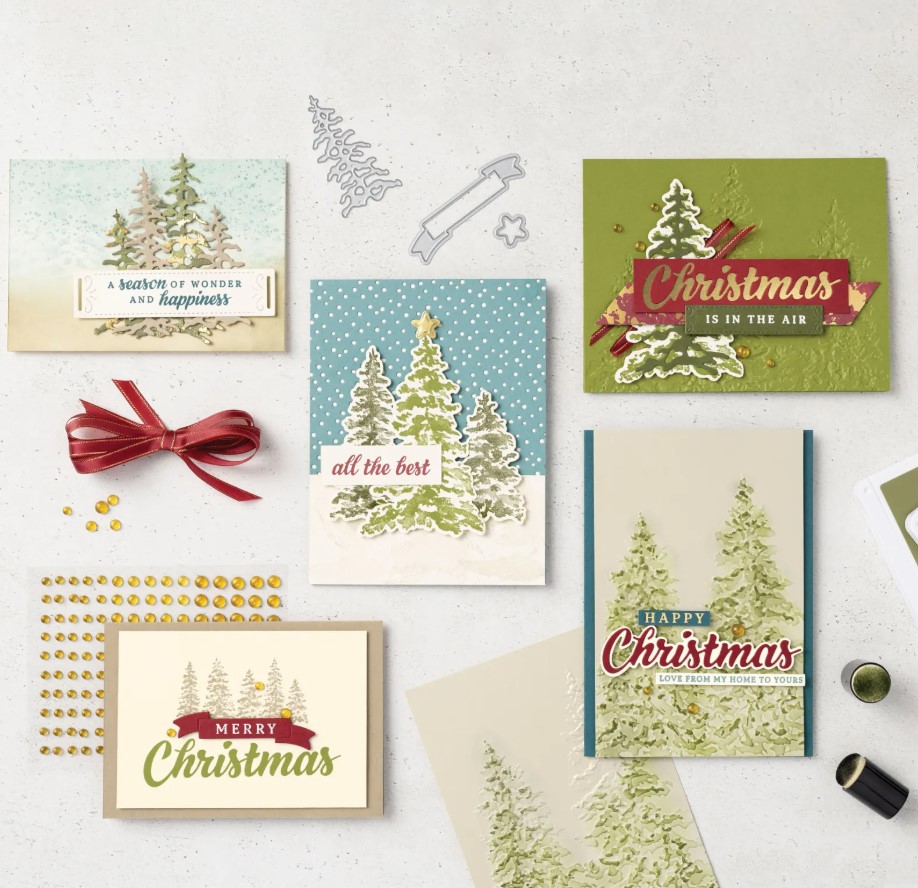
What about some projects with this. These are created by Stampin’ Up! artists.
Just a tip with using the Embossing Folder. When you have embossed your card. Try daubering on some ink over the raised trees to give the trees some coloured definition.
The “square” shaped diecuts can be layered together to add directly to the front of the card.
Or layer the other elongated shaped diecuts.
These little Gift card pockets are dressed up with the diecut bows.
What do you think of the Season of Elegance Suite? So much to love.
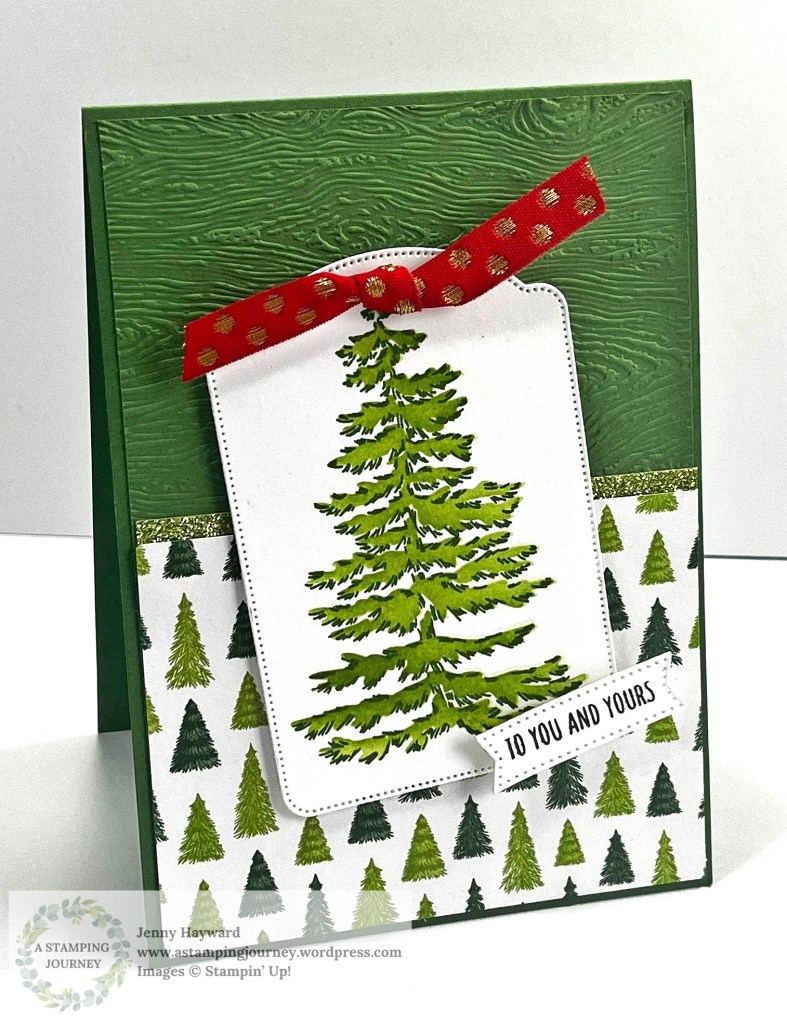
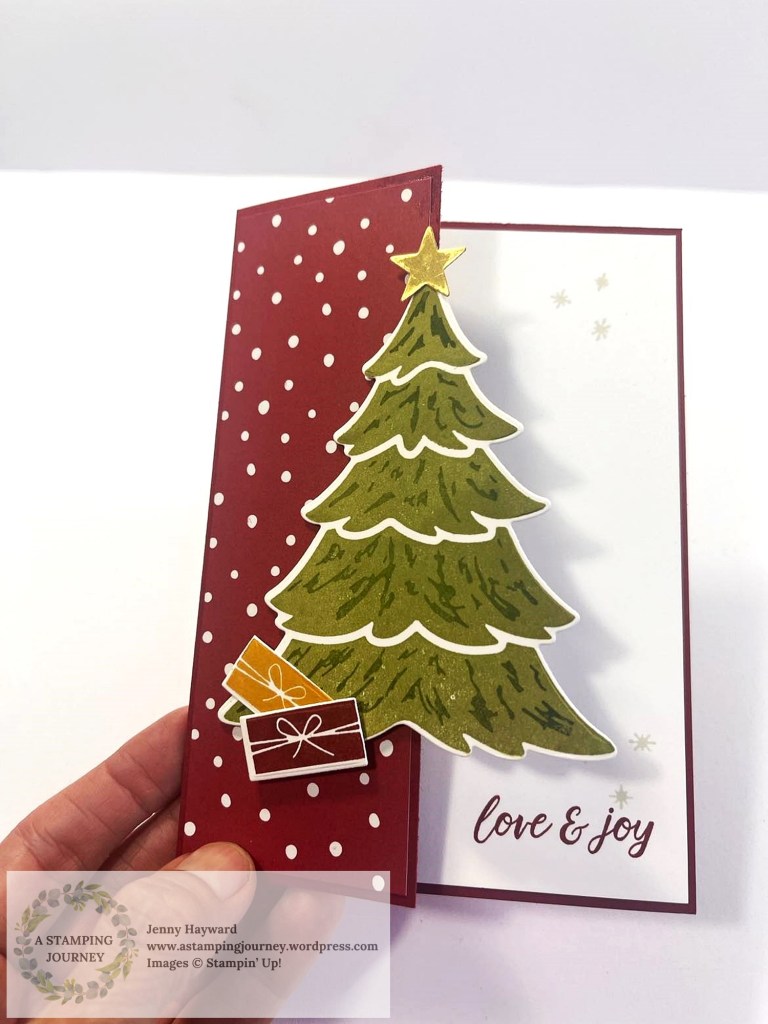
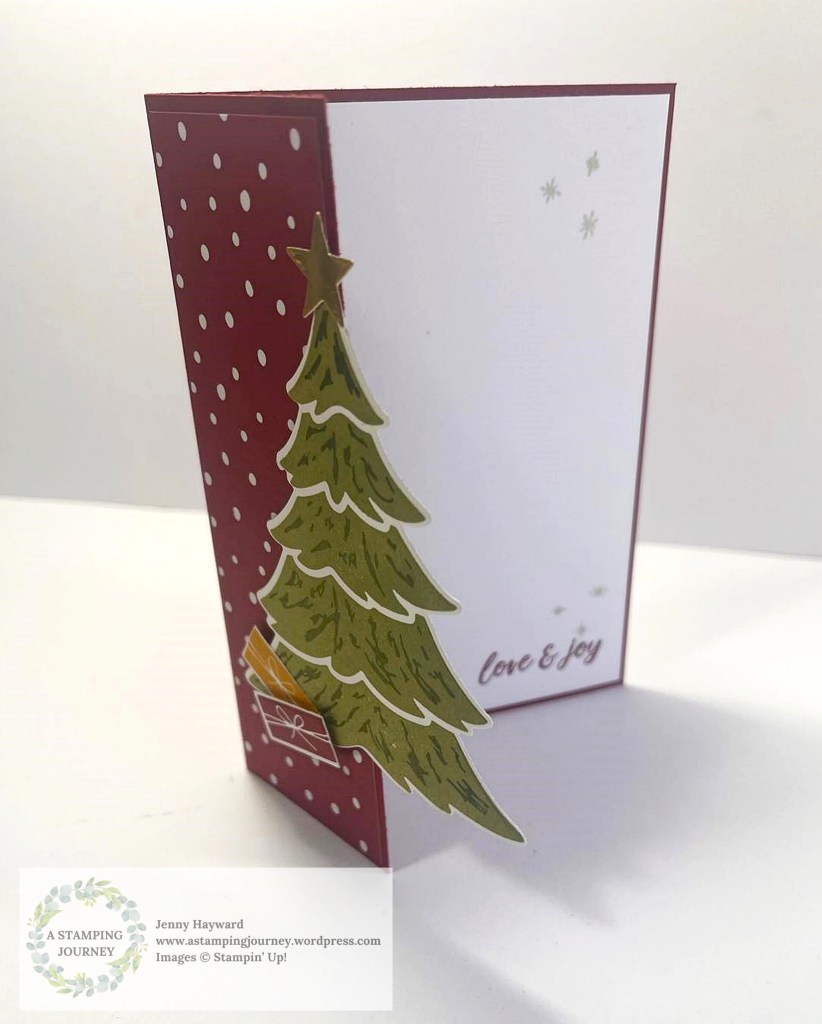
This week’s card is using the Frosted Forest stamps and masks. You could use this idea with any tree stamp.
This is a Portrait Fold card. That’s what I’m calling it anyway. I’m not sure if it has a particular name. The fold is at the top of the card.
You can follow along with the video below. The full tutorial will be sent out in next week’s newsletter if you are a subscriber. If not check the side bar on my blog.
I have used the Reindeer Days Designer Series Paper and some sparkly Glimmer Paper.
I used just one mask in the Frosted Forest mask set. You can add other layers of ink if you would like to.
This is the card.
Embossing the card mat adds some extra texture. I have used the Timber 3D Embossing Folder on this one.
Hope you enjoy it.
Happy Crafting,
Jenny
You can PIN it Now to Pinterest to come back to later.
Need to order and you are in Australia? I would love to help you.
You can shop in my store Online -> HERE. OR contact me directly.
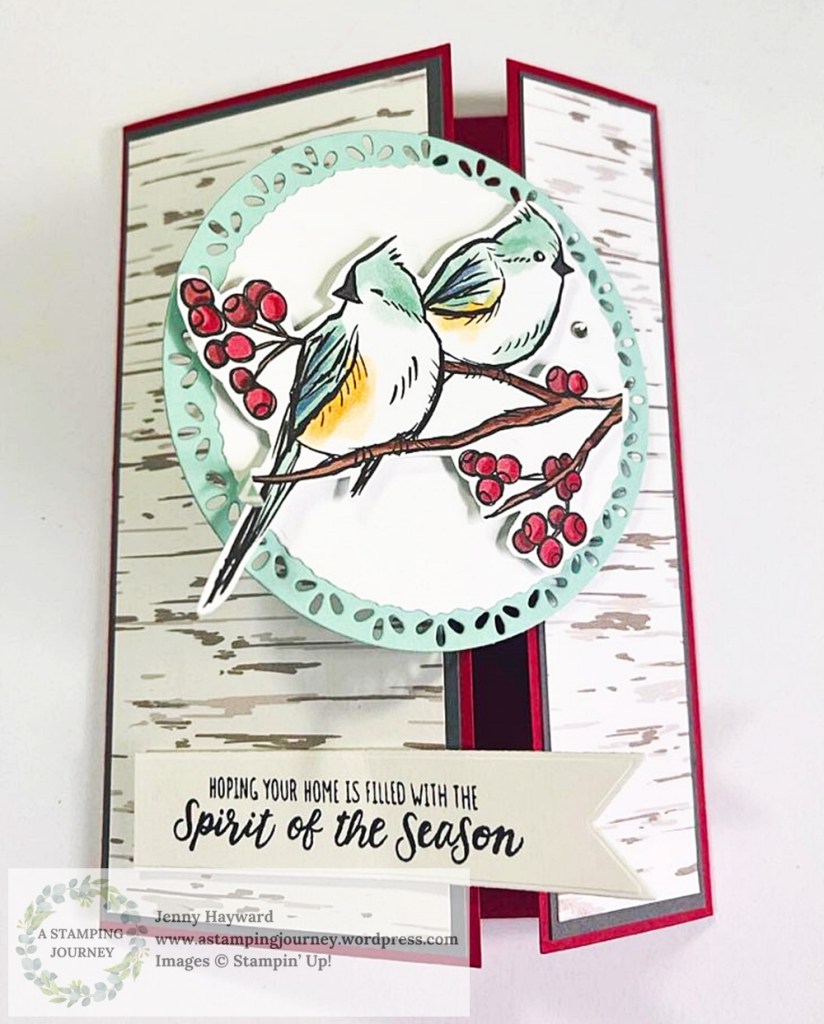
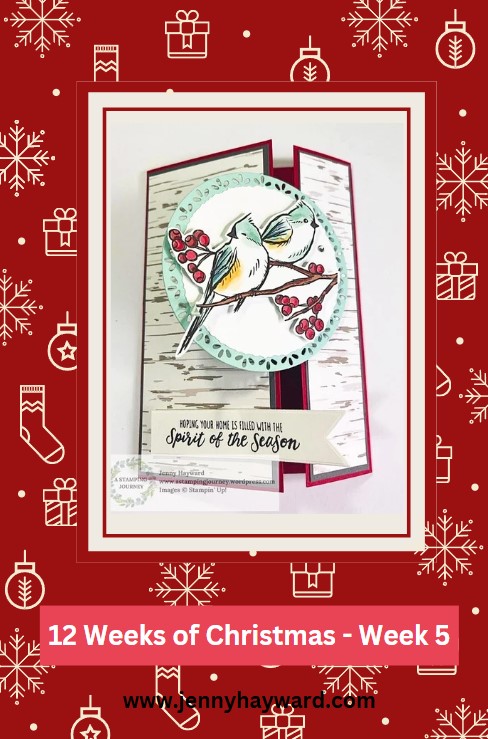
Week 5 of our 12 Weeks of Christmas series. This week it is an Off-Set Gatefold card. It’s just a little different to the regular Gatefold Cards.
For this card I have used the Nests of Winter Designer Series Paper. It’s so easy to cut one of the sweet birds from the paper to add to the front of your card. One of the Dies from the Winterly Tree Tops Dies is meant to diecut one of the birds but you can fussy-cut them out too.
Create this how you like to and it can be great for any occasion. Once you have the scoring worked out it’s very easy to create. You can follow along in the video.
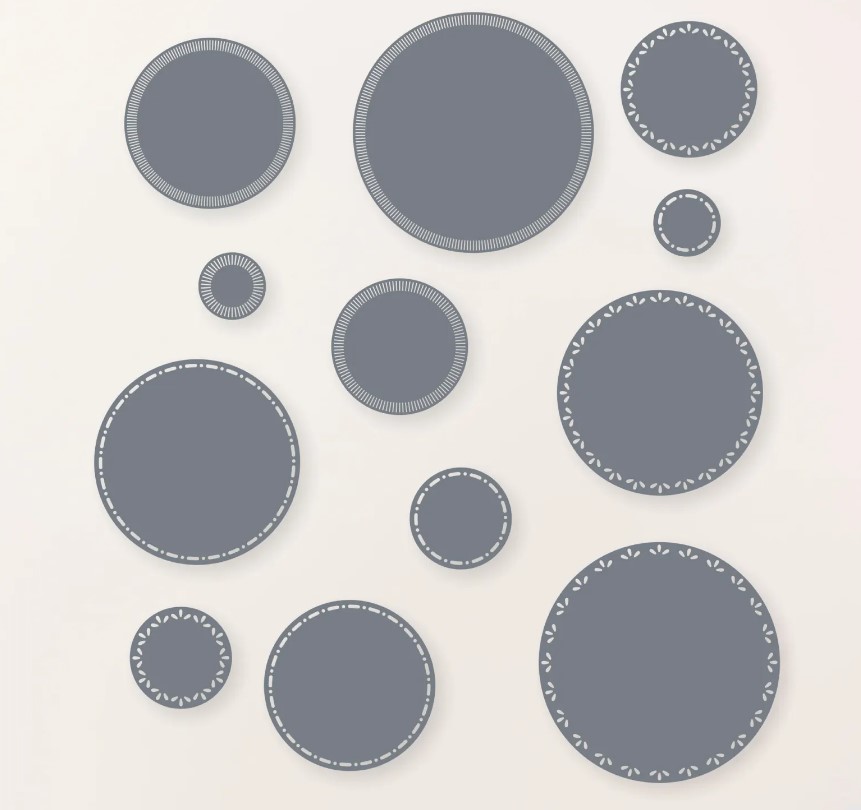
The pretty diecut circle was cut with the Spotlight on Nature Dies. I do love this die set with the pretty edges. There are 3 different die edges in the set. See them more -> HERE.
The written tutorial will be sent out in next week’s newsletter. If you would like to receive them the link details are in the right hand side column.
This is the card created and you can see the inside.
Have fun creating one. And share it with me if you like to. I love to see other versions.
Happy Crafting,
Jenny
PIN it Now to come back to.
If you are in Australia and would love some supplies to create your projects I would love to serve you.
You can shop in my store -> HERE Please use the Host Code: EXSTTBB6
Did you catch last week’s video for our 12 Weeks of Christmas series?? It was created with the Cut and Flip Method. That’s what I call it anyway.
The card in the video was using the Season of Green and Gold Specialty Designer Series Paper. I created another version. This one is using the Reindeer Days Designer Series Paper.
Simply put the Cut and Flip Method is take a piece of pretty paper. Cutting it and then flipping one side over. So you see both sides of the paper. And it is cool too.
This is the card.
The sentiment is from Reindeer Fun Stamps and Dies. The tree was stamped in Garden Green and Granny Apple Green.
Don’t forget some sparkle with the Granny Apple Green Glimmer Paper.
You can check the video by heading back a post or two.
Have fun creating one.
Happy Crafting,
Jenny
Need some supplies for your crafting and you are in Australia? You can stop by my store -> HERE OR Contact me directly.
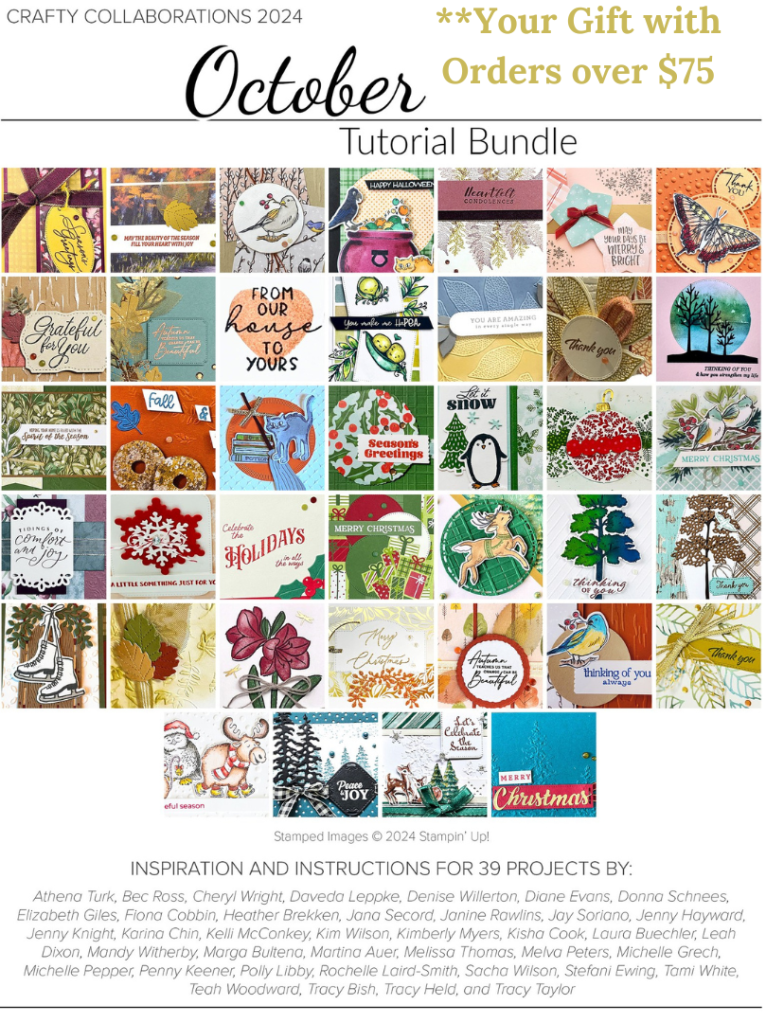
For orders over $75 receive a Tutorial Bundle of nearly 40 projects.
Back with Week 4 for our 12 Weeks of Christmas series.
This week we are looking at the Cut and Flip Method for our Christmas cards. This method can be a great one for making multiple cards at one time too. It’s very quick and easy.
You can just use this idea to make as a single card too.
You just need some gorgeous paper with co-ordinating patterns on each side of the paper. Watch the video below to find out how.
I have used the Season of Green and Gold Specialty Designer Series Paper on this one. And also used the Golden Greenery Stamps and Dies and the Greetings of the Season Stamps and Dies.
At the end of the video I share another version with different papers.
I will send out the measurements in next week’s Newsletter. If you would like the written version you can sign up for my free newsletters. You will see the link in the right hand column on my blog.
This is the card that was made.
Happy Christmas creating,
Jenny
You can PIN this now.
If you need some supplies and you are in Australia I would love to serve you.
You can stop by my Online store -> HERE to order. Please use the Host Code: JDH3D9KQ
Or Contact me Directly and I can assist you.
Have a large Wish List? It would be better value to join the Stampin’ Up! Community. Get a large number of products ticked off your list quickly and then get a discount each time you order after that for as long as you stay around. Find out more ->HERE.
Our last class was creating with the Faux Tearing Technique. It was a lot of fun looking back at this older technique. Have you tried it?
This was one of the cards we made. This one using the Irresistible Blooms Stamps and Dies.
It is very easy technique to do. All you need is Blending Brushes and ink and use any stamps you have. You can use scrap paper for the masks or use the Masking Paper or large Sticky Note Paper.
Tear your paper so it is at least as wide as your white card. Position that over your card at the top and bottom leaving a gap on the card in the centre section.
Blend over some ink on the white card building up your colour. Hold your paper firmly so it doesn’t move. I then moved the paper away from the inked edge just slightly and added some more ink for a light edge. Then return your masks to the original position and stamp over the images having some go off the edge of the masked area.
Finish your card as you like.
Are you game to try it?
Happy crafting,
Jenny
Need supplies for your next project and you are in Australia?
Head over to my store -> HERE.Or contact me directly. (at present I am away until the 12th of September so please email not phone as I won’t have the phone available).
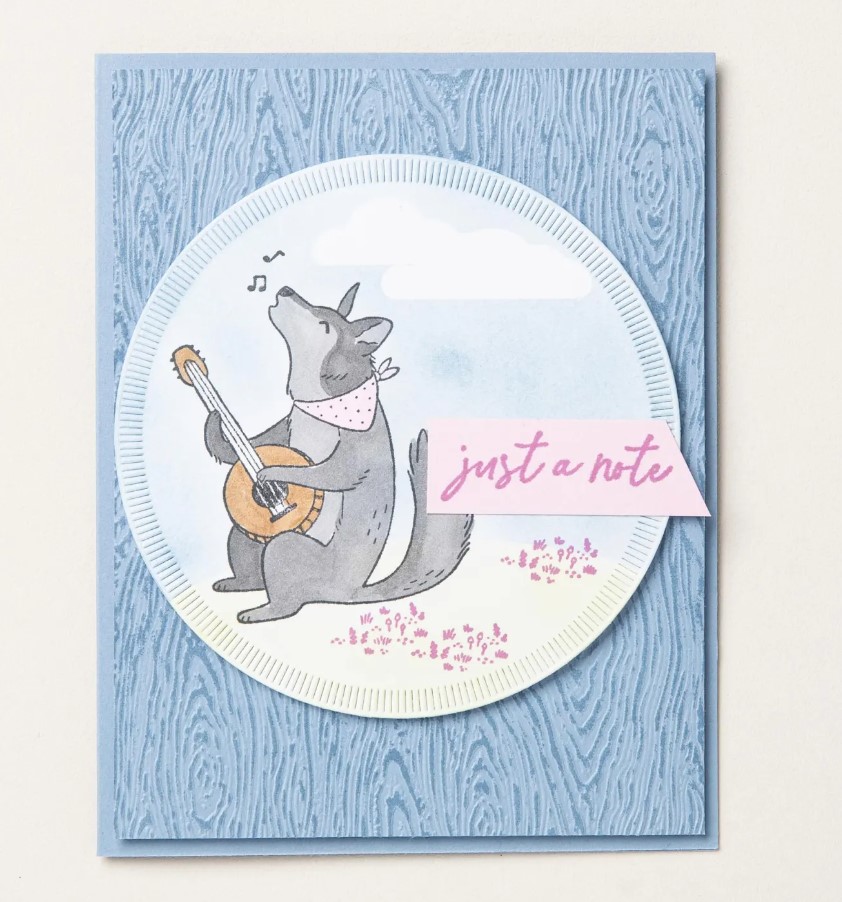
It’s a cute sing, song with the Muscial Jamboree Stamp Set for Sweet Sunday.
Isn’t this character having such a great time singing his heart out??
(Card created by Stampin’ Up! artists)
On the circle diecut with one from the Spotlight in Nature dies the image was stamped and coloured with the Stampin’ Blends. The clouds were first cut from the Hot Air Balloon Dies and then placed on the circle creating a mask. Then brush over the sky with some ink with the Blending Brushes.
On the Timber 3D Embossing Folder ink was swiped over the inside of the folder. You can swipe over with the Ink Pad or use the Brayer with ink. Then add your Balmy Blue card mat and run it through the machine. This adds an extra dimension to you card and highlights the embossed detail.
So enjoy a little sing along with this cutie for our Sweet Sunday. Have a great week ahead. I hope you escape to your craft space this week.
Happy Crafting,
Jenny
For your crafty supplies in Australia head to my store -> HERE. Or you can contact me directly and I can assist you.
Wednesday’s WOW! #164 – Creating a masked background.
Here’s a technique for you to try sometime. You can create a masked frame and add colour to the centre area.
To do this use the Masking Paper to add strips around the edge of your card leaving a rectangle or square shape in the middle. Using the Brayer or the Blending Brushes roll (or brush) over your ink. Try different colours to create a coloured background.
Once you are done gently remove the masking paper and stamp over your images. Stamping them in black ink will really highlight them against the background. Then it is a matter of adding a simple greeting.
Hope you get to try this out in your crafting soon.
Happy Crafting,
Jenny
Bonus Days are happening now. Receive a $9 voucher now to redeem in August when your orders are over $90.
Need supplies and you are in Australia? Head to my store -> HERE. Please use the Host Code: JTRANKN3
Or contact me directly and I can help you with your order.