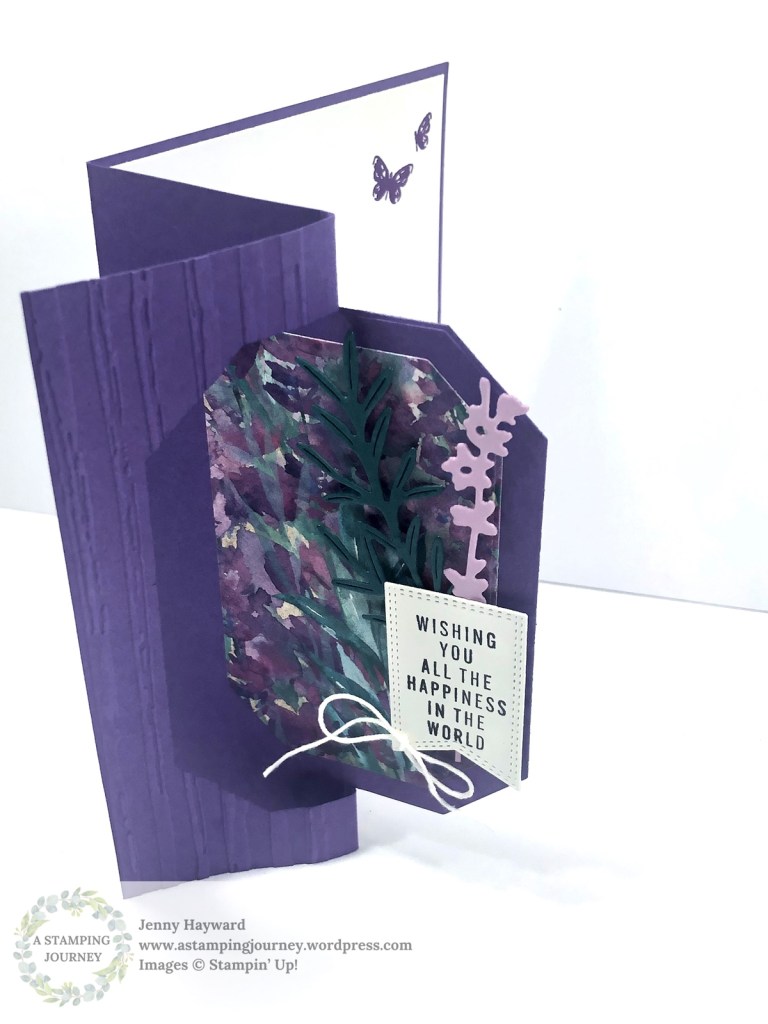
For our recent Onstage event in Melbourne I created a Flip Z-Fold Card for my swap. Swapping is great fun to give and receive the cards. It’s always good to see the different ideas others use – and to meet with other Demonstrators too.
I created 3 coloured versions.
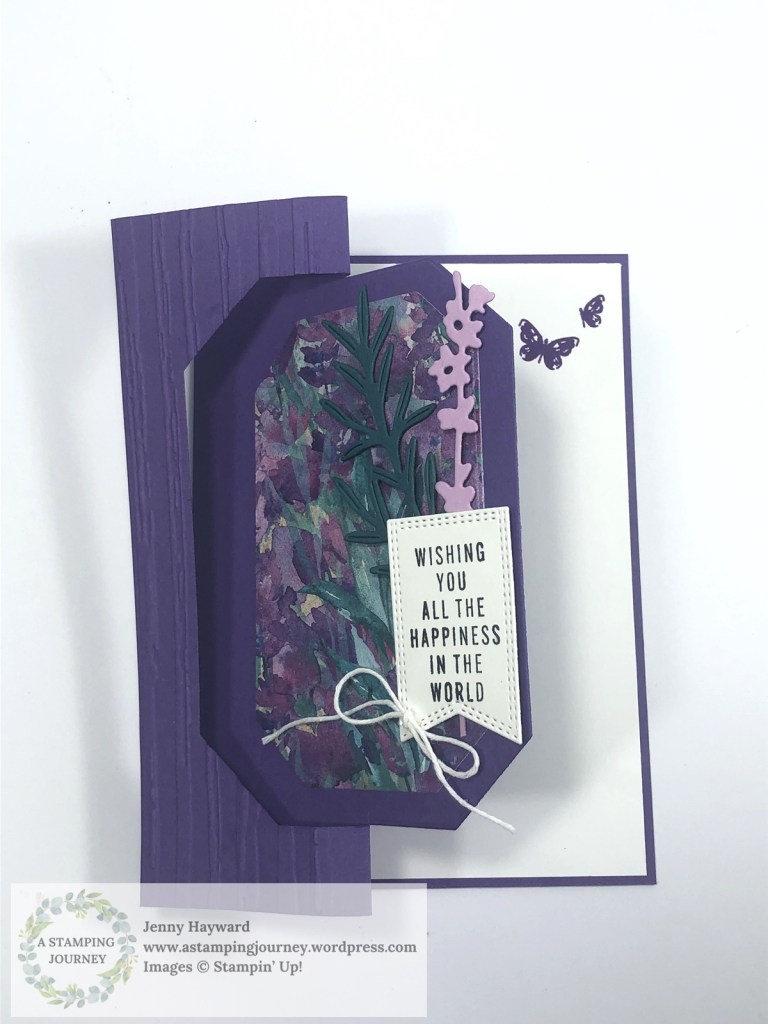
The Gorgeous Grape.
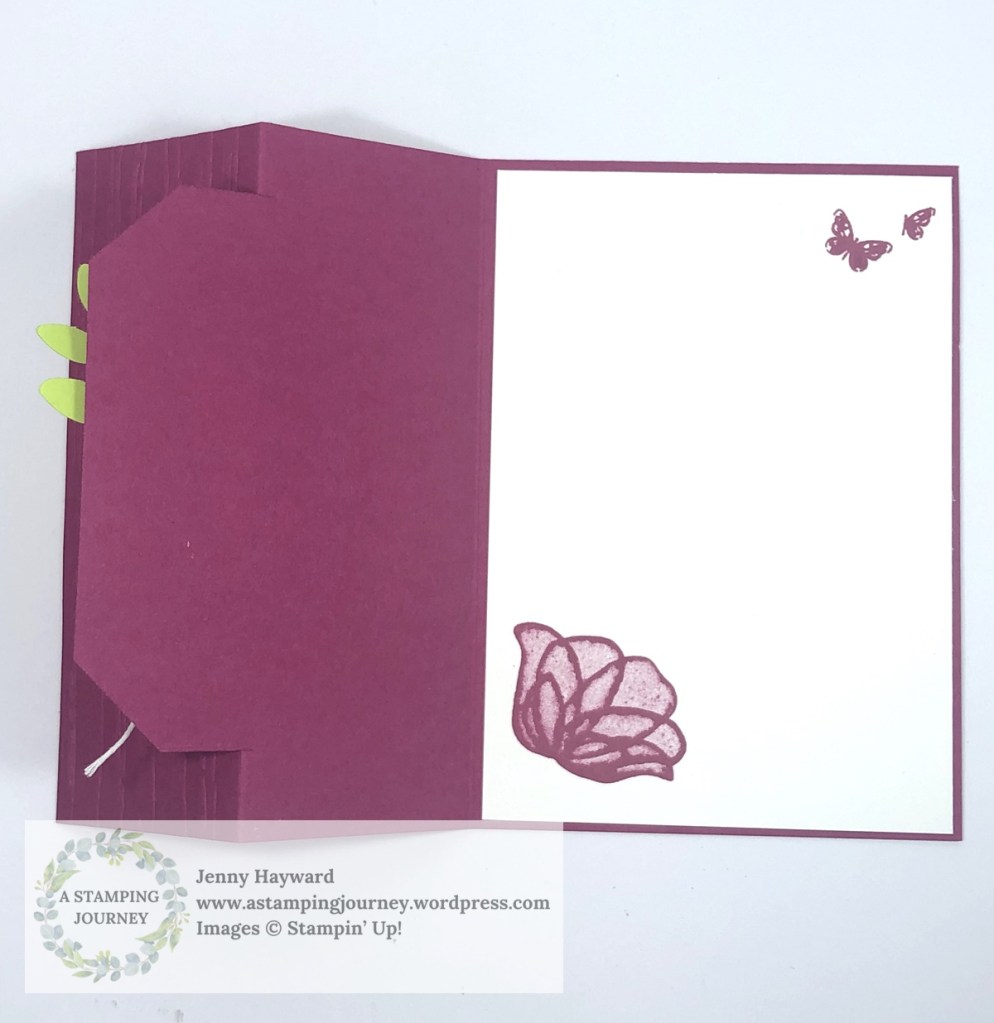
The Berry Burst version.
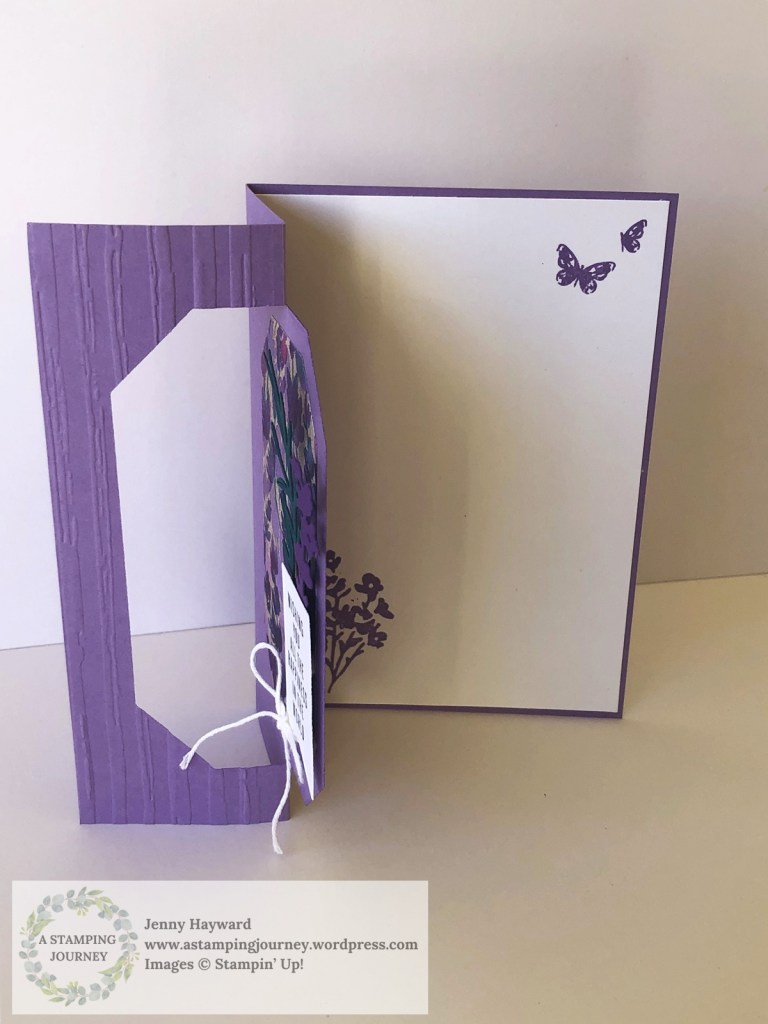
The Highland Heather version.
The Gorgeous Grape and the Highland Heather version uses the Perennial Lavender Designer Series Paper with the Painted Lavender Dies. The Berry Burst version uses the Delightful Floral Designer Series Paper with the Bough Punch. The sentiment for all 3 is from the Translucent Floral Stamp Set.
So what colour do you like?
I thought I would put together a video to show you how to make one yourself.
Hope you get to make one yourself.
If you need any of these lovely products or others and you are in Australi head to my store -> HERE.
I love doing Fun Folds. I made this one some weeks ago but only now getting it out to you. This is a Concertina Fold Card. Have you made one before?
They are very easy to make once you know the scoring. This is the Concertina card. It’s a great way to use your pretty paper and to show off the both sides of it. I used the Perennial Lavender Designer Series Paper with it.
Here is the card.
Do you want to make one? The video is below and I have the measurements further below.
A Quick and Easy Concertina Card
CREATE YOUR OWN CONCERTINA CARD
Cut your paper to 14.4cm x 29.8cm 5 1/4″ x 11 3/4″
Score the paper at 4.4cm, 12.1cm, 19.7cm 1 3/4″, 4 3/4″, 7 3/4″
Card Mat: 10.5cm x 14.8cm 4 1/4″ x 5 1/2″
Fold your paper on the score lines. It’s that easy. The narrow piece folds back over itself on the paper so you see the reverse side. Watch the video if you are not sure.
HOW TO GET YOUR OWN STAMPIN’ UP! PRETTIES?
If you are in Australia and “need” some supplies I would love to serve you.
You can head to my store -> HERE. Please use the Host Code: U7YGDUNP
I have been having lots of fun with the Merriest Trees stamps and dies recently. So I thought I would put together a video for you with 5 Different ways to create with it. There are some extra bonuses too in the video.
Of course there are so many more than 5 ways to use this great versatile Christmas set and the dies.
So take a few minutes to watch the video. Tell me what your Favourite card is. I would love to know.
This is the card I created in the video. It’s a Window card.
See how it looks when it is flat.
Be sure to get this Merriest Trees Bundle. It is carrying over but of course getting it now will save you 10% as the Bundle. It won’t be available as a Bundle later.
If you are in Australia and need to order this or any other products. Head to my store -> HERE.Please use the Host Code: DGASD34B OR contact me directly and I can help you.
And did you know I have a Loyalty Club??
For every order over $50 you receive a Token. Collect 10 and choose $25 of free products. Sounds pretty good doesn’t it?? 🙂
Playing more with the Cheerful Daisies Bundle I created a Split Easel Card.
I used the Fresh as a Daisy Paper with it too.
It folds up flat so you can post it.
You will want to decorate the inside for this one.
Do you want to make one too?
I have the video below. If it doesn’t show you can go straight to Youtube ->HERE.
I have the basic measurements further below for you in both Metric and Imperial.
MAKE A SPLIT EASEL CARD
Card Base: Lemon Lolly – 1 cm x 14.8 cm. Score at 10.5cm. 5 1/2” x 8 ½” . Score at 4 ¼” Centre piece – 8.8cm x 10.5cm 3 ¼” x 4 ¼” Early Espresso Cardstock Side strips – 2 @ 10.1cm x 2.6cm 2 @ 4 ⅛” x 1” Front Panel mat – 8.4cm x 10.1cm 3 ⅛” x 4 ⅛” Designer series paper Side Strips – 2 @ 9.7cm x 2.2cm 2 @ 4” x ⅞” Front Panel – 8cm x 9.7cm 3” x 4” Inside – 10.1cm x 5cm 4 ¼” x 2 ⅛” Whisper White card stock Inside – 10.1cm x 10.1cm 4 ¼” x 4 ¼”
This is the lovely Cheerful Daisies Bundle.
But what about the Fresh as a Daisy Designer Series Paper.
Do you need any of the lovely Stampin’ Up! Supplies for your creating and you are in Australia?
You can head to my store and order -> HERE. Please use the Host Code: 4RY72TBP
Or contact me directly and I can help you with your order.
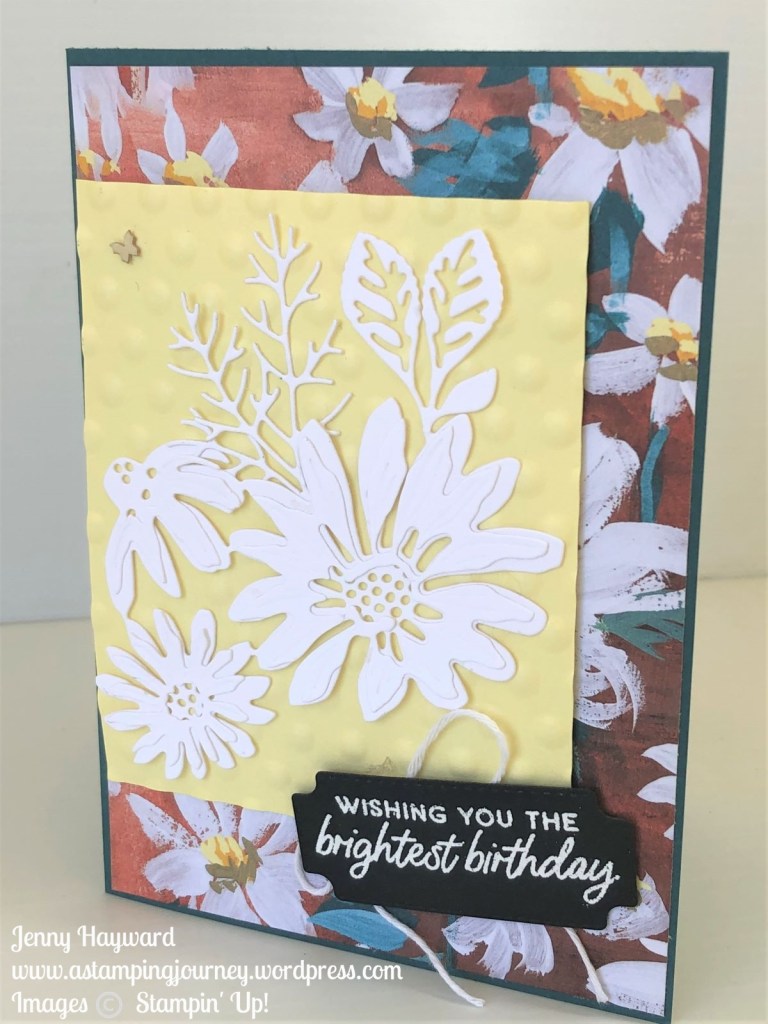
Another project for your on Day 3 of Cheerful Daisies Week. I hope they are cheering your week up?
Today’s project is a simple card with layering the daisy diecuts. This card was shown in my Instagram Reel earlier today. Did you catch it? Head to my Instagram -> HERE.
I like how these dies layer together. It gives the daisies added dimension. I think the black embossed card for the sentiment gives it a POP too don’t you think?
You can see more of the gorgeous Cheerful Daisies Bundle -> HERE.
Don’t miss the Fresh as a Daisy Designer Series Paper too -> HERE.
Do you need some Daisies in your life. Or other Stampin’ Up! supplies and you are in Australia? You can order in my store -> HERE. Please use the Host Code: 4RY72TBP.
Or contact me directly.
Every $50 order receives 1 token in my VIS Loyalty Program. Collect 10 and receive $25 of products of your choice.
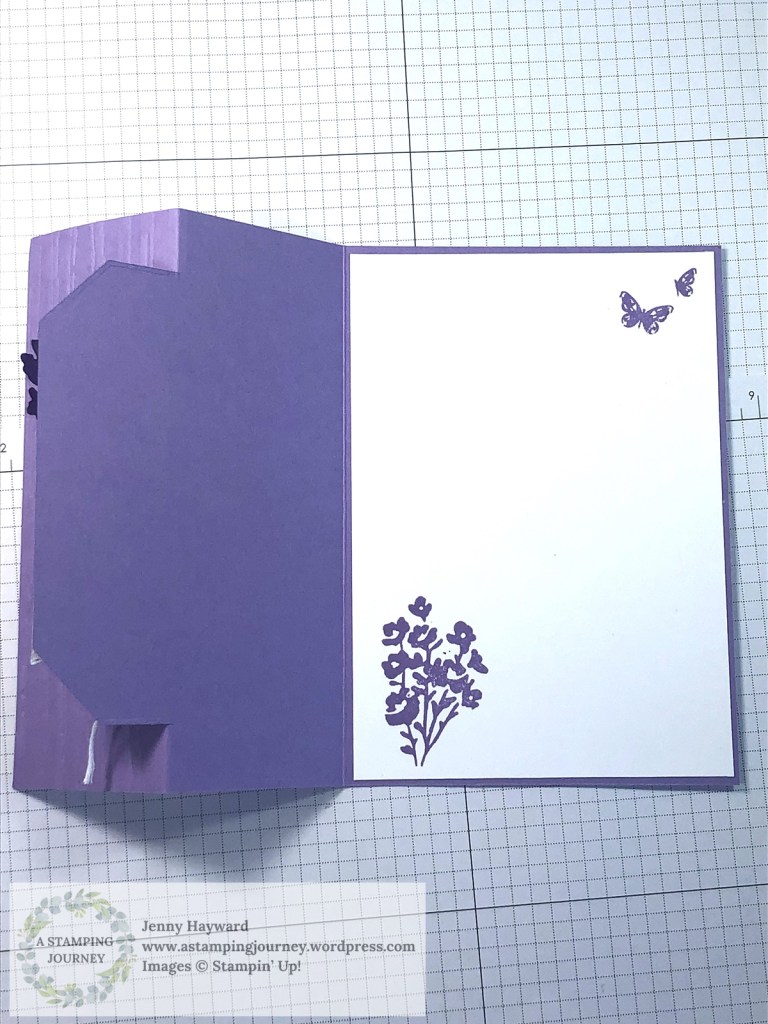
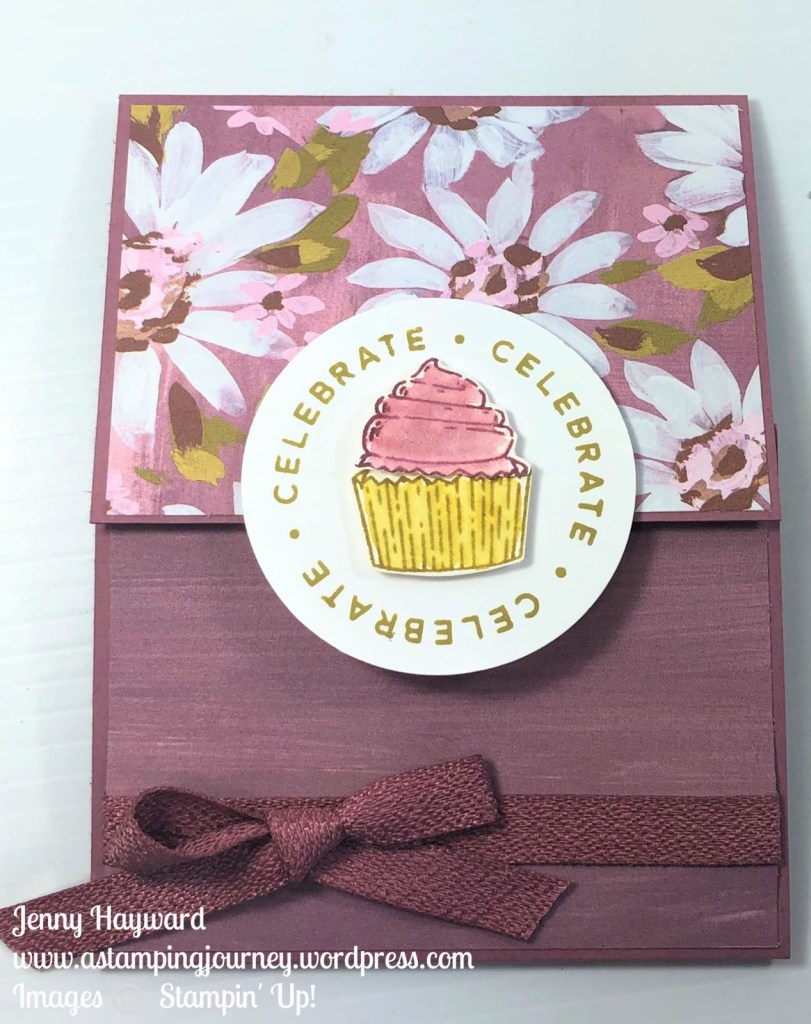
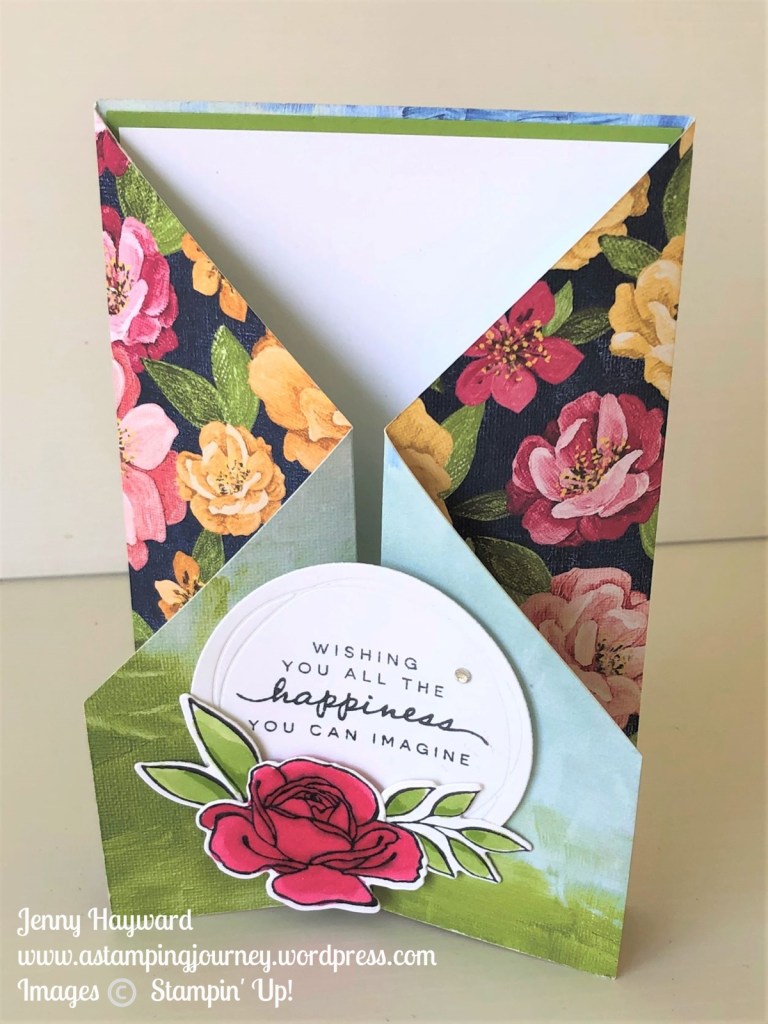
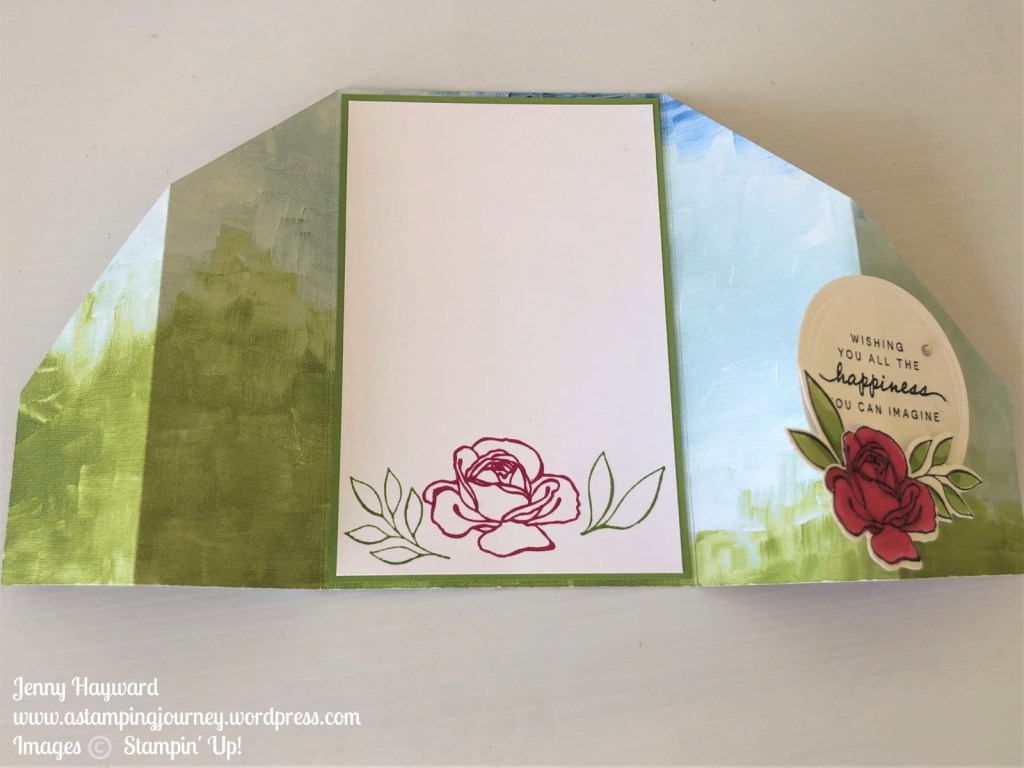
I have used the Circle Sayings Bundle (Stamps and Punch) to make a Top Fold Flap Card. Say that lots of times quickly!
This is the front of the card. I have used the Fresh as a Daisy Designer Series Paper with it.
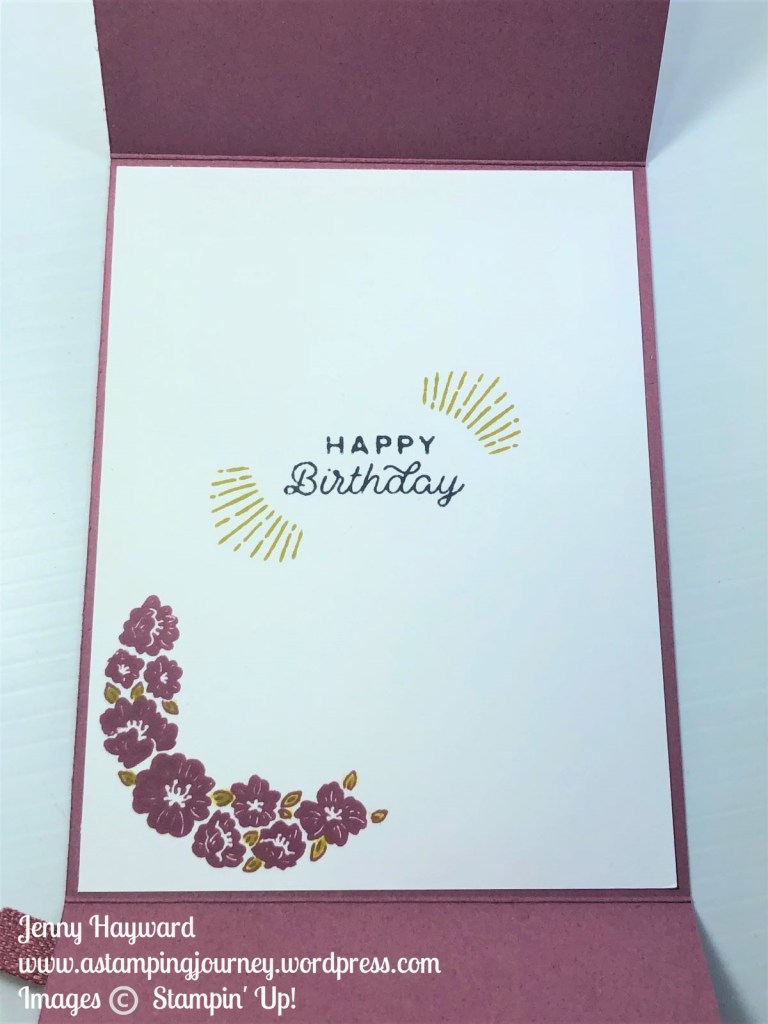
See the inside.
It’s a very easy Fun Fold. I have the video below you can follow along.
The measurements can be seen in the video. I will be sending a tutorial out with this card to my newsletter subscribers next week.
Are you one of my Newsletter subscribers yet? I send out a Project tutorial every week to help inspire your creating.
You can head -> HERE to subscribe straight away. I send out a tutorial when you first subscribe too.
Now for the video. This project was created for the Crafty Collaborations Global Catalogue Launch. A number of demonstrators from around the world joined together to create some great projects using all those lovely new products. I will add the link below for the rest of the projects.
If you can’t see the video then you can head to Youtube Directly and watch it. Click -> HERE.
Have you seen the Circle Sayings Bundle yet?
I love the sentiments and the font of this stamp set. It is so versatile too. And you can just grab the punch and punch it out.
You can join in on the Crafty Collaborations Global Catalogue Launch. There are a number of projects and even some games to join in on.
On the platform that you will see the projects you will first need to create an account. The videos and activities are free but it just registers you so in case you win a prize …
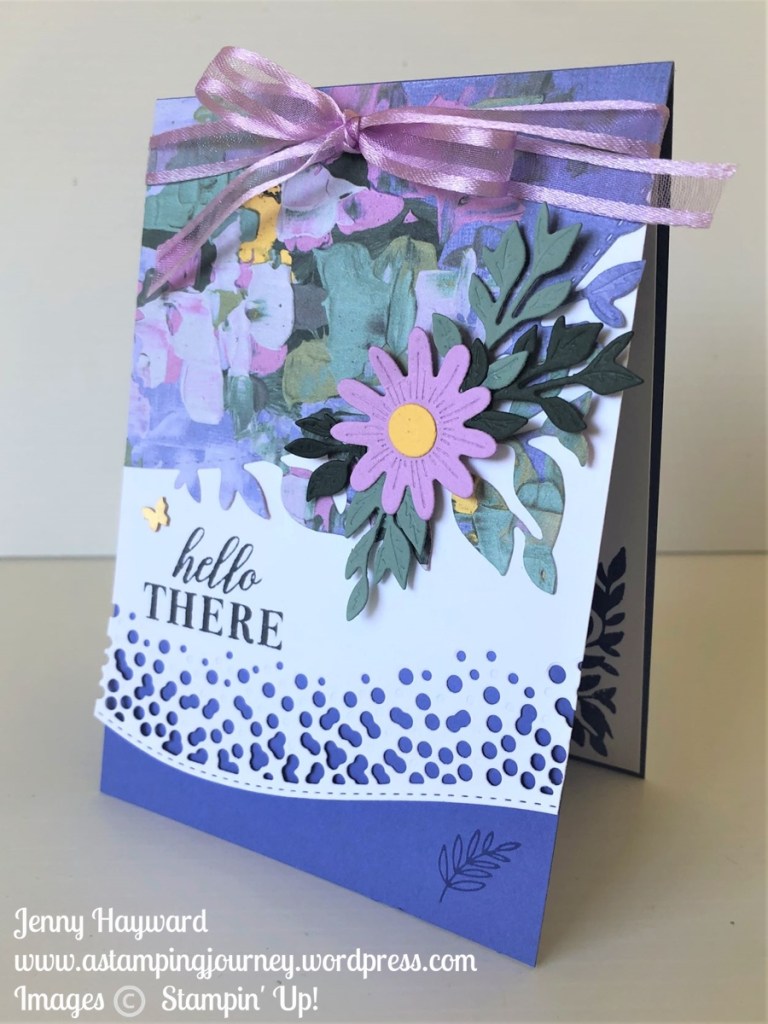
Have you made a Zig Zag Fold Card before? They are so easy and fun. The great thing I love about this fold too is that you get to see both sides of the gorgeous paper. Who really wants to hide one side away!
Here is the card.
Don’t forget the inside when you make one.
I have used the Hues of Happiness Paper. So pretty! And with the Happiness Abounds Bundle.
You can catch the video now below to make your own.
Follow along with the video for the measurements or they will be sent out in next week’s Newsletter. Have you subscribed yet? I send out a different Tutorial each week. Some projects I haven’t shared before on Facebook or on my blog. Click on the link in the Right Hand Column on my Blog.
Hope you get to make one very soon,
Happy Crafting,
Jenny
If you need supplies to create this project or any others and you are in Australia then jump on over to my store -> HERE and pick them out. Please use the Host Code: B47Q7JP2
Or Contact me Directly. I would love to help you out. Thank You.
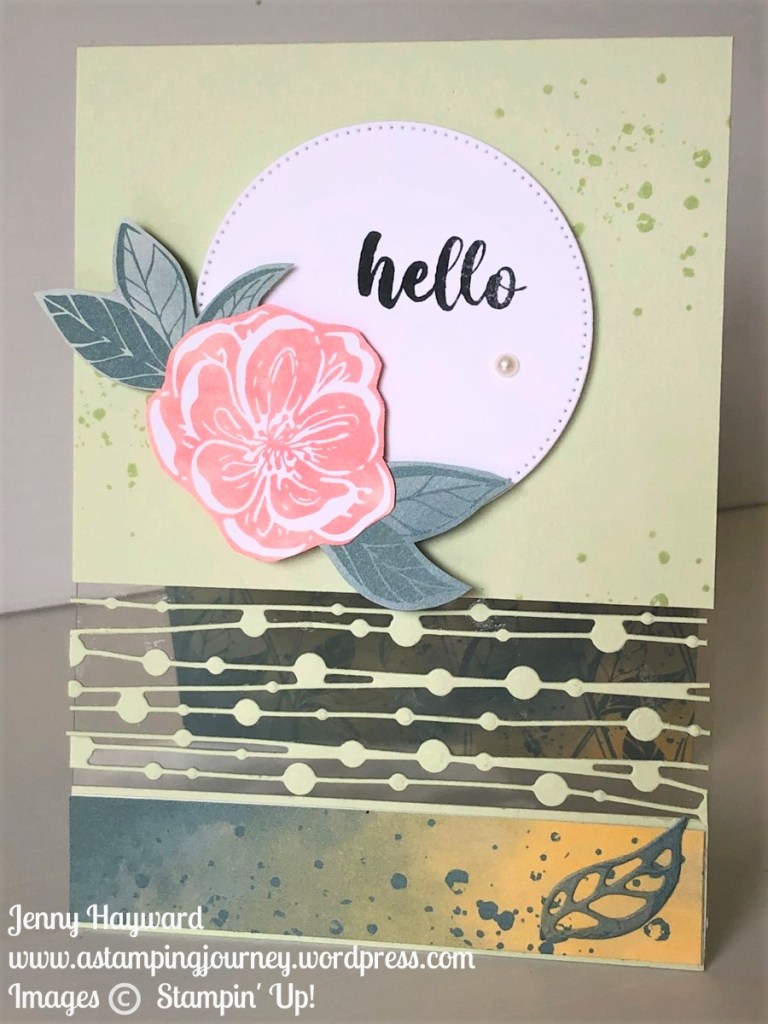
Today is a great Fold card with a little interesting window. It makes such a fun addition. And I have a video to share some tips when you create it.
I have used the Irresistible Blooms Bundle and Hello Irresistible Designer Series Paper.
This is the card.
Don’t you just love that “dotty” strip. It’s so cool!
And for the inside of the card.
Just a tip with this paper. The Paper colours include Pretty Peacock and Lost Lagoon. These were current as In Colors a few years back.
Why have they included these now???
Well they are coming back. Yes! They will be part of the Regular Colour Collections starting in the new catalogue in May.
Watch out! It looks like a little Colour Refresh is happening. More on that in the coming weeks. It will be all revealed on the 29th March.
I share a tip in this video. If you don’t have the those colours as yet. I found using the Evening Evergreen and stamping off one time. It matched so close. But Evening Evergreen will be going at the end of this current catalogue. It’s a good short term fix for now.
So watch the video below. (If you are catching this in an email post and the video doesn’t show, head to my blog directly Or head to my Youtube Channel (HERE) and view the video there.
If you haven’t subscribed already to my Youtube Channel I would love for you to. You will keep up with all those crafty videos that you can go back to anytime. Thanks for that.
Happy Crafting,
Jenny
Need some supplies and you are in Australia? I would love to serve you.
Head to my store -> HERE. Please use the Host code: B47Q7JP2
It’s all happening now with the 2023 Mini Catalogue going Live. Have you checked it out yet??
I mentioned I was involved with the Global Catalogue Launch Party with Demonstrators from around the world. It’s such an exciting time to share with you.
Let me show you the the card I made.
For my project I shared a card with the Around the Bend Bundle and the gorgeous Fancy Flora Designer Series Paper.
I love the detail in these curvy dies. It creates such a cool edge. And there are some other great curvy dies as well.
Here is the inside of the card. Don’t forget that.
Want to catch the YouTube video to follow along? Check it out below.
If you haven’t joined in with the Global Launch Party you can still catch the replays.