Blog Hops, cards, Catalogues

TO A WILD ROSE FOR JULY STAMPING AROUND THE WORLD BLOG HOP!

Hello and welcome to another Stamping Around The World Tutorial Blog Hop.  I am excited to share again with this amazing, talented group.  You might have come from Jo Anne’s blog -> HERE or just starting out.  Either way, enjoy the hop.

Each month this group compiles a Bundle of Projects to send out free following orders from our customers, or people are able to purchase the tutorials regardless of where they live in the world.

We also come together to Blog Hop this time each month.  For our projects for the Blog Hop we create a project using the same stamp set we used in our Tutorials.  This month I used To A Wild Rose.

This is the card I have to share with you today.  It is not an original design and I have seen it on a few blogs but I am not sure what it is called.  I am calling it a Topper Card. 🙂 I have the measurements below.

THE TOPPER CARD

I have used the Perennial Essence Designer Series Paper for the front of the card. Isn’t it pretty?

I stamped the large sentiment image on the first card.  It is a beautiful sentiment.  What a blessing it is to have a true friend.  I am very thankful for the blessing of a number of true friends.  I really loved the sentiment and wanted to use it.  The sentiment was diecut with the stitched label shape in the Wild Rose dies.  I backed it with some Silver Glimmer Paper which I had punched out with the Tailored Tag punch and cut in half.

When I finished the card the sentiment seemed to be too large and out of proportion or so I thought.    What do you think?  I re-stamped a smaller sentiment to go on the front.  The smaller sentiment was diecut with the Stitched Labels dies.
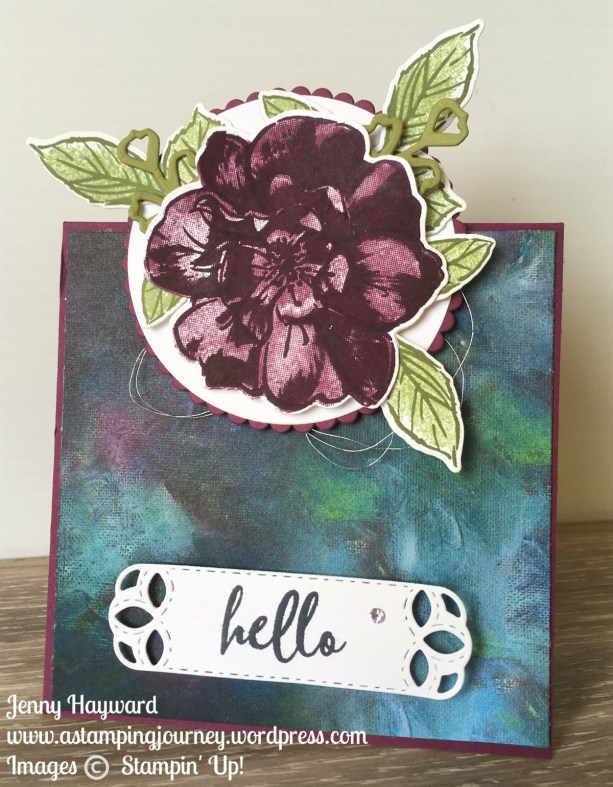
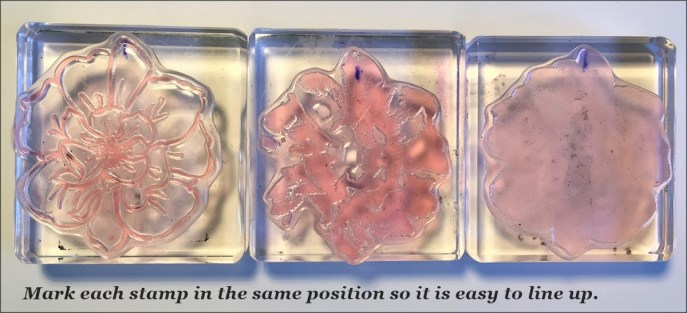
The rose in this set is created with 3 stamps.  You can use one, two or all three stamps together. I used all 3 in this one. The rose was stamped on scrap white paper.  Firstly stamp the outline rose image in Blackberry Bliss, the sparser filler image was stamped in Blackberry Bliss and the more detailed centre stamp was stamped in Rich Razzleberry.  I love how you get the depth to the flower with the multiple images.

I will say it can be a little tricky lining up the 3 images for the rose.  I will share a tip with you.

TIP FOR STAMPING THE ROSE: On each of the stamps I made a mark in pen on the back of each stamp in the same position.  When you stamp you can position the stamp in the same orientation each time.  It saves so much time and frustration – let me tell you.  Here is a photo showing the marks on the stamp. I hope this tip helps.
THE INSIDE OF THE TOPPER CARD

Of course, don’t miss the inside.  I had a strip of designer series paper over so I adhered that on to a piece of white card.  I had stamped an extra rose as I wasn’t sure which one to use for the front.  So I adhered that to the bottom right corner and trimmed off the overhang.  (This rose was stamped in blackberry Bliss for the outline image and Rich Razzleberry for the centre).

MAKE YOUR OWN TOPPER CARD

For the base card, cut card to 10.5cm x 21cm, score at 10.5cm.   (4 1/4″ x 8 1/2″, score at 4 1/4″).

Cut Designer Series Paper to 10.1cm x 10.1cm (4 1/8″ x 4 1/8″)

Cut White card for inside to 10.1cm x 10.1cm (4 1/8″ x 4 1/8).

To create the Topper part.  Make this any shape you desire.  I have used the Layering Circles Framelits. 

The topper is placed on the base card on the fold line with half of the topper overhanging. Remember when you add the topper to the top of the card only place your dimensionals to the lower half of the Topper shape so you don’t see them at the back. 

SEE IN STORE

You can see the To A Wild Rose Bundle in my store now -> HERE.  $93.50 AUS.

Now if you grab this bundle this month you will get a Bonus Day Voucher to get $9 off to go towards next month’s order,  AND you will receive the Tutorial Bundle of 12 exclusive Projects including my different project with the To A Wild Rose bundle.
GRAB A TUTORIAL FREE

Don’t want to miss anything?  Sign up for my Newsletter and receive one Tutorial as a Thank You.  This will be a project from a previous Tutorial Bundle.  Check the Right Hand Column.


CONTINUE THE HOP

Thanks for hopping with me today.

Now you are ready to move on to the next blog in the hop.  Now head off to Sue’s Blog -> HERE.  There is a list below if you get lost.


Eva Pottsova (Crafting with Angels)

Stefanie Pletscher (The Crafty Medic)

Margriet Siekman (Creatief met Marsie)

Jo Anne Hewins (Luv 2 Create)

Jenny Hayward (A Stamping Journey)

Sue Allen (Sue Allen Simply Craft)

Linda Handford (Stampin by the Beach)

Lori Mueller (Stampin’ Dreams)


cards, Christmas, Classes

CHRISTMAS IN JULY IS COMING!

Ho! Ho! Ho!

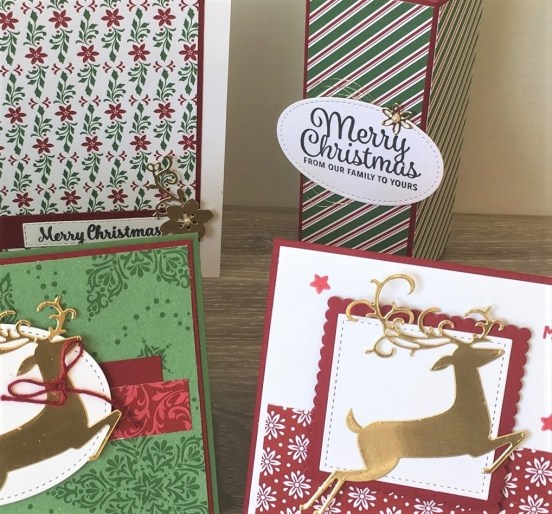
Come and celebrate Christmas in July with some festive fun and creating. We have 3 gorgeous cards and a gift box.

Here is a sneak peek.

WHEN: Friday 19th July at 10am or Saturday 20th July at 2pm.

WHERE: My studio, East Corrimal.  If you are a Wollongong Local come and join in.

COST: $25. Includes a $5 voucher to redeem in the upcoming Holiday Catalogue!!

Please RSVP: Wed 17th July. Book early to reserve your seat. By email jghayward@yahoo.com or drop a comment below and I will contact you.

I look forward to seeing you.

Jenny

cards, Catalogues, Stampin' Up!

SUNDAY SUITES – MOSAIC MOOD!

I don’t usually post on a Sunday but today I am starting a new series on my blog.  Most Sundays I am going to share  with you about some of the Stampin’ Up! Suites available for Sunday Suites. You hear about the Suites but sometimes don’t see them closely.

I have been sharing some projects this past week with the Mosaic Mood Suite so I thought we would start here today.

Introducing the Mosaic Mood Suite.

Look closely at the samples.  The images are pretty cool right.  They look like mosaic tiles.  You can easily cut some of the images from the pretty Mosaic Mood Specialty Designer Series Paper.  

Stampin' Up! Mosaic  Mood Suite

Here is a closer look at the papers.  You can’t tell in the photo but some of the images have a shiny finish.  It looks – and feels really nice.

The colours in the papers are Blushing Bride, Crushed Curry, Garden Green, Mint Macaron, Soft Suede, Terracotta Tile, Very Vanilla, Whisper White

To see the complete suite see below.

You have lovely Flower Faceted Gems. 8 each of 3 colours: Crushed Curry, Mint Macaron, Terracotta Tile.  The Mint Macaron Textile Ribbon is so soft and gorgeous. The Timeless Label Punch can be used for many of your Sentiments.  I love the funky Mosaic 3D Embossing Folder.  You could use that for many different occasions for a fun background on your cards.

With all the Suites, you can buy the items individually or buy them in the Suite Bundle with just one item code.  Makes ordering so much quicker.   This is what you will find in the Mosaic Mood Suite Bundle.  $130.25 AUS

Here are just a couple more samples for you.  You can see the images closer that has been cut from the paper and even the funky embossing.

These are available in my store now -> HERE. 

Thanks for visiting.  Enjoy your Sunday,

Jenny

cards, Challenges

COLOUR INKSPIRATION CHALLENGE #58!

It’s been some time since I have been able to play along with the Colour INKspiration Challenges – or any challenges really.  So the other day I had a little time so thought I was going to do one.

This week’s Colour INKspiration Challenge #58 is using the colours: Blushing Bride, Crumb Cake, Whisper White and Gold Foil.  You can follow along -> HERE.

Here is my card.  I thought the colours suited a Vintage Style or for a sweet Baby card.  I went with a Baby card.  The new stamp set Wildly Happy arrived last week so thought this was a great opportunity to ink it up.

The bunny and the sentiment were heat embossed with Gold Embossing Powder. I used the Shimmery White card. I lightly watercoloured the bunny using the Blushing Bride inkpad and an Aquapainter. A decorative strip and little flower was diecut from Gold Foil using the Flourish Thinlits dies.

Then I went a little “arty”.  On the Shimmery White card mat I flicked some Blushing Bride ink splatters by adding some Blushing Bride ink to a Clear Block, adding a littler water with the Aquapainter and then flicking it off the block gently on to the card.  I was a little nervous doing this as it is not something I have done before and wasn’t sure how much control I had – but it worked ok.

If you have time why not play along with this challenge.  They are fun to be a part of and to really extend/challenge your creativity.  Have a go!  (I added the link above).

Thanks for looking,

Jenny

cards, Catalogues

SIMPLE AND AVID DAISY LANE!

I wasn’t sure about these cards and I’m still not but you know I am showing you anyway because sometimes things don’t always go right.

For these 2 cards I wanted to use the Daisy Lane to make a card for #simplestamping which is a big focus of Stampin’ Up! at the moment but then step it up a little for a Casual or avid stamper.  

Firstly to define the two.  Simple stamping is for those just starting out with limited supplies and putting together a card with card, ink and stamps.

A Casual stamper is one who likes to make a card semi-regularly you might stay.  They are starting to collect a few more supplies and is using more involved steps and techniques.

An Avid Stamper who is one that you could say is “obsessed”.  They collect all the tools and stamps and will create very regularly.

Who do you say you would be??

We have a card more for the simple stamping first.

This card is not quite one layer.  There is the Rich Razzleberry card base and Petal Pink card mat.  The sentiment is from the Beautiful Day stamp set with the little flourish from A Big Thank You.  So there is more than one stamp set that you would normally use on a simple card for someone who has very limited supplies.

We have the next one which is for the Casual/Avid stamper. 

This one has a couple of more layers.  Using the same stamp sets though.  Adding the extra elements gives it a little more detail.

I hope you like them. As I said I am still not sure about them and the lighting is not great but there they are for you.

Have a great day,

Jenny


cards, Catalogues

FLIRTY DAISIES!

This week I am sharing some Daisy cards with you using the Daisy Lane Bundle.  

I am sharing this card with you first.  I am not sure about it still but, well … I am still putting it out here as it may inspire someone – in some way.

We are just keeping it simple with this one with a little stamping of the daisies in Flirty Flamingo and Rich Razzleberry.

Just one stamped and punched daisy on one of the daisies to highlight it.  Add a little Clear Faceted Gem to the centre.

Sometimes you can just do simple right. 🙂

I will share more daisies with you again next post,

Jenny

cards, Catalogues, Stampin' Up!

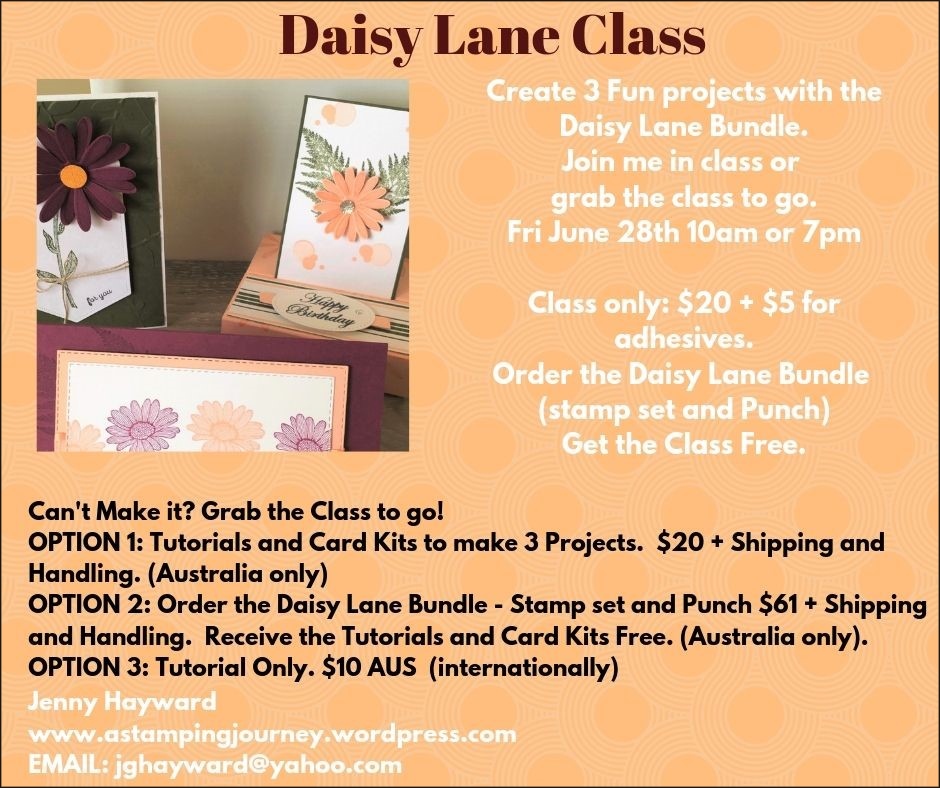
DAISY LANE CLASS – OR TO GO!

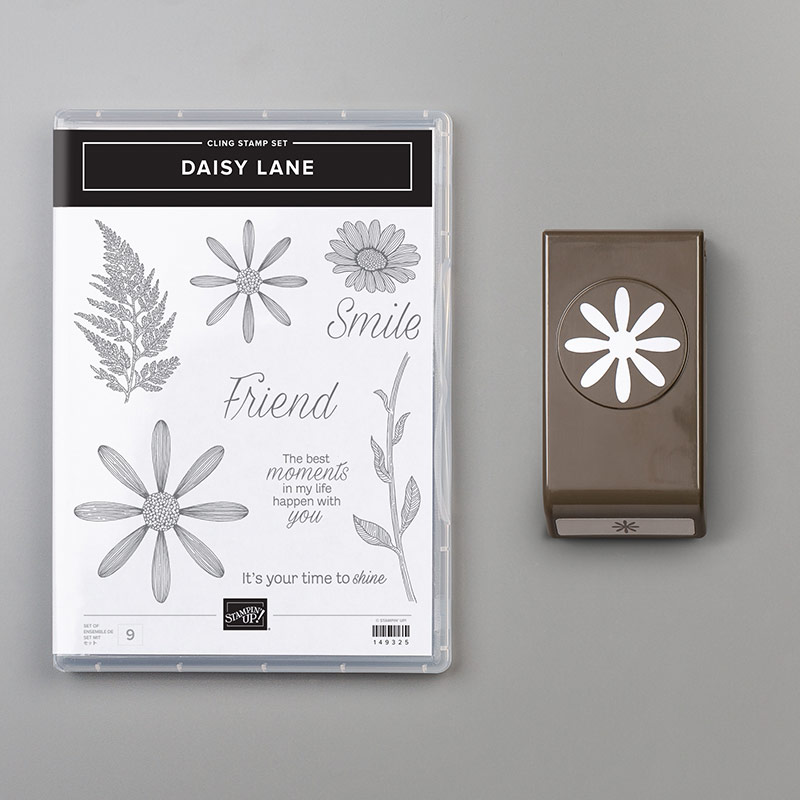
The Daisy Lane Bundle is a great new stamp and punch set in the 2019 Catalogue.  The Daisy Punch from the previous catalogue co-ordinates so well with it too.

We are going to have some fun with it in class this week.  Never fear if you can’t make it.  You can get the Class-To-Go or buy just the tutorial. 

Here are all the details.

Make your choice.

Just to summarise here are the options.

DAISY LANE CLASS

Friday 28th at 10am or 7pm

1) Class Only – $20 (+ extra $5 for adhesives).

OR

2)  Get the Class Free when you order the Daisy Lane Bundle (stamp set and Medium Daisy Punch) $61 + Shipping and Handling.

CLASS TO GO 

1) Tutorial + Card Kit for 3 projects – $20

2) Order The Daisy Lane Bundle and receive the tutorial and card kits Free. $61 AUS + Shipping and Handling.

3) Tutorial Only $10

PLEASE RSVP BY 26TH JUNE


The Daisy Lane Bundle is available in my store now -> HERE.

Please use the Host Code: H2BBRFTE

or Order from me directly.

THIS WEEKS SPECIAL ONLY:

Order the Daisy Lane Bundle and receive a pack of Clear or Gold Faceted Gems free. (your choice of colour).  Great for the centres for your daisies.


I will be sharing lots of Daisy projects this week so stay tuned.

Jenny


cards, Catalogues, Stampin' Up!

BIRD BALLAD WEEK DAY 5 – CUTE TAGS!

I have been sharing cards all week for my Bird Ballad Week.  Have you liked seeing them?  Today I thought I would show you some tags I have made.

These first ones are very simple.  I adhered a strip of the Bird Ballad Designer Series Paper to a strip of White card.  This makes the tags more sturdy.  Then I could punch them with the new Delightful Tag Topper Punch.  It was just a matter of tying through some Mint Macaron Ribbon and I added a small sentiment on Petal Pink card with some loops of Silver Thread behind.

Bird Ballad tags

I made a number of these tags below. These were little Thank You tags for customer orders this month.  Did you get one??

For these tags I added some of the Bird Ballad Designer Series Paper to White card again and punched them out with the Delightful Tag Topper Punch. These were then decorated a little differently.

For the “thank you” flower one I stamped the flower on some scrap white card and coloured it with the Stampin’ Blends.  The sentiment was stamped on Mint Macaron card and punched out with the new Timeless Label Punch. I positioned the flower on the card so I could see where to stamp the leaves on it.  Then when I had done that I raised up the flower with Dimensionals.

For the other tag I stamped the sentiment (which is from a Demonstrator stamp set – Workshop Words Too).  It’s hard to see but I diecut a flower from the Wild Rose Dies out of Vellum and added it under the sentiment piece.

Did you see the fringing though??  This is made from the Woven Threads Trim.  I just pulled off the stitching from along the bottom to the length I wanted.  Here you can see it clearer in the photo below.

Below is an image for you to PIN on Pinterest as an easy reminder.

There you have it. 5 Days of the Bird Ballad Suite showing lots of different projects with this lovely suite.  I am sure I will be creating a lot  more with them so watch out.

Be sure to add this bundle or any of the other products to your next order.

In Australia? You can grab it in my store now -> HERE

Please use the Host Code: H2BBRFTE

Orders over $75 receive the Tutorial Bundle of 12 Projects for Free (They are not using Free As A Bird bundle in the projects).

Thanks for visiting me for all these projects.  I would love to hear what your favourite has been.  Drop me a comment and let me know.

Jenny


cards, Catalogues, Classes

BIRD BALLAD WEEK DAY 4 – CATALOGUE KICK OFF MAKE AND TAKE!

Bird Ballad Week Day 4.  Have you liked the projects so far?

A few weeks ago I had my Catalogue Kick-Off event for everyone to come and see the new catalogue and have fun creating.  This was one of the cards that everyone got to make using the Bird Ballad Suite.

I have CASED this card from Angie’s blog -> HERE. I loved the simpleness of it yet it is still elegant.  Everyone who came to my Kick-Off loved the card too.

Bird Ballad card

I used the Stitched Nested Labels Dies and the gorgeous Bird Ballad Designer Series Paper.  The birds were coloured with the Petal Pink Stampin’ Blends.  I had never used Petal Pink until a few weeks ago.  Now I am really starting to love it – possibly.  They certainly work nicely with this suite.

You can grab the Bird Ballad Bundle in my store now -> HERE.  Please use the Host Code: H2BBRFTE

I really love those Stitched Nested Labels Dies.  You won’t be sorry you bought those. You can buy them as the bundle or individually.

Thanks for visiting today.  Have a great day/night wherever you may be visiting me from.

Jenny


cards, Stampin' Up!, Techniques, Videos

WEDNESDAY’S WOW! #72 + BIRD BALLAD WEEK DAY 3 – COLOURING THE PRETTY BIRDS!

Today is a double Whammy for you.  We have Wednesday’s WOW!  and also we are up to Day 3 of my Bird Ballad Week.  Today I have a video for you. I have been colouring the little birds and the flowers from the Free As A Bird stamp set so thought I would actually share a video with you.

This is the card I will show you how to colour in the video.

See the video below.  Bare in mind that this is a new area for me so it’s a work in progress AND I have a bit of a cold so the volume might be a bit quiet.  Just turn up your volume and watch away.  And you can fast forward in parts of the colouring. 🙂  I will work on that too.  I do appreciate your feedback though.  Good or bad – I can handle it.   Thank You. 🙂

I really like the Stampin’ Blends for colouring.  They make it so easy to get the contrast in colours.  I love that a lot of the images with Stampin’ Up! have shading on different parts of the image so you can follow these to get the contrast as well with the Light and Dark Stampin’ Blends.

I hope you found this helpful?  Would you  like more videos like this?  Constructive criticisms welcome.

I still have more to show you with this bundle so be sure to stop by again tomorrow as we continue our Bird Ballad Week,

Jenny