cards, Catalogues, Techniques, Tutorials

BRUSHO CRYSTALS LONG WEEKEND – DAY 2!

What did you think of yesterday’s project??  I have a another project for you today.  
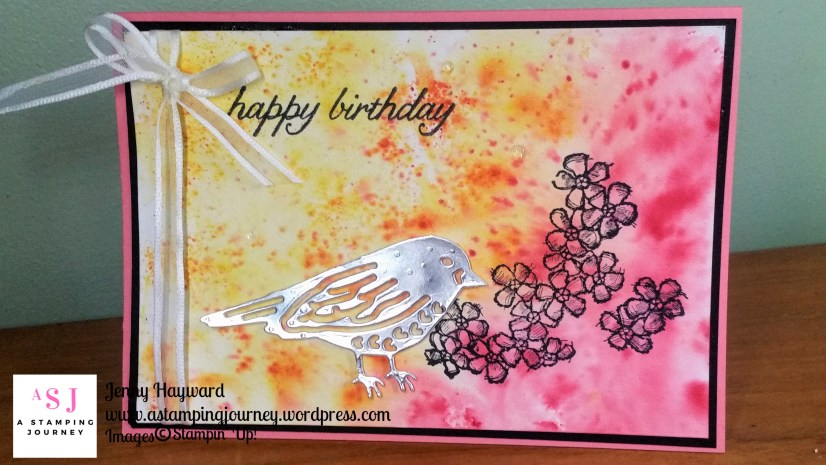
We saw yesterday creating a background with the background.  They are really fun to use them that way.  This is another type of background.  I don’t have a video for this one but I will walk you through it.

CREATING A BACKGROUND WITH THE BRUSHO CRYSTAL COLOURS

On this card I have used Shimmery White card and I have added the Brusho to dry card.

On your card sprinkle over your Brusho Crystals.  I added the Brilliant Red in the right hand corner, a small amount of the Gamboge in the centre section and the Yellow on the left.  Use the Spritzer and lightly spritz the card with water. It’s always magical watching the crystals dissolve and the colour emerge.  It’s one of those moments like heat embossing.  Do you feel that?? 🙂

Take your time and just play and watch what happens.  You may want to spritz more or you may want to add more crystals.  The “speckly” effect is created by sprinkling with the Crystals and only spritzing lightly so they are more spots than actually blended if that makes sense??

Leave your card to dry.

Once dry you can assemble the card.  For this one I stamped the flowers from Birthday Blossoms in the corner and the sentiment at the top.  I was going to stamp the sentiment and raise it up and I think I should have done that but never mind it’s more to see the Brusho effect.  I love the thin White Organza ribbon.  So soft and pretty to tie.  The base card is Flirty Flamingo.  It worked out a good match for it even with using the Red on the card.  The bird from Birds and Blooms Thinlits were cut in Silver Foil.


Thanks for stopping by for this one.  Come on by tomorrow.  I think I have left my favourite until last.

cards, Techniques, Tutorials, Videos

IT’S A BRUSHO CRYSTALS LONG WEEKEND – DAY 1!

We start today! I am excited to bring these projects to you for our Brusho Long Weekend.  I have been playing with these Brushos (as I commonly call them) for the past few weeks.   Each day over the next 3 days I will bring you a fun new project with a video and tips.  I hope you enjoy them.  Plus don’t miss out on the Special bonus savings this weekend if you are an Australian resident.

Warning: These Brushos are fun, addictive and at times messy.  🙂

DAY 1

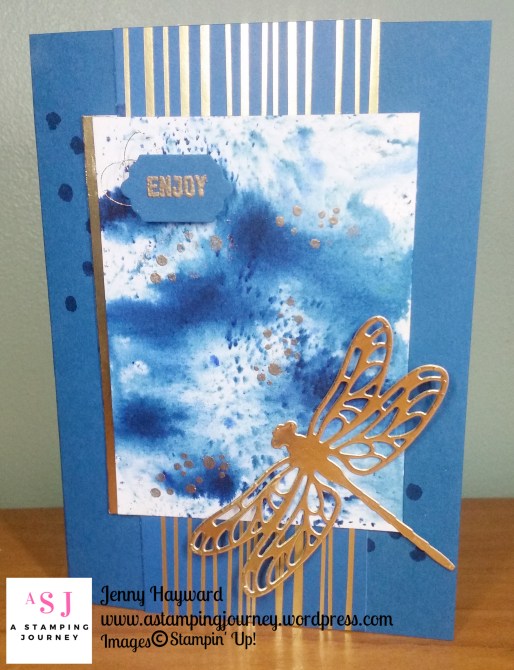
My first project is creating a simple background similar to this one I have shown on this Dragonfly card.

Here is a video to create a washed out effect but I have also written a description below with a few tips.

NB. The above card was made a few weeks ago as I was still experimenting.  For the card above I used watercolour card and sprinkled over the powder with the card dry and then wet it. It does give a slightly different effect.  On watercolour card the colour doesn’t run as well. You can create a background like this or how I have in the video.

In the video: I chose to use Gloss card and wet the card with the Aquapainter before I added the Brusho Crystals as the water enables the Crystals to spread easier.

Sprinkle over some Brusho Crystals lightly on your card after you have wet the card.  I have used the Prussian Blue.  You only need a small amount and for this technique I would keep it to one colour.

Spritz the card with water. Tilting the card will help make the colour run. Spritz lightly with more water if you think it needs more or you can sprinkle over more colour if need be.   When you are happy with the effect, leave the card aside to dry.  Once dry you can assemble the card.

On the card above I stamped the Dapper Denim base with the dots from the Dragonfly Dreams set.  A dragonfly was cut from the Detailed Dragonfly Thinlits in Gold Foil. I stamped a few of the dots from Timeless Textures in Versamark on my coloured card piece and heat embossed them in gold.  The paper is from the Eastern Palace Specialty Designer Series Paper.

Just a note on the sentiment: I masked part of the sentiment from the Dragonfly Dreams set and inked it with versamark.  After I stamped it on the Dapper Denim card I heat embossed it in gold.  It was cut with the smallest framelits in the Lots of Labels Framelits.  I added a few loops of the Gold Thread behind the sentiment.

I hope you like this project. Each time you do it the effect will be different.

Come back tomorrow for a second project.

Grab 15% off your Brusho Crystals this weekend. (ends Sunday 11th 8pm). Details below.  Includes an information sheet on ways to use your Brusho Crystal Colours.


cards, Catalogues, Stampin' Up!, Techniques, Tutorials, Videos

IT’S ALL ABOUT THE BRUSHOS THIS WEEKEND + GET15% OFF!

It’s coming this weekend.  It’s a Brusho Crystals Long Weekend and I am inviting you to be my guest.

I have been busy experimenting, preparing, creating and videoing ready for you. I have 2 face-to-face classes happening tomorrow and Saturday but I have some projects to share with you too. It all starts on my blog here tomorrow so be sure to stop by.  If you haven’t already subscribed to my blog to get updates then click on the link in the right hand bar so you won’t miss out on the updates.

So what do I have in store?

I have 3 projects to share with you including some videos of different ways to use the Brusho Crystal Colours. The projects I share will be different to the ones I am doing in the classes but they will be special.

In addition, I have a special on the Brushos for Australian residents only. (sorry folks!).

**Receive 15% off the price. RRP is $52    Take  off $7.80    Weekend price = $44.20 (+S&H).  This is for Australian residents only.  Special not available in store.  Contact me directly.  Includes an information sheet on using your Brusho Crystal Colours.  Offer ends 8pm Sunday 11th Feb.**

So stop by tomorrow for our first project.

Jenny

cards, Catalogues, Tutorials, Videos

TIPS WITH THE CHARMING CAFE BUNDLE!

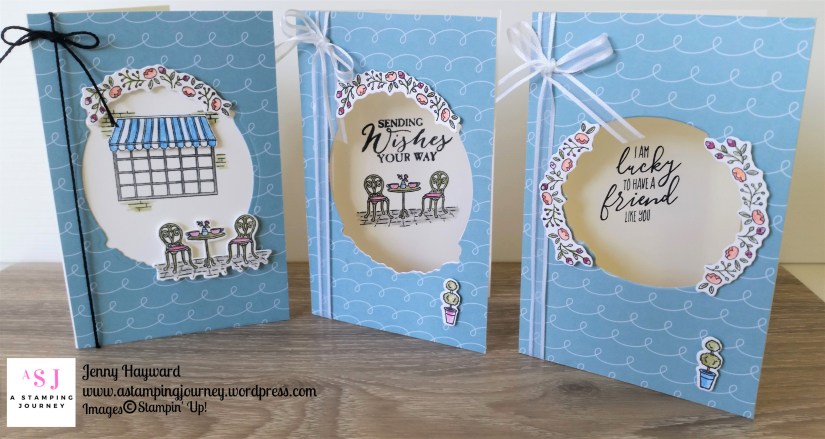
Have you seen the Charming Cafe Bundle in the Occasions Catalogue?  I was quite taken with this bundle as I saw great new options when making your cards like the Tri-fold card it shows. So this bundle was one of the first on my order.  I haven’t seen much done with this Bundle around so I thought I would share a few tips with using it.

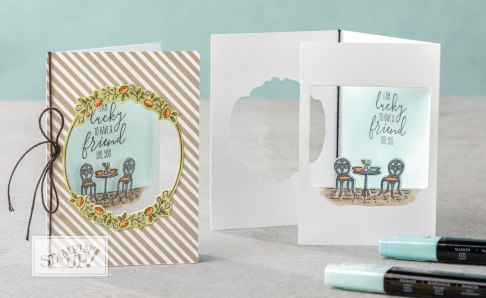
This is the Bundle shown in the catalogue on page 25. It has the really sweet Charming Cafe stamp set and the Cafe Builder Framelits.

For the first card I made with this bundle I CASED this card which is in the Catalogue.

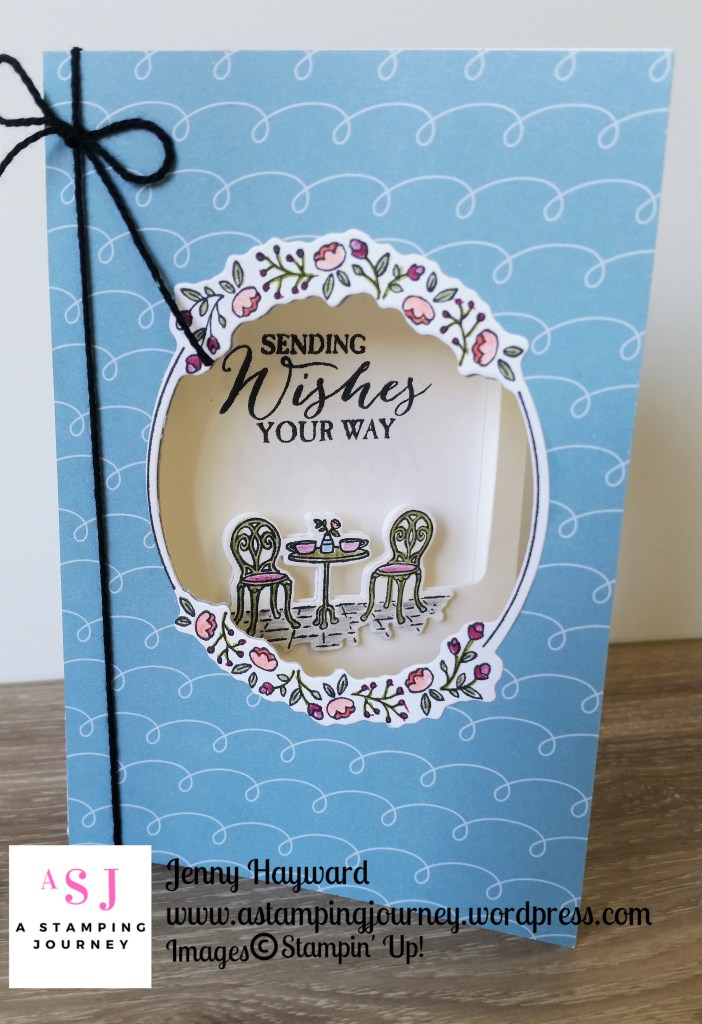
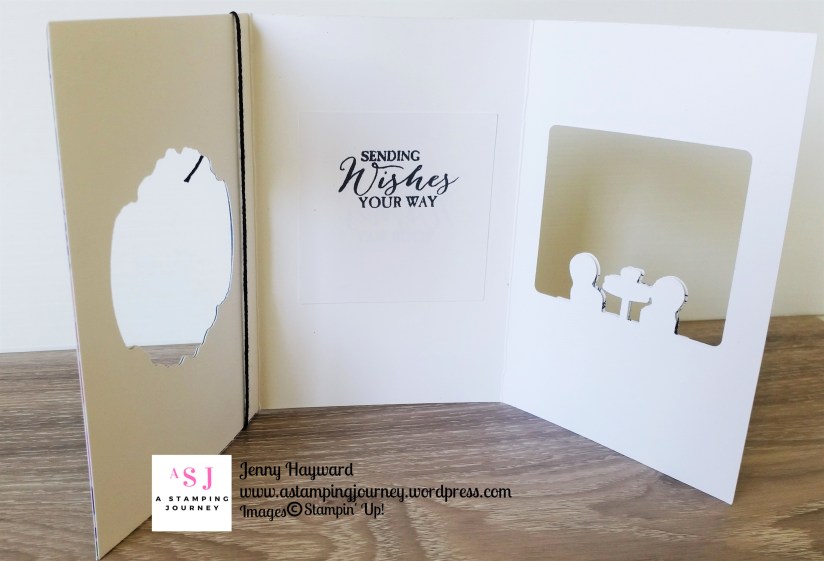
I will be honest it didn’t go as smooth as I thought, but that’s just me …  😉  Here is my card.

The front view

Inside

Open

It all came together well in the end.

I have a video below to show you some tips that I discovered using it.  I apologise in advance.  I am new at the video business but hopefully it helps.  I will outline the tips below too.

(NB: If you receive this blog update by email and the video is not showing please head to the blog post directly and view it there.


SOME HELPFUL TIPS

– Adhere your designer Series Paper BEFORE you cut the front window.  Much easier. 🙂

– Use the smaller rounded shape for the front window so you have something to adhere the flowery circle on.

– After you cut your front window.  Fold the card and sit the next Framelit inside to get the correct position to look through the front.  Open your card before you cut it.

– To stamp your sentiment or the inside image close up the centre fold so you can position the stamp THROUGH the window. 🙂

Since I put together this video I discovered Stampin’  Up! have a video on these but I think I can share a few “user errors”.


SOME ADDITIONAL CARDS

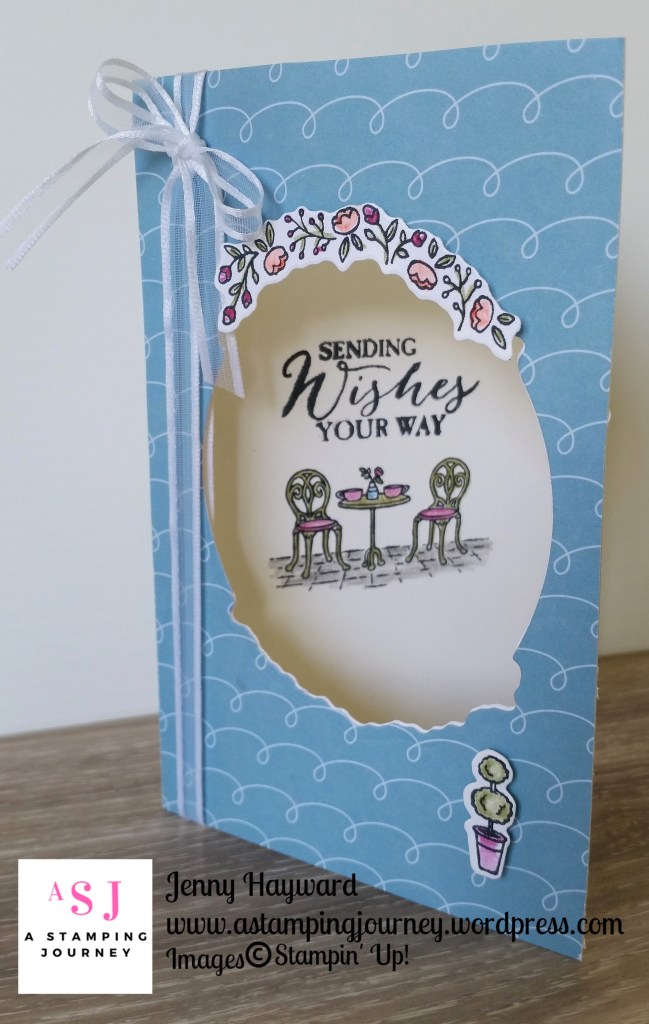
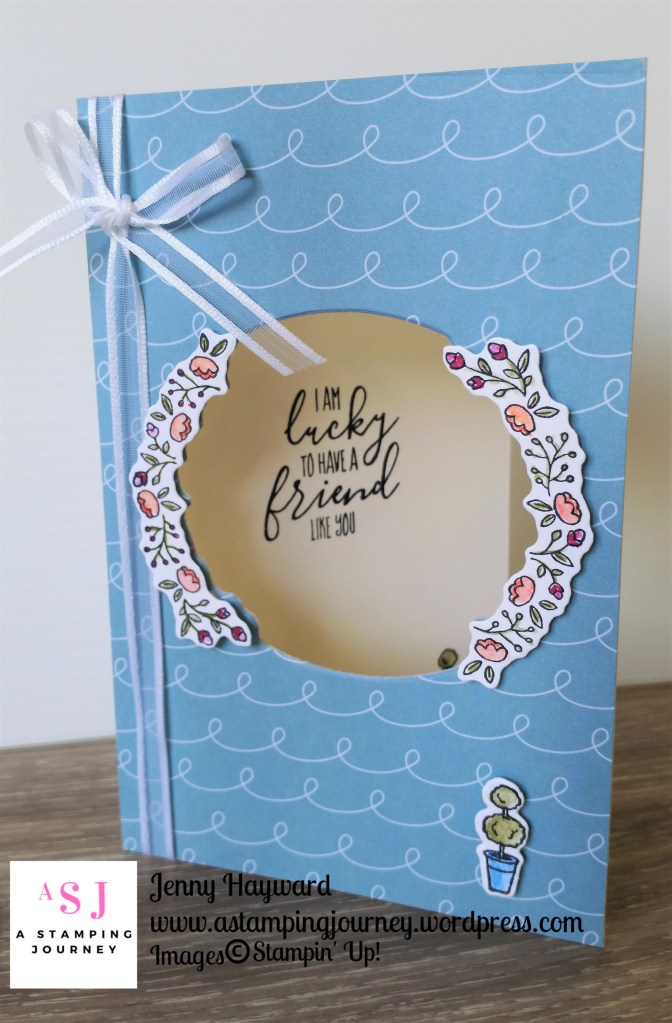
All is not lost though with my “mistakes.  Here are a few of the other cards that I salvaged.  I cut off the centre flap and made standard fold cards with them. Note: All the images were coloured with the Watercolor Pencils. It’s hard to tell but I coloured some of the flowers and the Topiary bush with the Clear Wink of Stella pen.  I have used the gorgeous Whisper White Organza ribbon too.

Close-ups.

I cut the large Circle shape from the front which wouldn’t work trying to adhere the diecut flower circle on it. So I added one flower strand to the top and stamped the chairs and sentiment inside.

You would have thought I learnt the first time not to cut the large circle shape. No! So I stamped the awning image on a piece of Whisper White and adhered that to the inside of the front flap on the card.  I stamped the window a second time and cut just the awning and raised it up.

Look! I cut the smaller circle shape in the front.  DOH! It was on the side.  It doesn’t matter too much as I cut the flower strands and raised them up off the card.  I kept it simple and stamped the Topiary for the front and I added one to the inside of the card too.

So I hope you find these tips helpful.  I do love this bundle.  We are using it at my Catalogue Launch this weekend so I will show you the card next week.

You can buy the Bundle in store now -> HERE.  It is available in Wood mount ($88AUS) or Clear Mount ($75.50AUS)

Have a great weekend,

Jenny


3D projects, Blog Hops, cards, Catalogues, Stampin' Up!, Tutorials

STAMPIN’ DREAMS BLOG HOP – IT’S A LOVE THEME!

We are back with the Stampin’  Dreams Blog Hops for 2018.  We start off the year with a Love theme.  You might have come from the super, talented Juana’s Blog or starting here with me.  Either way, enjoy the Hop.

I don’t do a lot of  “lovey dovey” stuff and don’t usually do anything for Valentine’s Day but lately I have had to do a lot of wedding and engagement cards so maybe this Hop would be a good one for me. 🙂

For my project I have created a “love” Panel card and Gift Card Holder.  

I just received the Bubbles and Fizz Designer Series Paper which is a Free choice for Sale-A-Bration.  I noticed in the pack this sheet with the circled hearts in Calypso Coral so I thought I would use that.  It looked pretty cool! The Panel card idea was inspired by a card from a recent papercrafts Magazine.  I thought it was a little bit different to the standard card.

Here is a closer view of it.  The middle section of the base card is cut off and a separate card mat adhered to the front.  I will give you details to make your own further below.

I added the hearts from the Sunshine Wishes Thinlits in Calypso Coral and Dazzling Diamonds Glimmer Paper.  It needed something else when I had finished so I added a little bow with the Calypso Coral Sheer Ribbon.

The Gift Card holder is created with the Envelope Punch Board with the Gift Card size and scoring instructions on the board (the first one listed).  I added a strip of the Designer Series paper around it.  Just a note on that:  As the card holder is made in card it is a little thicker so the flap can’t tuck in to the envelope without  squishing it.  So I just left it open.   The “for you” is from the Mini Treat Bag Thinlits.

CREATE YOUR OWN PANEL CARD.

– Cut a standard size Card base.  From the front panel cut a piece off the front at 3cm (1 1/4″) down from the front score line.  On the piece you cut off, cut a piece off that at 3cm (1 1/4″).  **NB: For Imperial do check the measurements.  Basically you are cutting off a section down from the top of the fold line and then cutting a piece of that cut off section the same measurements.  You can vary the measurements to however you like.

– Make the panel piece the size you like.  This piece, the Calypso Coral mat measures 8cm x 12.3cm (3 1/8″ x 4 7/8″).  The Designer Series Paper piece is just slightly smaller.

– To assemble the card.  Lay down the White card strip that you cut off previously.  Line it up with the bottom edge of the back of the card base.  Adhere the panel on to the top and bottom edge pieces remembering to only place adhesive at the top and bottom at the back of the card mat for the panel.  I hope that makes sense. 🙂


NOW CONTINUE TO HOP

Now you can continue on your way around the Blog Hop to see the other “Love” projects.   Head on your way to Alejandra’s Blog -> HERE.  (I can’t add the list of participants on my hop as I have a WordPress blog but you shouldn’t get lost, just keep following the links on other blog posts).

Enjoy,

Jenny

cards, Catalogues, Stampin' Up!, Techniques, Tutorials, Videos

HEDGEHUGS WITH THE STAMPARATUS!

I have been playing with new products the last few days.  I am loving this new set Hedgehugs coming out in the new Occasions Catalogue on January 3rd.  I think you will love it too.

I have recently got the Stamparatus and have used that to stamp this so all the images are evenly spaced.

Today I put together a video showing how to use the Stamparatus for this.  It’s a different type of video.  I spent the last 2 days to put together one and it just wasn’t happening.  What do you think of this format.  Would you like to see more of this type or would you like the traditional type of videos?  Do let me know.  The video is below. (Please note: If you are receiving this post by email subscription the video might not show up so head directly to the blog post by clicking on the post title above).

If you missed the card size for the Whisper White on the video here are the measurements again.

Metric       14.8cm x 7cm.

Imperial   5 1/2″ x 2 3/4″.

Hope that is helpful.

Other details on the card:

Paper:  Sweet Soiree Specialty Designer Series Paper, Old Olive card base.

Ink: Berry Burst, Old Olive, Marina Mist.

Other: Whisper White Organza Ribbon.

————-

STAMPARATUS RESERVATION

While we are talking Stamparatus, you only have a few days left until the end of the month to reserve your Stamparatus.  This will be shipped out early March.  After that you won’t be able to order one until the new catalogue in June 2018.

To reserve your Stamparatus: Head -> HERE. Scroll part way down the page and click on the box on the right hand side of the page under Stamparatus.

The Stamparatus is $85 plus shipping.  You won’t need to pay until it ships in early March.  You will need add your credit card details when you reserve it though.  If you have any further questions, please drop me a comment or email me.

Jenny


3D projects, Christmas, Stampin' Up!, Tutorials

MID-SIZE GIFT TOTE FOR SECRET SANTA!

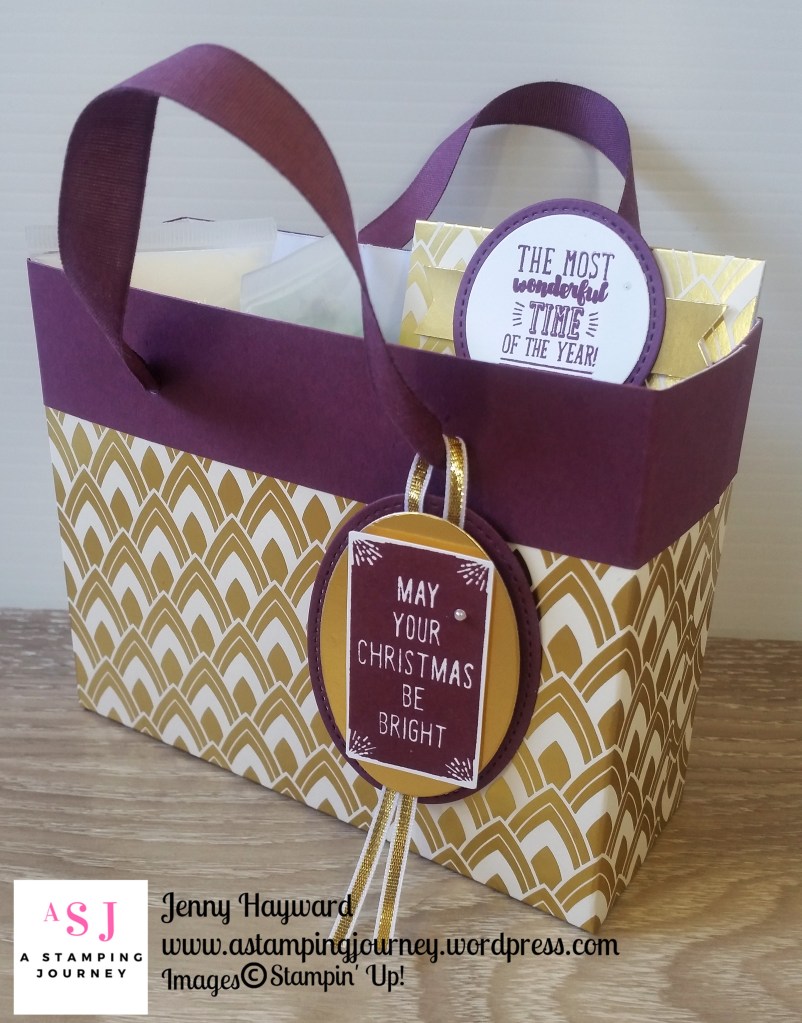
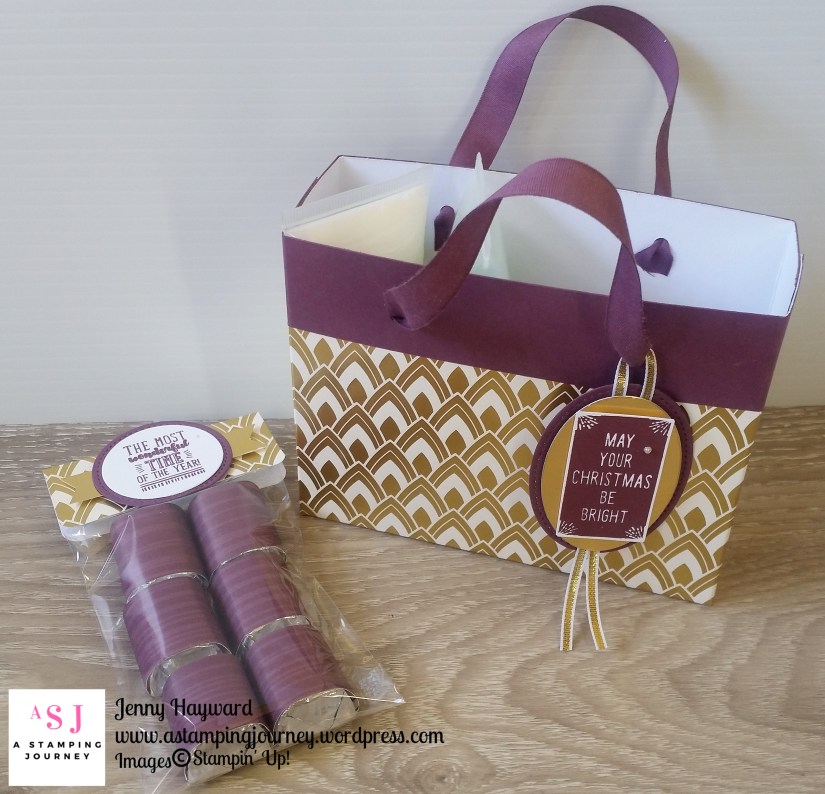
I can share this project now.  I made this Gift Tote last week with a small gift in it for our team Secret Santa.  I thought you might like to see it and if you are still in need for some Christmas packaging it might be just the size you need.  I have the tutorial below.

It was just the right size for my gift of 2 small tubes of lotion and some chocolates.

The chocolates were wrapped Hershey Nuggets. We can’t get these here in Australia but I grabbed some when I went to Hawaii recently.  Score!! I put them in a cello bag with a little topper.

I wanted to make up a little Tote but I didn’t have any Christmas paper left.  This sheet of the Gold from the Eastern Palace Specialty Designer Series Paper is kinda Christmas-sy. 🙂 Teamed with some Fresh Fig card trim and the ribbon it makes it a little classy don’t you think?

Here is a close up of the tag on the bag.

The sentiment is from the Brightly Lit set layered on a Gold Foil oval and then layered on a Fresh Fig oval cut from the Stitched Shapes Framelits.  The Gold ribbon is looped around the handle and adhered between the Fresh Fig and the Gold layer.  The label on the chocolates which you don’t see too well is also from the Brightly Lit set and cut with a circle from the Layering Circles Framelits and one from the Stitched Shapes Framelits again in Fresh Fig.

To make this I was inspired by a tutorial I had saved quite a few years ago before the days of Pinterest.  I converted it to metric and modified the instructions.

Do you want to know how to make your own Tote? I have the tutorial below for you in step-by-step instructions in both metric and in imperial.

If you like a more visual tutorial just hang tight and I will get that out to you shortly.

MID-SIZE GIFT TOTE

1. Cut Designer Series (patterned) paper to 21cm x 28cm (8 ½” x 11”).

2. On the short side score at 3.5cm (1 3/8”) on one side. Turn your paper 180 degrees and score at 3.5cm ( 1 3/8”) on the other side.

3. On the long side score the paper at 11.5cm (4.1/2”) on one end. Turn your paper 180 degrees and score at 11.5cm (4 ½”) on the other end.

4. Cut in on the middle tabs on the long side on both sides. Fold on all the scored lines.

5. Cut 2 strips of Co-ordinating card measuring 21cm x 3.5cm. (8 ½” x 1 3/8”). Score at 3.5cm (1 3/8”) in on each end on each piece. Adhere these strips along the top and bottom edge of the Designer Series Paper.  (ie the short side).

6. Add adhesive to the outside of the small centre tab on the side. Fold up one long side tab over this tab to adhere. Repeat the same on the other side.

7. Run Adhesive on the inside edge of the other long tab and fold over to adhere on to the other side tab. This forms a bag shape.

8. Punch 2 holes along the top evenly spaced. If it helps mark with pencil the points you want to punch to help you line it up.

9. Run your length of ribbon through the holes on one side and tie on the inside to secure. Repeat with ribbon on the other side.

——

If you make one do share your version with me.  I would love to see it.

Have a great day,

Jenny

cards, Catalogues, Christmas, Classes, Stampin' Up!, Techniques, Tutorials

CHRISTMAS TAG TIME CLASS!

This Friday and Saturday for my last class for the year we made Christmas tags.  It was a lot of fun and my class members were very creative.  I wanted to share them with you.

Firstly, I made up a Circle Christmas tag which I will show you further below.  They all got to make one of these (or more if they wanted too).  Then I had some other tag samples from the past year or 2 I had made or received and put out my retired and current papers and ribbons and Christmas stamps and let them be creative.  I forgot to take photos from Friday’s class but here is Saturday’s creative achievements.

Aren’t they great???

——-

I wanted to show you the Carols of Christmas Circle Christmas tag particularly and how we made it.


You can make these type of tags to any size or any shape you like.  The principle is the same. I will give you the general instructions but then give you the measurements I used below.

The card will be cut depending on the size of the circle Framelit you use. Cut your card to about twice the length of the circle and score in half.  This is for your card base.

You will need a second piece of card for the front measuring just larger than your die.

For the measurements for this tag:

Cut your card to 9cm x 18cm score at 9cm.  (3 1/2″ x 7″ score at 3 1/2″)

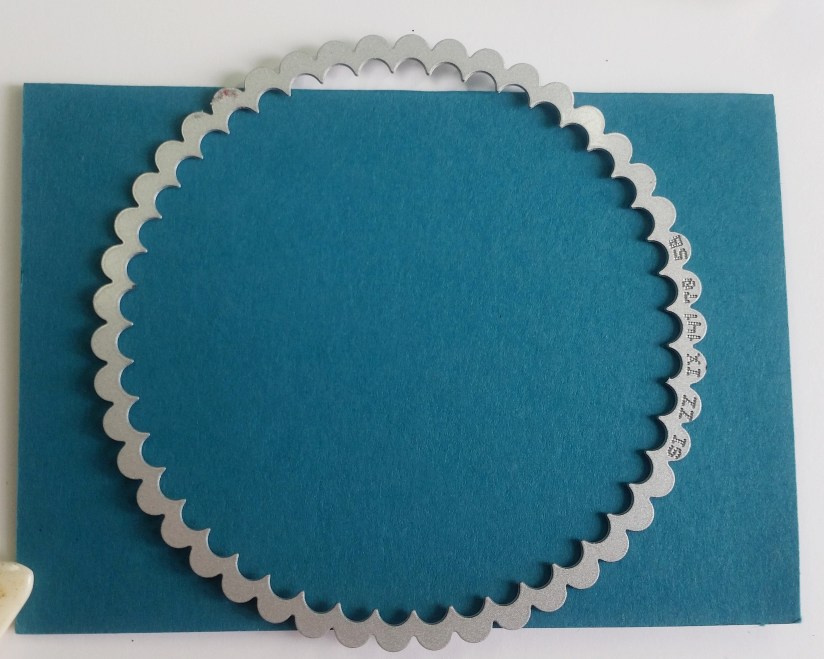
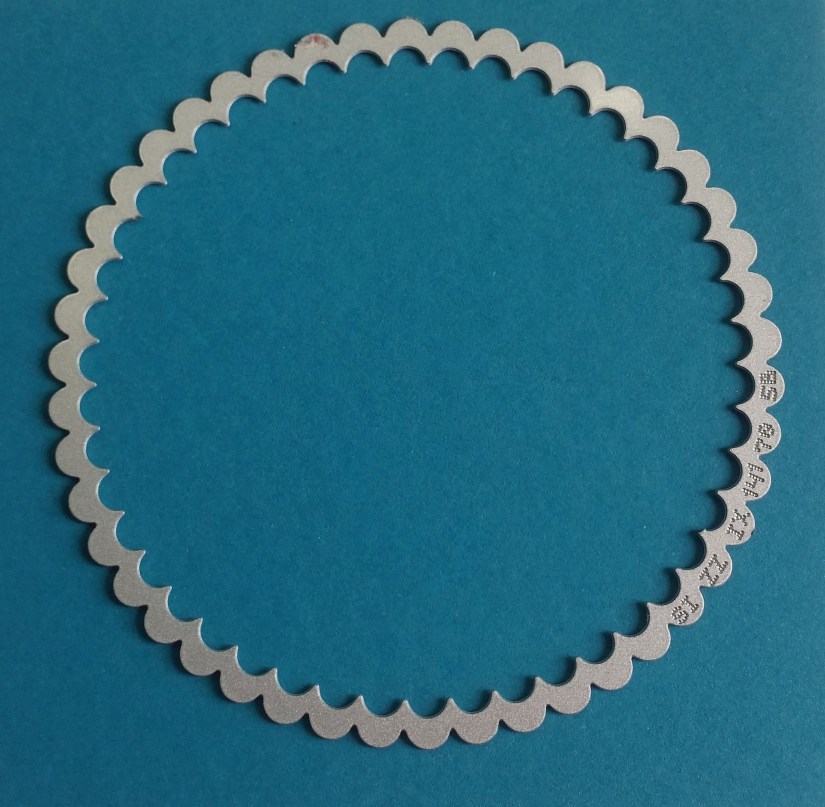
1. I used the Largest scallop circle of the Layering Circles Framelits.  Place the top of the Framelit just off the edge of the scored fold.  This edge won’t cut creating your fold for the card.

2. On a smaller piece of card cut a full size scallop circle with the same Framelit.  This is for the front of the card.

3. Adhere the full size scallop circle onto the front of the folded scallop card lining up the scallops carefully.  I found using the Multipurpose adhesive gives you a little more sliding room.

4. Using the largest circle in the Layering Circles Framelits cut a circle from Whisper White to stamp your sentiment from the Carols of Christmas set.

5. I cut a smaller circle in white to line inside the tag so you can write on.

6.  Using a hole punch or I used the Crop A Dile, punch through at the top to tie your ribbon through.  You may like to mark the place to punch with a pencil to mark it in the right spot.

Here is a condensed photo for pinning.

Hope you like it.  Everyone loved it that came to class.

Thanks for stopping by,

Jenny


cards, Classes, Tutorials

WEDNESDAY’S WOW! COLOURING OVER EMBOSSING!

This project for today’s Wednesday’s WOW! is a card we made at class a couple of weeks ago using the Stampin’ Blends. I thought it might be a good technique to share with you.

I have used the Lift Me Up set and heat embossed it with white embossing powder and then coloured it with the Blends markers.

Do you want to see how to do this? 

I haven’t done a video as yet but I have an earlier tutorial from some time ago using the Blendablilities.  They work the same way.  To find out head -> HERE to see the blog post.

Happy Colouring!

Jenny

cards, Catalogues, Classes, Stampin' Up!, Tutorials, Videos

WATCH IT WEDNESDAY #11 – COLOURING BEAUTIFUL YOU WITH THE BLENDS!

I have been sharing a lot of projects using the Stampin’ Blends.  I am really enjoying them.  So easy to use and I am feeling like an artist!!!  Well, maybe I have a little way to go.  A few weeks ago I played with the Blends with the Beautiful You set.  So I thought I would show you these in Watch It Wednesday #11.

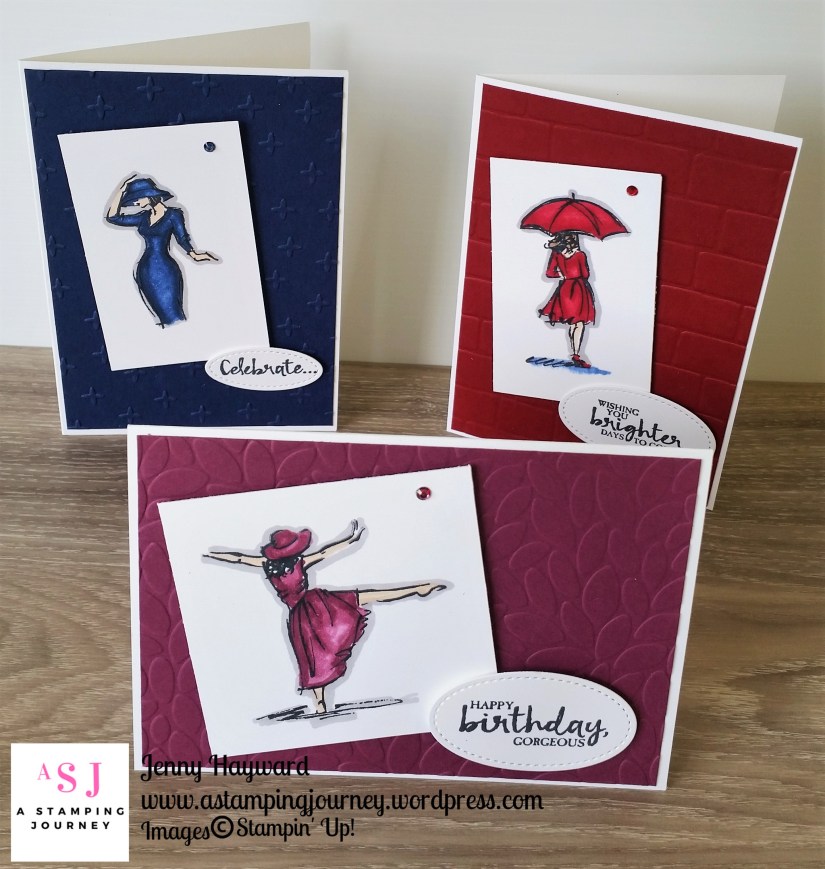
Here are the 3 cards but I will show you them individually further below.

I did colour these a few weeks ago and I have worked on my colouring a bit more but you might find it helpful.

Here is the video for your enjoyment.

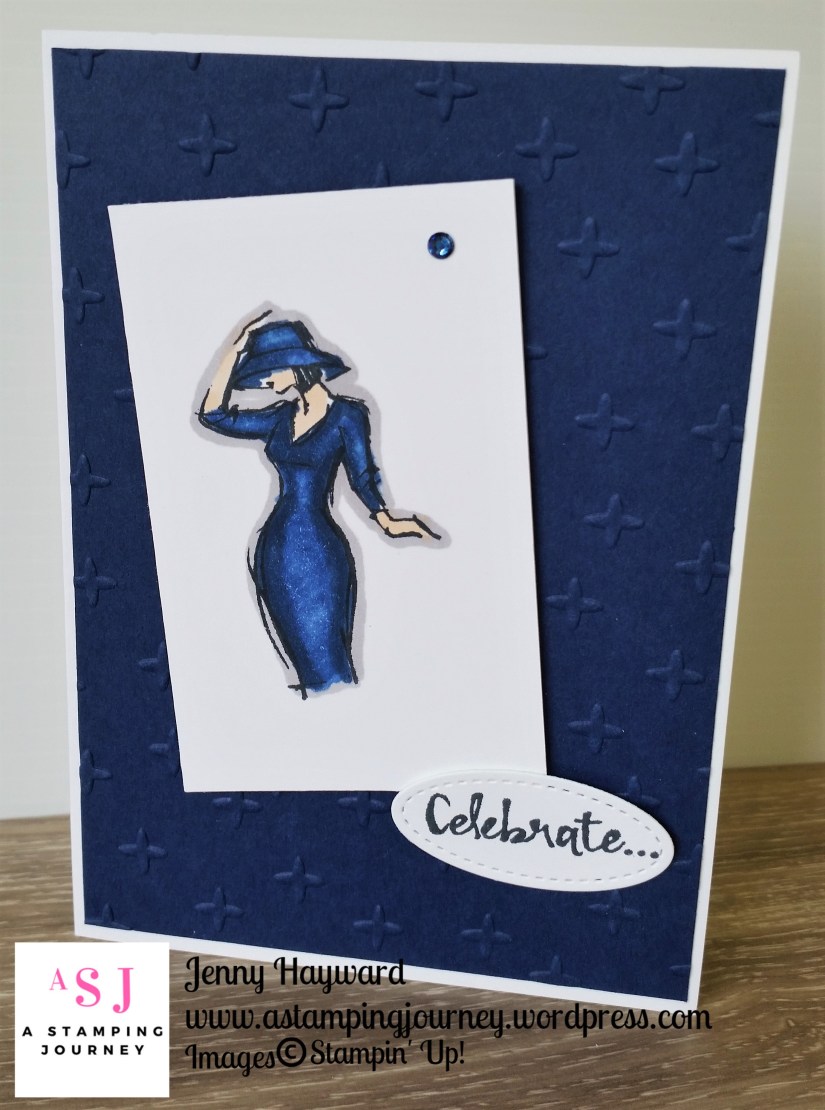
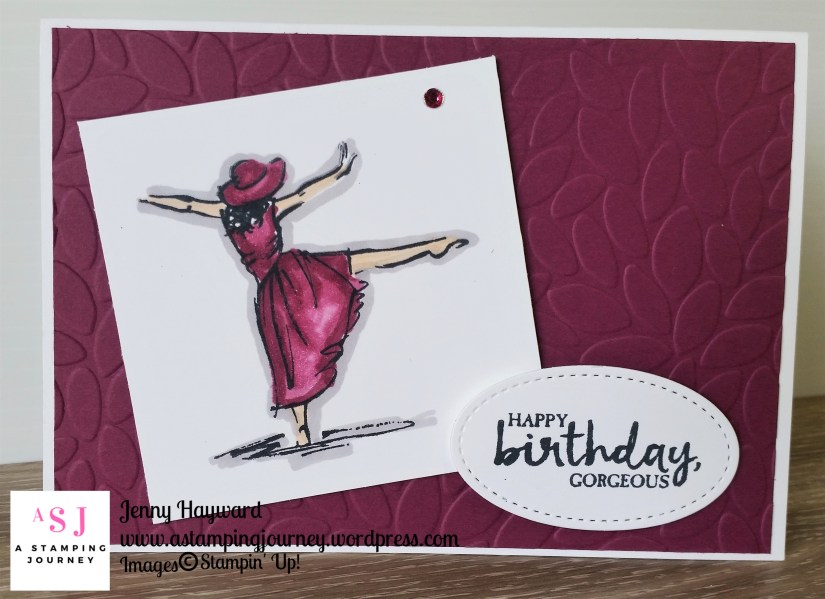
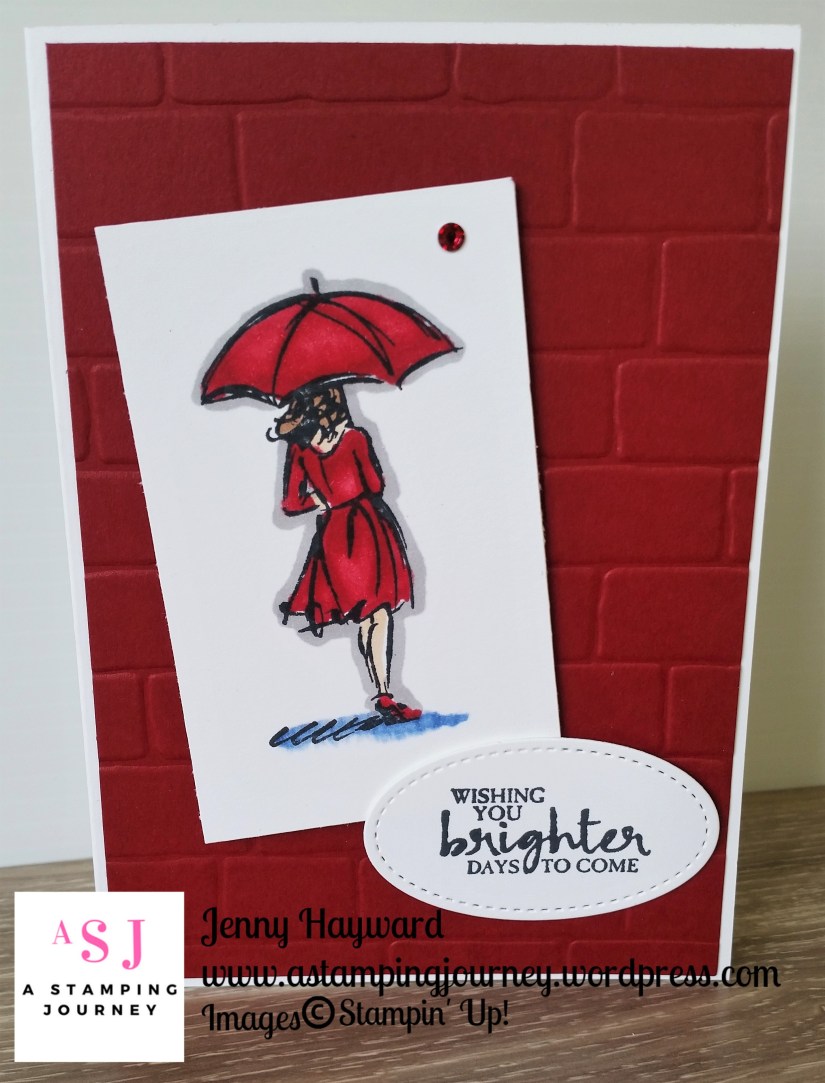
Here are each of the cards so you can see them close-up.  I have kept the layout similar but created them in different colours and changed the Embossing Folders.

Night of Navy with the Sparkle Embossing Folder.

Rich Razzleberry with the Petal Burst Folder.

Cherry Cobbler with the Brick Wall Embossing Folder.

Did you notice the Rhinestones?? You can colour them with the Blends too.

So I hope you might have a play with them.  They are really not hard at all to use and I love the effect with them.

Thanks for stopping by,

Jenny