cards, Challenges, Personal Ramblings, Tutorials

HAPPY CELEBRATIONS FOR COLOUR INKSPIRATIONS CHALLENGE #30!

I had some time over Easter to have a go at the Colour Inkspirations challenge for this week.  Let me say these colours were hard!!!!

These are the colours for Colour Inkspirations #30.

What do you think of them?? What a combination!!

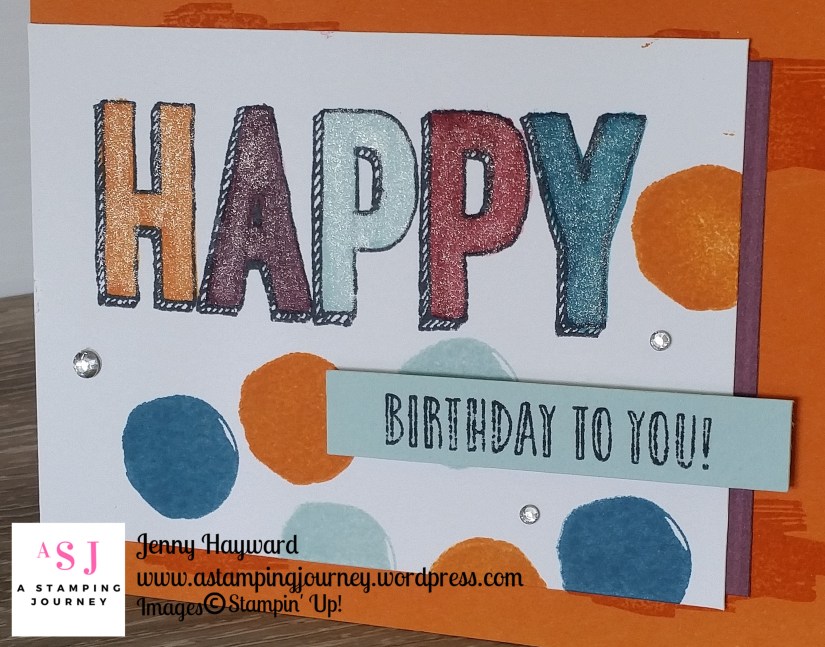
I will share the card I made.  I will say this is Take Two.  The first card was not good.  Can a card be ugly?  Yes … :/

I was happier with this one.

When I attempt a challenge like this I pull out all the ink pads to see how the colours look together and then go through my stamp sets to see what might work with the colours.  I had a few stamps out.  I made the first card and I wasn’t happy with it – at all! And no it won’t see the light of day.  Just let it be said that we can all do dud cards.

Any of the sets I had out didn’t appeal to me to try another one so I went through my stamps again and came across this set, Happy Celebrations.  I had forgotten about this set.  It was in my drawer with the “sentiment” stamps.  I have had this set for over a year I think and used one sentiment out of it.  I thought this might just work and it had 5 letters in “HAPPY” for the 5 colours. 🙂

The letters were coloured with the Stampin’ Write Markers.  I even added a little sparkle with the Clear Wink of Stella pen.

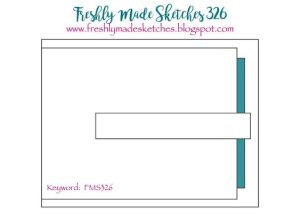
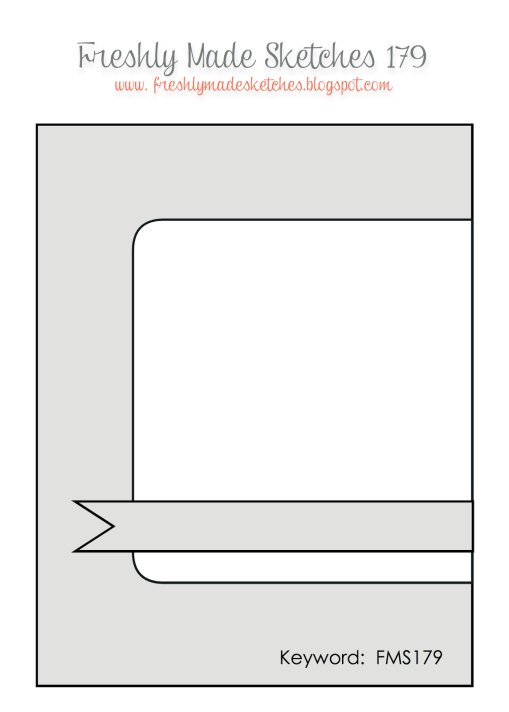
The layout was based on Freshly Made Sketches #326.

If you get stuck how to put a card together following a card sketch is a great idea.  I have a board for Card Sketches on Pinterest -> HERE if you want to follow it.  If you missed yesterday’s post I gave some tips on following a sketch to make a card so head back to the previous post.

So how would you work these colours in a card??

Thanks for stopping by,

Jenny


cards, Catalogues, Tutorials

WEDNESDAY’S WOW! #20 – USING A SKETCH!

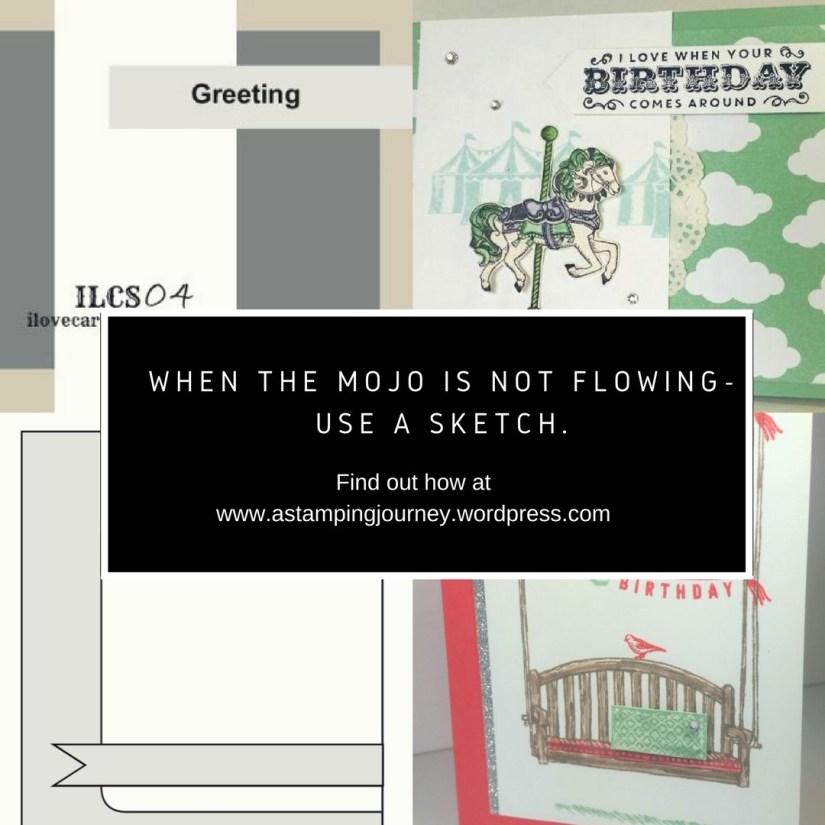
Do you get stuck making a card thinking how will I put this card together?  Well today I thought I might give you a few tips for Wednesday’s WOW! #20.  

When I get stuck creating a card firstly I have a look through my stamps to find one I might want to stamp with.  With a new catalogue and new products that’s often easy.  Once I choose the stamp set I then turn to card sketches to help me.  I think it’s hard when you just look at blank card and have no idea what to do with it.  Today I thought I would go through a few previous cards I have made and go through the card sketches.  Full details can be found on the blog post which I will add the link.

BUT WHICH CARD SKETCH?

I get a few emails from different Sketch blogs.  My favourite is Freshly Made Sketches but I also follow Clean and Simple Stamping.

I also have a board on Pinterest which I pin Card Sketches too that I come across and the design I like.  You can check out that board HERE.  Follow along if you like to.

I will talk you through a few sketches and how the card resulted.

BRIGHTLY LIT

This was a new set at the time and as I was not sure what to do with it so I looked up a few sketches.

When choosing a sketch I look at the stamps in the set and then look at some sketches to see if some of the images in the set would work with the elements in the sketch.

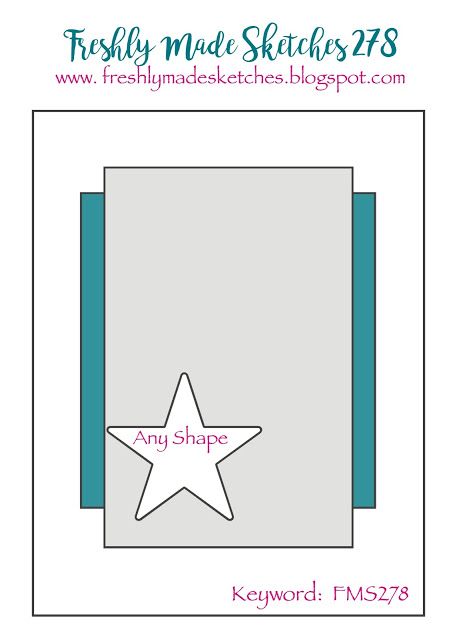
The layer underneath could be paper or card.  I chose paper for mine.

The rectangle shape is where you can stamp your images in the space.

The Star shape can be any shape.  The thing with sketches is that it doesn’t have to be the exact shape or even the same position.  I slid it across and used it for the sentiment.

You can see the post for this card -> HERE.


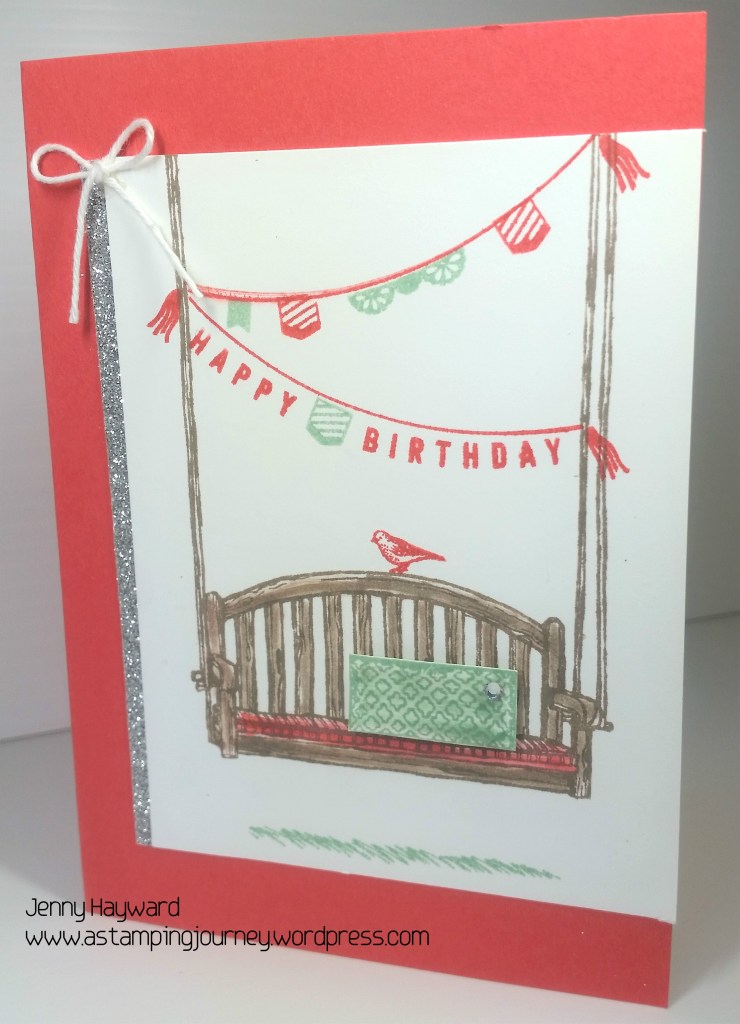
SITTING HERE

I loosely based this card on the above sketch.  The sentiment banner I slid to the top and stamped the sentiment directly on the card.  I added a few elements to this card that wasn’t on the sketch like the Glimmer paper strip and the bow.

You can see the full post for this card -> HERE.

A COLOURED BUTTERFLY

I like simple style sketches.  This was an easy sketch to follow and I think is a little different by having your stamped piece off-set on  your card.  For this I used some Designer Series Paper.  Once again the star shape can be any shape.  I had been playing with colouring this butterfly so this worked here.  I added an additional card mat being the Gold Foil to lift the paper.  The sentiment could be stamped directly on the piece but I stamped it separately and raised it off the card.

You can see the full post -> HERE.

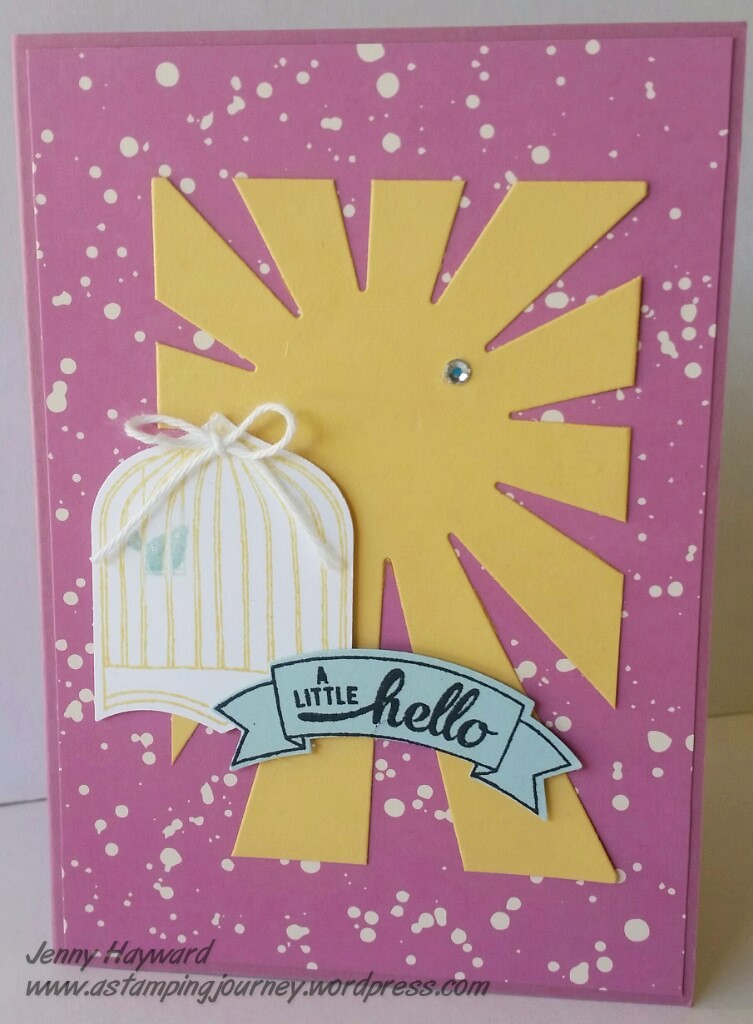
SUNBURST

This card I particularly wanted to show you that elements on the sketch can take any shape.  Don’t be scared to change the shape or even move elements.  The sketches are spring-boards to ideas to start your card.

For this card the larger square was a piece of Designer Series Paper. It could be card though.  For the tag shape I created a trimmed down starburst using the Starburst Thinlits.  I slid down the extra elements a little lower to make them fit better.

You can see the full card post -> HERE.

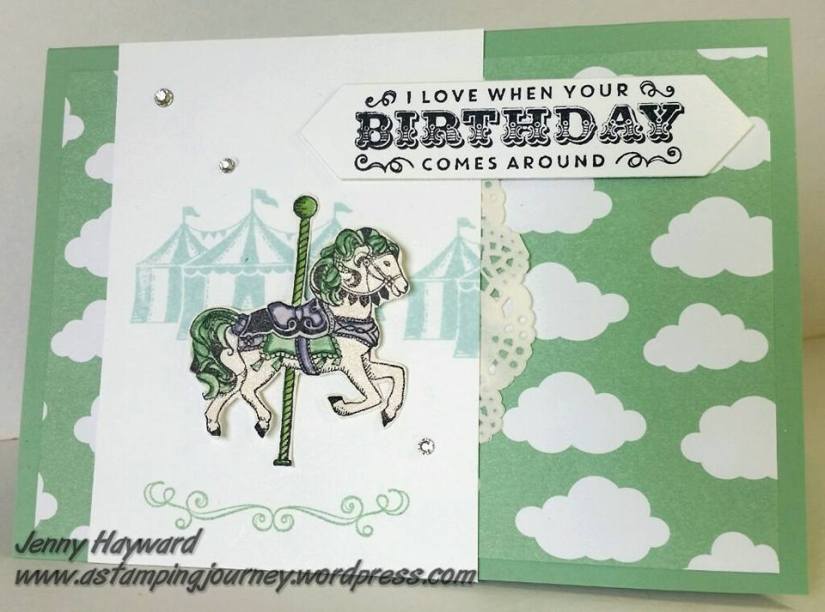
CAROUSEL BIRTHDAY

A different sketch blog site other than Freshly Made Sketches is this one, http://www.ilovecardsketches.com.  This site is not available any more but I had the sketch on my Pinterest board to use. The sketch has several layers which I used with Designer Series Paper with the larger rectangle.  The vertical strip worked for the stamped image in this case.  The sentiment banner was placed up in the top right.  If you were to use this sketch then you might want to slide a few of these elements around and that works too.  It’s about playing around with them.

You can see the full post -> HERE.

———–

Is this helpful to you??  I hope so.  Why not drop a comment to let me know or you can click “like post” which is at the end of the post.  

If you want to see more sketches and cards then click on the tag at the bottom for card sketches or sketch challenges and it will take you to other posts.

Thanks for getting through all this. I know there was a lot of information but hope it was helpful.  To come back to this post you can PIN the image at the top.

Have a great day,

Jenny

cards, Catalogues, Sale-A-Bration, Tutorials

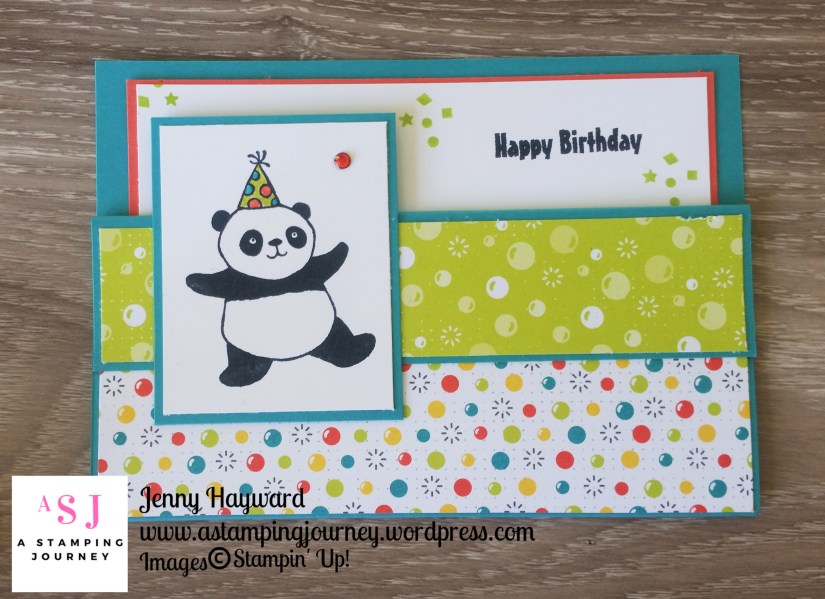
PARTY PANDA POCKET CARD!

I am going to miss these Party Pandas.  Seriously, aren’t they so cute??  I had to use them again for one last blast.  I saw THIS POCKET CARD by Barbstamps the other week and thought the Pandas would be great for it.

Here is my version.

MEASUREMENTS FOR POCKET CARD

If you head to Barb’s link at the top you can see the video with the instructions to make the card.  Below is a general idea.

Card Base:    21cm x 14.8cm     (8 1/2″x 5 1/2″)    Score at 3.5 cm and 10.5cm.          (Score at 1 1/2″ and 4 1/4″)

Fold in at the half way score line and fold back on the small scored line.  Staple or adhere the front of the card to the back.  Underneath the flap so you don’t see the staples.

Designer Series Paper: Top piece – 14.4cm x 3.1cm     (approximately 5 1/4″x 1 1/4″)        Bottom piece:  14.4cm 3.6cm   (aprroximatly 5 1/4″ x 1 1/2″)

Cut the stamped piece for the image according to the size of your image.  This piece for the Panda was card mat: 6.9cm x 5.5cm    Whisper White 6.5cm x 5.1cm.

Pocket Insert: 13.2cm x 10cm   (5 1/8″x4″)   Whisper White 12.8cm x 9.6cm   (5″x 3 3/4″)

——

On the Panda stamped piece I coloured a Rhinestone with the Pumpkin Pie Stampin’ Blends.

The Designer Series Paper is from the Bubbles and Fizz pack that is a Free choice with Sale-A-Bration.

Hope you like it,

Jenny


cards, Classes, Stampin' Up!, Tutorials

LOOKING THROUGH THE CAVE WITH THE WATERFRONT SET!

Today I am following on from yesterday’s post with watercolouring the Waterfront set.  If you missed yesterday’s post and video then be sure to head back a post.

I have another card created in the same way that I had made last week.  I shared it on Facebook and Instagram and received lots of comments.  I hope you might like it too.

Firstly, I did a search on Pinterest for landscapes to find some inspiration.  There is a lot let me tell you.  But this image particularly jumped out at me I think because of the colours and it was a little different to the “typical” scenes you might be seeing using the Waterfront set.  This is a photo from the Flinders Ranges in South Australia.

So here is the image with the card I created trying to recreate it.

Here is a closer photo for you.
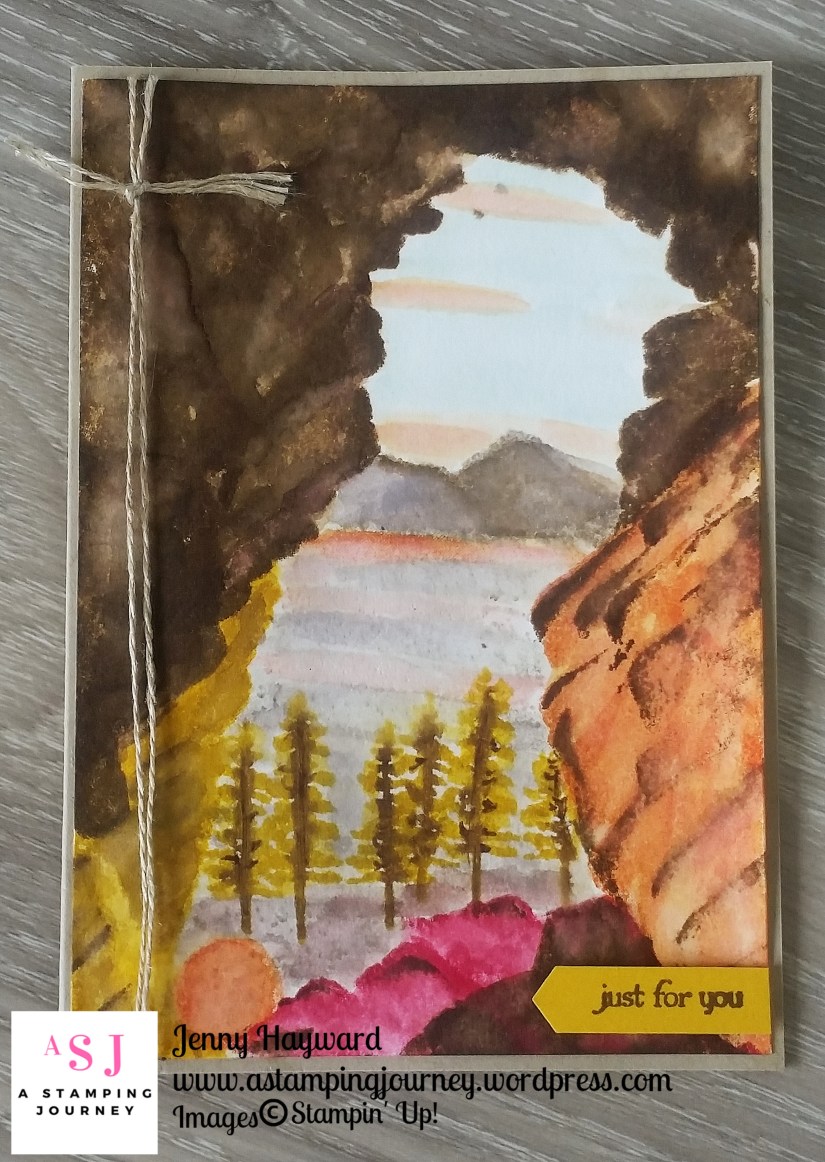
I was pleased with the result but it took some time to create.  Like 2 hours!!  I won’t share step-by-step but I will point out some tips for you to create your own.

TIPS TO RECREATING THIS CARD

With any of the watercoloured images I have created I start with the right mid-point of the card.  For this one I worked around from this edge in a clock wise direction and filled in the centre last.

I used Shimmery White card.  I prefer to use that card as it doesn’t have the textured surface that watercolour paper has.  You do use the Aquapainter but it’s only a small amount.

The inks I used are Tangerine Tango, Soft Suede, Crumb Cake, Rose Red, Crushed Curry and then for the sky and land I also used Soft Sky and Blushing Bride.

For most of the “cave” shape I used only the mountain stamp in the set and twisted and turned it to develop the shape and to fill in the areas of rock. I used the Aquapainter to blend the ink regularly after I stamped.  I think this is what took most of the time.

The right hand rock surface looked orange when I looked at it on the Ipad which is why I did it in orange tones but when I looked at the print-out of the scene it looked more red. Oh Well! Artistic interpretation right. 😉

I will show you how I added the edge marks on the rocks down below.  I have used this a lot now on different scenes I have done.

For the sky I watercoloured some streaks with the Blushing Bride ink and the Aquapainter and then filled in the rest of the area with the Soft Sky ink.  For the centre ground area I watercoloured areas of Blushing Bride and Crumb Cake.

For the trees I inked them up in Crushed Curry and then use the Soft Suede marker to colour the tree trunks and part of the branches.

After I finished it and it dried I wanted to keep the card simple.  I wrapped around some Linen Thread and adhered that on to a Crumb Cake base. The sentiment is from Teeny Tiny Sentiments.  I wanted to keep that small so not to cover too much of the image.

Create the edge marks to create depth/shadow

Firstly stamp your mountain image on your card.  It will depend on what you are creating as to how they would be positioned.  For this one to create the rock wall I stamped the mountain stamp a few times down the side of the card.  On the sample below I have just stamped this twice to give you an idea.

Ink up your mountain stamp again on just the tip of the peaks.  To do this take your stamp on to the inkpad not the inkpad on to the stamp.  Tilt the stamp so just the edge of the stamp will be inked. For this one I inked the tip in Soft Suede.
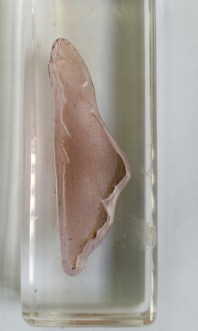
Position the stamp over your pre-stamped mountain shapes and stamp down.  Just the tip will be inked.  You will do this several times over your project.
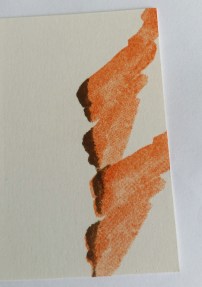
I have done this too when I wanted a grassy edge to a mountain top by stamped the tips in Old Olive.

——

So what do you think?? I would love your thoughts.  If you create one do share with me.  I would love to see it.

Hope you are enjoying the projects for Waterfront Week.  There is still more to come.

Have a great day,

Jenny

Have you got your own Waterfront set yet?  If you are in Australia, you can grab it in my store now -> HERE.  Please use the Host Code this week: SBZEJCNH

As a Bonus this week: receive 4 x A4 sheets of Shimmery White cardstock PLUS a tutorial for an exclusive project.  


cards, Techniques, Tutorials, Videos

CREATING LANDSCAPES WITH THE WATERFRONT SET FOR WEDNESDAY’S WOW #17!

We have seen some simple stamping with this set and I will show you in the coming days but today for Wednesday’s WOW! #17 I thought it would be a good opportunity to share with you how you can create watercoloured landscapes.  It’s truly amazing and I have had fun creating these.  I will share the cards in later posts.

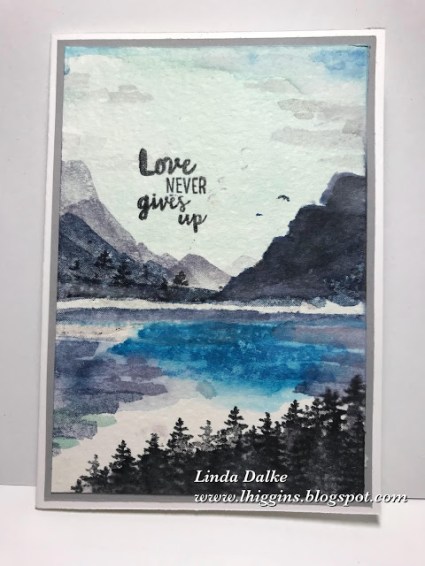
For today though I asked a lovely Demo friend Linda Dalke if she would mind if I shared her video to create watercoloured landscapes.  She can show it so much better than I could.  You really must watch this.  It is long, about 18 minutes, but totally worth it.  Firstly, this is her card, then watch the video below.


Isn’t it amazing! If you want to see more of Linda’s work do check her blog out.  She creates such gorgeous cards.  Visit her blog -> HERE. 

Tomorrow I will share one of my watercoloured creations.  I have shared this card already on my Facebook and Instagram and I think it was well received, so watch out for it.

Jenny

***Order the Waterfront stamp set this week either online or directly to me and receive 4 x A4 sheets of Shimmery White cardstock PLUS a tutorial for an exclusive project.  

You can order online in my store -> HERE.  Please use the Host Code this week: SBZEJCNH

3D projects, Blog Hops, Catalogues, Stampin' Up!, Tutorials

ESAD BLOGHOP SALE-A-BRATION 2018!

Today I am joining in on a Bloghop with lots of other demonstrators in Australia and New Zealand in the ESAD Facebook group.  (ie Extra Special Australian and New Zealand Demonstrators.  We are all special though!).  We are focusing on Sale-A-Bration.  You might be starting here or might have come from Melinda’s blog -> HERE.  Either way, enjoy the fabulous creations along the way. 

Firstly, what is ESAD.  Let’s get that out of the way.

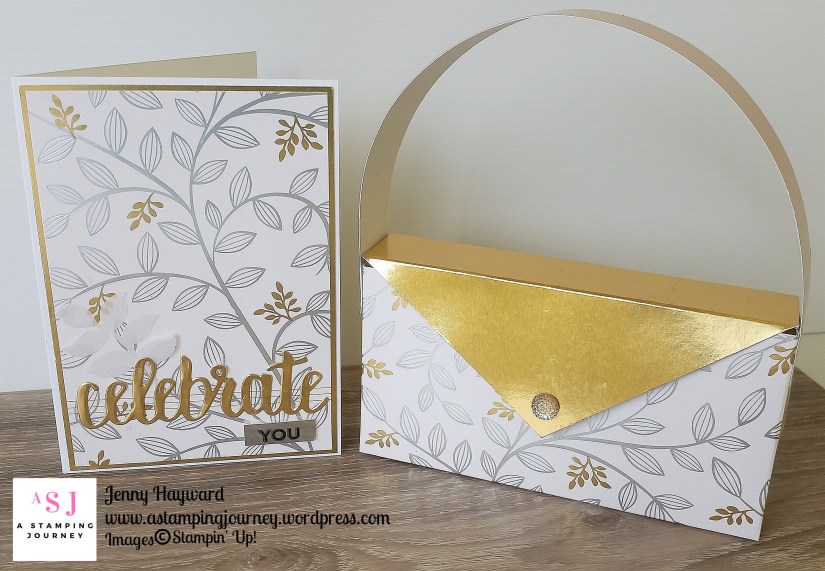
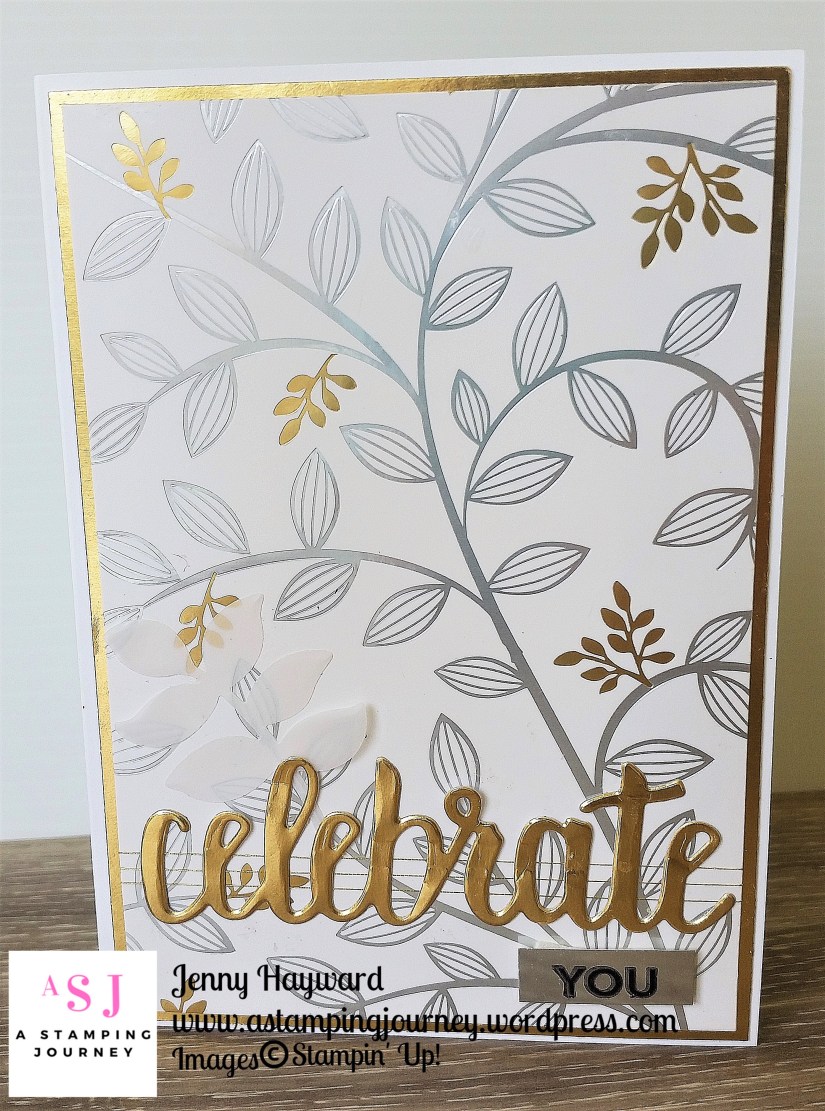
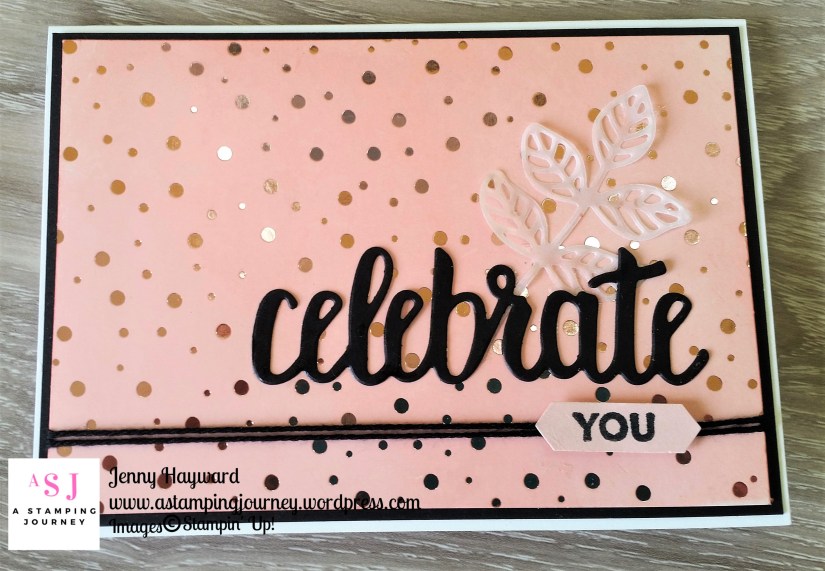
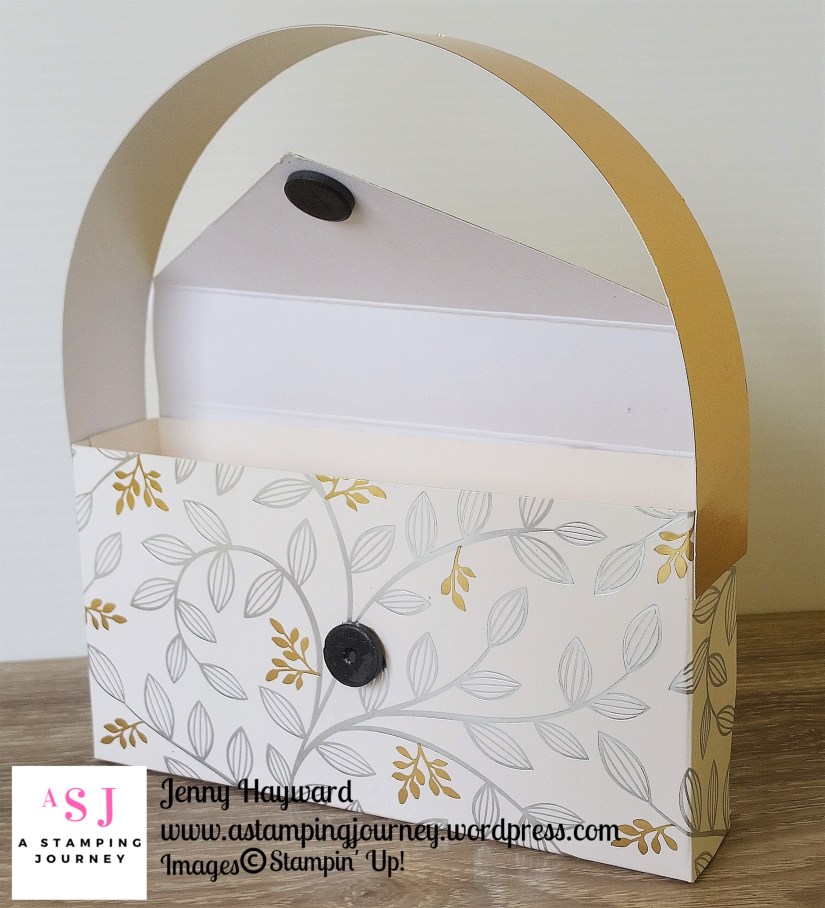
I am loving the gorgeous new Springtime Foils Specialty Designer Series Paper that has just become available for the second release for Sale-A-Bration last week. You have already heard me go on about it.  🙂  Anyway, I thought a CLASSY CLUTCH BAG AND CARD was in order with this gorgeous paper!!

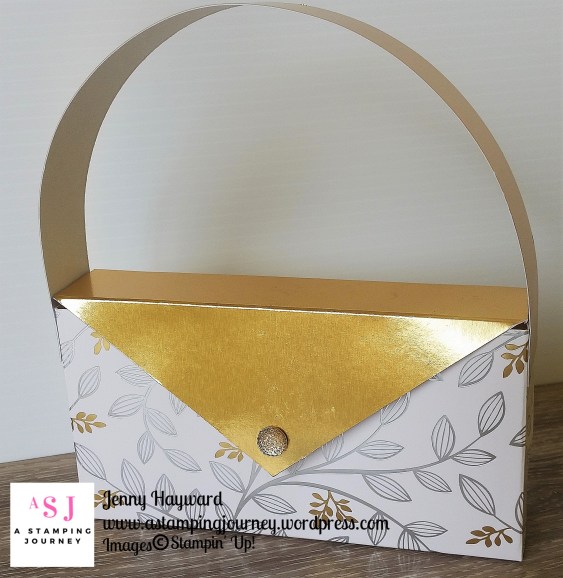
What special gifts you could fill in this clutch bag. It’s a good size for chocolates, a small gift, makeup???? So many different gifts for a very special occasion.  I will show you how to make the clutch bag further below.

———–

Firstly, the card.

Really, you don’t need to do too much when you add this gorgeous paper to a card.

Firstly I wrapped some Gold Thread several times around the bottom section of the paper.  Then adhered this piece to a Gold Foil mat and then adhered them both to a Thick Whisper White card base.  The “celebrate” is cut from the Celebrate You Thinlits from Gold Foil.  Another bonus choice for Sale-A-Bration.  It is hard to tell but I stamped the “YOU” on to a small piece of Silver Foil in Black Stazon.  I also added a small Vellum leaf under the “celebrate”.  This is from the Eclectic Layers Thinlits set.

MAKE A CLUTCH BAG FOR A SPECIAL GIFT

I originally made this bag back in 2010.   You can see that version -> HERE.  I have been wanting to create it again for some time so this was a great opportunity.

This is the front view.

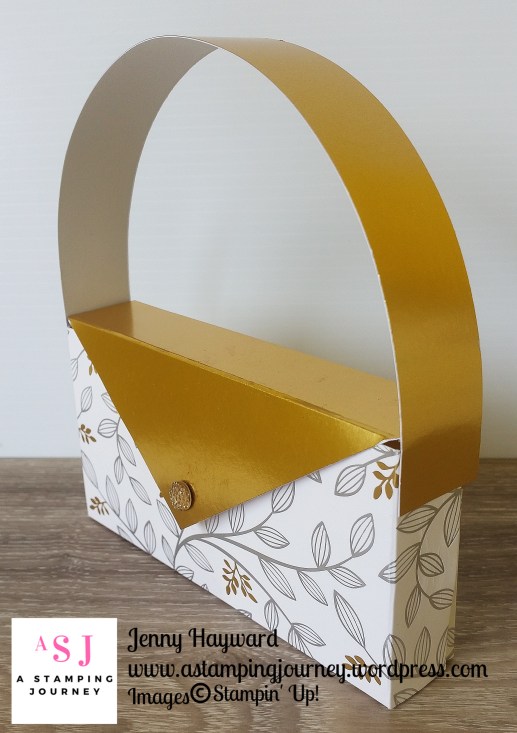
And we have the side view.

To make your clutch.

NB: Measurements are in Metric and Imperial. (please check the Imperial measurements in scrap card to check. It’s always a good idea to test run your projects beforehand anyway).

1. Cut a piece of the Springtime Foils Specialty Designer Series Paper (or other card of choice) to 19cm x 20cm (7 1/2″ x 7 7/8″).  NB: Check the pattern of your piece is running the way you want it to.  The 20cm side (7 7/8″) is the front/back.

Score on the 19cm (7 1/2″) side at 8cm and 11cm (3 3/8″ and 4 5/16″).

Score on the 20cm (7 7/8″) at 2.5cm and 17.5cm (1″ and 6 7/8″).

2. Cut up the tabs on the side to meet the score line.  Fold on the score lines. Fold up to form a box and then you can see where to place your adhesive.

Add adhesive to your tabs.  Fold up and adhere together in the box shape.

3.  Create your handle. Cut a strip of the Gold foil for your measuring 3cm x 30.5cm (approximately 1 1/4″ x 12″).  TIP:  I ran this piece along the edge of the table a few times to help curl the card strip.  Place adhesive on the ends of the strip and adhered this to the sides of the box.

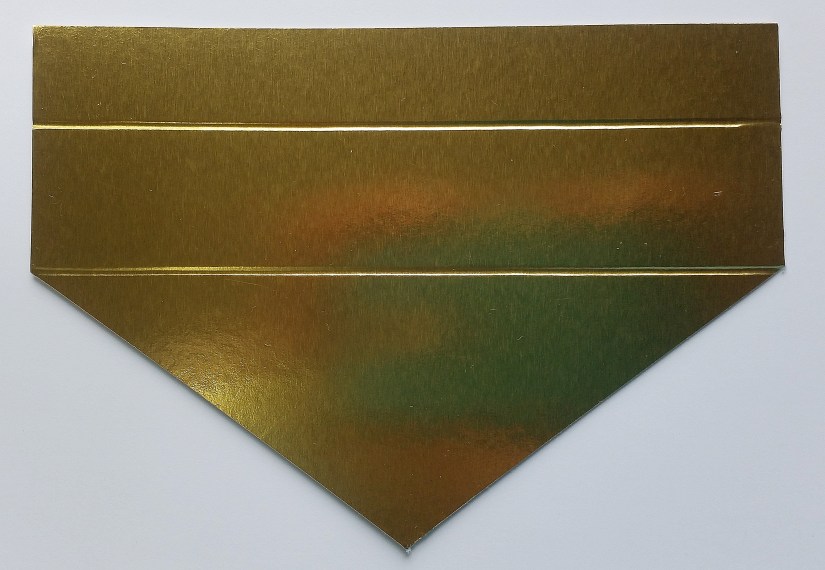
4. Create your flap for you bag.  From Gold Foil cut your piece 15cm x 10.5cm (6″ x 4 1/8″).  Score on the 10.5cm side (4 1/8″ side) at 5.5cm and 8.5cm (2 3/16″ and 3 3/8″).  Cut the front flap to a triangle if you like.  To do this mark the edge of the Foil piece at 7.5cm (3″) which is the mid-point.  Then cut from the point to the side of the card where the score line meets on both sides.  See the photo to show how it would look. 

5. Place adhesive on the inside edge of the narrow tab. Adhere this to the back of the bag.

6.  I used magnets to hold the bag closed.  Place a magnet on the underside of the front flap.  Then line it up and place a magnet on the front.  I would have preferred to have the magnet inside the bag and I tried several times but the magnets weren’t strong enough for the card thickness.  Maybe your magnets would be better. 🙂

I hope you like this project.  I can imagine it in so many different papers but this paper is just so gorgeous.
Thanks for hopping.


 Now you are off to Lou’s blog -> HERE.


Here is a list of participants if you get lost.

Blog Hop Participant List

  1. Lou Kitzelman
  2. Sandra Mastello
  3. Courtenay Heuston
  4. Ellen Woodbridge
  5. Cheryl Algie
  6. Peta Stephen
  7. Nicole Wilson
  8. Maree McIntosh
  9. Kristel Rimmer
  10. Libby Dyson
  11. Leonie Schroder
  12. Jessie Holton
  13. Megan Lenske
  14. Delys Cram
  15. Rachael Lewsley
  16. Kim Oliver
  17. Sharon Dalton
  18. Melinda Whittington
  19. Jenny Hayward


cards, Catalogues, Techniques, Tutorials

EXTRA GORGEOUSNESS FOR SALE-A-BRATION WITH THE SPRINGTIME FOILS PAPER!

The gorgeousness just keeps on coming for Sale-A-Bration.  Yesterday was the 2nd release of fantastic, beautiful new free choices that you can receive with your qualifying orders. I think you will love them.  I do. 🙂  If you haven’t seen them yet then I will show them to you in the next couple of posts.

Today I want to show you the gorgeous Springtime Foils Specialty Designer Series Paper. To be honest it really doesn’t do it justice in the catalogue but you can see them in this image.

Last week I shared a video on my Facebook page showing the sparkle and shine of this paper.  It truly is just gorgeous!  If you didn’t see it head to my page -> HERE and scroll down a little to see it.  You really must.

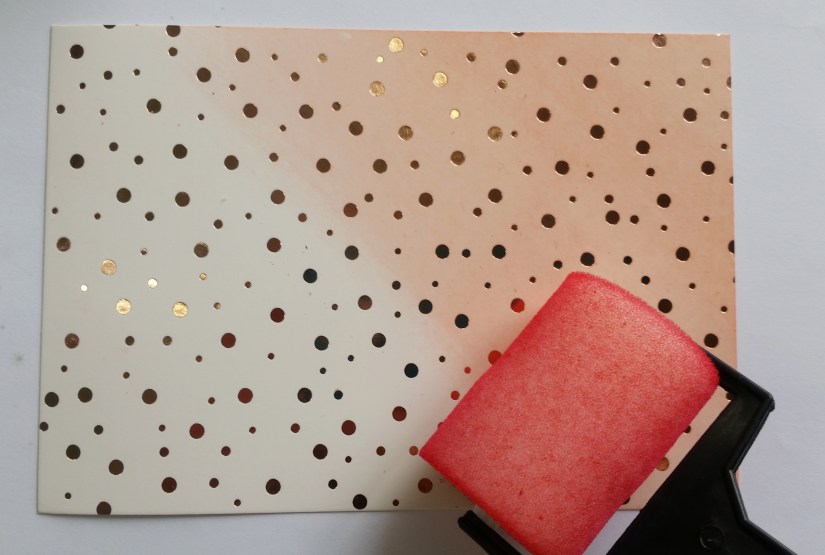
Today I was playing around with it.  I have seen some images of it this past week inking it so thought I would give it a whirl.  I have to say it just lifts the gorgeousness to a whole new level.  This is the finished card I made.

I posted a video on Youtube of how to colour this gorgeous paper.  It was a very quick video but might give you some idea.

Here it is for you.

If you like a visual of this then it is simply a matter of rolling over it with your sponge roller and inkpad.  It does take some time but it is worth it.  I did dab some ink on with my inkpad too.  You can do that if you get a bit impatient. Then roll over it with the roller to smooth it.

On my card to finish I cut the “celebrate” from the Celebrate You Thinlits and added the “YOU” stamped on Powder Pink.  I found that a better match with the inked paper in the end.   I finished it off with some Black Baker’s Twine and cut a vellum leaf from the Flourish Thinlits.

Hope you like it? I really think you need this paper.  It is a free choice now added for Sale-A-Bration when you have a minimum $90 order.  It doesn’t take much to get to $90 by the time you grab a stamp set and stock up on your paper and adhesives.  What about the sponge rollers?  Do you have them?

I look forward to playing more with this paper so stay tuned.

Have a great weekend,

Jenny

IN AUSTRALIA? 

You can order these products and any other Stampin’  Up! products in my store -> HERE now.  Please use the Host Code this week: 6NRCJVMT


cards, Challenges, Stampin' Up!, Techniques, Tutorials

A LITTLE BLACK MAGIC WITH THE EPIC CELEBRATIONS SET!

I was going to share these cards with you as part of a Bloghop tonight BUT I was too busy making the cards and fussing around with other things that when I came to register for the Bloghop I found that it was full already.  That’s a bit disappointing. 😦  It doesn’t matter big time really I guess.  I can still share them with you.  I hope that you like them.

The theme for the Bloghop was colouring.  Stampin’ Up! have a great number of choices for colouring with the Inkpads, markers, Blends, Watercolour Pencils and now the Brusho Crystals.  So many choices what should I do?? I am no way an expert in colouring but I have been trying my hand at it a bit recently.  I decided in the end to go with the Stampin’ Blends.

I used a technique you might have seen around a bit.  The Black Magic technique.  It’s an oldie but a goodie.  It’s colouring over White heat embossed images.  You can use pencils or the markers.

STEPS TO  CREATE YOUR BLACK MAGIC CARDS

Of course you can use a multiple of colours for your images but I thought for this particular image one colour worked better.  I made a set of cards in 4 different colours.

To create it:

1. First stamp your image on black card in versamark and heat emboss with White Embossing Powder.  Don’t forget to use your Embossing Buddy to help reduce the little stray specks. 🙂

2. Allow to cool slightly and then colour over it with the Stampin’ Blends.  I went over the image twice to intensify the colours.

3. I coloured some of the White Organza Ribbon with the Stampin’ Blends to match and layered it on a strip of the Silver Foil. The sentiment was stamped on the coloured card and cut with the Stitched Shapes Framelits and that was raised up with Dimensionals. 

4. The black card was adhered to a piece of Silver Foil.  TIP: cut the centre from the foil so you can use it for something else.  It is only getting hidden after all.  Before you adhere this piece to your card base stamp your card base with the “earphone” image in the set in the same colour as the card.

This Epic Celebrations set is one of the free choices for  Sale-A-Bration.  Have you got your set yet?  It’s great for the young teen cards.

So I hope you like this “epic” set.  Thanks for stopping by.

I have some exciting news to share with you tomorrow so stay tuned.

Have a good night,

Jenny


3D projects, Catalogues, Stampin' Up!, Tutorials, Videos

THERE IS “LOTS TO LOVE” ON VALENTINE’S DAY!

I showed you in yesterday’s post the cute Flip Top Treat Box using the Lots To Love Box Framelits.  Here it is if you missed it but you can jump back to the last post though too and see more of it and the instructions.


This is actually a cute little Framelit set but there were parts that I wasn’t sure what they were used for.  Like those little tiny arch shaped dies down at the bottom of the image below???

I found this video from Stampin’ Up! explaining the pieces and showing some great projects.  I thought for my Wednesday WOW! #14 this week we will take a look at this set.  Very timely today being Valentine’s Day right. ❤  It does work well with the matching Sure Do Love You stamp set too.

That explains everything!

You can grab the Framelits in my store now -> HERE $57 AUS or grab the bundle and use them together.  Clear mount stamp set is $84.50 AUS  See that -> HERE.

Aren’t these projects pretty? These are from the current Occasions Catalogue and shows how gorgeous the products are especially with the beautiful Painted with Love Specialty Designer Series paper. SO much prettiness!

Thanks for visiting me today.  Always nice of you to drop by whether you are from near or far.  I hope your day has been a great one.

Until next time.

Jenny x


3D projects, Tutorials

LOTS TO LOVE VALENTINE FLIP TOP BOX!

So it is Valentine’s Day here tomorrow apparently.  We don’t celebrate Valentine’s Day in a big way in Australia.  You might give your “significant other” a little chocolate treat and I do give my 2 kiddies (well they are mostly adults now), a little chocolate treat.

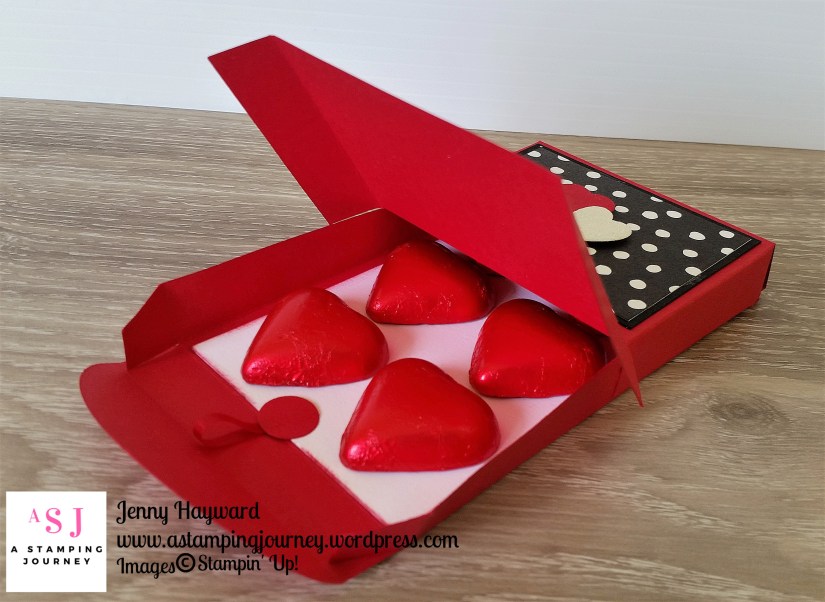
I thought that this year I should do SOMETHING! I have had the Lots to Love Box Framelits for a couple of weeks and not used them.  I had this in mind for about that long too.  So I just managed to create it in time.

I call it a Flip Top Treat Box. I am sure you could use the idea for a Gift Card not just chocolates.

This is with the Flip Top open. Mmm! Chocolate Hearts!

It has a little card insert in it to add the Chocolates. I added a Glue Dot under each one to stick them them to the card. I added a loop of ribbon which was adhered to the end of the card and then I added a small red punched circle to cover it.

CREATE YOUR OWN FLIP TOP TREAT BOX

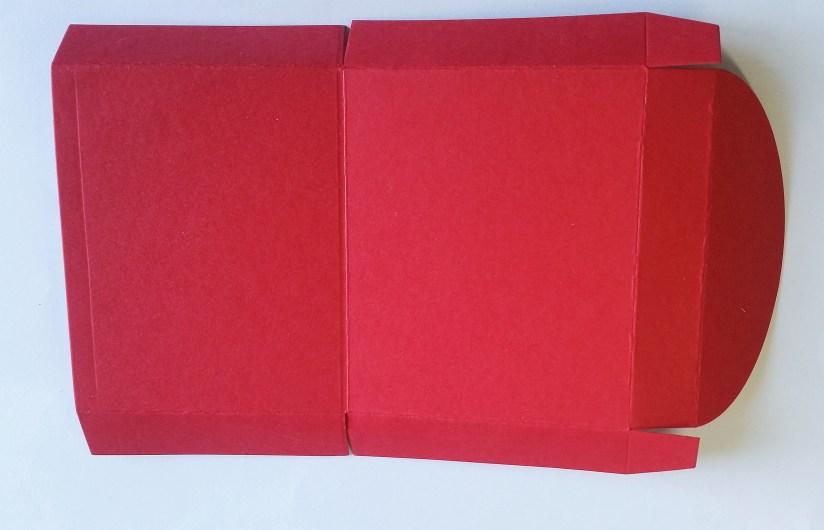
1. Cut 2 of the box shapes from the Lots To Love Box Framelits from your card.

On one piece which will be your top score it at half way along the long side of the box. This will be at 6cm (2 3/8″) which is from the scored line measurement not from the start of the curved edge.

2. Place adhesive on the underside along the long tabs ONLY to the half way point that will be adhered to the box.  You don’t want to adhere the whole section or it won’t open. I added the adhesive on the curved end half.

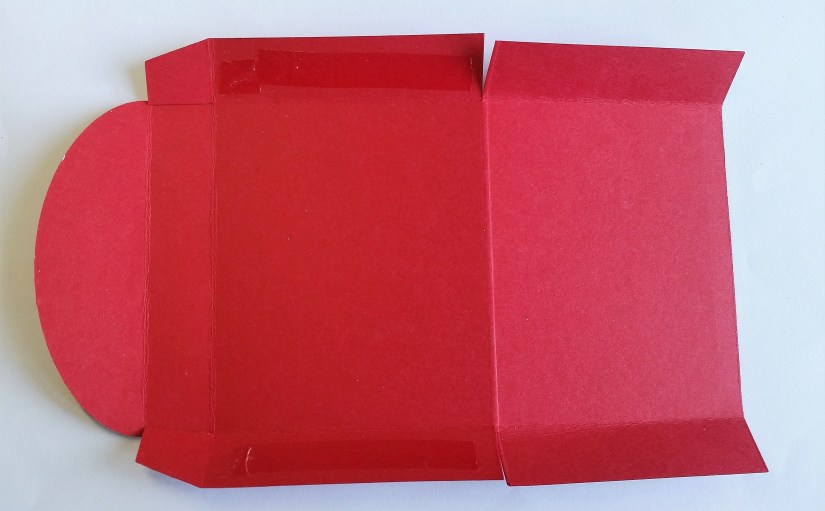
3. Adhere the top piece to the bottom piece of the die-cut box.  Your bottom piece will have the curved end to the opening end as shown in the photo below.

4. Decorate the box as you like.  I used the Party Pandas set.  The hearts were cut from the Lots of Love Box Framelits set. The sentiment was cut with the Layering Square Framelits.

So cute enough for Valentine’s do you think?  Maybe it is a little late now to whip some up but file it away for another special Occasion.

Below I have a collage image ready to PIN.

Have a great day,

Jenny