cards, Catalogues, Sale-A-Bration

STAMPIN’ UP! HEART SHAPED STAMPS AND DIES IN LAVENDER!

I have been loving the Heart Shaped Stamps and Dies.

They are so pretty. The elegant leafy heart die is different to your regular diecut heart. I think this type of heart can be used for many different occasions not just for the “love” type cards.

I teamed it with the Perennial Lavender Paper. I think we move on to the new and greatest new thing and forget the “older” products. The Lavender paper works so well with this leafy heart.

Here is the card.

If you notice too, I diecut the heart from the Perennial Lavender Paper too. It gives a nice, subtle colour variation. The stamped leafy heart add something extra to the diecut heart.

How pretty is this set??

It’s such a simple but elegant set. Sadly it is going this Friday. This is one of the Level 2 Sale-A-Bration choices. Meaning you can choose this one with orders over $200 AUD. I think it is a must have and it might even go to my “keep” pile after it is gone.

Be sure to get your order in by Friday to get this or any of the other Sale-A-Bration choices.

If you need to order you can Shop in my Store -> HERE OR contact me directly. I would love to help you.

Happy Crafting,

Jenny

cards, Catalogues, Stampin' Up!, Sunday Suites

SUNDAY SUITES – BRIGHT AND BEAUTIFUL SUITE!

Sunday Suites today with the Bright and Beautiful Suite.

With lots of celebrations this suite provides lots of festive designs and images to create with. The colours in the papers are bright and patterned too for fun projects.

You can create peek-through cards, gift tags, and more to celebrate birthdays, graduation, and achievements of all sorts.

Let’s see what is in the Beautiful Balloons Suite.

The suite includes:

  • The Beautiful Balloons Bundle (Stamps and Dies)
  • The Bright and Beautiful 6″x6″ (15.2cm x 15.2cm) Designer Series Paper.
  • Gold Celebrations 12″ x 12″ (30.5cm x 30.5cm) Specialty Designer Series Paper. 3 sheets – 1 each of 3 designs

The Beautiful Balloons Bundle. It certainly is a fun, festive set and check the fringing die. You can create some fringed finishes on your project OR I have recently seen someone roll it up and create fringed flowers. Try that idea out. 🙂

Lots of great bright colours in the Beautiful Balloons Designer Series Paper. The colours in this paper are Azure Afternoon, Berry Burst, Blueberry Bushel, Bubble Bath, Fresh Freesia, Lemon Lime Twist, Lemon Lolly, Lost Lagoon, Misty Moonlight, Pretty Peacock.

This is the Gold Celebrations Specialty Paper.

Now what about some projects with this suite.

See how the fringing can work.

Make a Shaker card with some sequins and it has some of the Gold Specialty Paper to layer on the top of the shaker part. That’s a fun element.

You can see the Beautiful Balloons Suite in my store -> HERE.

If you are in Australia and need to order you can head to that link OR contact me directly and I am happy to serve you.

Have a Happy Sunday,

Jenny

cards, Personal Ramblings

BIRTHDAY CARD SHARE!

I really should share more of the cards I receive from others.  I get some lovely Happy Mail some times and apart from me showing you the love maybe they will inspire your next project.

Last month (October) I had a Birthday and received some beautiful cards from lovely friends.

So here they are for you.

From Ruth S. (Thank you x)

Using the Perennial Essence Designer Series Paper and the Floral Essence Stamp set.

From Lynda (Thanks Lynda xx)

Using the Country Floral 3D Embossing Folder and the Delicate Lace Dies.

From Laurie – on the left (Thank you Laurie x) and Kate  – on the right (Thanks Kate x)

Aren’t they lovely.

I think each month I need to share the lovely cards I receive.  I am blessed with so many beautiful people in my life who send me such loveliness.

Have a wonderful day in your part of the world.

Thanks for visiting my part of the world.

Jenny

Blog Hops, cards, Stampin' Up!, Tutorials

STAMPING AROUND THE WORLD FEBRUARY BLOG HOP!

Welcome to the Stamping Around the World Blog Hop.  The team brings you the Free Tutorials each month and we have decided to join in a Blog Hop to share more creations just for you.  You will travel all over the world in this hop.  Each of us are using the same stamp set that we used in our Tutorial projects. So I hope you enjoy the Hop.

You would have come from Margriet’s Blog HERE or just starting from mine here. Either way you can follow along with us.

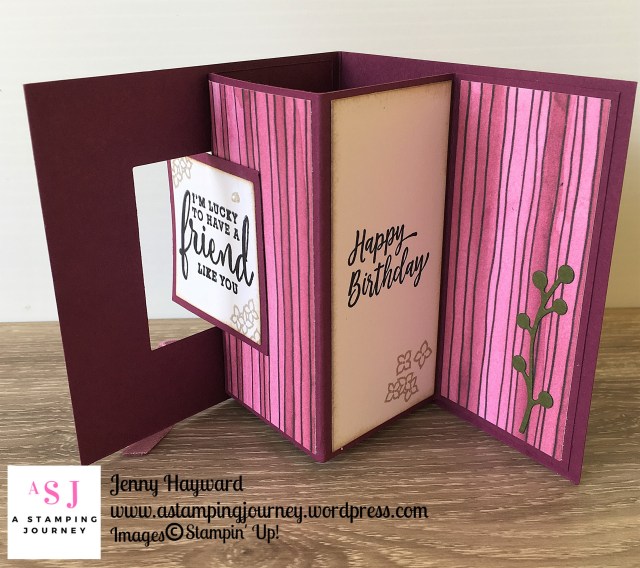
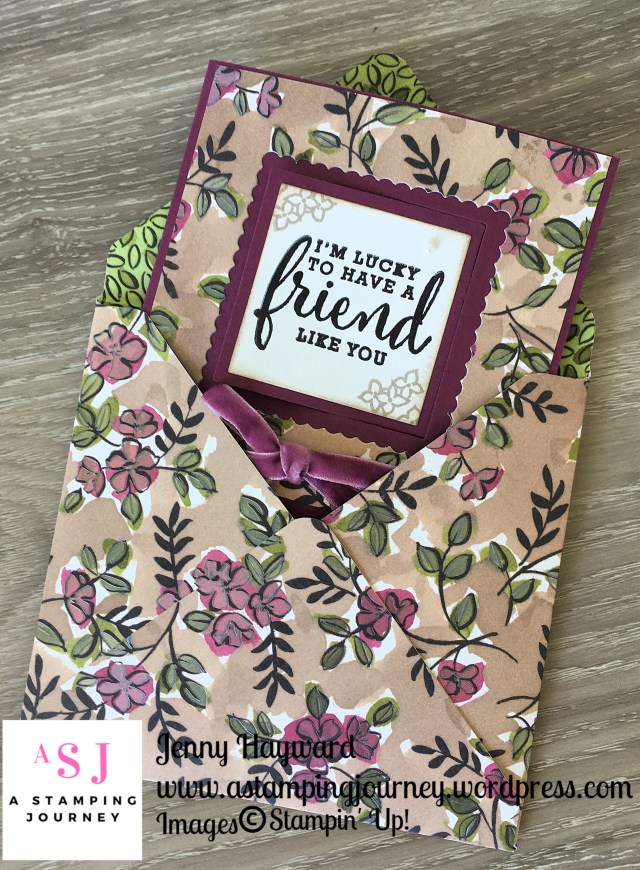
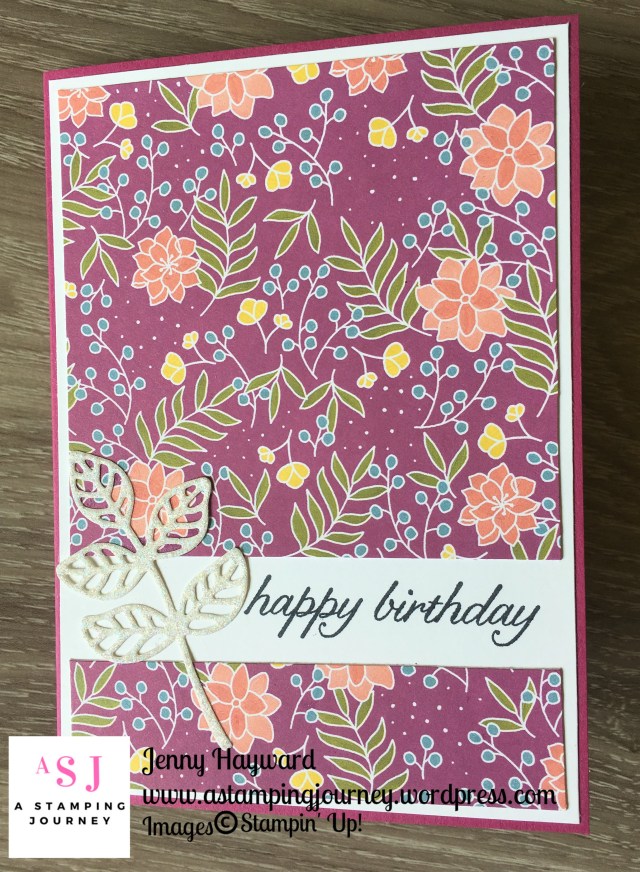
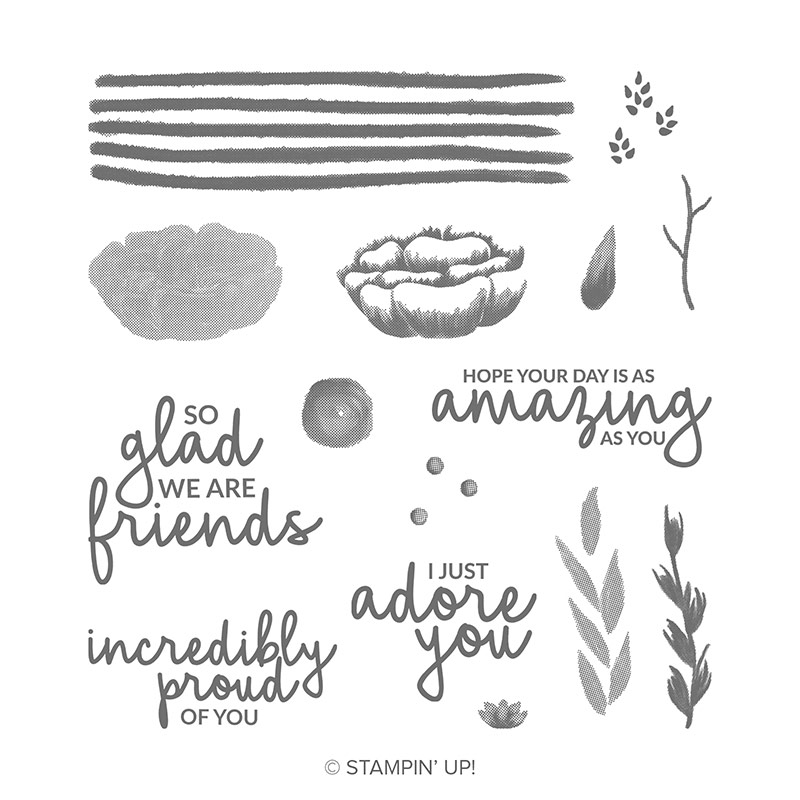
For my project this month I have used the Incredible Like You set.  For today’s project I created a Panel card using this set.  I have the instructions below so if you want to make your own you can.  This card was hard to take photos of so I hope you get the idea.
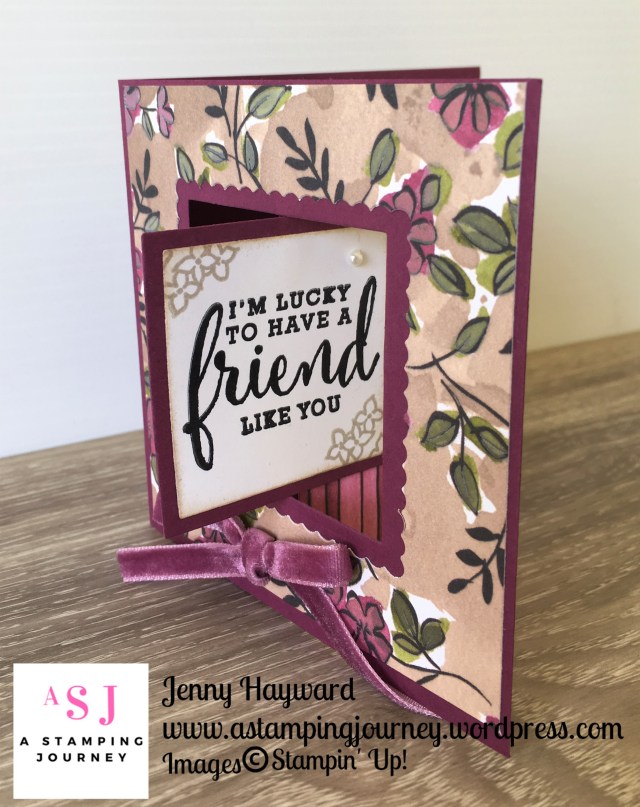
Front on.

The front of the card is cut shorter with the panel overhanging.

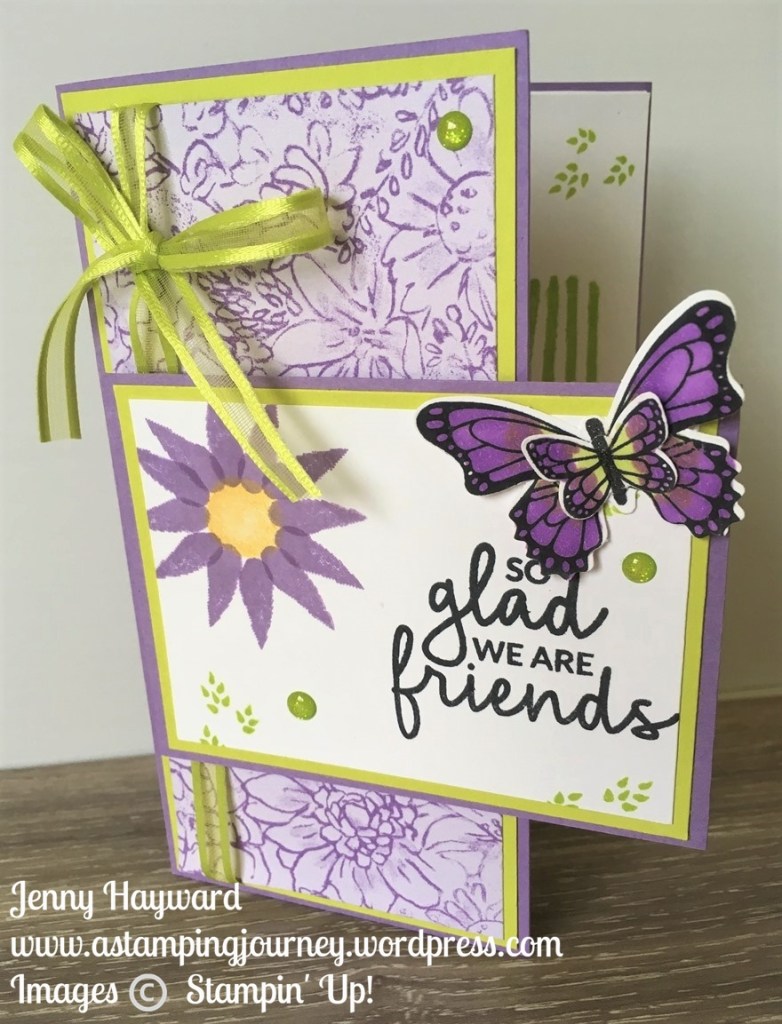
The butterfly is from Butterfly Gala coloured with the Stampin’ Blends. I just happened to have this finished butterfly on my desk left over from a previous project that I didn’t end up using. It worked well I think.

I added the Glitter Gems for a little sparkle.  The paper is from the Botanical Butterfly Designer Series Paper from Sale-A-Bration.  (This paper is in low supply so you if you want it you better grab this one soon). The Organdy Ribbon is already gone sorry.

The inside. 

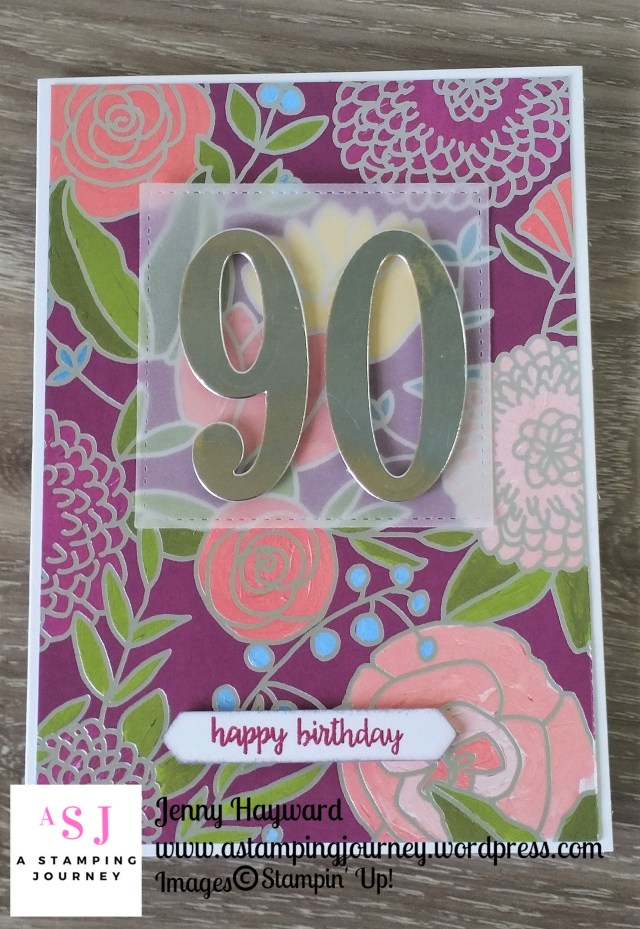
The sentiment is from Happy Birthday Gorgeous.

MAKE YOUR OWN PANEL CARD

I have the measurements for you in Metric and Imperial.

METRIC (apologies in advance for the odd measurements but this is what I started with on my white stamped piece and went from there.  The panel can be made in any size to suit)

CARD

Base Card (Highland Heather) – 14.8cm x 21cm scored at 10.5cm.  Trim off 3cm on the front.

Card Mat (Lemon Lime Twist) – 14.4cm x 7cm

Paper – 14cm x 6.6cm

Inside Piece (Whisper White) – 14.4cm x 10.1cm


FRONT PANEL

Mat (Highland Heather) – 9.5cm x 7.2cm

Mat (Lemon Lime Twist) – 9.1cm x 6.8cm

Stamped Piece (Whisper White) – 8.7cm x 6.4cm


IMPERIAL (for the mat pieces I have reduced them by 1/4″.  You may wish to reduce them more to suit you)

CARD

Base Card (Highland Heather) – 5 1/2″ x 8 1/2″scored at 4 1/4″.  Trim off 1 1/2″ on the front.

Card Mat (Lemon Lime Twist) – 5 3/8″ x 2 7/8″

Paper – 5 1/4″ x 2 3/4″

Inside Piece (Whisper White) – 5 3/8″ x 4 1/8″


FRONT PANEL

Mat (Highland Heather) – 3 3/4″ x 2 3/4″

Mat (Lemon Lime Twist) – 3 5/8″ x 2 5/8″

Stamped Piece (Whisper White) – 3 1/2″ x 2 1/2″
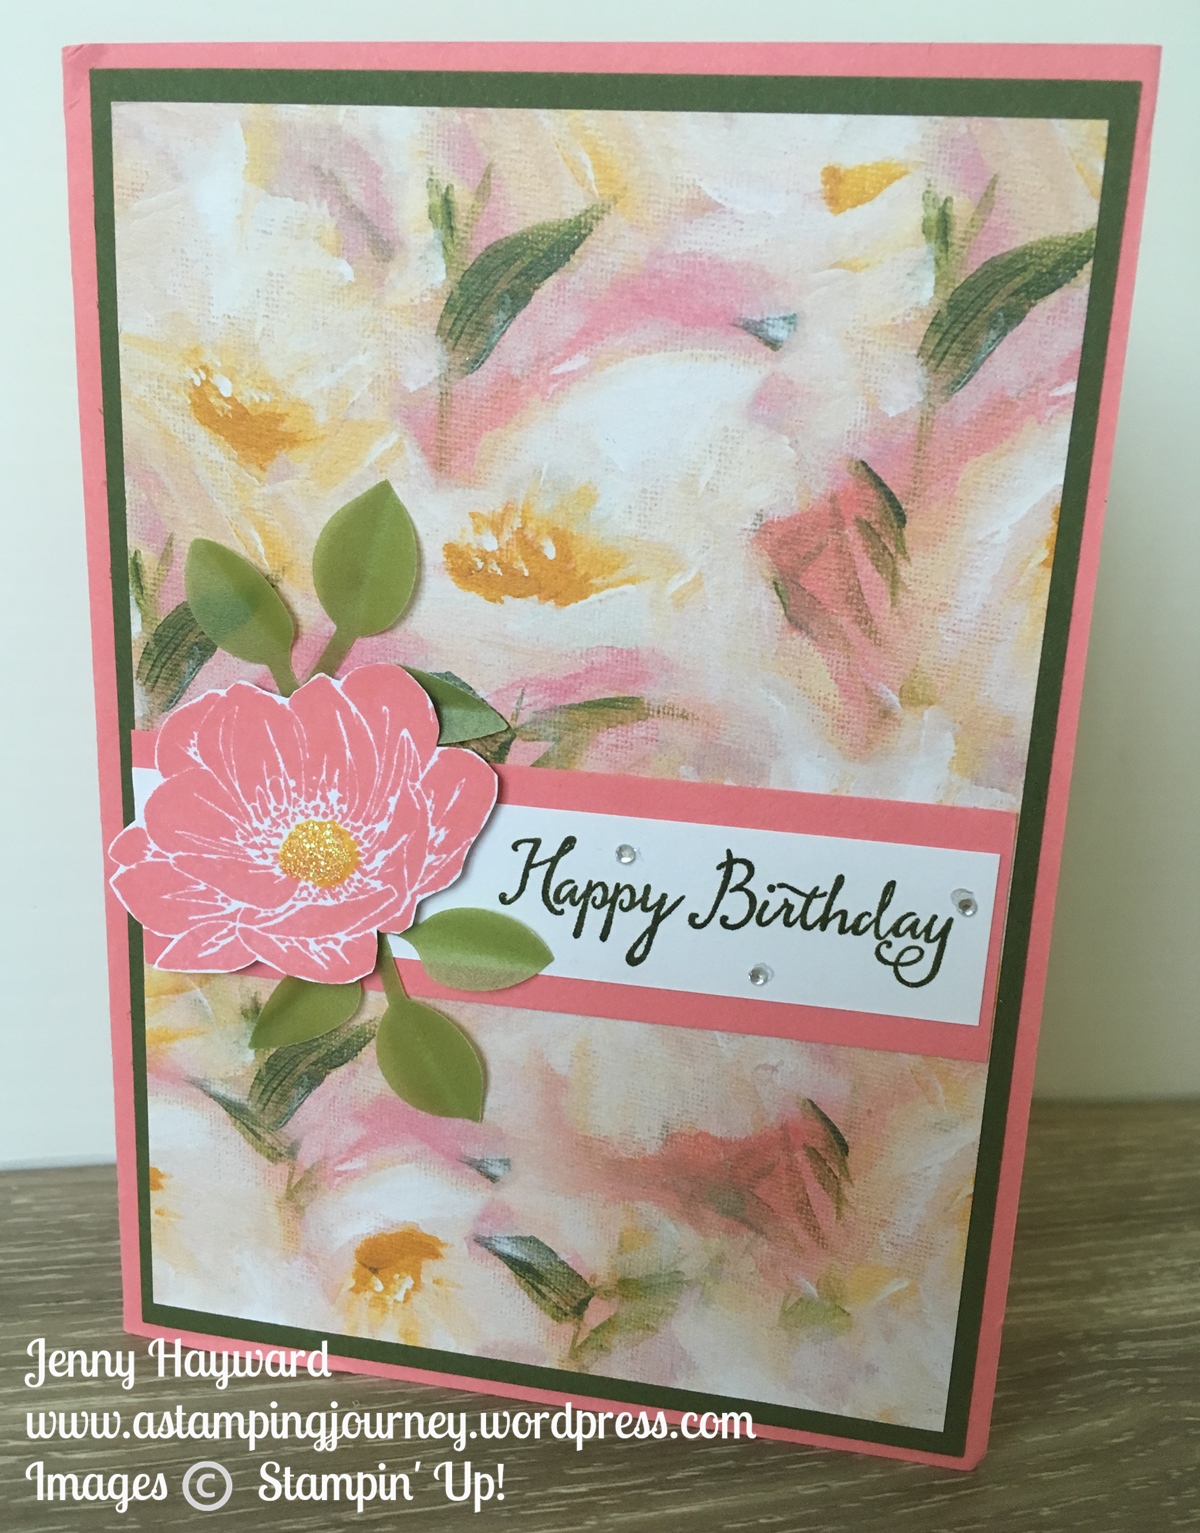
STAMPED FLOWER

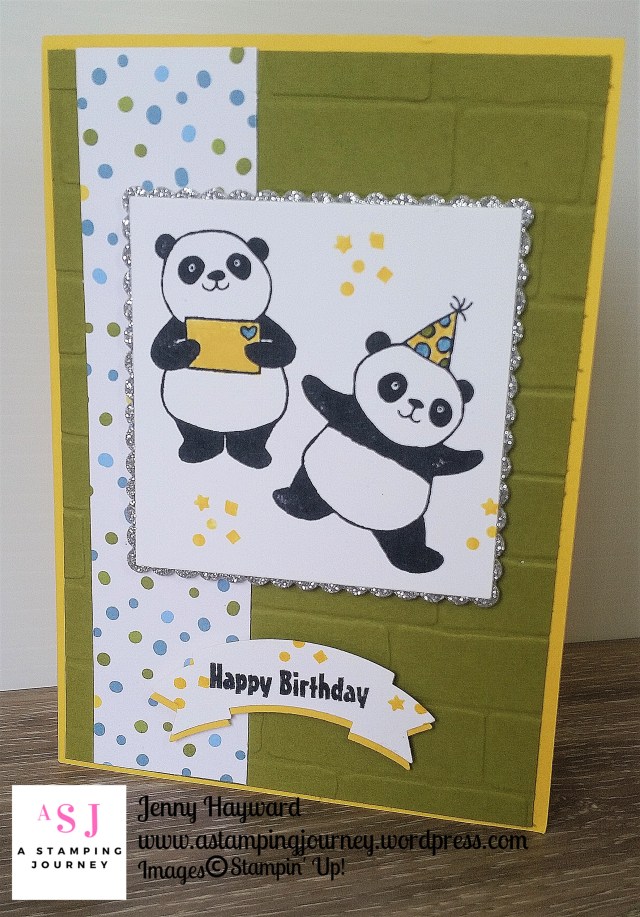
Now if you notice the flower on the front there isn’t actually a stamp for that.  I created that using some of the images in the set.  The “dot” for the centre and the “petals” for the leaf.  This is how you can build your flower up.  I hope it is clear enough.

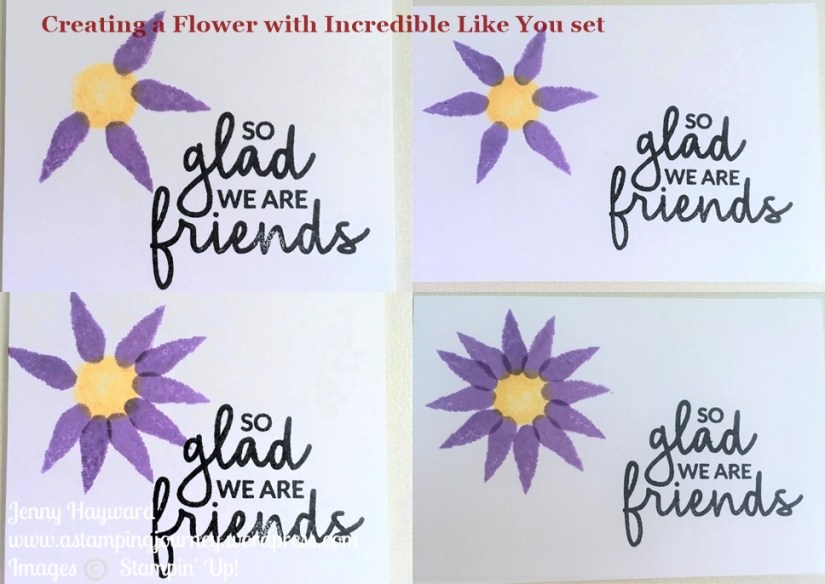
1. First stamp the “dot” on your card.  I used So Saffron.  Use the leaf shape to build your petals of your flower.

2. Stamp around the circle spacing them evenly apart.

3.  Go back around the circle stamping in the spaces.

4. You have your finished flower.  I added some Wink of Stella in the centre of the flower but it didn’t show up too well on the card photo.


The Incredible Like You set is in my store now -> HERE.  $28 Aus. It has been very popular at all the events I have done recently.  Everyone loves how versatile it is and the sentiments are lovely.

There is only one week left for the February Tutorial Bundle.  The bundle contains 10 exclusive projects from Demonstrators around the world. Receive it Free with your orders over $78 AUS.  This will be emailed out to you after you order.

OR you can purchase the Tutorials for $20 AUS. You won’t be disappointed.  People have said to me how gorgeous the projects are.  (and they are!). 🙂

Now continue on your Blog Hop by following the NEXT and BACK arrows below.  I have the list below if you get lost.

        BACK 

    NEXT


Roll Call List

Eva Pottsova (Crafting with Angels)

Linda Handford (Stampin by the Beach)

Stefanie Pletscher (The Crafty Medic)

Sue Allen (Sue Allen Simply Craft)

Jo Anne Hewins (Luv 2 Create)

Margriet Siekman (Creatief met Marsie)

Jenny Hayward (A Stamping Journey)

Lori Schaefer Mueller (Stampin’ Dreams)

Alejandra Gomez (Creating with Allie)


Thanks for visiting me

Jenny


cards, Classes, Stampin' Up!

BIRTHDAY CHEER WITH THE STAMPIN’ BLENDS!

I have another card for you using the Birthday Cheer Bundle.  This was another card we made at class last week.

Some tips to make your own.

Firstly, cut the White card piece with the Rectangle Stitched Framelits die before you stamp. Then you know where to stamp your images.

The images need to be stamped in Memento Black ink so it can be coloured with the Stampin’ Blends.  The smaller sentiment is stamped on  a strip of Mint Macaron.  Rather than flag the ends of the strip or punch it with a Banner punch or a die I decided to keep it straight and wrap some of the Nature’s Twine around it.

On the Rich Razzleberry card mat first stamp your images in Razzleberry ink on the card and then run it through the Big Shot with the Subtle Embossing Folder.  It adds just a little texture to the card.  I really love this folder for creating the light texture. I think it gets missed in the catalogue.

The Birthday Cheer Bundle and the Subtle Embossing Folder are now available in my store now -> HERE.  Please use the Host Code: Q6XB6QR6  OR you can contact me directly.

Thanks for your order.  I appreciate each and every one of them.  Be sure not to mark your order anonymous or I won’t be able to send you out  your small gift.

Thanks for visiting.  I am off this weekend to the huge Craft Alive show. I am holding a booth there with 3 other wonderful demonstrator friends. It has been months  and months of planning and work.  I am exhausted already to be honest but I hope it goes well.

I will tell you more about it next week.

Have a great weekend,

Jenny


Blog Hops, cards, Stampin' Up!

KELLY’S STAMPING FRIENDS BIRTHDAY BLOGHOP!

Today we have a very special Blog Hop celebrating the lovely Kelly Kent’s Birthday.  She wanted to get some stamping friends together and share our creations with you.  How exciting! I have to say though it is a little overwhelming.  What to create …  It had to be a birthday card of course.

You would either be starting here on your hop or you have just come from Siobhan’s blog -> HERE.  So come and join the Birthday Hop.

Today I am sharing with you a Fun Fold card,  It’s a Pop Out Swing Card. I have made a few versions of this card (see one HERE), but this one is a teeny tiny version.  So cute!  It stand about 10cm (4″) high.  I have used the gorgeous new set available early this month, the Love What You Do stamp set and the Share What You Love Designer Series Paper.

Don’t forget a matching envelope for this card too.  Made easy with the Envelope Punch Board.

The beautiful paper and colours makes this a gorgeous project without too much to it.  That Rich Razzleberry Velvet ribbon is just so soft and gorgeous too.

The Frame on the front of the card is made with the Layering Squares Framelits.  The sentiment inside is from the Southern Serenade set.  The leaf stem on the inside is cut from Mossy Meadow cardstock using the Flourish Thinlits.

You can continue on the Birthday Blog Hop now and pop back again later to get the instructions link.  You will find the instructions for this card on Amanda’s blog -> HERE.

 -> -> ->To continue on the Hop. Click on the ‘NEXT’ image, or you can Head on over to Kathryn’s Blog by clicking-> HERE.

If you get lost, then you can follow the list below.  Thanks for hopping along.  See below the list too for the link for a second round of Birthday Blog Hops happening at same time.  So many wanted to share in the Birthday love that 2 groups were needed. 🙂

  1. Kelly Kent
  2. Lou Kitzelman
  3. Jenny Hall
  4. Denita Wright-Smee
  5. Jackie Aitken
  6. Narelle Simm
  7. Sandra Collett
  8. Monique Fielder
  9. Nicole Wilson
  10. Siobhan Fitzsimmons
  11. Jenny Hayward
  12. Kathryn Mangelsdorf
  13. Josie Dean
  14. Peta Stephen
  15. Kristel Rimmer
  16. Kim Oliver
  17. Denise Buetler
  18. Jacqui Crouch
  19. Tina Gillespie
  20. Jan McQueen


***For Group B of the Birthday Blog Hop you can go to a different post on Kelly’s Blog -> HERE to follow along. 

cards, Catalogues, Techniques, Tutorials

SOMETHING QUICK WITH THE SWEET SOIREE PAPER!

OK, Let’s chat.  Do you have lots of pretty paper sitting in your craft stash??  I can guess you do.  It looks so nice sitting there but you are scared to cut in to it or you might be saving it for a “special” project?? Yes I know.  It is tough!

So a new catalogue is coming very soon and we will have more pretty paper to collect.  We need to use this paper we have now.

SO… Let’s use it.  I am going to be sharing some projects over the next days and weeks to USE THAT PAPER.  Will you join me??  I am sharing these projects on here and Facebook and Instagram and adding #usethatpaper  So you can join in with me.

Today’s project is using that gorgeous SweetSoireepaper.  It is so pretty and I was really hesitant to use it but really …

Anyway, here is the card.

Cut the Designer Series paper about 2cm (3/4″) shorter than you would usually.  Cut off 2.5cm (1″).  Adhere them to the Whisper White card with the smaller section at the bottom of the card.  Stamp your sentiment in the white space.  This is from the set Birthday Blossoms.  The leaf is from the Flourish Thinlits cut from Dazzling Diamonds Glimmer Paper although you can’t see the sparkle too well.

ok. Go and grab some pretty paper and #usethatpaper

Have a happy, crafty weekend.

Jenny

cards, Personal Ramblings

TWO 90TH BIRTHDAY!

I had the pleasure of making 2 special 90th Birthday cards the last couple of weeks.  I thought I would show you them.

This first one requested by a friend for a lovely old friend of hers.

I pulled out the Number of Years set and the Large Numbers Framelits for it.  The card was inspired by one on Pinterest.  The “90” needed something to lift it so I added a square cut with the Stitched Shapes Framelits in Copper Foil and added a few loops with the Copper Thread. The sentiment is from the Blooms and Wishes set.

This next card I sent to a special lady.  I didn’t know her but I know what a milestone 90 is and I heard she was going to be having a very quiet birthday.  I couldn’t let this special milestone slip by.

I added a piece of the Sweet Soiree Specialty DSP to a white card base.  Cut a square with the Stitched Shapes Framelits in Vellum to sit the silver “90” on.  It’s hard to adhere vellum so I added a couple of dabs with Snail Adhesive under where the numbers would sit. Then sentiment is from Happy Birthday Gorgeous.  

Two special cards for 2 lovely ladies.  I hope they had a lovely celebration in the end.

Have a wonderful week.

Jenny

cards, Catalogues, Sale-A-Bration, Stampin' Up!

PARTY PANDAS PAIR!

OK, I promise this will be the last Party Pandas card for a little while.  I’m sorry.  I really love these guys.  I wanted to show you this card and then I will move on.

The stamped pandas were left overs with trying to get my Peekaboo Panda card right.  You can see that card if you head back 2 posts.  Not wanting to waste them I cut the white stamped card down.  Layered it on a Silver Glimmer Paper scalloped Square mat.  This was cut with the Layering Square Framelits.  The Old Olive card was embossed with the Brick Wall Embossing Folder.  The paper strip is from the Sweet Soiree Specialty Designer Series Paper pack.  The sentiment is punched with the Duet Banner Punch.  I wasn’t completely happy with how the sentiment looked but hey! I am trying not to dwell on things too much.  What do you think about it?

I hope you can get some Panda Action.  Don’t forget they are a free choice during Sale-A-Bration.

Have an awesome weekend.  I hope you get in some creating time for you.

Jenny

cards, Catalogues, Challenges

A 50TH ECLIPSE CARD WITH BLOOMS AND WISHES!

A friend of mine turned 50 this week and we went to her birthday celebrations last night.  Of course I wanted to make a card but sometimes it can be a bit overwhelming with what stamps to use or what colours.  In our team group this week we have had a challenge to use a stamp set we haven’t used before.  I could choose from a few different ones here.  I have a number still uninked!! I went with the Blooms and Wishes set and used the Eclipse technique.

The colours used are Sweet Sugarplum, Fresh Fig, Flirty Flamingo, Pear Pizzazz and Lemon Lime Twist.  I picked those colours from a Colour combination off Pinterest.  I added a little bling with the Rhinestones.

Hope your weekend is going great.  Today I have been at a Christmas market all day so it was a busy one but always great talking to people about stamping right. 🙂

Jenny